
Tutorial recommendation: bootstrap tutorial
Vue.js is a popular JavaScript library , for developing prototypes in a short time. This includes user interfaces, front-end apps, static web pages, and native mobile apps. It is known for its easy-to-use syntax and simple data binding capabilities.
Recently, the Vue.js ecosystem released a new package. It is an integration of the popular Bootstrap framework with Vue.js. This package is called BootstrapVue. It allows us to use custom components integrated with Bootstrap (v4).
It also supports custom Bootstrap components, grid system, and Vue.js directives.
In this article, we will introduce the basics of BootstrapVue, explain the general concepts, demonstrate the setup process, and build a mini Vue.js project through it to provide you with more practical experience.
Given that Bootstrap is the most popular standalone CSS framework (in my opinion), many developers who have or intend to move from vanilla JavaScript frameworks to Vue.js I've always found migration a bit difficult because of Bootstrap's heavy dependence on jQuery.
With BootstrapVue, anyone can switch from Vanilla.js or jQuery to Vue.js without worrying about Bootstrap's heavy dependence on jQuery or even finding a workaround. That’s how BootstrapVue comes to the rescue. It helps bridge this gap and allows Vue developers to easily use Bootstrap in their projects.
When using module bundles such as webpack and babel, it is best to include these packages directly into the project. To demonstrate and provide you with a practical way to understand and use BootstrapVue, we will set up a Vue.js project with BootstrapVue and build it into a functional Vue.js application.
Prerequisites
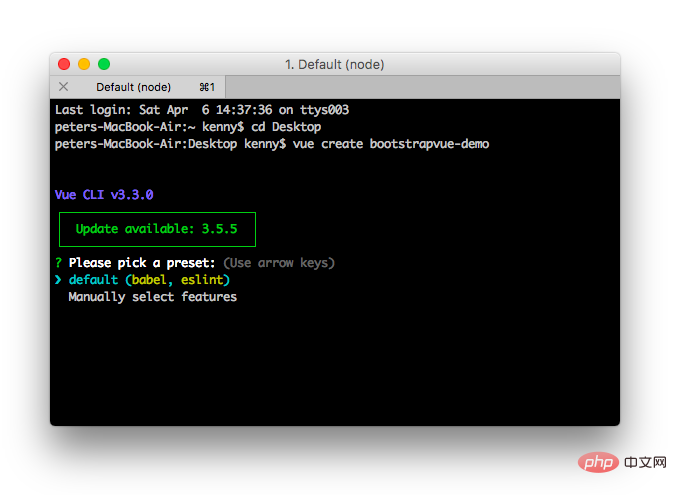
vue create bootstrapvue-demo
If you do not have Vue CLI installed globally, please follow this installation guide before continuing with this tutorial .
The above command will display a default selection dialog box, as shown below:
EnterContinue:

cd bootstrapvue-demo
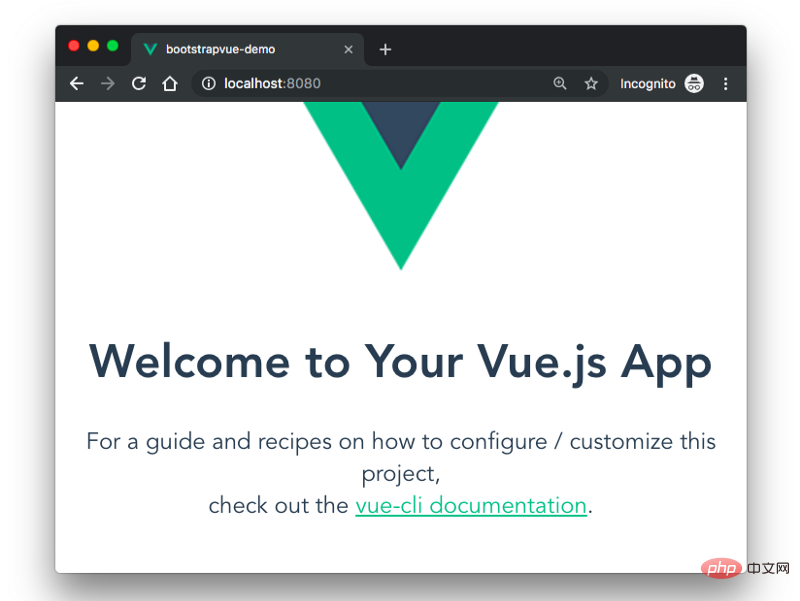
npm run serve

We will use npm or yarn to install the previously mentioned packages. Change to the root directory of your project and run any of the following commands, depending on your preferred package manager:
# With npm
npm install bootstrap-vue bootstrap axios

# With yarn
yarn add bootstrap-vue bootstrap axios
上面的命令将会安装BootstrapVue和Bootstrap包。 BoostrapVue包中包含所有BootstrapVue组件,常规Bootstrap包含CSS文件。另外还安装了Axios来帮助我们从themealdb API获取程序所需的数据。
要通过CDN将Bootstrap和BootstrapVue添加到Vue项目,请打开项目公共文件夹中的index.html文件,并将此代码添加到适当的位置:
<!-- public/index.html-->

<!-- Add Bootstrap and Bootstrap-Vue CSS to the <head> section -->
<link type="text/css" rel="stylesheet"
        href="https://unpkg.com/bootstrap/dist/css/bootstrap.min.css"/>
<link type="text/css" rel="stylesheet"
               href="https://unpkg.com/bootstrap-vue@latest/dist/bootstrap-vue.min.css"/>

<!-- Add Vue and BootstrapVue scripts just before the closing </body> tag -->
<script src="https://unpkg.com/vue/dist/vue.min.js"></script>
<script src="https://unpkg.com/bootstrap-vue@latest/dist/bootstrap-vue.min.js"></script>这将把每个库的缩小版和最新版本引入我们的项目中,非常简单!但是出于本文的目的,我们将使用第一个方法中的包管理器。下面继续设置BootstrapVue包。
接下来,让我们设置刚刚安装的BootstrapVue包。转到你的main.js文件并将这行代码添加到顶部:
//src/main.js
import BootstrapVue from 'bootstrap-vue'
Vue.use(BootstrapVue)
在这里做的事情非常简单,我们导入了BoostrapVue包,然后用Vue.use()函数在程序中注册它,以便Vue程序可以识别。
我们还需要将Bootstrap CSS文件导入到项目中。将这段代码段添加到main.js文件中:
//src/main.js
import 'bootstrap/dist/css/bootstrap.css'
import 'bootstrap-vue/dist/bootstrap-vue.css'
在将必要的模块导入Vue程序后,你的main.js文件应该和下面的代码段类似:
//src/main.js
import Vue from 'vue'
import App from './App.vue'
import BootstrapVue from 'bootstrap-vue'
import 'bootstrap/dist/css/bootstrap.css'
import 'bootstrap-vue/dist/bootstrap-vue.css'

Vue.use(BootstrapVue)
Vue.config.productionTip = false

new Vue({
  render: h => h(App),
}).$mount('#app')下面开始创建我们的第一个组件,第一个组件是Navbar组件。转到组件目录,创建一个名为Navbar.vue的文件,并使用以下代码更新它:
//src/components/Navbar.vue
<template>
<div>
<b-navbar toggleable="lg" type="dark" variant="success">
<b-container>
<b-navbar-brand href="#">Mealzers</b-navbar-brand>
<b-navbar-toggle target="nav-collapse"></b-navbar-toggle>
<b-collapse id="nav-collapse" is-nav>
<!-- Right aligned nav items -->
<b-navbar-nav class="ml-auto">
<b-nav-form>
<b-form-input
size="sm"
class="mr-sm-2"
placeholder="Search for a meal"
v-model="meal"
></b-form-input>
<b-button
size="sm"
class="my-2 my-sm-0"
type="submit"
@click.prevent="getMeal"
>Search</b-button>
</b-nav-form>
<b-nav-item-dropdown right>
<!-- Using 'button-content' slot -->
<template slot="button-content"><em>User</em></template>
<b-dropdown-item href="#">Profile</b-dropdown-item>
<b-dropdown-item href="#">Sign Out</b-dropdown-item>
</b-nav-item-dropdown>
</b-navbar-nav>
</b-collapse>
</b-container>
</b-navbar>
</div>
</template>
<script>
export default {
data() {
return {
meal: ''
}
},
methods: {
getMeal() {
...
}
}
}
</script>Navbar组件中包含几个BootstrapVue组件,其中一个是b-navbar组件。它是Navbar中其他组件的父组件。如果没有这个组件,Navbar中的所有其他组件将无法正确呈现。
可以用type 属性更改Navbar上的文本颜色。 Navbar的background-color也可以用variant 属性来改变。这些颜色可以是任何正常的Bootstrap默认颜色 —— info、primary、success 等。
另一个是b-navbar-brand组件。这是可以呈现网站徽标的地方。它还包含variant和type属性,它们可以分别用于改变background-color和text-color。
其他BootstrapVue组件是:
BootstrapVue组件的一个美妙之处在于它们默认是响应式的。所以你无需编写额外的代码或用外部库来使其实现响应式。
还有一个组件是Card组件。card 组件允许我们在卡中显示图像、文本等。它写做b-card 。为了演示它,让我们在组件目录中创建一个Cards.vue文件。然后用下面的代码更新其内容:
//src/components/Cards.vue
<template>
  <b-container>
    <div v-if="meals.length">
      <b-row>
        <div v-bind:key="data.index" v-for="data in meals">
          <b-col l="4">
            <b-card
                    v-bind:title="data.strCategory"
                    v-bind:img-src="data.strCategoryThumb"
                    img-alt="Image"
                    img-top
                    tag="article"
                    style="max-width: 20rem;"
                    class="mb-2">
              <b-card-text>{{ `${data.strCategoryDescription.slice(0,100)}...` }}</b-card-text>
              <b-button href="#" variant="primary">View food</b-button>
            </b-card>
          </b-col>
        </div>
      </b-row>
    </div>
    <div v-else>
      <h5>No meals available yet</h5>
    </div>
  </b-container>
</template>

<script>
  import axios from "axios";
  export default {
    data() {
      return {
        meals: []
      };
    },
    mounted() {
      axios
        .get("https://www.themealdb.com/api/json/v1/1/categories.php")
        .then(response => {
        this.meals = response.data.categories;
      })
        .catch(err => {
        console.log(err);
      });
    }
  };
</script>为了渲染刚刚创建的Cards组件,需要修改HelloWorld.vue文件。打开它并使用以下代码更新:
//src/components/HelloWorld.vue
<template>
<div>
<Cards />
</div>
</template>
<script>
import Cards from './Cards.vue'
export default {
name:'cards',
components: {
Cards
},
data() {
return {
};
},
};
</script>
<style scoped>
</style>在这里做的是创建一个Cards组件并将其嵌入到HelloWorld.vue文件中。请注意,在Cards组件中,有一个生命周期hook来修改数据。数据在被渲染到浏览器之前被填充到b-card组件中。
接下来,更新App.vue文件,用来捕获最近的更改并将正确的组件呈现给浏览器。打开它并使用下面的代码更新:
//App.vue
<template>
<div id="app">
<Navbar />
<HelloWorld/>
</div>
</template>
<script>
import HelloWorld from './components/HelloWorld.vue'
import Navbar from './components/Navbar.vue';
export default {
name: 'navbar',
components: {
Navbar,
HelloWorld
}
}
</script>这是在浏览器上可以看到我们的餐饮程序运行如下:

正如你所看到的,card 没有被正确的布局,所以必须纠正这一点。幸运的是,BootstrapVue有一些可以将我们的card放在网格中的内置组件。
它们是:
修改Cards.vue文件中的代码,使用上面提到的BootstrapVue组件在网格中呈现内容。打开Cards.vue文件并使用下面的代码片段更新:
//src/components/HelloWorld.vue
<template>
  <b-container>
    <div v-if="meals.length">
      <b-row>
        <div v-bind:key="data.index" v-for="data in meals">
          <b-col l="4">
            <b-card
              v-bind:title="data.strCategory"
              v-bind:img-
              img-alt="Image"
              img-top
              tag="article"
              style="max-width: 20rem;"
              class="mb-2">
              <b-card-text>{{ `${data.strCategoryDescription.slice(0,100)}...` }}</b-card-text>
              <b-button href="#" variant="primary">View food</b-button>
            </b-card>
          </b-col>
        </div>
      </b-row>
    </div>
    <div v-else>
      <h5>No meals available yet</h5>
    </div>
  </b-container>
</template>
<script>
import axios from "axios";
export default {
  data() {
    return {
      meals: []
    };
  },
  mounted() {
    axios
      .get("https://www.themealdb.com/api/json/v1/1/categories.php")
      .then(response => {
        this.meals = response.data.categories;
      })
      .catch(err => {
        console.log(err);
      });
  }
};
</script>现在刷新浏览器,应该看到一个正确布局的卡片,其中包含渲染内容。
Now there is a neatly arranged catering program. We built all of this using some BootstrapVue components. To learn more about BootstrapVue, check out the official documentation (https://bootstrap-vue.js.org/docs/).
What if you want to migrate an existing project from regular Bootstrap4 to BootstrapVue? This will be a breeze. Here's what you need to do:
bootstrap.js file from your build scriptjQuery from your program , BootstrapVue can work independentlyThat’s it! With these three steps, you can migrate an existing project from regular Bootstrap that relies on jQuery to the simpler standalone BootstrapVue package without breaking any existing code.
This article demonstrates how to use BootstrapVue through examples. We start with installation, setting it up in a Vue project, and finally building part of the Mealzers program using its custom components. As you can see, the BootstrapVue module is simple and easy to use. If you have knowledge of regular Bootstrap packages, using BootstrapVue will be a breeze.
Original English address: https://blog.logrocket.com/getting-started-with-bootstravue-2d8bf907ef11
For more programming-related knowledge, please visit: Introduction to Programming! !
The above is the detailed content of Quick Start with BootstrapVue. For more information, please follow other related articles on the PHP Chinese website!
 Why does vue.js report an error?
 What are the uses of vue.js slots?
 How to jump with parameters in vue.js
 Five major components of a von Neumann computer
 How to set cad point style
 Can the appdata folder be deleted?
 Ethereum browser query digital currency
 pci device universal driver
 computer software