

Overview
vue-cli is an official command line tool provided by Vue, which can be used to quickly build large single page application. The tool provides out-of-the-box build tool configuration, bringing a modern front-end development process. It only takes a few minutes to create and launch a project with hot reload, static checks on save, and a production-ready build configuration.
Using vue-cli has the following major advantages:
Installation
Let’s install vue-cli
# 必须全局安装vue--g vue-cli
$ vue -V
Create project
Next, use vue-cli to create a new Vue project
# 项目创建完之后需要执行npm install安装依赖

$ vue init webpack vuedemo$ npm install
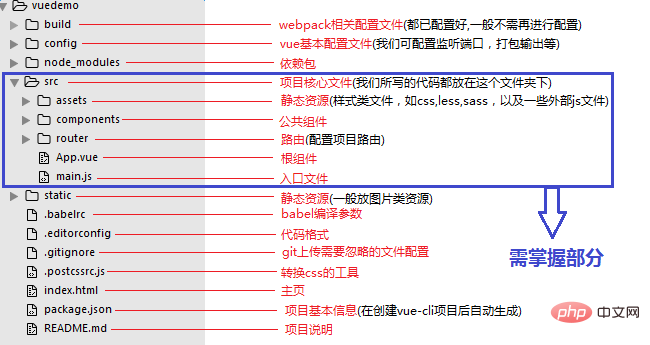
The files contained in the created vuedemo folder are as follows:
[index.html]
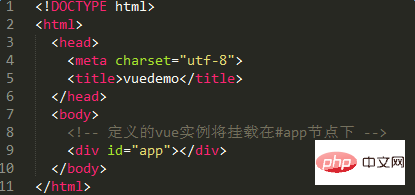
Index.html is the same as other html files, but generally only an empty root node is defined, and the instance defined in main.js will be hung. Loaded under the root node, the content is filled through vue components. Since all mounting elements will be replaced by the DOM generated by Vue, it is not recommended to directly mount the instance to <html> or <body>Up.
[main.js]
is the entry file of the Vue application , used to create a new Vue instance and mount this instance under the root node. It can also be used to introduce the Vue plug-in
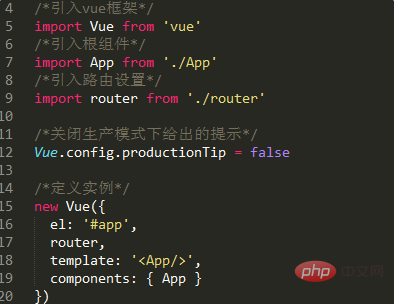
The 'el' option: provided A DOM element that already exists on the page is used as the mounting target of the Vue instance. Here is the node with the id 'app' in index.html
The 'router' option: Inject the router instance into the Vue root instance , making each of its subcomponents accessible to $router (router instance) and $route (currently activated routing information object)
The 'template' option: Use a string template as the identifier of the Vue instance. It will replace the mounted element, that is, use the component
'components': locally registered components, The option object of
[App.vue]
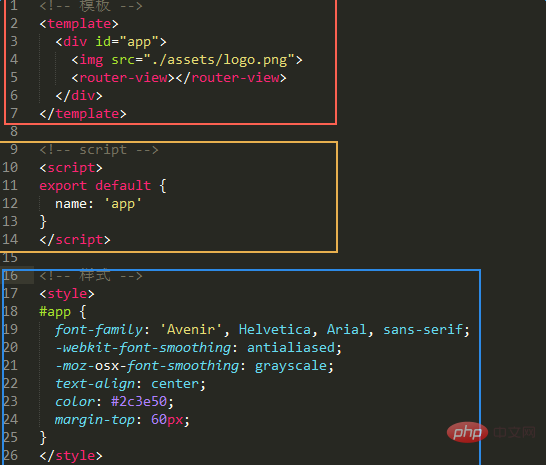
The root component of the project can contain other sub-components to form a component tree. Due to the use of vue-loader, it will write a single file in this format Vue components are converted into JavaScript modules
template option