Preface
This time we only record the use of webSocket and Swoole to create a small chat room. The function is simple, but it can be used as a good entry case.
Project Introduction
It was originally written as a very small case, and it didn’t include that many functional points, so I just followed the minimum configuration.
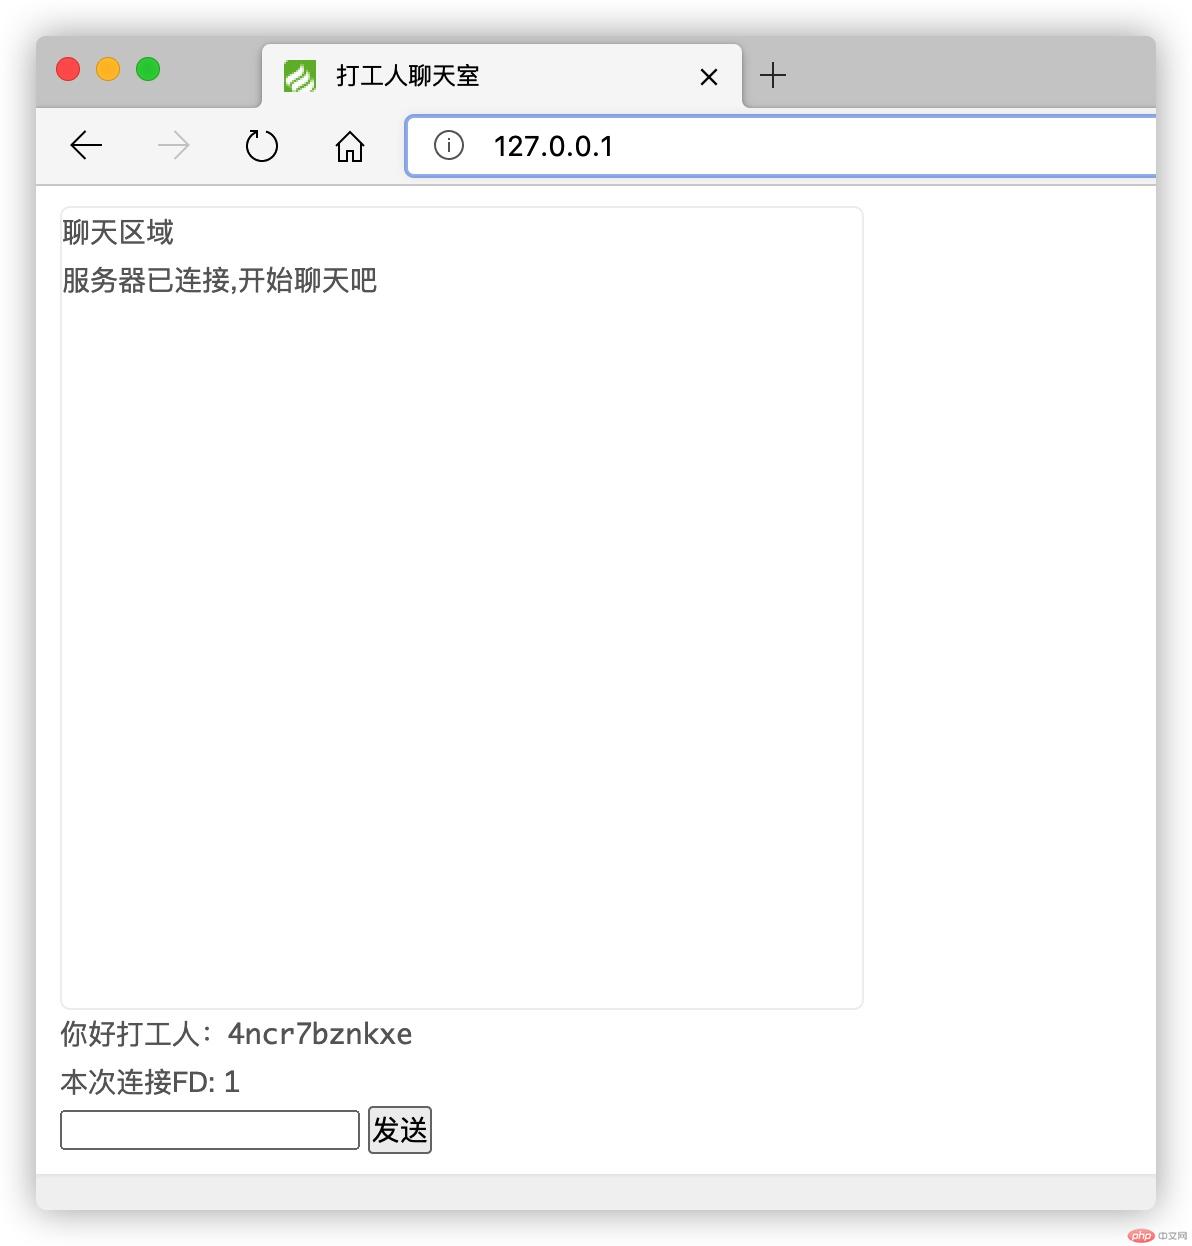
A chat area that can display chat messages, while also taking into account the link status, whether the current connection is successful, or whether the server is disconnected, and the front end does not know the situation.
An input box, a pure input box?
Click the button to send without refreshing the page, and at the same time clear the current input box content, it’s simple It's just a button. Click to execute. It does not support pressing Enter to send.
When a message is received, the scroll bar automatically bottoms out. This function is convenient in some usage scenarios, but it also makes it inconvenient to use in certain scenarios. The convenience lies in the fact that new messages are not available. Manual scrolling is required. The inconvenience is that maybe you are looking at historical news and it automatically bottoms out... You also need to optimize it according to your actual needs.
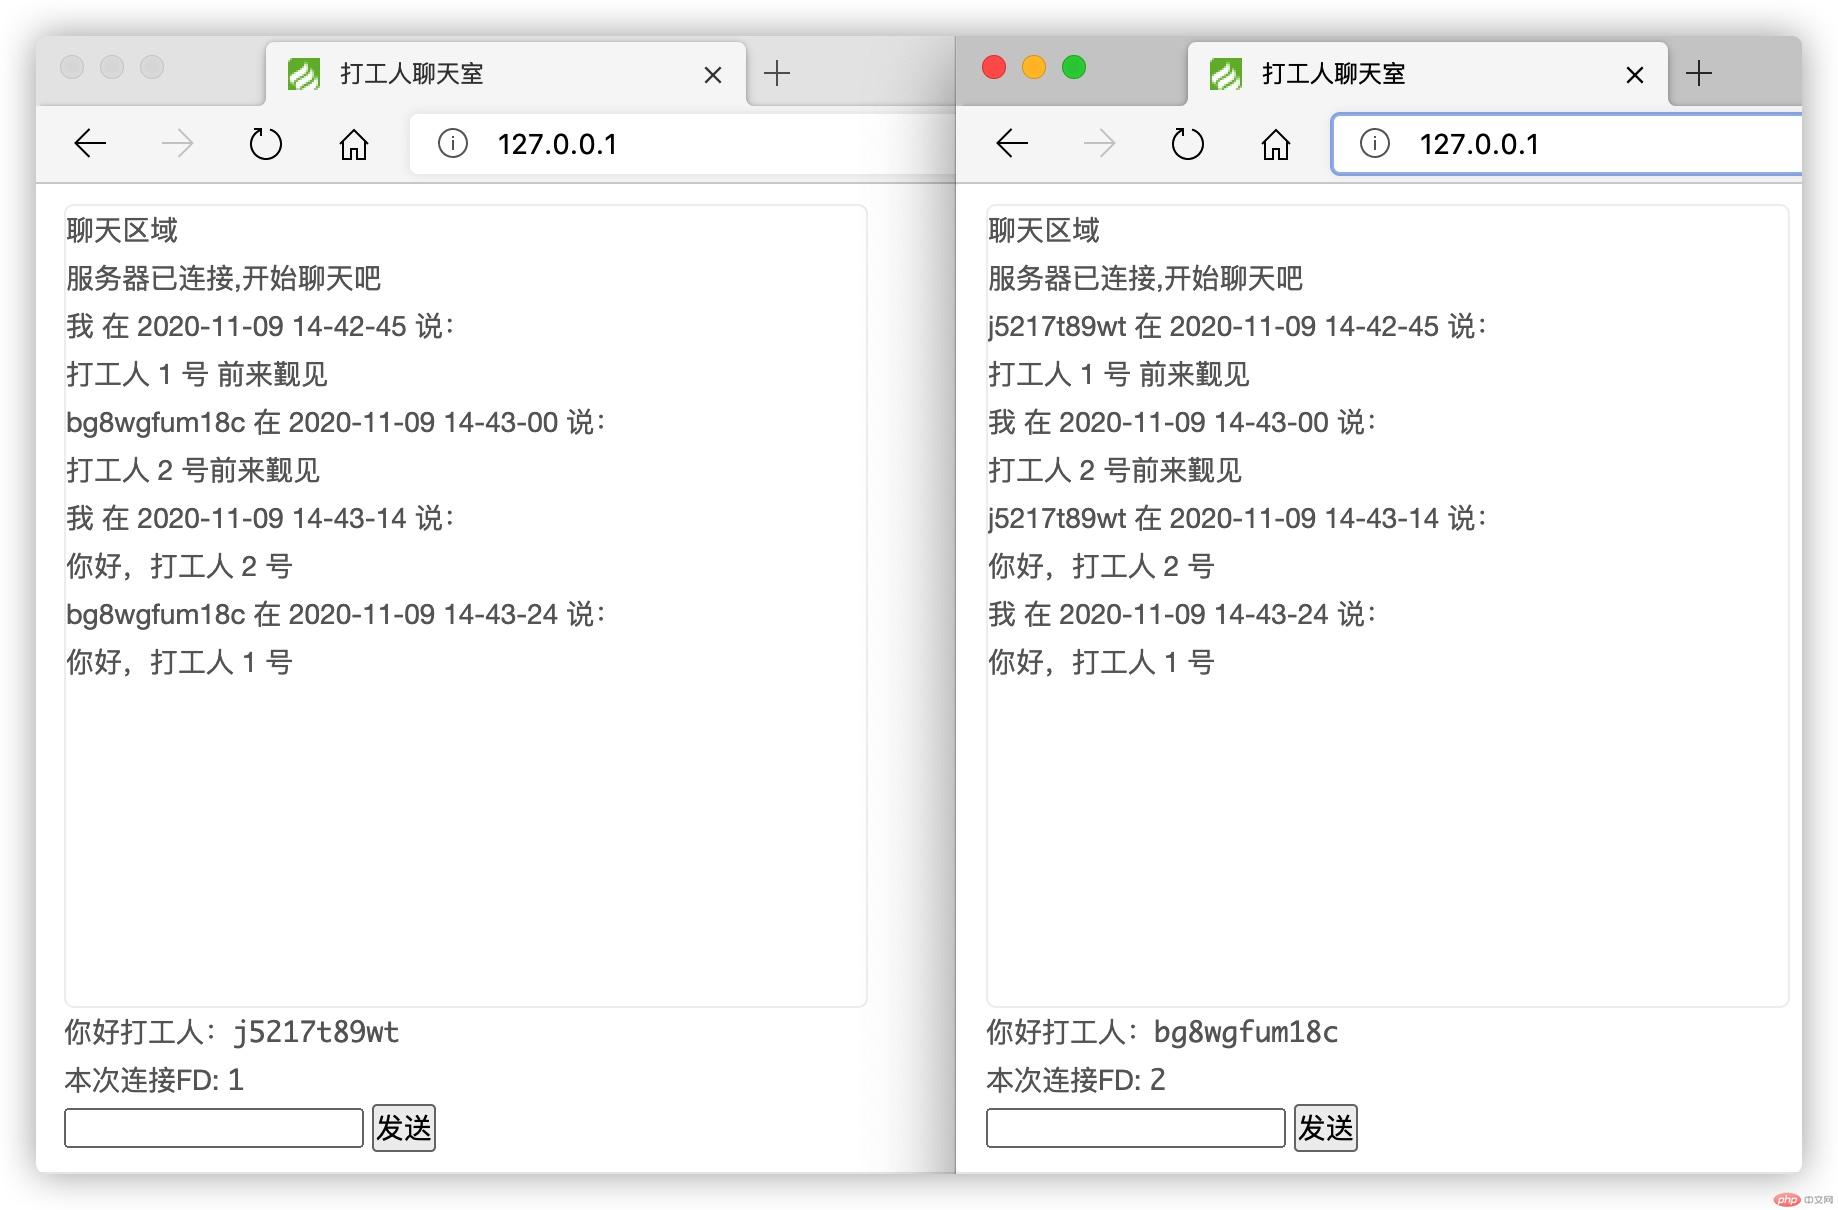
Random nickname, of course, no need to save, it will be lost after refreshing. When receiving the message, if it was sent by myself, it will display [I] sent a certain message at such and such time, and Instead of displaying the nickname string.
Project environment
Paste the copied directly
composer create-project topthink/think tpcd tpcomposer require topthink/think-swoole
Because it is a test project, everything is installed by default. After installation, when accessing the front-end page, an error will be reported when using the view method. Baidu will have a solution immediately.
Usage of webSocket
Reference documentation: https://developer.mozilla.org/zh-CN/docs/Web/API/WebSocket
- onopen() initiates a connection and is executed after the connection is successful.
- onclose() is executed after the connection is disconnected.
- onmessage() is executed after receiving the server message.
- onerror() The server executes abnormally.
In fact, webSocket has these common methods and has no special requirements. It exists as a browser API that maintains connections and receives server status, which is very simple and convenient.
Front-end page code:
<!DOCTYPE html><html lang="en"><head> <meta charset="UTF-8"> <title>打工人聊天室</title> <!--需要引入jq 文件--></head><style> .content { height: 400px; max-width: 400px; overflow: auto; border-radius: 5px; border: 1px solid #f0f0f0; }</style><body> <div id="content" class="content"> <p>聊天区域</p> </div> 你好打工人:<samp id="nickname">昵称</samp> <br> 本次连接FD: <samp id="fd-samp"></samp> <br> <input type="text" id="msg"> <input type="hidden" id="fd" value=""> <button id="send" onclick="send()">发送</button></body></html>JS code:
When the server information is received, there will be a receipt for the first connection, or a receipt for the message sent by the server. The status difference is distinguished by msgType. If it is a receipt message for the first connection, the FD will be saved on a page and will not be displayed in the chat message area. If a message receipt is received, it will be displayed directly in the chat message area.
Also, the things sent by the front-end and back-end communication are all of the best string nature. My front-end processing method is to first combine it into an object and then convert it into a JSON string.
<script> //滚动条最底部 function scrolltest() { var div = document.getElementById("content"); div.scrollTop = div.scrollHeight; } var wsServer = 'ws://127.0.0.1:9502'; var websocket = new WebSocket(wsServer); var nickname = Math.random().toString(36).substr(2); thisFd = ''; $('#nickname').html(nickname); //点击发送 function send() { var msg = $('#msg').val(); var data = { 'nickname': nickname, 'fd': thisFd, 'data': msg } //生成json 方便后台接收以及使用 var data = JSON.stringify(data); websocket.send(data); //然后清空 $('#msg').val(''); } //链接成功 websocket.onopen = function (evt) { $("#content >p:last-child").after('<p> 服务器已连接,开始聊天吧 </p>'); }; //链接断开 websocket.onclose = function (evt) { $("#content >p:last-child").after('<p> 服务器已断开,请重新连接 </p>'); }; //收到服务器消息 websocket.onmessage = function (evt) { //握手成功后,会接受到服务端返回的fd ,msgType = 1 //字符串格式化成json var data = eval('(' + evt.data + ')'); // console.log(evt.data); switch (data.msgType) { case 1: thisFd = data.fd; $('#fd-samp').html(thisFd); $('#fd').val(thisFd); break; case 2: if (data.nickname == nickname) { data.nickname = '我'; } $("#content >p:last-child").after('<p>' + data.nickname + ' 在 ' + data.time + ' 说:<br>' + data.data + '</p>'); //接收到消息自动触底 scrolltest(); break; } }; //服务器异常 websocket.onerror = function (evt, e) { $("#content >p:last-child").after('<p> 服务器异常 </p>'); };</script>Server-side code
The server needs to callback the message from the front-end, convert it into object data, then add some custom data and return it directly as it is, and send it to the front-end in bulk.
<?php //创建WebSocket Server对象,监听0.0.0.0:9502端口 $ws = new Swoole\WebSocket\Server('0.0.0.0', 9502); //监听WebSocket连接打开事件 $ws->on('open', function ($ws, $request){ $fd = $request->fd; $data = json_encode([ 'fd' => $request->fd, 'msgType' => 1 //代表第一次连接,前端处理fd ]); $ws->push($request->fd, $data); }); //监听WebSocket消息事件 $ws->on('message', function ($ws, $frame) { $stats = $ws->stats(); //格式化接收到json $data = json_decode($frame->data); // 原基础上不动,增加一些自定义 $data->msgType = 2; //代表服务器端回复 $data->time = date('Y-m-d H-i-s'); $data = json_encode($data); //因为是聊天室,所以包括自己都需要收到回执,就直接群发 swoole 提供 connections 方法 包含了所有在线的 fd foreach ($ws->connections as $conn_fd){ $ws->push($conn_fd,$data); } }); //监听WebSocket连接关闭事件 $ws->on('close', function ($ws, $fd) {// echo "client-{$fd} is closed\n"; }); $ws->start();After the code is complete, you only need to execute the following PHP file on the console. 
Then the front desk directly accesses your website address, mine is local 127.0.0.1
Open a few more windows to simulate multiple users, Then send a message to test: 
Hello, worker.
The code is very simple and not very difficult, but it can reflect the power of webScoket and Swoole very concisely.


