 WeChat Applet
 Mini Program Development
 Implement WeChat payment through inline h5 pages in mini programs, web pages within mini program webview, etc.
Implement WeChat payment through inline h5 pages in mini programs, web pages within mini program webview, etc.
小program development tutorialThe column introduces various methods to implement WeChat payment function

https://v.qq.com/x/page/t0913iprnay.html
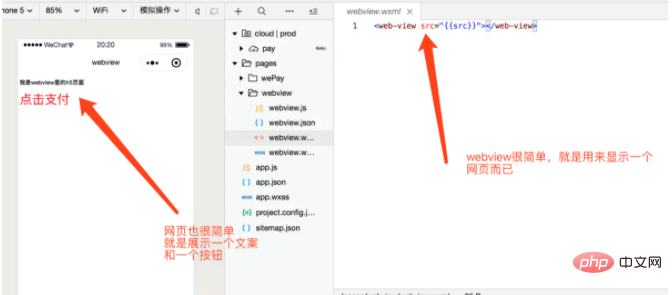

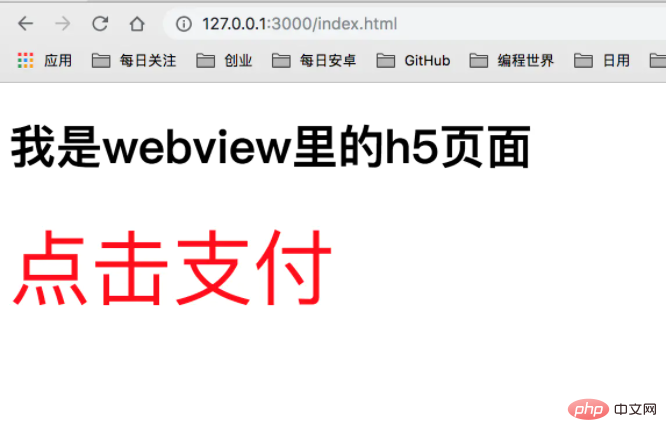
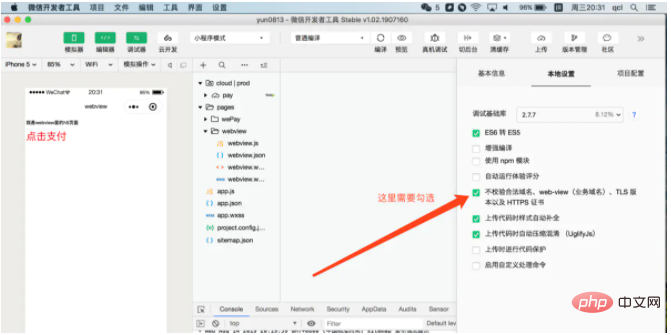
Next, we display this page in the webview of the mini program. It is also very simple. We only need to define our src as our local web page link.

nbsp;html>
<meta>
<title>小程序内嵌webview</title>
<style>
.btn {
font-size: 70px;
color: red;
}
</style>
<h1 id="我是webview里的h-页面">我是webview里的h5页面</h1>
<a>点击支付</a>
<script></script>
<script>
console.log(location.href);
let payOk = getQueryVariable("payOk");
console.log("payOk", payOk)
if(payOk){//支付成功
document.getElementById('desc').innerText="支持成功"
document.getElementById('desc').style.color="green"
}else{
document.getElementById('desc').innerText="点击支付"
}
//获取url里携带的参数
function getQueryVariable(variable) {
var query = window.location.search.substring(1);
var vars = query.split("&");
for (var i = 0; i < vars.length; i++) {
var pair = vars[i].split("=");
if (pair[0] == variable) {
return pair[1];
}
}
return (false);
}
function jumpPay() {
let orderId = Date.now();//这里用当前时间戳做订单号(后面使用你自己真实的订单号)
let money = 1;//订单总金额(单位分)
let payData = {orderId: orderId, money: money};
let payDataStr = JSON.stringify(payData);//因为要吧参数传递给小程序,所以这里需要转为字符串
const url = `../wePay/wePay?payDataStr=${payDataStr}`;
wx.miniProgram.navigateTo({
      url: url
 });
// console.log("点击了去支付", url)
console.log("点击了去支付")
}
</script>
Copy after login
The h5 code will not be explained in detail here, but will be briefly explained. When we click the payment button, we use the current timestamp as the order number (because the order number must be unique), and then pass in an order amount (unit points). For the sake of saving here, just pass 1 cent. It is your own expense. Money, distressed. . . . The key points are1. jweixin must be introduced to implement the h5 jump applet. nbsp;html>
<meta>
<title>小程序内嵌webview</title>
<style>
.btn {
font-size: 70px;
color: red;
}
</style>
<h1 id="我是webview里的h-页面">我是webview里的h5页面</h1>
<a>点击支付</a>
<script></script>
<script>
console.log(location.href);
let payOk = getQueryVariable("payOk");
console.log("payOk", payOk)
if(payOk){//支付成功
document.getElementById('desc').innerText="支持成功"
document.getElementById('desc').style.color="green"
}else{
document.getElementById('desc').innerText="点击支付"
}
//获取url里携带的参数
function getQueryVariable(variable) {
var query = window.location.search.substring(1);
var vars = query.split("&");
for (var i = 0; i < vars.length; i++) {
var pair = vars[i].split("=");
if (pair[0] == variable) {
return pair[1];
}
}
return (false);
}
function jumpPay() {
let orderId = Date.now();//这里用当前时间戳做订单号(后面使用你自己真实的订单号)
let money = 1;//订单总金额(单位分)
let payData = {orderId: orderId, money: money};
let payDataStr = JSON.stringify(payData);//因为要吧参数传递给小程序,所以这里需要转为字符串
const url = `../wePay/wePay?payDataStr=${payDataStr}`;
wx.miniProgram.navigateTo({
url: url
});
// console.log("点击了去支付", url)
console.log("点击了去支付")
}
</script>
const url = `../wePay/wePay?payDataStr=${payDataStr}`;
wx.miniProgram.navigateTo({
url: url
});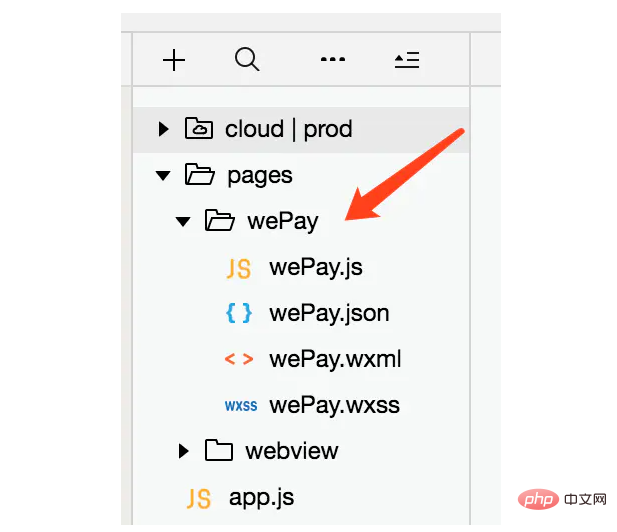
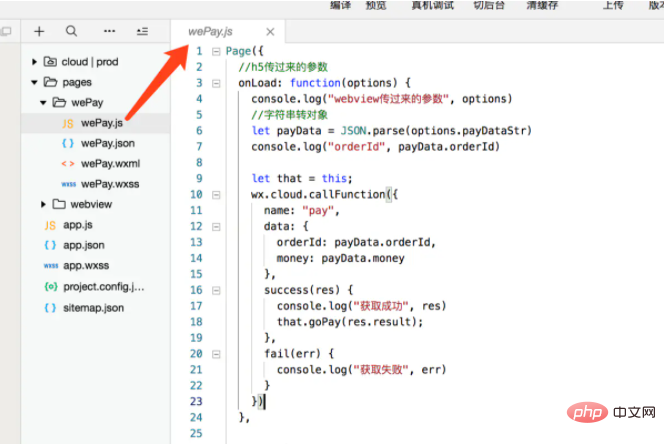
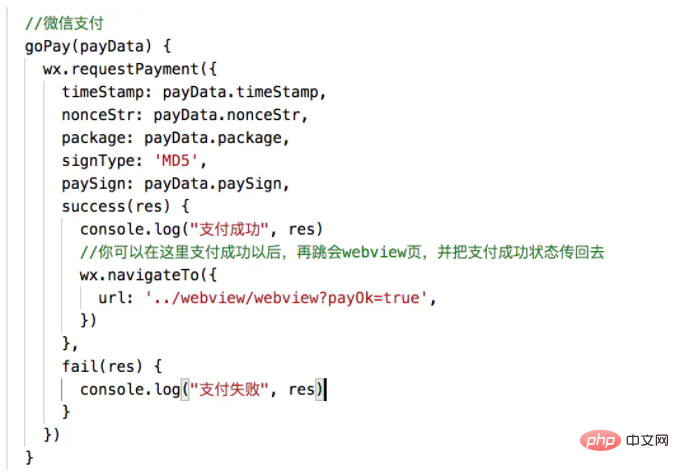
支付我们这里实用的小程序云开发来实现的支付,核心代码只有10行。由于支付不是本节的重点,所以这里不做具体讲解。感兴趣的同学可以去看我写的文章和我录的视频
小程序支付文章:https://www.jianshu.com/p/2b391df055a9
小程序支付视频:https://edu.csdn.net/course/play/25701/310742
下面把小程序接收参数和支付的完整代码贴出来给大家
Page({
  //h5传过来的参数
  onLoad: function(options) {
    console.log("webview传过来的参数", options)
    //字符串转对象
    let payData = JSON.parse(options.payDataStr)
    console.log("orderId", payData.orderId)

    let that = this;
    wx.cloud.callFunction({
      name: "pay",
      data: {
        orderId: payData.orderId,
        money: payData.money
      },
      success(res) {
        console.log("获取成功", res)
        that.goPay(res.result);
      },
      fail(err) {
        console.log("获取失败", err)
      }
    })
  },

  //微信支付
  goPay(payData) {
    wx.requestPayment({
      timeStamp: payData.timeStamp,
      nonceStr: payData.nonceStr,
      package: payData.package,
      signType: 'MD5',
      paySign: payData.paySign,
      success(res) {
        console.log("支付成功", res)
        //你可以在这里支付成功以后,再跳会webview页,并把支付成功状态传回去
        wx.navigateTo({
          url: '../webview/webview?payOk=true',
        })
      },
      fail(res) {
        console.log("支付失败", res)
      }
    })
  }
})代码里注释很清楚,这里有一点,就是我们支付成功后,需要告诉h5我们支付成功了,通知h5去刷新订单或者支付状态。
到这里我们就完整的实现了小程序webview展示h5页面,并且做到了h5和小程序的交互,实现了小程序webview的支付功能。
是不是很简单呢。
The above is the detailed content of Implement WeChat payment through inline h5 pages in mini programs, web pages within mini program webview, etc.. For more information, please follow other related articles on the PHP Chinese website!

Hot AI Tools

Undresser.AI Undress
AI-powered app for creating realistic nude photos

AI Clothes Remover
Online AI tool for removing clothes from photos.

Undress AI Tool
Undress images for free

Clothoff.io
AI clothes remover

AI Hentai Generator
Generate AI Hentai for free.

Hot Article

Hot Tools

Notepad++7.3.1
Easy-to-use and free code editor

SublimeText3 Chinese version
Chinese version, very easy to use

Zend Studio 13.0.1
Powerful PHP integrated development environment

Dreamweaver CS6
Visual web development tools

SublimeText3 Mac version
God-level code editing software (SublimeText3)

Hot Topics
 If you forget your WeChat payment password, how to retrieve it?
Feb 23, 2024 pm 09:40 PM
In WeChat, users can enter their payment password to make purchases, but how do they retrieve their payment password if they forget it? Users need to go to My-Services-Wallet-Payment Settings-to recover their payment password if they forget it. This introduction to how to retrieve your payment password if you forget it will tell you the specific operation method. The following is a detailed introduction, so take a look! WeChat usage tutorial. How to find the WeChat payment password if you forget it? Answer: My-Service-Wallet-Payment Settings-Forgot payment password. Specific method: 1. First, click My. 2. Click on the service inside. 3. Click on the wallet inside. 4. Find the payment settings. 5. Click Forgot payment password. 6. Enter your own information for verification. 7. Then enter the new payment password to change it.
 What should I do if I forget my WeChat payment password?
Jan 08, 2024 pm 05:02 PM
Solution for forgetting WeChat payment password: 1. Open WeChat APP, click "I" in the lower right corner to enter the personal center page; 2. In the personal center page, click "Pay" to enter the payment page; 3. On the payment page , click "..." in the upper right corner to enter the payment management page; 4. In the payment management page, find and click "Forgot payment password"; 5. Follow the page prompts and enter personal information for identity verification. After successful verification, you can Choose the method of "retrieve by swiping your face" or "retrieve by verifying bank card information" to retrieve your password, etc.
 How to set up WeChat payment for Meituan Takeout How to set up WeChat payment
Mar 12, 2024 pm 10:34 PM
There are many food and snack shops provided in the Meituan takeout app, and all mobile phone users log in through their accounts. Add your personal delivery address and contact number to enjoy the most convenient takeout service. Open the homepage of the software, enter product keywords, and search online to find the corresponding product results. Just swipe up or down to purchase and place an order. The platform will also recommend dozens of nearby restaurants with high reviews based on the delivery address provided by the user. The store can also set up different payment methods. You can place an order with one click to complete the order. The rider can arrange the delivery immediately and the delivery speed is very fast. There are also takeout red envelopes of different amounts for use. Now the editor is online in detail for Meituan takeout users. We show you how to set up WeChat payment. 1. After selecting the product, submit the order and click Now
 How to set the order of deduction for WeChat payment
Sep 06, 2023 am 11:11 AM
Steps to set the order of deductions for WeChat payment: 1. Open the WeChat APP, click on the "Me" interface, click on "Services", and then click on "Collect and Payment"; 2. Click on "Prioritize Use This Payment Method" under the payment code on the collection and payment interface; 3. Select the preferred payment method you need.
 Can Xianyu pay with WeChat? How to change to WeChat payment method?
Mar 12, 2024 pm 12:19 PM
When everyone has nothing to do, they will choose to browse the Xianyu platform. Everyone can find that there are a large number of products on this platform, which can allow everyone to see various second-hand products. Although these products are second-hand products, there is absolutely no problem with the quality of these products, so everyone can buy them with confidence. The prices are very affordable, and they still allow everyone to face-to-face with these products. It is entirely possible for sellers to communicate and conduct some price bargaining operations. As long as everyone negotiates properly, then you can choose to conduct transactions, and when everyone pays here, they want to make WeChat payment, but it seems that the platform It's not allowed. Please follow the editor to find out what the specific situation is. Xianyu
 Sharing the steps to apply for a refund with WeChat Pay
Mar 25, 2024 pm 06:31 PM
1. First, we need to open the WeChat APP on the mobile phone, and then click to log in to the WeChat account, so that we enter the WeChat homepage. 2. Click the [Me] button in the lower right corner of the WeChat homepage, then select the [Payment] option. We click to enter the payment page. 3. After entering the [Payment] page, click the [Wallet] option to enter, and click [Bill] in the upper right corner of the [Wallet] page.
 How to set up WeChat payment on Didi Chuxing How to set up WeChat payment
Mar 13, 2024 pm 01:22 PM
The Didi Chuxing app provides more convenience for everyone's daily travel. You can go wherever you want, and all Didi vehicles are on call. You no longer need to wait anxiously. Dozens of taxi red envelopes are available for free. Travel faster. Open the homepage of the software, enter the starting point and destination according to your personal itinerary, and freely choose from vehicles of different prices below. Place an order with one click and publish the itinerary. Didi drivers will receive the order in seconds and arrive at the designated location as quickly as possible. For the location, just check your mobile phone number before getting on the bus. Of course, there are many ways to pay for the fare, including WeChat and Alipay, but everyone usually uses WeChat. It is easy to set up payment with one click. Now the editor is online carefully paying for Didi one by one. Travel users bring how to set up WeChat payment. 1. We are on the mobile phone
 How to use WeChat payment on Taobao
Feb 28, 2024 pm 12:31 PM
Taobao is a shopping software that is loved by users and provides a convenient shopping experience. In addition to Alipay payment, Taobao also supports WeChat payment, providing users with more payment options. Next, in the following article, the editor of this website will introduce in detail whether you can add WeChat payment method on Taobao. Players who want to know more should not miss it. Come and follow this article to learn more about it. How to use WeChat payment on Taobao Answer: Taobao cannot use WeChat payment. 1. In the Taobao software, we need to select the goods we want to buy. After selecting, we click to go to [Checkout]; 2. Then on the settlement page, you can see Alipay, use now and pay later, and ask friends to help pay. Three ways;


