How to create a homepage slideshow in uniapp
Uniapp’s method of making a homepage slideshow: first modify the configuration file; then write the homepage code, the code is [
]; finally, complete the css code and run it That’s it.

The operating environment of this tutorial: windows7 system, uni-app2.5.1 version, this method is suitable for all brands of computers.
Recommended (free): uni-app development tutorial
How to make a homepage slideshow with uniapp:
1. Modify the configuration file
First we need to set the navigation bar background to black in the page configuration file (pages.json) under the project root directory created earlier, and change the header font color Set to white.
After the configuration is completed, the code is as follows:
{
"pages": [ //pages数组中第一项表示应用启动页,
{
"path": "pages/index/index",//首页文件路径
"style": {
"navigationBarTitleText": "首页"//首页头部标题
}
}
],
"globalStyle": {
"navigationBarTextStyle": "white",//导航栏标题颜色(仅支持 black/white)
"navigationBarTitleText": "WPApp",//导航栏默认标题
"navigationBarBackgroundColor": "#000000;",//导航栏背景颜色,此处为黑色
"backgroundColor": "#F8F8F8"//页面背景颜色
}
}2. Write the homepage code
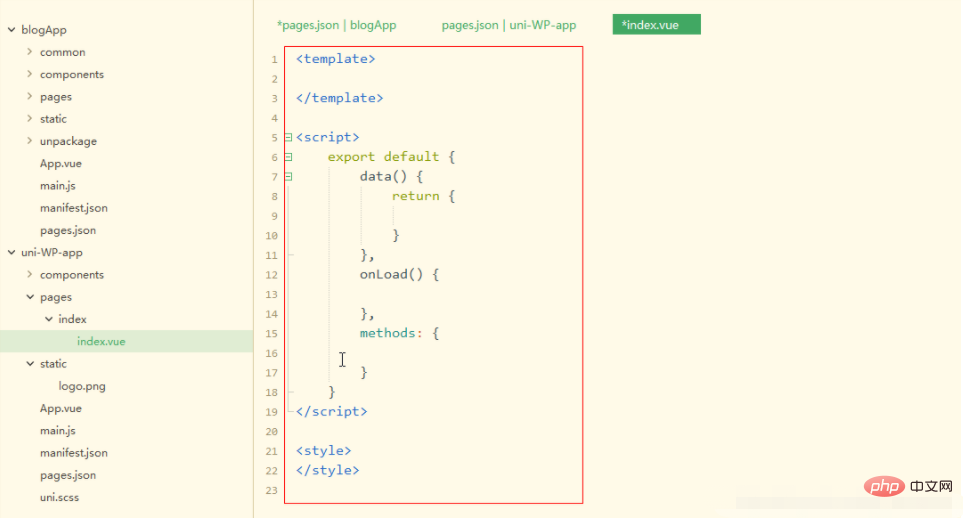
You need to add slides to the homepage. We need to use uni- here For the official components of the app, you can click on the link to view the specific usage: swiper. Then, open the directory pages>index>index.vue in sequence, and there is already a part of the code when creating the project in index.vue. This part of the code is useful for us. It said it was useless, so we first deleted the original code. After deletion, it is as shown below:

After deleting the existing code, we started to write the code we wanted. , here we want to add a slideshow function to the homepage, so we start writing the slideshow code here.
A page in uni-app is composed of three parts: template code (view), js code (data, interaction), css code (view style). Here we first write the template code as follows:
<template>
    <view>
        <view class="uni-padding-wrap">
            <view class="page-section swiper">
                <view class="page-section-spacing">
    <!-- 一组幻灯片代码开始,用到组件swiper -->
<!-- indicator-dots autoplay interval……:组件相关属性,具体可以查看官网说明 -->
                    <swiper class="swiper" indicator-dots="indicatorDots" autoplay="autoplay" interval="interval" duration="duration">
                        <!-- 每组幻灯片中的子项目 1 -->
<swiper-item>
<!-- 此处放内容,可以是图片,也可是图片加文字 -->
                        </swiper-item>
<!-- 每组幻灯片中的子项目 2 -->
                        <swiper-item>
<!-- 此处放内容,可以是图片,也可是图片加文字 -->
                        </swiper-item>
<!-- 每组幻灯片中的子项目 3 -->
                        <swiper-item>
<!-- 此处放内容,可以是图片,也可是图片加文字 -->
                        </swiper-item>
                    </swiper>
                </view>
            </view>
        </view>
    </view>
</template>The second is the js code, because data and user interaction have not been used here yet, so the js code will not be changed here and remains as follows:
<script>
export default {
data() {
return {
}
},
onLoad() {

},
methods: {

}
}
</script>The last is the css code, as follows:
<style>
/* 将这组幻灯片中的子项目改成我们设计图中的灰色 */
swiper-item{
background-color: #f8f8f8;
}
</style>3. Run
and run it into Google Chrome to see the following effect:

Attach the last The code of the entire page:
<template>
    <view>
        <view class="uni-padding-wrap">
            <view class="page-section swiper">
                <view class="page-section-spacing">
    <!-- 一组幻灯片代码开始,用到组件swiper -->
<!-- indicator-dots autoplay interval……:组件相关属性,具体可以查看官网说明 -->
                    <swiper class="swiper" indicator-dots="indicatorDots" autoplay="autoplay" interval="interval" duration="duration">
                        <!-- 每组幻灯片中的子项目 1 -->
<swiper-item>
<!-- 此处放内容,可以是图片,也可是图片加文字 -->
                        </swiper-item>
<!-- 每组幻灯片中的子项目 2 -->
                        <swiper-item>
<!-- 此处放内容,可以是图片,也可是图片加文字 -->
                        </swiper-item>
<!-- 每组幻灯片中的子项目 3 -->
                        <swiper-item>
<!-- 此处放内容,可以是图片,也可是图片加文字 -->
                        </swiper-item>
                    </swiper>
                </view>
            </view>
        </view>
    </view>
</template>

<script>
export default {
data() {
return {
}
},
onLoad() {

},
methods: {

}
}
</script>

<style>
/* 将这组幻灯片中的子项目改成我们设计图中的灰色 */
swiper-item{
background-color: #f8f8f8;
}
</style>Related free learning recommendations: php programming (video)
The above is the detailed content of How to create a homepage slideshow in uniapp. For more information, please follow other related articles on the PHP Chinese website!

Hot AI Tools

Undresser.AI Undress
AI-powered app for creating realistic nude photos

AI Clothes Remover
Online AI tool for removing clothes from photos.

Undress AI Tool
Undress images for free

Clothoff.io
AI clothes remover

Video Face Swap
Swap faces in any video effortlessly with our completely free AI face swap tool!

Hot Article

Hot Tools

Notepad++7.3.1
Easy-to-use and free code editor

SublimeText3 Chinese version
Chinese version, very easy to use

Zend Studio 13.0.1
Powerful PHP integrated development environment

Dreamweaver CS6
Visual web development tools

SublimeText3 Mac version
God-level code editing software (SublimeText3)

Hot Topics
 1386
1386
 52
52
 How to start preview of uniapp project developed by webstorm
Apr 08, 2024 pm 06:42 PM
Steps to launch UniApp project preview in WebStorm: Install UniApp Development Tools plugin Connect to device settings WebSocket launch preview
 Which one is better, uniapp or mui?
Apr 06, 2024 am 05:18 AM
Generally speaking, uni-app is better when complex native functions are needed; MUI is better when simple or highly customized interfaces are needed. In addition, uni-app has: 1. Vue.js/JavaScript support; 2. Rich native components/API; 3. Good ecosystem. The disadvantages are: 1. Performance issues; 2. Difficulty in customizing the interface. MUI has: 1. Material Design support; 2. High flexibility; 3. Extensive component/theme library. The disadvantages are: 1. CSS dependency; 2. Does not provide native components; 3. Small ecosystem.
 What basics are needed to learn uniapp?
Apr 06, 2024 am 04:45 AM
uniapp development requires the following foundations: front-end technology (HTML, CSS, JavaScript) mobile development knowledge (iOS and Android platforms) Node.js other foundations (version control tools, IDE, mobile development simulator or real machine debugging experience)
 What are the disadvantages of uniapp
Apr 06, 2024 am 04:06 AM
UniApp has many conveniences as a cross-platform development framework, but its shortcomings are also obvious: performance is limited by the hybrid development mode, resulting in poor opening speed, page rendering, and interactive response. The ecosystem is imperfect and there are few components and libraries in specific fields, which limits creativity and the realization of complex functions. Compatibility issues on different platforms are prone to style differences and inconsistent API support. The security mechanism of WebView is different from native applications, which may reduce application security. Application releases and updates that support multiple platforms at the same time require multiple compilations and packages, increasing development and maintenance costs.
 Which is better, uniapp or native development?
Apr 06, 2024 am 05:06 AM
When choosing between UniApp and native development, you should consider development cost, performance, user experience, and flexibility. The advantages of UniApp are cross-platform development, rapid iteration, easy learning and built-in plug-ins, while native development is superior in performance, stability, native experience and scalability. Weigh the pros and cons based on specific project needs. UniApp is suitable for beginners, and native development is suitable for complex applications that pursue high performance and seamless experience.
 What is the difference between uniapp and flutter
Apr 06, 2024 am 04:30 AM
UniApp is based on Vue.js, and Flutter is based on Dart. Both support cross-platform development. UniApp provides rich components and easy development, but its performance is limited by WebView; Flutter uses a native rendering engine, which has excellent performance but is more difficult to develop. UniApp has an active Chinese community, and Flutter has a large and global community. UniApp is suitable for scenarios with rapid development and low performance requirements; Flutter is suitable for complex applications with high customization and high performance.
 What component library does uniapp use to develop small programs?
Apr 06, 2024 am 03:54 AM
Recommended component library for uniapp to develop small programs: uni-ui: Officially produced by uni, it provides basic and business components. vant-weapp: Produced by Bytedance, with a simple and beautiful UI design. taro-ui: produced by JD.com and developed based on the Taro framework. fish-design: Produced by Baidu, using Material Design design style. naive-ui: Produced by Youzan, modern UI design, lightweight and easy to customize.


