

Introduction to the method of implementing tab switching in angular4

angularHow to implement tab bar switching? This article will introduce to you how to implement tab bar switching in angular4. It has certain reference value. Friends in need can refer to it. I hope it will be helpful to everyone.

Related tutorial recommendations: "angular Tutorial"
Management system tab switching page is a common requirement, which is roughly as follows :
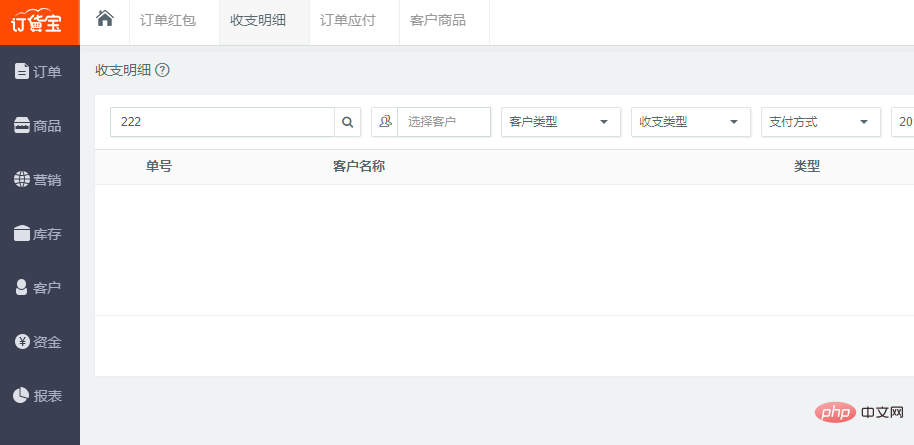
Click on the left menu, the corresponding tab will be displayed on the right, and then different tabs can be edited at the same time, and the information will not be lost when switching!
Use PHP or .net, Java development technology, probably switch the display, and then add an ifram to do it, or load the information through ajax to display the corresponding layer.
But if you use angular How to achieve this? The first idea is, can it be implemented using the same ifarm?
The second thing that comes to mind is that the routing socket looks like this
But I couldn’t achieve it, so I was wondering if a simple tab page is so difficult?
Or is there really no simple way?
For a long time, I didn’t care about this
Because I knew that my understanding and learning of angular was not enough, so I put it down for a long time until I saw it on Zhihu An article
Angular routing reuse strategy
So I had an idea, and it took me half a day to finally implement anguar 4 tab The general idea of switching pages is as follows:
1. Implement the RouteReuseStrategy interface to customize a routing utilization strategy
SimpleReuseStrategy.ts code is as follows:
import { RouteReuseStrategy, DefaultUrlSerializer, ActivatedRouteSnapshot, DetachedRouteHandle } from '@angular/router';

export class SimpleReuseStrategy implements RouteReuseStrategy {

    public static handlers: { [key: string]: DetachedRouteHandle } = {}

    /** 表示对所有路由允许复用 如果你有路由不想利用可以在这加一些业务逻辑判断 */
    public shouldDetach(route: ActivatedRouteSnapshot): boolean {
        return true;
    }

    /** 当路由离开时会触发。按path作为key存储路由快照&组件当前实例对象 */
    public store(route: ActivatedRouteSnapshot, handle: DetachedRouteHandle): void {
        SimpleReuseStrategy.handlers[route.routeConfig.path] = handle
    }

    /** 若 path 在缓存中有的都认为允许还原路由 */
    public shouldAttach(route: ActivatedRouteSnapshot): boolean {
        return !!route.routeConfig && !!SimpleReuseStrategy.handlers[route.routeConfig.path]
    }

    /** 从缓存中获取快照,若无则返回nul */
    public retrieve(route: ActivatedRouteSnapshot): DetachedRouteHandle {
        if (!route.routeConfig) {
            return null
        }

        return SimpleReuseStrategy.handlers[route.routeConfig.path]
    }

    /** 进入路由触发,判断是否同一路由 */
    public shouldReuseRoute(future: ActivatedRouteSnapshot, curr: ActivatedRouteSnapshot): boolean {
        return future.routeConfig === curr.routeConfig
    }
}2. Register the strategy into the module :
import { BrowserModule } from '@angular/platform-browser';
import { NgModule } from '@angular/core';
import { FormsModule } from '@angular/forms';
import { CommonModule as SystemCommonModule } from '@angular/common';
import { AppComponent } from './app.component';
import { AppRoutingModule,ComponentList } from './app.routing'
import { SimpleReuseStrategy } from './SimpleReuseStrategy';
import { RouteReuseStrategy } from '@angular/router';

@NgModule({
  declarations: [
    AppComponent,
    ComponentList
  ],
  imports: [
    BrowserModule,
    AppRoutingModule,
    FormsModule,
    SystemCommonModule
  ],
  providers: [
    { provide: RouteReuseStrategy, useClass: SimpleReuseStrategy }
  ],
  bootstrap: [AppComponent]
})
export class AppModule { }The above two steps basically implement the reuse strategy, but to achieve the first rendering, we still need to do some other work
3. Define the route and add some data. The data routing code is as follows :
import { NgModule } from '@angular/core';
import { Routes, RouterModule } from '@angular/router';
import { AboutComponent } from './home/about.component'
import { HomeComponent } from './home/home.component'
import { NewsComponent } from './home/news.component'
import { ContactComponent } from './home/contact.component'


export const routes: Routes = [
  { path: '', redirectTo: 'home', pathMatch: 'full', },
  { path: 'home', component: HomeComponent,data: { title: '首页', module: 'home', power: "SHOW" } },
  { path: 'news',component: NewsComponent ,data: { title: '新闻管理', module: 'news', power: "SHOW" }},
  { path: 'contact',component: ContactComponent ,data: { title: '联系我们', module: 'contact', power: "SHOW" }},
  { path: 'about', component: AboutComponent,data: { title: '关于我们', module: 'about', power: "SHOW" } },
];

@NgModule({
  imports: [RouterModule.forRoot(routes)],
  exports: [RouterModule]
})

export class AppRoutingModule { }

export const ComponentList=[
    HomeComponent,
    NewsComponent,
    AboutComponent,
    ContactComponent
] 4. Implement routing events in the
import { Component } from '@angular/core';
import { SimpleReuseStrategy } from './SimpleReuseStrategy';
import { ActivatedRoute, Router, NavigationEnd } from '@angular/router';
import { Title } from '@angular/platform-browser';
import 'rxjs/add/operator/filter';
import 'rxjs/add/operator/map';
import 'rxjs/add/operator/mergeMap';
@Component({
selector: 'app-root',
styleUrls:['app.css'],
templateUrl: 'app.html',
providers: [SimpleReuseStrategy]
})
export class AppComponent {
//路由列表
menuList: Array<{ title: string, module: string, power: string,isSelect:boolean }>=[];
constructor(private router: Router,
private activatedRoute: ActivatedRoute,
private titleService: Title) {
//路由事件
this.router.events.filter(event => event instanceof NavigationEnd)
.map(() => this.activatedRoute)
.map(route => {
while (route.firstChild) route = route.firstChild;
return route;
})
.filter(route => route.outlet === 'primary')
.mergeMap(route => route.data)
.subscribe((event) => {
//路由data的标题
let title = event['title'];
this.menuList.forEach(p => p.isSelect=false);
var menu = { title: title, module: event["module"], power: event["power"], isSelect:true};
this.titleService.setTitle(title);
let exitMenu=this.menuList.find(info=>info.title==title);
if(exitMenu){//如果存在不添加,当前表示选中
this.menuList.forEach(p => p.isSelect=p.title==title);
return ;
}
this.menuList.push(menu);
});
}
//关闭选项标签
closeUrl(module:string,isSelect:boolean){
//当前关闭的是第几个路由
let index=this.menuList.findIndex(p=>p.module==module);
//如果只有一个不可以关闭
if(this.menuList.length==1) return ;
this.menuList=this.menuList.filter(p=>p.module!=module);
//删除复用
delete SimpleReuseStrategy.handlers[module];
if(!isSelect) return;
//显示上一个选中
let menu=this.menuList[index-1];
if(!menu) {//如果上一个没有下一个选中
menu=this.menuList[index+1];
}
// console.log(menu);
// console.log(this.menuList);
this.menuList.forEach(p => p.isSelect=p.module==menu.module );
//显示当前路由信息
this.router.navigate(['/'+menu.module]);
}
}app.html code is as follows:
<div class="row">
  <div class="col-md-4">
    <ul>
      <li><a routerLinkActive="active" routerLink="/home">首页</a></li>
      <li><a routerLinkActive="active" routerLink="/about">关于我们</a></li>
      <li><a routerLinkActive="active" routerLink="/news">新闻中心</a></li>
      <li><a routerLinkActive="active" routerLink="/contact">联系我们</a></li>
    </ul>
  </div>
  <div class="col-md-8">
    <div class="crumbs clearfix">
      <ul>
          <ng-container  *ngFor="let menu of menuList">
              <ng-container *ngIf="menu.isSelect">
                  <li class="isSelect">
                      <a routerLink="/{{ menu.module }}">{{ menu.title }}</a>
                      <span (click)="closeUrl(menu.module,menu.isSelect)">X</span>
                  </li>
              </ng-container>
              <ng-container *ngIf="!menu.isSelect">
                  <li>
                      <a routerLink="/{{ menu.module }}">{{ menu.title }}</a>
                      <span  (click)="closeUrl(menu.module,menu.isSelect)">X</span>
                  </li>
              </ng-container>
          </ng-container>
      </ul>
    </div>
    <router-outlet></router-outlet>
  </div>
</div>The overall effect is as follows:
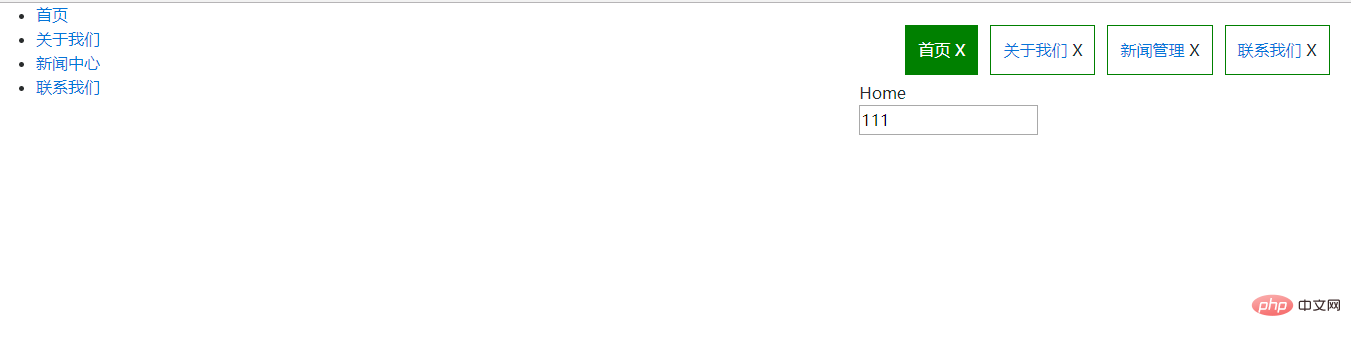
Finally click the menu to display the corresponding label selection, you can switch the editing content, when closing the label, click the menu again to reload content.
For more programming-related knowledge, please visit: Programming Teaching! !
The above is the detailed content of Introduction to the method of implementing tab switching in angular4. For more information, please follow other related articles on the PHP Chinese website!

Hot AI Tools

Undresser.AI Undress
AI-powered app for creating realistic nude photos

AI Clothes Remover
Online AI tool for removing clothes from photos.

Undress AI Tool
Undress images for free

Clothoff.io
AI clothes remover

AI Hentai Generator
Generate AI Hentai for free.

Hot Article
Hot Tools

Notepad++7.3.1
Easy-to-use and free code editor

SublimeText3 Chinese version
Chinese version, very easy to use

Zend Studio 13.0.1
Powerful PHP integrated development environment

Dreamweaver CS6
Visual web development tools

SublimeText3 Mac version
God-level code editing software (SublimeText3)
Hot Topics
 1380
1380
 52
52

 Let's talk about metadata and decorators in Angular
Feb 28, 2022 am 11:10 AM
Let's talk about metadata and decorators in Angular
Feb 28, 2022 am 11:10 AM
This article continues the learning of Angular, takes you to understand the metadata and decorators in Angular, and briefly understands their usage. I hope it will be helpful to everyone!
 How to install Angular on Ubuntu 24.04
Mar 23, 2024 pm 12:20 PM
How to install Angular on Ubuntu 24.04
Mar 23, 2024 pm 12:20 PM
Angular.js is a freely accessible JavaScript platform for creating dynamic applications. It allows you to express various aspects of your application quickly and clearly by extending the syntax of HTML as a template language. Angular.js provides a range of tools to help you write, update and test your code. Additionally, it provides many features such as routing and form management. This guide will discuss how to install Angular on Ubuntu24. First, you need to install Node.js. Node.js is a JavaScript running environment based on the ChromeV8 engine that allows you to run JavaScript code on the server side. To be in Ub
 Detailed explanation of angular learning state manager NgRx
May 25, 2022 am 11:01 AM
Detailed explanation of angular learning state manager NgRx
May 25, 2022 am 11:01 AM
This article will give you an in-depth understanding of Angular's state manager NgRx and introduce how to use NgRx. I hope it will be helpful to you!
 An article exploring server-side rendering (SSR) in Angular
Dec 27, 2022 pm 07:24 PM
An article exploring server-side rendering (SSR) in Angular
Dec 27, 2022 pm 07:24 PM
Do you know Angular Universal? It can help the website provide better SEO support!
 Angular + NG-ZORRO quickly develop a backend system
Apr 21, 2022 am 10:45 AM
Angular + NG-ZORRO quickly develop a backend system
Apr 21, 2022 am 10:45 AM
This article will share with you an Angular practical experience and learn how to quickly develop a backend system using angualr combined with ng-zorro. I hope it will be helpful to everyone!
 A brief analysis of how to use monaco-editor in angular
Oct 17, 2022 pm 08:04 PM
A brief analysis of how to use monaco-editor in angular
Oct 17, 2022 pm 08:04 PM
How to use monaco-editor in angular? The following article records the use of monaco-editor in angular that was used in a recent business. I hope it will be helpful to everyone!
 How to use PHP and Angular for front-end development
May 11, 2023 pm 04:04 PM
How to use PHP and Angular for front-end development
May 11, 2023 pm 04:04 PM
With the rapid development of the Internet, front-end development technology is also constantly improving and iterating. PHP and Angular are two technologies widely used in front-end development. PHP is a server-side scripting language that can handle tasks such as processing forms, generating dynamic pages, and managing access permissions. Angular is a JavaScript framework that can be used to develop single-page applications and build componentized web applications. This article will introduce how to use PHP and Angular for front-end development, and how to combine them
 A brief analysis of independent components in Angular and see how to use them
Jun 23, 2022 pm 03:49 PM
A brief analysis of independent components in Angular and see how to use them
Jun 23, 2022 pm 03:49 PM
This article will take you through the independent components in Angular, how to create an independent component in Angular, and how to import existing modules into the independent component. I hope it will be helpful to you!
