

uni-app introductory tutorial to master the basic use of components


Recommended (free): uni-app development tutorial
Article Contents
- Preface
- 1. Basic components
- 1.scroll-view
- 2.swiper
- 3.text
- 4.rich-text
- 5.process
- 2. Form component
- 1.button
- 2.checkbox
- 3.input
- 4.label
- 5.picker
- 6.radio
- 7.slider
- 8.switch
- 9.textarea
- 10.form
- 3. Navigation component and page parameter passing
- 1.navigator
- 2.Parameter passing
- 4. Media component
- 1.audio
- 2.image
- 3.video
- Summary
Preface
This article mainly introduces the components in uni-app, including four major categories: basic components (scroll-view, swiper, text, etc. ), form components (button, checkbox, input, etc.), navigation components navigator and page parameters, media components (audio, image, video, etc.), details the common properties and methods of these components, and provides usage examples and demonstrations.
1. Basic components
Components are the basic components of the view layer. A component usually includes a start tag and an end tag. Attributes are used to Modify this component so that the content is within two tags.
All component and attribute names are lowercase, and words are connected with hyphens -. The root node is <template>, and there can only be one root component under it.
The framework provides developers with a series of basic components, and developers can quickly develop by combining these basic components.
Common basic components are as follows:
| Component name | Description |
|---|---|
| view | View container, similar to p |
| scroll-view | Scrollable view container |
| swiper | Slider view container |
| icon | icon |
| text | Text |
| rich-text | Rich text |
| Progress bar |
1.scroll-view
Scrollable view area, used for area scrolling. Please note that in pages rendered by webview, the performance of area scrolling is not as good as page scrolling.
| Type | Default value | Description | |
|---|---|---|---|
| Boolean | false | Allow horizontal scrolling | |
| Boolean | false | Allow vertical scrolling | |
| Number | 50 | How far away from the top/left (unit px) is to trigger the scrolltoupper event | ##lower-threshold |
| 50 | How far away from the bottom/right (unit px) is to trigger the scrolltolower event | scroll-top | |
| None | Set the vertical scroll bar position | scroll-left | |
| None | Set the horizontal scroll bar position | scroll-into-view | |
| None | The value should be a certain sub-element id (the id cannot start with a number). Set which direction can be scrolled, then scroll to the element in which direction | scroll-with-animation | |
| false | Use animated transitions when setting the scroll bar position | enable-flex | |
| false | Enable flexbox layout. After it is turned on, the current node that declares display: flex will become a flex container and act on its child nodes. |
| @scrolltolower | ||||||||||||||||||||||||||||||||||||||||||||||||||||||||||||||||||||||||||||||||||||||||||||||||||||||||||||||||||||||||||||||||||||||||||||||||||||||||||||||||||||||||||||||||||||||||||||||||||||||||||||||||||||||||||||||||||||||||||||||||||||||||||||||||||||||||||||||||||||||||||||||||||||||||||||||||||||||||||||||||||||||||||||||||||||||||||||||||||||||||||||||||||||||||||||||||||||||||||||||||||||||||||||||||||||||||||||||||||||||||||||||||||||||||||||||||||||||||||||||||||||||||||||||||||||||||||||||||||||||||||||||||||||||||||||||||||||||||||||||||||||||||||||||||||||||||||||||||||||||||||||||||||||||||||||||||||||||||||||||||||||||||||||||||||||||||||||||
| @scroll | ||||||||||||||||||||||||||||||||||||||||||||||||||||||||||||||||||||||||||||||||||||||||||||||||||||||||||||||||||||||||||||||||||||||||||||||||||||||||||||||||||||||||||||||||||||||||||||||||||||||||||||||||||||||||||||||||||||||||||||||||||||||||||||||||||||||||||||||||||||||||||||||||||||||||||||||||||||||||||||||||||||||||||||||||||||||||||||||||||||||||||||||||||||||||||||||||||||||||||||||||||||||||||||||||||||||||||||||||||||||||||||||||||||||||||||||||||||||||||||||||||||||||||||||||||||||||||||||||||||||||||||||||||||||||||||||||||||||||||||||||||||||||||||||||||||||||||||||||||||||||||||||||||||||||||||||||||||||||||||||||||||||||||||||||||||||||||||||
| @refresherpulling | ||||||||||||||||||||||||||||||||||||||||||||||||||||||||||||||||||||||||||||||||||||||||||||||||||||||||||||||||||||||||||||||||||||||||||||||||||||||||||||||||||||||||||||||||||||||||||||||||||||||||||||||||||||||||||||||||||||||||||||||||||||||||||||||||||||||||||||||||||||||||||||||||||||||||||||||||||||||||||||||||||||||||||||||||||||||||||||||||||||||||||||||||||||||||||||||||||||||||||||||||||||||||||||||||||||||||||||||||||||||||||||||||||||||||||||||||||||||||||||||||||||||||||||||||||||||||||||||||||||||||||||||||||||||||||||||||||||||||||||||||||||||||||||||||||||||||||||||||||||||||||||||||||||||||||||||||||||||||||||||||||||||||||||||||||||||||||||||
| @refresherrefresh | ||||||||||||||||||||||||||||||||||||||||||||||||||||||||||||||||||||||||||||||||||||||||||||||||||||||||||||||||||||||||||||||||||||||||||||||||||||||||||||||||||||||||||||||||||||||||||||||||||||||||||||||||||||||||||||||||||||||||||||||||||||||||||||||||||||||||||||||||||||||||||||||||||||||||||||||||||||||||||||||||||||||||||||||||||||||||||||||||||||||||||||||||||||||||||||||||||||||||||||||||||||||||||||||||||||||||||||||||||||||||||||||||||||||||||||||||||||||||||||||||||||||||||||||||||||||||||||||||||||||||||||||||||||||||||||||||||||||||||||||||||||||||||||||||||||||||||||||||||||||||||||||||||||||||||||||||||||||||||||||||||||||||||||||||||||||||||||||
| @refresherrestore | ||||||||||||||||||||||||||||||||||||||||||||||||||||||||||||||||||||||||||||||||||||||||||||||||||||||||||||||||||||||||||||||||||||||||||||||||||||||||||||||||||||||||||||||||||||||||||||||||||||||||||||||||||||||||||||||||||||||||||||||||||||||||||||||||||||||||||||||||||||||||||||||||||||||||||||||||||||||||||||||||||||||||||||||||||||||||||||||||||||||||||||||||||||||||||||||||||||||||||||||||||||||||||||||||||||||||||||||||||||||||||||||||||||||||||||||||||||||||||||||||||||||||||||||||||||||||||||||||||||||||||||||||||||||||||||||||||||||||||||||||||||||||||||||||||||||||||||||||||||||||||||||||||||||||||||||||||||||||||||||||||||||||||||||||||||||||||||||
| @refresherabort | ||||||||||||||||||||||||||||||||||||||||||||||||||||||||||||||||||||||||||||||||||||||||||||||||||||||||||||||||||||||||||||||||||||||||||||||||||||||||||||||||||||||||||||||||||||||||||||||||||||||||||||||||||||||||||||||||||||||||||||||||||||||||||||||||||||||||||||||||||||||||||||||||||||||||||||||||||||||||||||||||||||||||||||||||||||||||||||||||||||||||||||||||||||||||||||||||||||||||||||||||||||||||||||||||||||||||||||||||||||||||||||||||||||||||||||||||||||||||||||||||||||||||||||||||||||||||||||||||||||||||||||||||||||||||||||||||||||||||||||||||||||||||||||||||||||||||||||||||||||||||||||||||||||||||||||||||||||||||||||||||||||||||||||||||||||||||||||||
| Attribute name | Type | Default value | Description |
|---|---|---|---|
| indicator-dots | Boolean | false | Whether to display panel indicator dots |
| indicator-color | Color | rgba(0, 0, 0, .3) | Indicator color |
| indicator-active-color | Color | #000000 | The color of the currently selected indicator point |
| active-class | String | None | swiper-item class when visible |
| changing-class | String | None | acceleration is set to {{true}} and is in the sliding process. The class when several screens in the middle are visible |
| autoplay | Boolean | false | Whether to switch automatically |
| current | Number | 0 | The index of the current slider |
| interval | Number | 5000 | Automatic switching time interval |
| duration | Number | 500 | Sliding animation duration |
| circular | Boolean | false | Whether to use connection sliding, that is, play to the end and then return to the beginning |
| Boolean | false | Whether the sliding direction is vertical | |
| String | 0px | Front margin, can be used to expose a small part of the previous item, accepts px and rpx values | |
| String | 0px | Back margin, can be used to expose a small part of the following item, accepts px and rpx values |
| Meaning | |
|---|---|
| @transition | |
| @animationfinish | |
<template>
	<view>
		<swiper :indicator-dots="true" :autoplay="true" :interval="2000" :duration="1000" previous-margin="10px" next-margin="10px">
			<swiper-item>
				<view class="swiper-item uni-bg-red">A</view>
			</swiper-item>
			<swiper-item>
				<view class="swiper-item uni-bg-green">B</view>
			</swiper-item>
			<swiper-item>
				<view class="swiper-item uni-bg-blue">C</view>
			</swiper-item>
		</swiper>
	</view></template><script>
	var _self;
	export default {
		data() {
			return {}
		},
		onLoad() {
			_self = this
		},
		onShow() {},
		onHide() {},
		methods: {}
	}</script><style>
	swiper-item {
		background: #4CD964;
		height: 200px;
		width: 90%;
	}</style>
As you can see, the effect of dynamic playback of carousel images is achieved. 
3.text
Text component is used to wrap text content and provide text that can be selected and copied
, while the text of other components None can be selected or copied.Common attributes are as follows:
| Default value | Description | ||
|---|---|---|---|
| false | Whether the text is selectable | space | |
| None | Display consecutive spaces | decode | |
| false | Whether to decode |
| emsp | |
| nbsp | |
Rich text. Common attributes are as follows:
Attribute name| Default value | Description | |||||||||||||||||||||||||||||||||||||||||||||||||||||||||||||||||||||||||||||||||||||||||||||||||||||||||||||||||||||||||||||||||||||||||||||||||||||||||||||||||||||||||||||||||||||||||||||||||||||||||||||||||||||||||||||||||||||||||||||||||||||||||||||||||||||||||||||||||||||||||||||||||||||||||||||||||||||||||||||||||||||||||||||||||||||||||||||||||||||||||||||||||||||||||||||||||||||||||||||||||||||||||||||||||||||||||||||||||||||||||||||||||||||||||||||||||||||||||||||||||||||||||||||||||||||||||||||||||||||||||||||||||||||||||||||||||||||||||||||||||||||||
|---|---|---|---|---|---|---|---|---|---|---|---|---|---|---|---|---|---|---|---|---|---|---|---|---|---|---|---|---|---|---|---|---|---|---|---|---|---|---|---|---|---|---|---|---|---|---|---|---|---|---|---|---|---|---|---|---|---|---|---|---|---|---|---|---|---|---|---|---|---|---|---|---|---|---|---|---|---|---|---|---|---|---|---|---|---|---|---|---|---|---|---|---|---|---|---|---|---|---|---|---|---|---|---|---|---|---|---|---|---|---|---|---|---|---|---|---|---|---|---|---|---|---|---|---|---|---|---|---|---|---|---|---|---|---|---|---|---|---|---|---|---|---|---|---|---|---|---|---|---|---|---|---|---|---|---|---|---|---|---|---|---|---|---|---|---|---|---|---|---|---|---|---|---|---|---|---|---|---|---|---|---|---|---|---|---|---|---|---|---|---|---|---|---|---|---|---|---|---|---|---|---|---|---|---|---|---|---|---|---|---|---|---|---|---|---|---|---|---|---|---|---|---|---|---|---|---|---|---|---|---|---|---|---|---|---|---|---|---|---|---|---|---|---|---|---|---|---|---|---|---|---|---|---|---|---|---|---|---|---|---|---|---|---|---|---|---|---|---|---|---|---|---|---|---|---|---|---|---|---|---|---|---|---|---|---|---|---|---|---|---|---|---|---|---|---|---|---|---|---|---|---|---|---|---|---|---|---|---|---|---|---|---|---|---|---|---|---|---|---|---|---|---|---|---|---|---|---|---|---|---|---|---|---|---|---|---|---|---|---|---|---|---|---|---|---|---|---|---|---|---|---|---|---|---|---|---|---|---|---|---|---|---|---|---|---|---|---|---|---|---|---|---|---|---|---|---|---|---|---|---|---|---|---|---|---|---|---|---|---|---|---|---|---|---|---|---|---|---|---|---|---|---|---|---|---|---|---|---|---|---|---|---|---|---|---|---|---|---|---|---|---|---|---|---|---|---|---|---|---|---|---|---|---|---|---|---|---|---|---|---|---|---|---|---|---|---|---|---|---|---|---|---|---|---|---|---|---|---|---|---|---|---|---|---|---|---|---|---|---|---|---|---|---|---|---|---|---|---|---|---|---|---|---|---|---|---|---|---|---|---|---|---|---|---|---|---|---|---|---|---|---|---|---|---|---|---|---|---|---|---|---|---|---|---|---|---|---|---|---|---|---|---|---|---|---|---|---|---|---|---|---|---|---|---|---|---|---|---|---|---|---|---|---|---|---|---|---|---|---|---|---|---|---|---|---|---|---|---|---|---|---|---|---|---|---|---|---|---|
| [] | Node list/HTML String | space | ||||||||||||||||||||||||||||||||||||||||||||||||||||||||||||||||||||||||||||||||||||||||||||||||||||||||||||||||||||||||||||||||||||||||||||||||||||||||||||||||||||||||||||||||||||||||||||||||||||||||||||||||||||||||||||||||||||||||||||||||||||||||||||||||||||||||||||||||||||||||||||||||||||||||||||||||||||||||||||||||||||||||||||||||||||||||||||||||||||||||||||||||||||||||||||||||||||||||||||||||||||||||||||||||||||||||||||||||||||||||||||||||||||||||||||||||||||||||||||||||||||||||||||||||||||||||||||||||||||||||||||||||||||||||||||||||||||||||||||||||||||||
| None | Display consecutive spaces | selectable | ||||||||||||||||||||||||||||||||||||||||||||||||||||||||||||||||||||||||||||||||||||||||||||||||||||||||||||||||||||||||||||||||||||||||||||||||||||||||||||||||||||||||||||||||||||||||||||||||||||||||||||||||||||||||||||||||||||||||||||||||||||||||||||||||||||||||||||||||||||||||||||||||||||||||||||||||||||||||||||||||||||||||||||||||||||||||||||||||||||||||||||||||||||||||||||||||||||||||||||||||||||||||||||||||||||||||||||||||||||||||||||||||||||||||||||||||||||||||||||||||||||||||||||||||||||||||||||||||||||||||||||||||||||||||||||||||||||||||||||||||||||||
| false | Whether rich text can be selected by long pressing and can be used for copying, pasting and other scenarios |
index.vue如下: <template>
<view>
<rich-text :nodes="nodes" @tap="tap"></rich-text>
</view></template><script>
var _self;
export default {
data() {
return {
nodes: [{
name: 'p',
attrs: {
class: 'p-class',
style: 'line-height: 60px; color: red; text-align:center;'
},
children: [{
type: 'text',
text: 'Hello uni-app!'
}]
}],
strings: '<p style="text-align:center;"><img src="https://img-cdn-qiniu.dcloud.net.cn/uniapp/images/uni@2x.png"/></p>'
}
},
onLoad() {
_self = this
},
onShow() {},
onHide() {},
methods: {}
}</script><style></style>Copy after login 显示: 显然,渲染出了富文本。 5.process 进度条。 常见属性如下:
index.vue如下: <template>
<view>
<view class="progress-box">
<progress percent="20" show-info stroke-width="3" />
</view>
<view class="progress-box">
<progress percent="40" active stroke-width="3" />
</view>
<view class="progress-box">
<progress percent="60" active stroke-width="3" backgroundColor="#999" />
</view>
<view class="progress-box">
<progress percent="80" activeColor="red" active stroke-width="8" />
</view>
</view></template><script>
var _self;
export default {
data() {
return {}
},
onLoad() {
_self = this
},
onShow() {},
onHide() {},
methods: {}
}</script><style></style>Copy after login 显示: 可以看到,显示出了进度的动态变化。 二、表单组件 表单组件很常用,主要用于数据的收集和提交。 1.button 按钮。 常见的属性和含义如下:
index.vue如下: <template>
<view>
<button type="default" size="defaultSize" :loading="loading" :plain="plain" :disabled="disabled" @tap="defaultHandler" hover-class="other-button-hover">default</button>
<button type="primary" size="primarySize" :loading="loading" :plain="plain" :disabled="disabled" @tap="primaryHandler">primary</button>
<button type="warn" size="warnSize" :loading="loading" :plain="plain" :disabled="disabled" @tap="warnHandler">warn</button>
<button @tap="setDisabled">点击设置以上按钮disabled属性</button>
<button @tap="setPlain">点击设置以上按钮plain属性</button>
<button @tap="setLoading">点击设置以上按钮loading属性</button>
</view></template><script>
var types = ['default', 'primary', 'warn']
export default {
data() {
return {
defaultSize: 'default',
primarySize: 'default',
warnSize: 'default',
disabled: false,
plain: false,
loading: false
}
},
onLoad() {
},
onShow() {
},
onUnload() {
},
methods: {
setDisabled: function(e){
this.disabled = !this.disabled },
setPlain: function(e){
this.plain = !this.plain },
setLoading: function(e){
this.loading = !this.loading }
}
}</script><style></style>Copy after login 显示: 可以看到,在点击button时,触发了相应的操作。 2.checkbox checkbox-group是多项选择器,内部由多个 checkbox 组成。 属性如下:
checkbox是多选项目,即复选框。 常见属性如下:
index.vue如下: <template>
<view class="content">
<checkbox-group name="" @change="checkboxChange">
<label class="checkbox" v-for="item in items" :key="item">
<checkbox :value="item" />{{item}} </label>
</checkbox-group>
</view></template><script>
var _self;
export default {
data() {
return {
items: ['Reading', 'Running']
}
},
onLoad() {
_self = this;
setTimeout(function(){
_self.age = 20
}, 3000);
},
onShow() {
console.log('index onshow')
},
onHide() {
console.log('index onhide')
},
methods: {
checkboxChange: function(e) {
console.log(e)
}
}
}</script><style>
.content {
display: flex;
flex-direction: column;
align-items: center;
justify-content: center;
}
.logo {
height: 200rpx;
width: 200rpx;
margin-top: 200rpx;
margin-left: auto;
margin-right: auto;
margin-bottom: 50rpx;
}
.text-area {
display: flex;
justify-content: center;
}
.title {
font-size: 36rpx;
color: #8f8f94;
}</style>Copy after login 显示: 可以看到,已经渲染出页面元素,同时支持点选。 3.input 输入框。 常见的属性如下:
常见的事件如下:
4.label 用来改进表单组件的可用性,使用for属性找到对应的id,或者将控件放在该标签下,当点击时,就会触发对应的控件。 属性如下:
5.picker 从底部弹起的滚动选择器。 (1)普通选择器,参数为
index.vue如下: <template>
<view>
<picker :range="years" @change="yearChange">
<view>
{{years[yearIndex]}} </view>
</picker>
</view></template><script>
export default {
data() {
return {
years: ["请选择年份", 2019, 2020, 2021],
yearIndex: 0
}
},
onLoad() {
},
onShow() {
},
onUnload() {
},
methods: {
yearChange: function(e){
console.log(e)
this.yearIndex = e.detail.value }
}
}</script><style></style>Copy after login 显示: 可以看到,在选择值后,显示也会同步变化,被选择的值的下标存储在 (2)多列选择器,参数为
index.vue如下: <template>
<view>
<picker mode="multiSelector" :range="years" @change="yearChange">
<view>
{{years[0][yearIndex]}}-{{years[1][monthIndex]}} </view>
</picker>
</view></template><script>
export default {
data() {
return {
years: [
["请选择年份", 2019, 2020, 2021],
["请选择月份 ", 3, 4, 5]
],
yearIndex: 0,
monthIndex: 0
}
},
onLoad() {
},
onShow() {
},
onUnload() {
},
methods: {
yearChange: function(e){
console.log(e)
this.yearIndex = e.detail.value[0],
this.monthIndex = e.detail.value[1]
}
}
}</script><style></style>Copy after login 显示: 显然,可以进行多级选择,此时 (3)时间选择器,参数为
index.vue如下: <template>
<view>
<picker mode="time" @change="yearChange">
<view>
{{timeText}} </view>
</picker>
</view></template><script>
export default {
data() {
return {
timeText: "请选择时间"
}
},
onLoad() {
},
onShow() {
},
onUnload() {
},
methods: {
yearChange: function(e){
console.log(e);
this.timeText = e.detail.value }
}
}</script><style></style>Copy after login 显示: (4)日期选择器,参数为
(5)省市区选择器,参数为
index.vue如下: <template>
<view>
<picker mode="region" @change="regionChange">
<view>
{{regionText}} </view>
</picker>
</view></template><script>
export default {
data() {
return {
regionText: "请选择地区"
}
},
onLoad() {
},
onShow() {
},
onUnload() {
},
methods: {
regionChange: function(e){
console.log(e);
this.regionText = e.detail.value }
}
}</script><style></style>Copy after login 显示: 显然,控制台输出了对应省市区的编码和文本。 6.radio radio-group是单项选择器,内部由多个 属性如下:
radio即单选项目,常见属性如下:
7.slider 滑动选择器,常见属性和含义如下:
index.vue如下: <template>
<view>
<slider @change="sliderChange" step="5"></slider>
</view></template><script>
export default {
data() {
return {
}
},
onLoad() {
},
onShow() {
},
onUnload() {
},
methods: {
sliderChange: function(e){
console.log(e);
}
}
}</script><style></style>Copy after login 显示: 可以看到,获取到了滑动选择器的值。 8.switch 开关选择器。 常见属性和含义如下:
index.vue如下: <template>
<view>
<switch @change="switchChange"></switch>
</view></template><script>
export default {
data() {
return {
}
},
onLoad() {
},
onShow() {
},
onUnload() {
},
methods: {
switchChange: function(e){
console.log(e);
}
}
}</script><style></style>Copy after login 显示: 可以看到,在选择器处于打开状态时,value为true,处于关闭状态时,value为false。 9.textarea 多行输入框。 常见属性和事件如下:
10.form 表单,将组件内的用户输入的 常见属性和含义如下:
index.vue如下; <template>
<view>
<form @submit="formSubmit" @reset="formReset">
<view class="section section_gap">
<view class="section__title">switch</view>
<switch name="switch" />
</view>
<view class="section section_gap">
<view class="section__title">slider</view>
<slider name="slider" show-value="" />
</view>
<view class="section">
<view class="section__title">input</view>
<input name="input" placeholder="please input here" />
</view>
<view class="section section_gap">
<view class="section__title">radio</view>
<radio-group name="radio-group">
<label>
<radio value="radio1" /><text>radio1</text>
</label>
<label>
<radio value="radio2" /><text>radio2</text>
</label>
</radio-group>
</view>
<view class="section section_gap">
<view class="section__title">checkbox</view>
<checkbox-group name="checkbox">
<label>
<checkbox value="checkbox1" /><text>checkbox1</text>
</label>
<label>
<checkbox value="checkbox2" /><text>checkbox2</text>
</label>
</checkbox-group>
<input name="input" placeholder="please input here" />
</view>
<view class="btn-area">
<button form-type="submit">Submit</button>
<button form-type="reset">Reset</button>
</view>
</form>
</view></template><script>
export default {
data() {
return {}
},
onLoad() {},
onShow() {},
onUnload() {},
methods: {
formSubmit: function(e) {
var formData = e.detail.value;
console.log(formData);
if (!formData.switch) {
console.log('No Pass')
}
},
formReset: function(e) {
console.log(e)
}
}
}</script><style></style>Copy after login 显示: 可以看到,在点击Submit按钮提交之后,会将数据全部提交,还可以对数据进行验证。 三、导航组件和页面传参 1.navigator 导航组件用于页面跳转,类似HTML中的 常见的属性和含义如下:
其中, open-type对应的API接口及其含义如下:
index.vue如下: <template>
<view>
<navigator url="../news" hover-class="navigator-hover">
<button type="default">跳转到news页面</button>
</navigator>
<navigator url="../about/about" open-type="switchTab" hover-class="navigator-hover">
<button type="default">跳转到about页面</button>
</navigator>
</view></template><script>
export default {
data() {
return {}
},
onLoad() {},
onShow() {},
onUnload() {},
methods: {
}
}</script><style></style>Copy after login 显示: 可以看到,实现了两种方式的跳转。 这是通过DOM进行页面跳转,还可以通过API进行跳转,如下: <template>
<view>
<button type="default" @click="skip">跳转到新闻页面</button>
</view></template><script>
export default {
data() {
return {}
},
onLoad() {},
onShow() {
setTimeout(function(){
uni.navigateBack({
delta: 1
})
}, 3000)
},
onUnload() {},
methods: {
skip: function() {
uni.navigateTo({
url: '../news'
})
}
}
}</script><style></style>Copy after login 显示: 可以看到,也实现了页面跳转,并且可以定时跳转回原页面。 2.参数传递 在进行页面跳转时,向其他页面传递参数一般在组件或接口的url参数指定的地址后追加,以 index.vue传递参数如下: <template>
<view>
<button type="default" @click="skip">跳转到新闻页面</button>
</view></template><script>
export default {
data() {
return {}
},
onLoad() {},
onShow() {
setTimeout(function(){
uni.navigateBack({
delta: 1
})
}, 5000)
},
onUnload() {},
methods: {
skip: function() {
uni.navigateTo({
url: '../news?size=20&page=1'
})
}
}
}</script><style></style>Copy after login news.vue接收参数如下: <template>
<view class="content">新闻页</view></template><script>
export default {
onLoad:function(options){
console.log(options)
}
}</script><style></style>Copy after login 显示: 可以看到,参数值保存在 四、媒体组件 1.audio 音频组件。 常见属性和事件如下:
index.vue如下: <template>
<view>
<audio :src="audioSrc" :poster="posterSrc" :name="name" :author="author" controls style="text-align: center;"></audio>
</view></template><script>
export default {
data() {
return {
audioSrc: "https://m10.music.126.net/20201221165005/b4e7a310f6e3ffda9f12ab518201087c/yyaac/obj/wonDkMOGw6XDiTHCmMOi/2513074700/92fc/e94b/8333/c8592b8e05995aa1744976275eb09ab0.m4a",
posterSrc: "https://y.gtimg.cn/music/photo_new/T002R300x300M000002npMQN1wN8nZ_1.jpg?max_age=2592000",
name: "Blackheart",
author: "Thomas Bergersen / Two Steps From Hell"
}
},
onLoad() {},
onShow() {
},
onUnload() {},
methods: {
}
}</script><style>
audio {
background: #007AFF;
width: 100%;
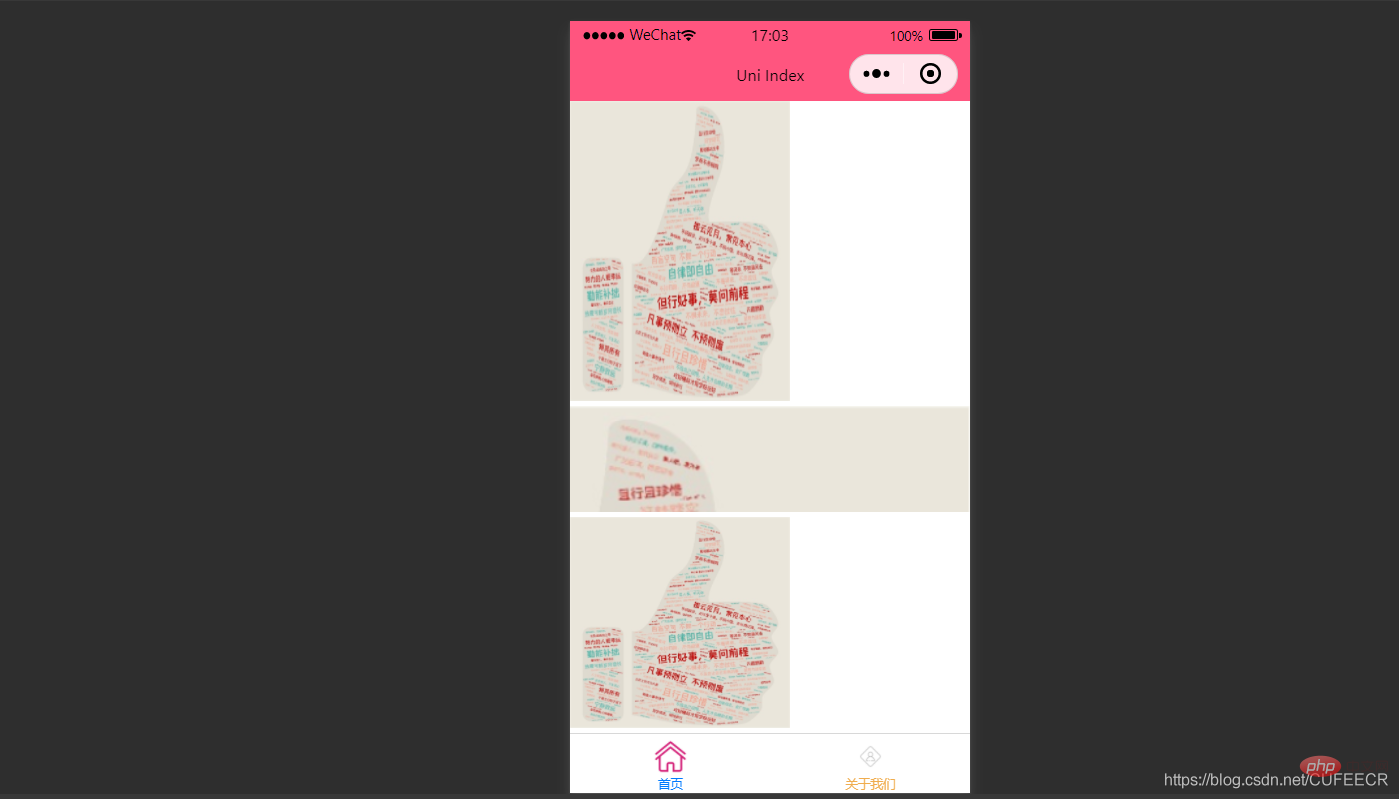
}</style>Copy after login 显示: uniapp component media audio 可以看到,实现了音乐播放功能。 2.image 图片组件。 常见的属性和事件如下:
index.vue如下: <template>
<view>
<image src="../../static/imgs/saying.png" style="width: 55%;"></image>
<image src="../../static/imgs/saying.png" style="height: 200rpx;" mode="top right"></image>
<image src="../../static/imgs/saying.png" style="width: 55%;" mode="widthFix"></image>
</view></template><script>
export default {
data() {
return {
}
},
onLoad() {},
onShow() {
},
onUnload() {},
methods: {
}
}</script><style>
</style>Copy after login 显示: 3.video 视频组件。 常见属性和事件如下:
index.vue如下: <template>
<view>
<video id="myVideo" src="https://vodkgeyttp9.vod.126.net/cloudmusic/N0qR6445_2249845426_hd.mp4?ts=1608546147&rid=C127086D22ABA8524D81BF20C706B22B&rl=3&rs=WPEhneQzZWbNSeETGHhAruzsoNATDuXC&sign=80864b2eb815f570c9ce0ca4e31a9b72&ext=XHOm0M2rNgl%252BOsuwtVhiXa7BA9%252FkbvJfK84GXv1FFd7SvvDty%252BQ0GH9eXueIlfcwNUnGHRzfhbEYqUYBZ7ygZIdke%252Bg2SpJHDq4lJBw1rnmQ3PMGLXkM3%252BzAlTLvRhAxrxz0O5mQJ%252BELGODgy6G%252Bp7lrZ1TUmeJpqovjqqiZ3g%252Bq8iLxQWFUOajn5NyiEBuv18Eb9Z%252FfrLVHVrjYvXEBAR6M3eYxHG13DGON2%252F0sniI%252FWdCjmuGWL6wk8NtEzV32kPjquU4yMUiMBX%252B3NYu70c9OUnBc4npLNLG2qBCjKxA8qv2Zyn7UjC3n4rvTjyQBnmMrh8ey%252FffGWXHOsrge088Wr7oVoVcCWbHlGaFyTJ9hgVfe%252F6%252BddmLZVuYT0mZ%252Ft4JPaSdoVAoujK54TRcwW9i5T4toFrUWjn1b13qquz3s%252FySUUnvfEF65s7Z1AjCdvoCG6LrShGdY%252Fu2yre8HDZVyHVjeAoYtbvG5VXQDVm1W74z%252BdRSLxp0Bml7L27EsVZlXaSqn32KJlR4fr4%252FvrgW5GrjiflWoOoyOZ1RK0sk%253D" enable-danmu danmu-btn controls></video>
</view></template><script>
export default {
data() {
return {
}
},
onLoad() {},
onShow() {
},
onUnload() {},
methods: {
}
}</script><style>
</style>Copy after login 显示: uniapp component media video |
The above is the detailed content of uni-app introductory tutorial to master the basic use of components. For more information, please follow other related articles on the PHP Chinese website!

Hot AI Tools

Undresser.AI Undress
AI-powered app for creating realistic nude photos

AI Clothes Remover
Online AI tool for removing clothes from photos.

Undress AI Tool
Undress images for free

Clothoff.io
AI clothes remover

AI Hentai Generator
Generate AI Hentai for free.

Hot Article
Hot Tools

Notepad++7.3.1
Easy-to-use and free code editor

SublimeText3 Chinese version
Chinese version, very easy to use

Zend Studio 13.0.1
Powerful PHP integrated development environment

Dreamweaver CS6
Visual web development tools

SublimeText3 Mac version
God-level code editing software (SublimeText3)
Hot Topics
 1378
1378
 52
52

 How to install the Windows 10 old version component DirectPlay
Dec 28, 2023 pm 03:43 PM
How to install the Windows 10 old version component DirectPlay
Dec 28, 2023 pm 03:43 PM
Many users always encounter some problems when playing some games on win10, such as screen freezes and blurred screens. At this time, we can solve the problem by turning on the directplay function, and the operation method of the function is also Very simple. How to install directplay, the old component of win10 1. Enter "Control Panel" in the search box and open it 2. Select large icons as the viewing method 3. Find "Programs and Features" 4. Click on the left to enable or turn off win functions 5. Select the old version here Just check the box
 How to implement calendar component using Vue?
Jun 25, 2023 pm 01:28 PM
How to implement calendar component using Vue?
Jun 25, 2023 pm 01:28 PM
Vue is a very popular front-end framework. It provides many tools and functions, such as componentization, data binding, event handling, etc., which can help developers build efficient, flexible and easy-to-maintain Web applications. In this article, I will introduce how to implement a calendar component using Vue. 1. Requirements analysis First, we need to analyze the requirements of this calendar component. A basic calendar should have the following functions: display the calendar page of the current month; support switching to the previous month or next month; support clicking on a certain day,
 VUE3 development basics: using extends to inherit components
Jun 16, 2023 am 08:58 AM
VUE3 development basics: using extends to inherit components
Jun 16, 2023 am 08:58 AM
Vue is one of the most popular front-end frameworks currently, and VUE3 is the latest version of the Vue framework. Compared with VUE2, VUE3 has higher performance and a better development experience, and has become the first choice of many developers. In VUE3, using extends to inherit components is a very practical development method. This article will introduce how to use extends to inherit components. What is extends? In Vue, extends is a very practical attribute, which can be used for child components to inherit from their parents.
 How to develop uni-app in VSCode? (Tutorial sharing)
May 13, 2022 pm 08:11 PM
How to develop uni-app in VSCode? (Tutorial sharing)
May 13, 2022 pm 08:11 PM
How to develop uni-app in VSCode? The following article will share with you a tutorial on developing uni-app in VSCode. This may be the best and most detailed tutorial. Come and take a look!
 Use uniapp to develop a simple map navigation
Jun 09, 2022 pm 07:46 PM
Use uniapp to develop a simple map navigation
Jun 09, 2022 pm 07:46 PM
How to use uniapp to develop a simple map navigation? This article will provide you with an idea for making a simple map. I hope it will be helpful to you!
 Angular components and their display properties: understanding non-block default values
Mar 15, 2024 pm 04:51 PM
Angular components and their display properties: understanding non-block default values
Mar 15, 2024 pm 04:51 PM
The default display behavior for components in the Angular framework is not for block-level elements. This design choice promotes encapsulation of component styles and encourages developers to consciously define how each component is displayed. By explicitly setting the CSS property display, the display of Angular components can be fully controlled to achieve the desired layout and responsiveness.
 How to open the settings of the old version of win10 components
Dec 22, 2023 am 08:45 AM
How to open the settings of the old version of win10 components
Dec 22, 2023 am 08:45 AM
Win10 old version components need to be turned on by users themselves in the settings, because many components are usually closed by default. First we need to enter the settings. The operation is very simple. Just follow the steps below. Where are the win10 old version components? Open 1. Click Start, then click "Win System" 2. Click to enter the Control Panel 3. Then click the program below 4. Click "Enable or turn off Win functions" 5. Here you can choose what you want to open
 Let's talk about how Vue dynamically renders components through JSX
Dec 05, 2022 pm 06:52 PM
Let's talk about how Vue dynamically renders components through JSX
Dec 05, 2022 pm 06:52 PM
How does Vue dynamically render components through JSX? The following article will introduce to you how Vue can efficiently dynamically render components through JSX. I hope it will be helpful to you!
