Super detailed MySQL8.0.22 installation and configuration

##Free learning recommendation: mysql video tutorial
Hello everyone, today we will learn about the installation and configuration of MySQL8.0.22. Read it carefully, learn it carefully, super detailed
The first step
Enter MySQL official website to download, as shown below:
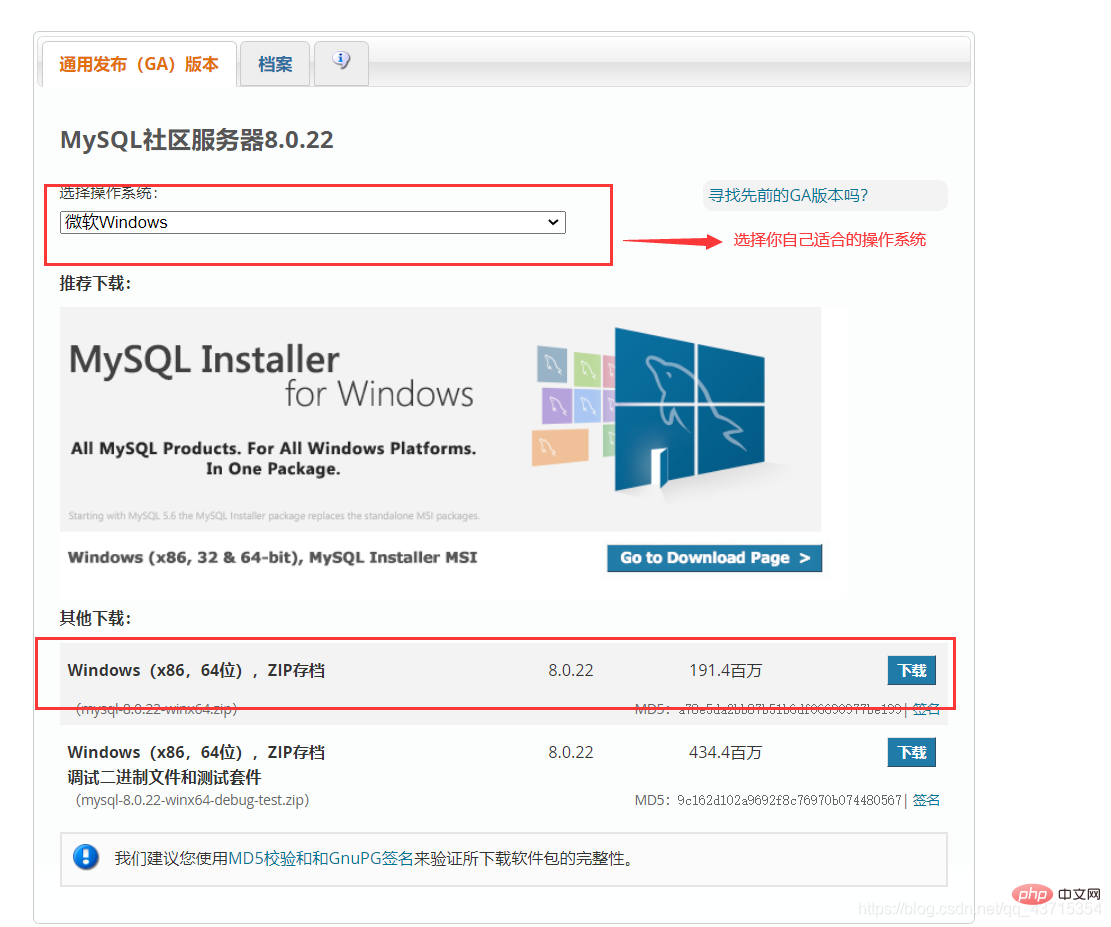
After the download is complete, extract it to a disk other than the c drive, as shown in the figure below:
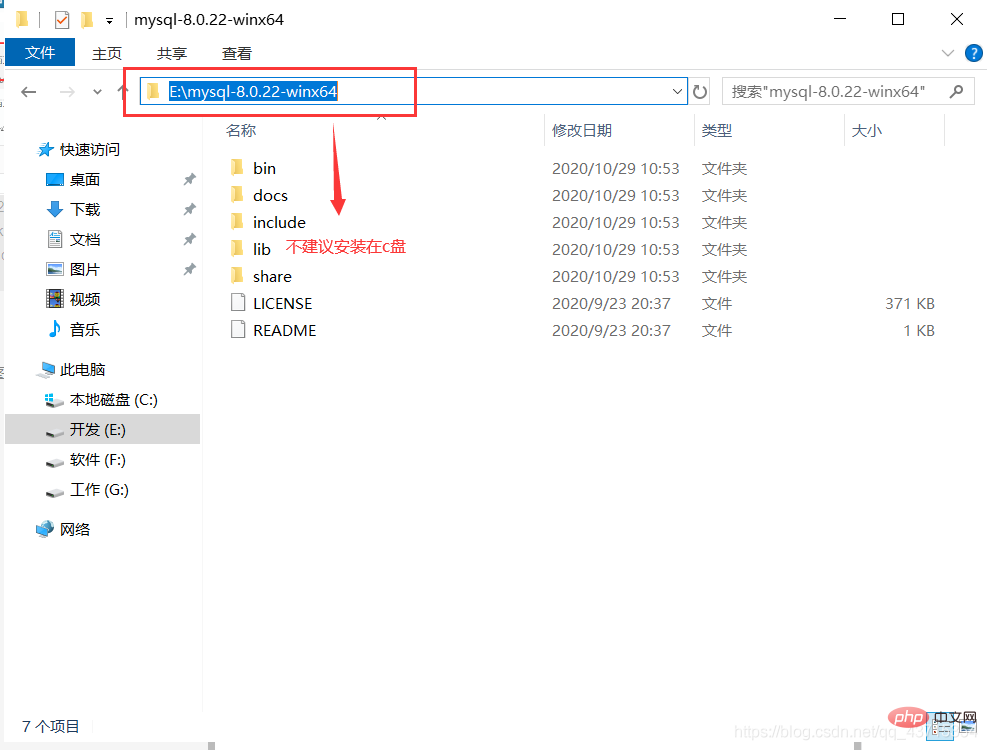
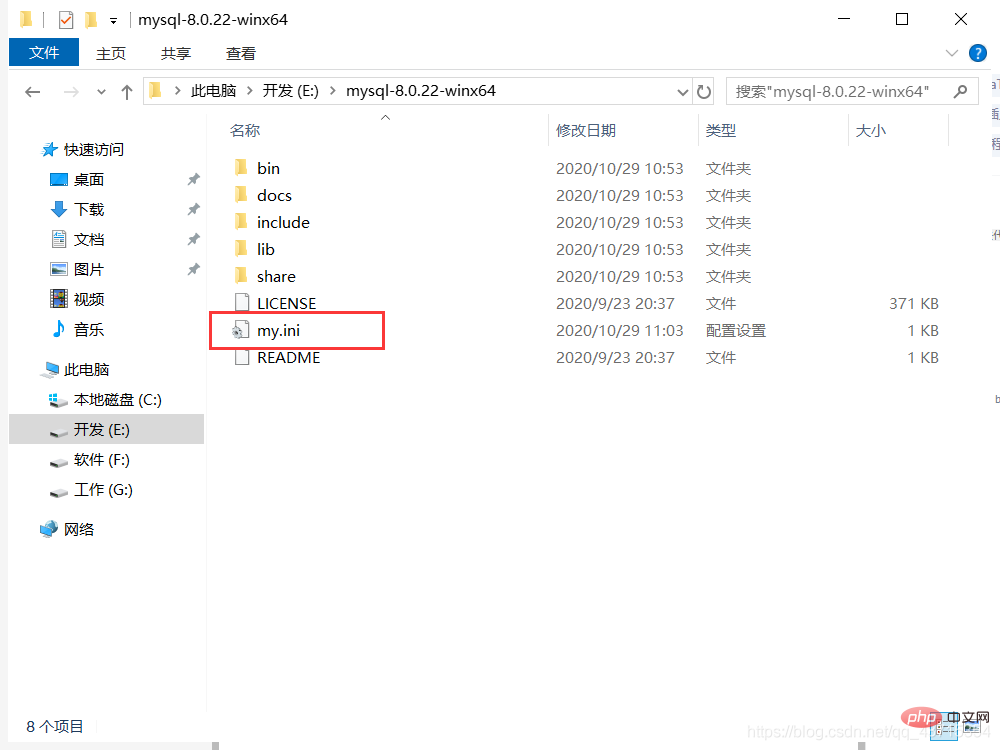
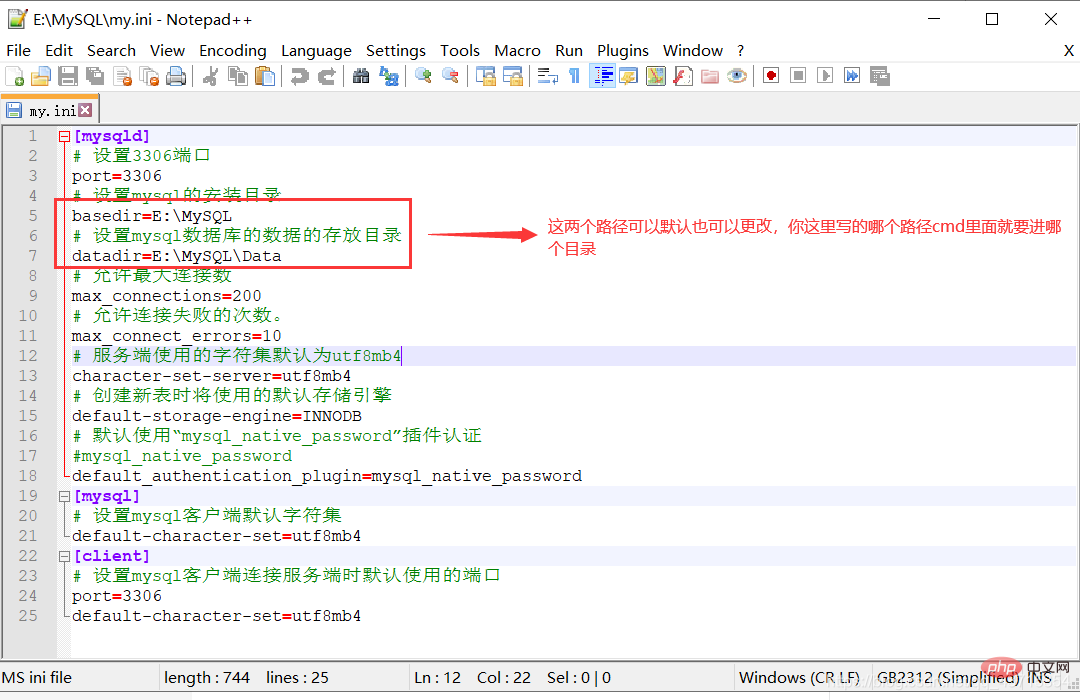
#The decompressed directory does not have the my.ini file. It doesn’t matter. You can create it yourself in the installation root directory. Add my.ini(create a new text file, change the file type to .ini), and write the basic configuration:
[mysqld]# 设置3306端口
port=3306# 设置mysql的安装目录
basedir=C:\Program Files\MySQL
# 设置mysql数据库的数据的存放目录
datadir=C:\Program Files\MySQL\Data
# 允许最大连接数
max_connections=200# 允许连接失败的次数。
max_connect_errors=10# 服务端使用的字符集默认为utf8mb4
character-set-server=utf8mb4
# 创建新表时将使用的默认存储引擎default-storage-engine=INNODB# 默认使用“mysql_native_password”插件认证
#mysql_native_password
default_authentication_plugin=mysql_native_password[mysql]# 设置mysql客户端默认字符集default-character-set=utf8mb4[client]# 设置mysql客户端连接服务端时默认使用的端口
port=3306default-character-set=utf8mb4
Copy after login
Initialize MySQL. During installation, to avoid permission issues, we try to run CMD as an administrator. , otherwise an error will be reported during installation, which will cause the installation to fail, as shown in the following figure:

After opening, enter the bin directory of mysql, entercd and spaces your path , as shown in the following figure:
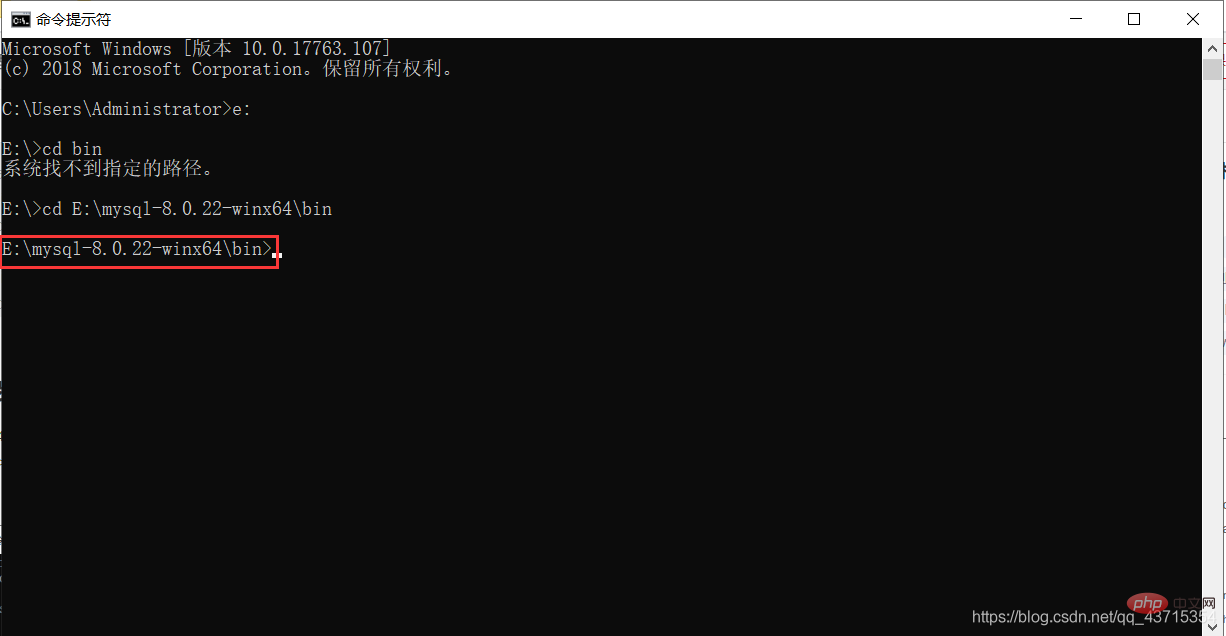
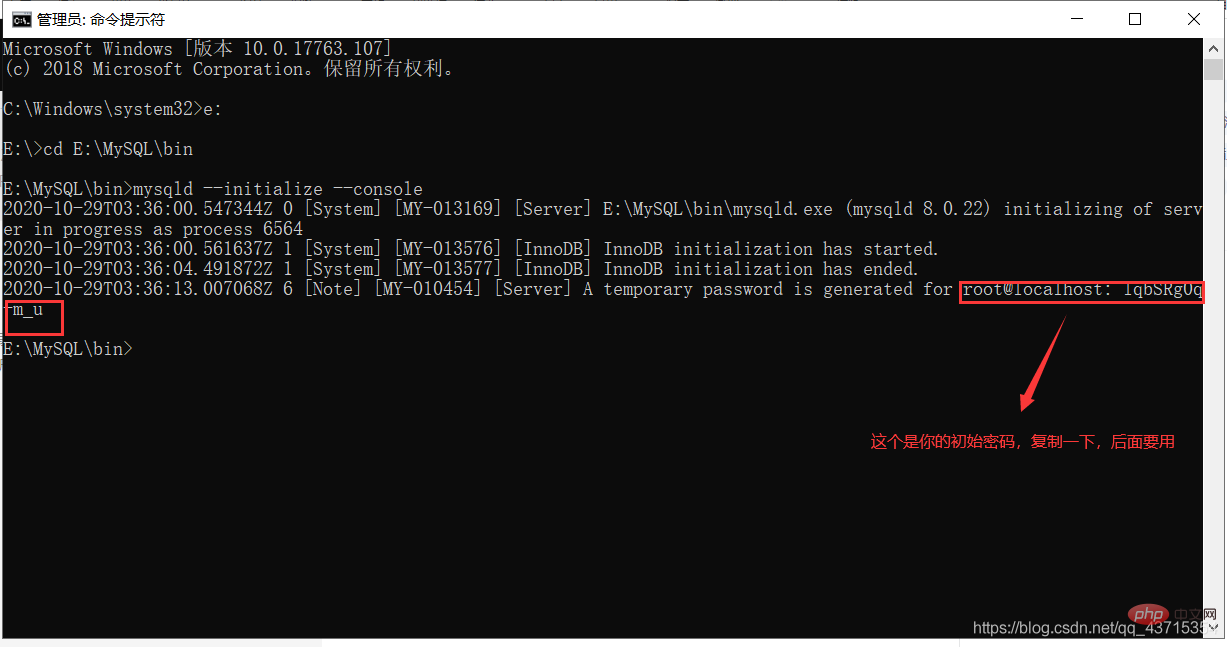
Entermysqld --initialize - in the bin directory under the MySQL directory -console, as shown below:
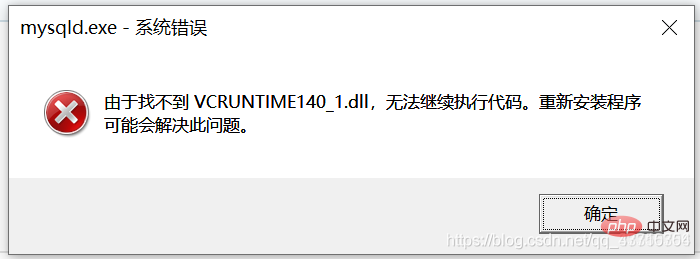
VCRUNTIME140_1.dll. Just download and install this program, as shown below:
2. Open the file explorer and enter
Step 7
windows folder, enter the system32 folder, and paste it. After pasting, you will be prompted to require administrator rights, give it to him! !
Install the MySQL service, enter
mysqld --install [service name] (the service name can be omitted and defaults to mysql) , as shown in the figure below:
##Eighth Step 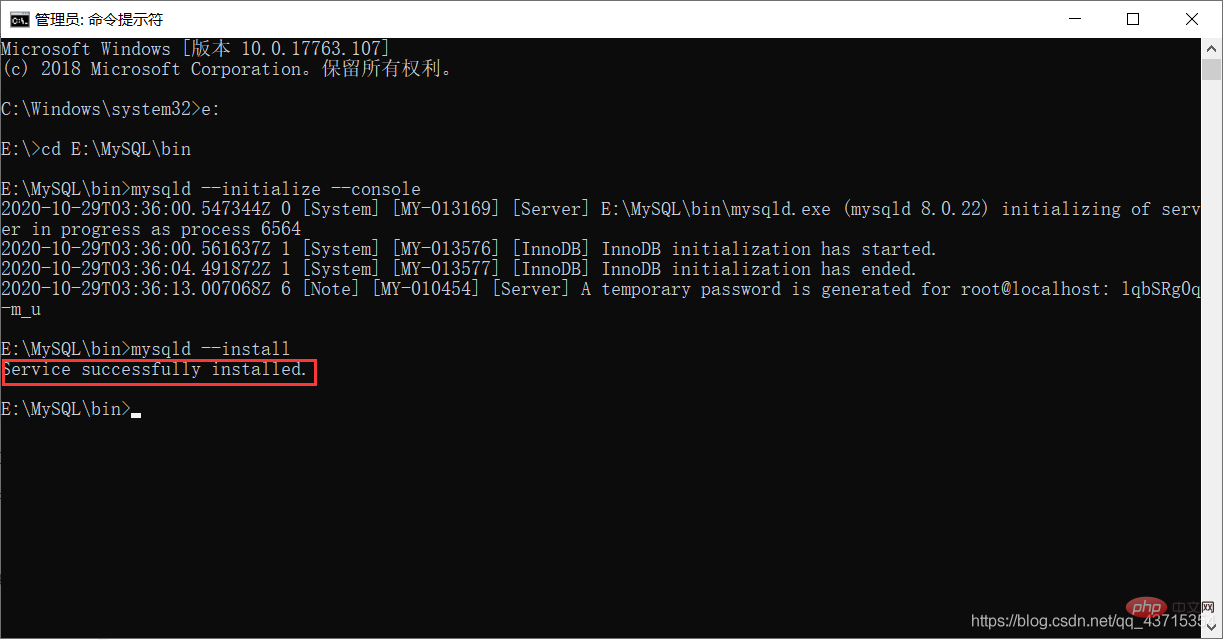
After the service is installed successfully, enter
net start mysql(start the MySQL service) , as shown in the figure below:
Step 9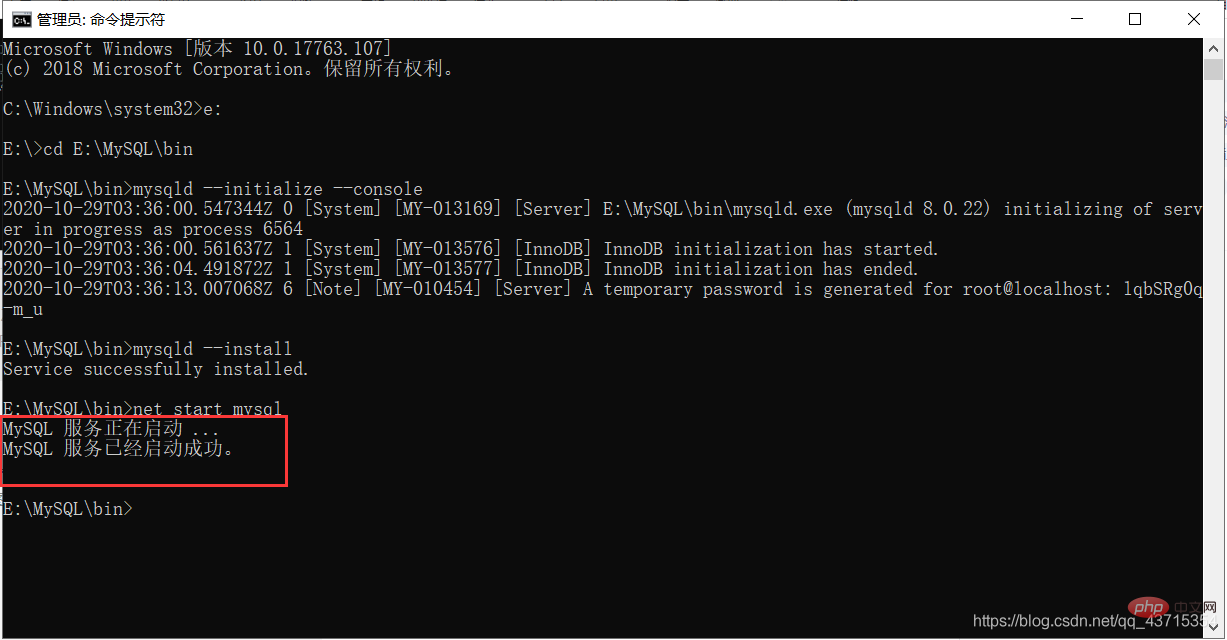
##Connect to MySQL, I use Navicat to show it, as follows As shown in the picture:
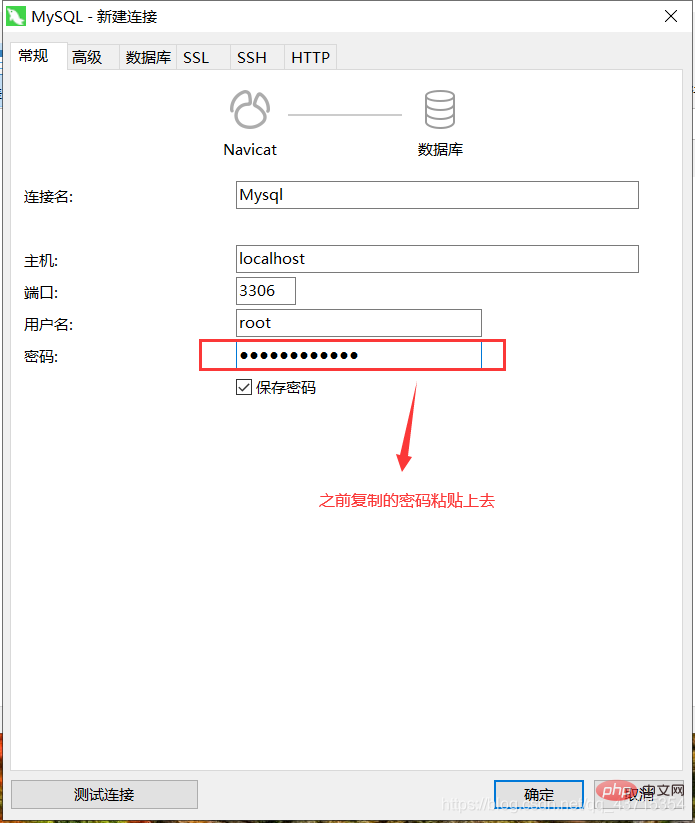
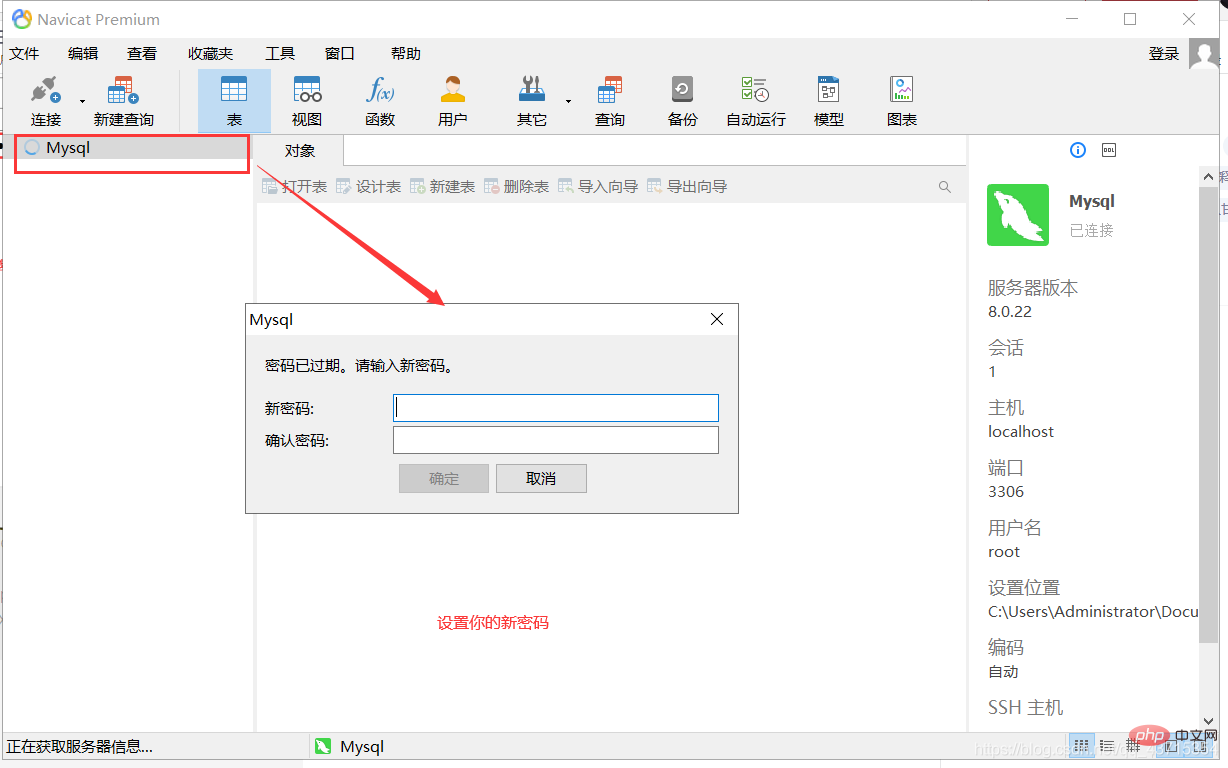
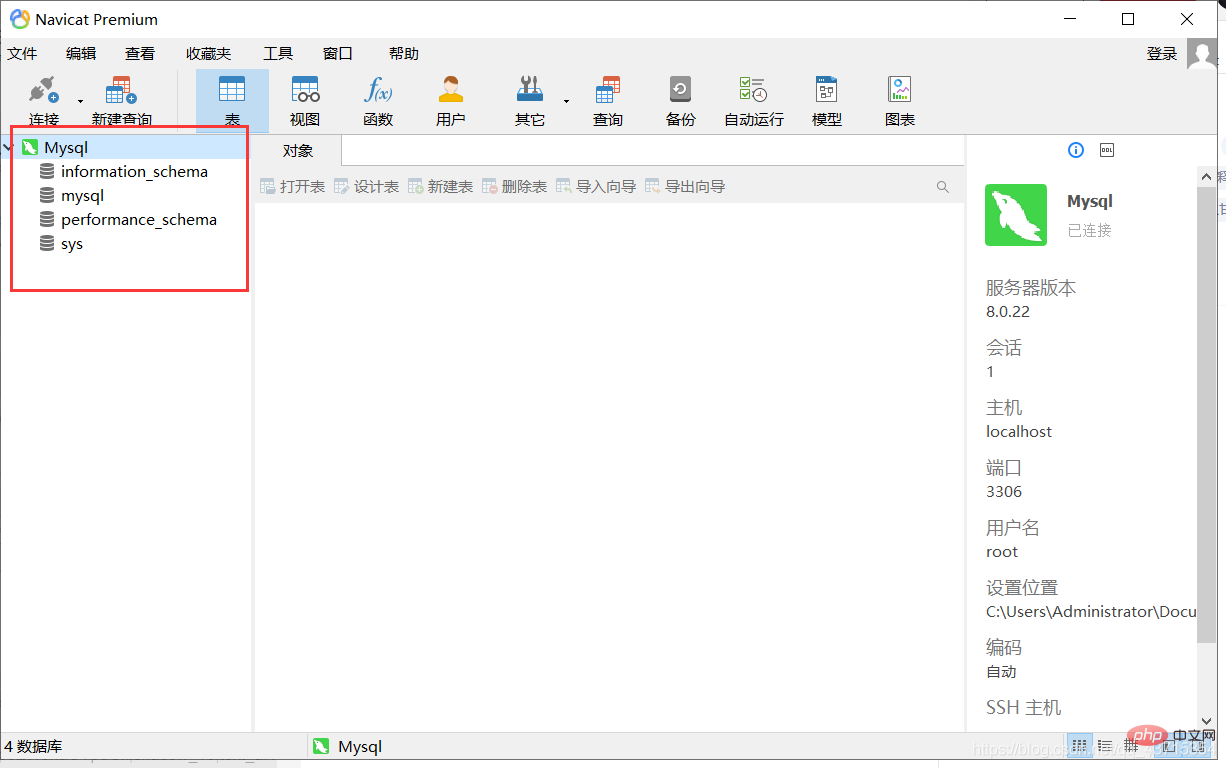
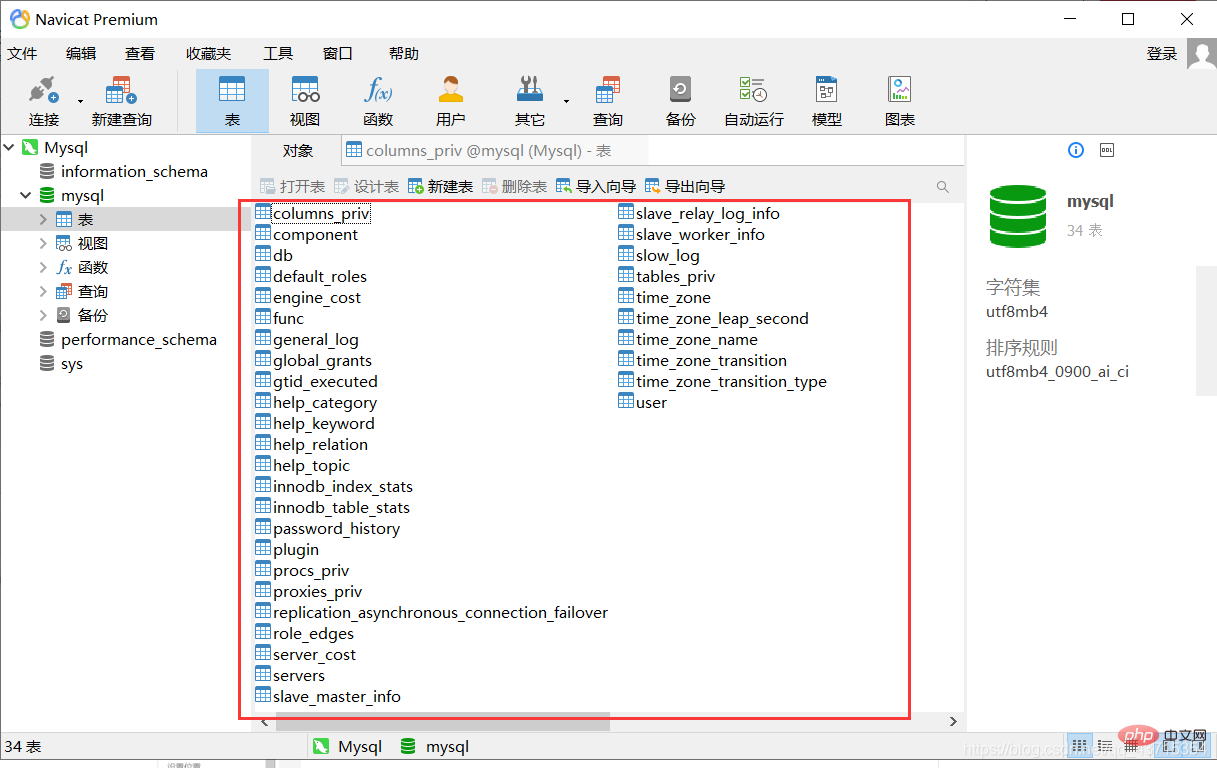
#This way you can use MySQL
Conclusion
##This is the introduction to the installation and configuration of MySQL8.0.22. Everyone is welcome to give your advice, communicate with each other, and learn together
Related free learning recommendations:mysql database(Video)
The above is the detailed content of Super detailed MySQL8.0.22 installation and configuration. For more information, please follow other related articles on the PHP Chinese website!

Hot AI Tools

Undresser.AI Undress
AI-powered app for creating realistic nude photos

AI Clothes Remover
Online AI tool for removing clothes from photos.

Undress AI Tool
Undress images for free

Clothoff.io
AI clothes remover

AI Hentai Generator
Generate AI Hentai for free.

Hot Article

Hot Tools

Notepad++7.3.1
Easy-to-use and free code editor

SublimeText3 Chinese version
Chinese version, very easy to use

Zend Studio 13.0.1
Powerful PHP integrated development environment

Dreamweaver CS6
Visual web development tools

SublimeText3 Mac version
God-level code editing software (SublimeText3)

Hot Topics
 1386
1386
 52
52
 Explain InnoDB Full-Text Search capabilities.
Apr 02, 2025 pm 06:09 PM
InnoDB's full-text search capabilities are very powerful, which can significantly improve database query efficiency and ability to process large amounts of text data. 1) InnoDB implements full-text search through inverted indexing, supporting basic and advanced search queries. 2) Use MATCH and AGAINST keywords to search, support Boolean mode and phrase search. 3) Optimization methods include using word segmentation technology, periodic rebuilding of indexes and adjusting cache size to improve performance and accuracy.
 How do you alter a table in MySQL using the ALTER TABLE statement?
Mar 19, 2025 pm 03:51 PM
The article discusses using MySQL's ALTER TABLE statement to modify tables, including adding/dropping columns, renaming tables/columns, and changing column data types.
 When might a full table scan be faster than using an index in MySQL?
Apr 09, 2025 am 12:05 AM
Full table scanning may be faster in MySQL than using indexes. Specific cases include: 1) the data volume is small; 2) when the query returns a large amount of data; 3) when the index column is not highly selective; 4) when the complex query. By analyzing query plans, optimizing indexes, avoiding over-index and regularly maintaining tables, you can make the best choices in practical applications.
 Can I install mysql on Windows 7
Apr 08, 2025 pm 03:21 PM
Yes, MySQL can be installed on Windows 7, and although Microsoft has stopped supporting Windows 7, MySQL is still compatible with it. However, the following points should be noted during the installation process: Download the MySQL installer for Windows. Select the appropriate version of MySQL (community or enterprise). Select the appropriate installation directory and character set during the installation process. Set the root user password and keep it properly. Connect to the database for testing. Note the compatibility and security issues on Windows 7, and it is recommended to upgrade to a supported operating system.
 Difference between clustered index and non-clustered index (secondary index) in InnoDB.
Apr 02, 2025 pm 06:25 PM
The difference between clustered index and non-clustered index is: 1. Clustered index stores data rows in the index structure, which is suitable for querying by primary key and range. 2. The non-clustered index stores index key values and pointers to data rows, and is suitable for non-primary key column queries.
 What are some popular MySQL GUI tools (e.g., MySQL Workbench, phpMyAdmin)?
Mar 21, 2025 pm 06:28 PM
Article discusses popular MySQL GUI tools like MySQL Workbench and phpMyAdmin, comparing their features and suitability for beginners and advanced users.[159 characters]
 How do you handle large datasets in MySQL?
Mar 21, 2025 pm 12:15 PM
Article discusses strategies for handling large datasets in MySQL, including partitioning, sharding, indexing, and query optimization.
 How do you drop a table in MySQL using the DROP TABLE statement?
Mar 19, 2025 pm 03:52 PM
The article discusses dropping tables in MySQL using the DROP TABLE statement, emphasizing precautions and risks. It highlights that the action is irreversible without backups, detailing recovery methods and potential production environment hazards.


