Quickly use svg to draw beautiful animations!

I often see heroes using SVG to draw incredible animations on Codepen. I have always been curious about how they work. I always feel that this needs to be corrected. Only if you have a thorough understanding of SVG and draw those SVG patterns yourself can you make it move.
But that’s not the case. Today I will teach you a simple trick that will allow you to quickly implement an SVG animation!
Open Codepen, click the build button in the interface, you can use animation to build a house, and let it rise with smoke!
Demo address: https://codepen.io/johnYu243/pen/bGBVEwv


devtoolObserve the svg pattern, you will see the following The result:

elementpath and circle are both DOM elements of svg , respectively represent the lines and circles in the svg pattern.
1 |
|
path corresponds to:

GreenSock Animation Platform (GSAP for short) The createable timeline (timeline) launched by the well-known GreenSock Animation Platform (referred to as GSAP) is used as a container for animation or other timelines. This makes it easy to control the entire animation and precisely manage timing.
GSAP even provides us with Ease Visualizer to show the effect of each Ease function, and also attaches the code:

Demo address: https://codepen.io/johnYu243/pen/jOVbMzX
A few simple lines of code can achieve the following effects:

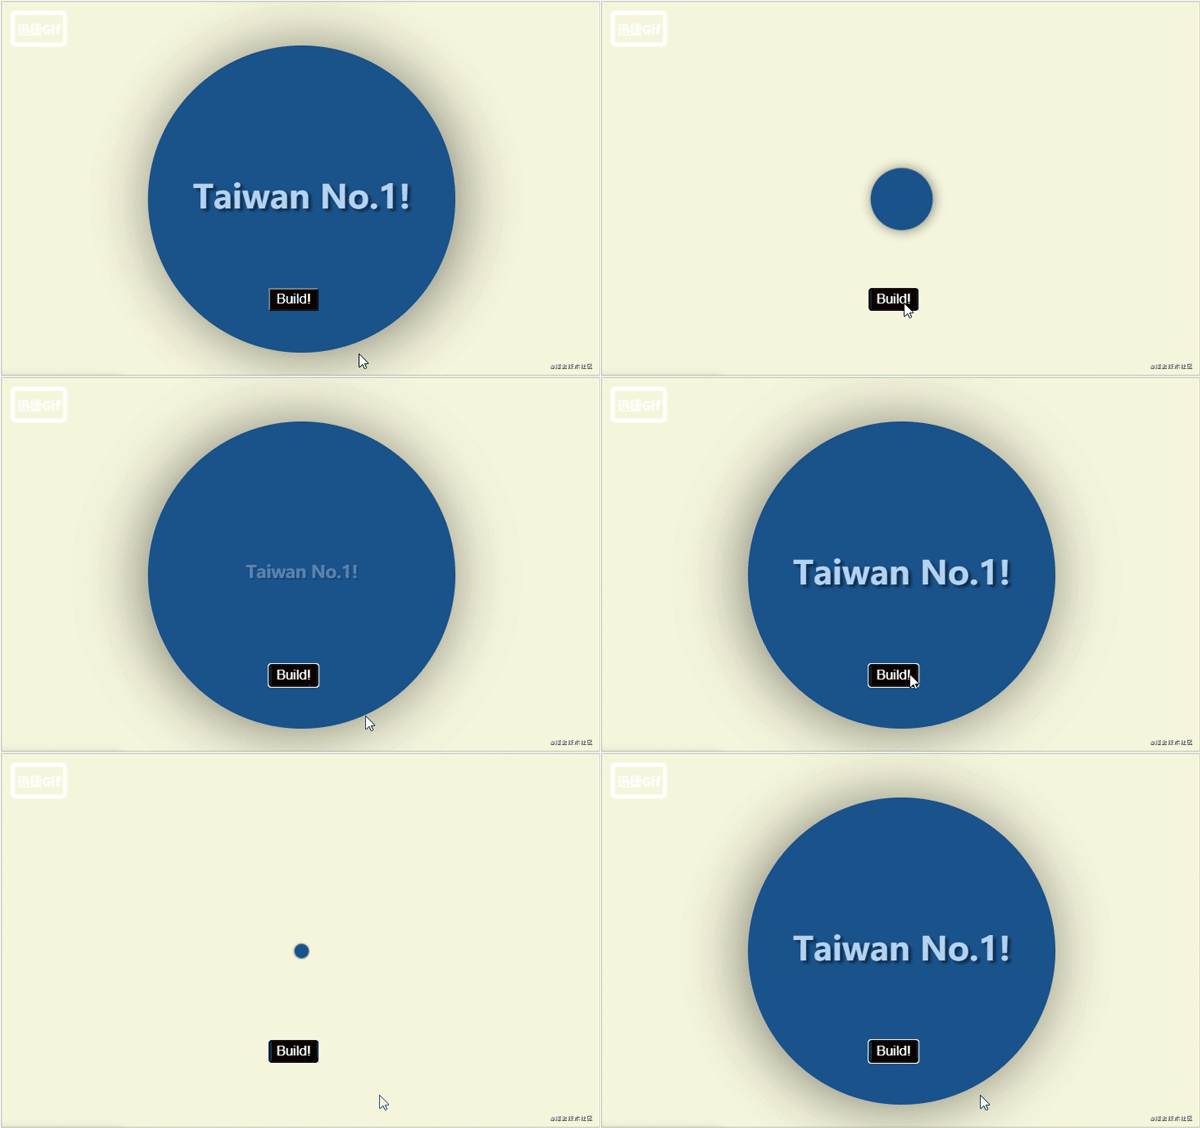
Getting started with GSAP
GSAP’s API function is very powerful, and there are related communities: Official website documentation, Forum, TimelineMax Chinese Manual
In the initial house construction example, I mainly used TimelineMax’s from and staggerFrom, which Both APIs only need to set initial values, and they will complete the tween animation within the specified time:
1 2 3 4 5 |
|
In this step we will CSS Selector #House > rect:nth-child(24) This element starts from scaleX being 0, with center as the starting point for deformation, and uses Power2.easeOut to return to the original state within one second and perform compensation. animation.
1 2 3 4 5 6 7 8 9 10 11 12 |
|
is similar to from, except that staggerFrom can put multiple CSS Selectors at once, and use the stagger attribute to set the Selector in the array At what time difference will it appear?
For detailed API parameters, please refer to the Official Document
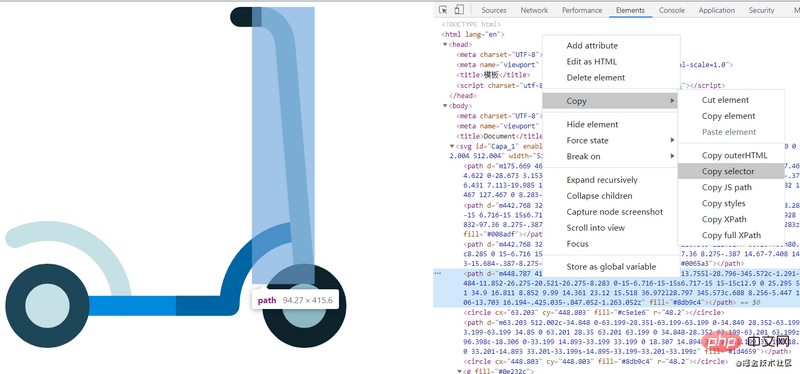
Then go back to our SVG, and with the help of devtool, we need to remove the CSS Selector# of the internal elements of the svg. ## It's very easy. Find the corresponding DOM element in the element panel, right-click, select Copy -> Copy selector, and you can directly copy it to the CSS Selector of the element:
现在我们能取得svg 中任意部分的CSS Selector,也知道怎么用GSAP API 来进行补间动画,现在是时候将其结合起来!
我们先调整下基本布局,一般在空白Html内直接放入svg时,图案大多会紧靠页面左上角,我们可以套用个margin: 0 auto将其置中,看起来会顺眼一些,你也能额外加些padding。我们在页面添加一个按钮来调用动画:
1 2 3 4 5 6 7 8 9 10 11 |
|
接着我们使用TimelineMax提供的staggerFrom函数,利用devtool将滑板车的轮子部分找出来,复制它们的CSS Selector,放入staggerFrom函数参数中,设定x与y轴的scale都从0开始,由center增长,采用Bounce.easeOut的ease function ,而四个Selector间以stagger: 0.2的属性值作为补间动画出现的时间差:
1 2 3 4 5 6 7 8 9 10 11 12 13 14 15 16 17 |
|
简单几行代码,就能让我们的滑板车动起来!
演示地址:https://codepen.io/johnYu243/pen/poNjNzz


补间是一个术语,用于描述逐帧序列,有时也称为"中间"。 在那个地方,一个动作导致下一个动作产生一个流畅的动作。
完善动画
你可以把TimelineMax想像成时间轴,动画按指定顺序执行,而staggerFrom则可以同时让多个DOM元素以微小时间差的顺序启动,另外我们还可以设置一些Flag来指定要等到哪几个动画完成后,才接续其他动画。
最后,发挥自己的创意,使用各种API打出一套组合拳:
演示地址:https://codepen.io/johnYu243/pen/yLVYVey

结论
看到这里,跃跃欲试了吗?
总之,我自己觉得蛮有趣的,希望或多或少对读到这篇文章的人有点帮助。
最后给大家分享一个很酷的demo,来自我的文章封面
参考文章
How to Create Beautiful SVG Animations Easily
更多编程相关知识,请访问:编程教学!!
The above is the detailed content of Quickly use svg to draw beautiful animations!. For more information, please follow other related articles on the PHP Chinese website!

Hot AI Tools

Undresser.AI Undress
AI-powered app for creating realistic nude photos

AI Clothes Remover
Online AI tool for removing clothes from photos.

Undress AI Tool
Undress images for free

Clothoff.io
AI clothes remover

AI Hentai Generator
Generate AI Hentai for free.

Hot Article

Hot Tools

Notepad++7.3.1
Easy-to-use and free code editor

SublimeText3 Chinese version
Chinese version, very easy to use

Zend Studio 13.0.1
Powerful PHP integrated development environment

Dreamweaver CS6
Visual web development tools

SublimeText3 Mac version
God-level code editing software (SublimeText3)

Hot Topics
 1377
1377
 52
52
 How to insert pictures on bootstrap
Apr 07, 2025 pm 03:30 PM
There are several ways to insert images in Bootstrap: insert images directly, using the HTML img tag. With the Bootstrap image component, you can provide responsive images and more styles. Set the image size, use the img-fluid class to make the image adaptable. Set the border, using the img-bordered class. Set the rounded corners and use the img-rounded class. Set the shadow, use the shadow class. Resize and position the image, using CSS style. Using the background image, use the background-image CSS property.
 How to use bootstrap button
Apr 07, 2025 pm 03:09 PM
How to use the Bootstrap button? Introduce Bootstrap CSS to create button elements and add Bootstrap button class to add button text
 How to write split lines on bootstrap
Apr 07, 2025 pm 03:12 PM
There are two ways to create a Bootstrap split line: using the tag, which creates a horizontal split line. Use the CSS border property to create custom style split lines.
 How to resize bootstrap
Apr 07, 2025 pm 03:18 PM
To adjust the size of elements in Bootstrap, you can use the dimension class, which includes: adjusting width: .col-, .w-, .mw-adjust height: .h-, .min-h-, .max-h-
 How to set up the framework for bootstrap
Apr 07, 2025 pm 03:27 PM
To set up the Bootstrap framework, you need to follow these steps: 1. Reference the Bootstrap file via CDN; 2. Download and host the file on your own server; 3. Include the Bootstrap file in HTML; 4. Compile Sass/Less as needed; 5. Import a custom file (optional). Once setup is complete, you can use Bootstrap's grid systems, components, and styles to create responsive websites and applications.
 How to view the date of bootstrap
Apr 07, 2025 pm 03:03 PM
Answer: You can use the date picker component of Bootstrap to view dates in the page. Steps: Introduce the Bootstrap framework. Create a date selector input box in HTML. Bootstrap will automatically add styles to the selector. Use JavaScript to get the selected date.
 The Roles of HTML, CSS, and JavaScript: Core Responsibilities
Apr 08, 2025 pm 07:05 PM
HTML defines the web structure, CSS is responsible for style and layout, and JavaScript gives dynamic interaction. The three perform their duties in web development and jointly build a colorful website.
 How to verify bootstrap date
Apr 07, 2025 pm 03:06 PM
To verify dates in Bootstrap, follow these steps: Introduce the required scripts and styles; initialize the date selector component; set the data-bv-date attribute to enable verification; configure verification rules (such as date formats, error messages, etc.); integrate the Bootstrap verification framework and automatically verify date input when form is submitted.


