
 Backend Development
PHP7
Introducing the establishment of php7 environment on windows (Apache2.4+MySQL5.7+PHP7)
Backend Development
PHP7
Introducing the establishment of php7 environment on windows (Apache2.4+MySQL5.7+PHP7)
Introducing the establishment of php7 environment on windows (Apache2.4+MySQL5.7+PHP7)


Recommended (free): PHP7
1. Preparation before installation
1. Remove the previous local environment (php, Apache, mysql). If the IIS service is enabled locally by default, the IIS service needs to be turned off (port occupation), although the Apache service port can be changed. , but it always feels awkward to use port access when accessing.
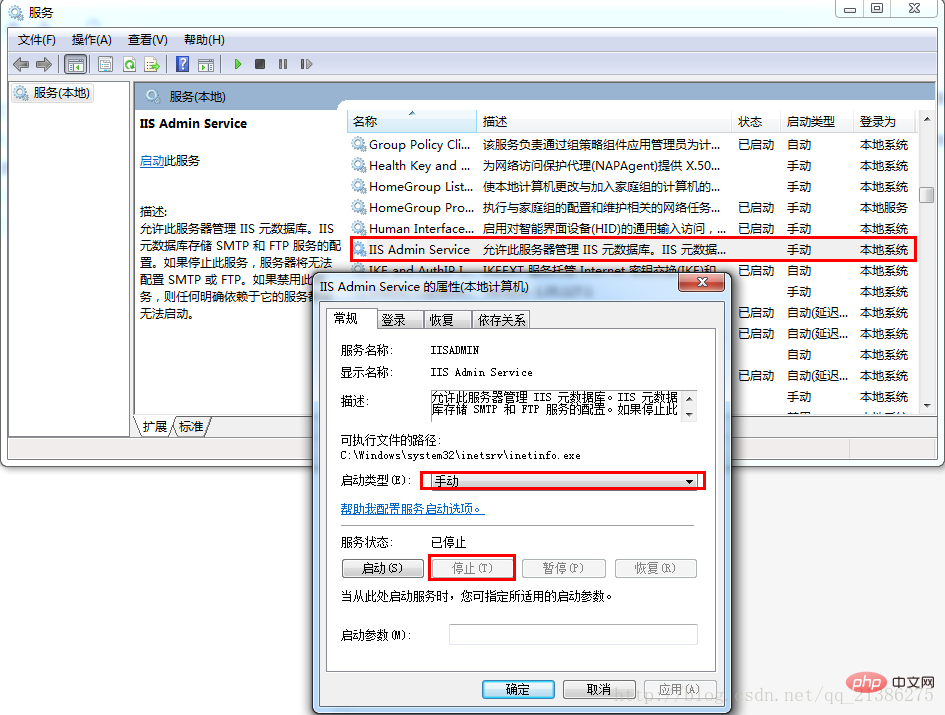
How to shut down the IIS service: Win R key, enter services.msc to confirm, open the local service list, find the IIS service, right-click and select Properties, stop the service and select manual, as shown below. 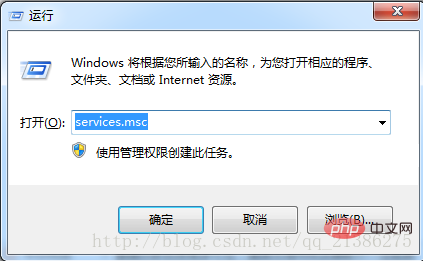
2. Download the required resources. You can choose the following resources according to whether your system is 32-bit or 64-bit.
①php resource download (the latest version when writing the blog is php7.1.10)
php7 for windows version resource download address: http://windows.php.net/download/
Version Choice: There are 4 versions of php7 for windows, divided into 32-bit and 64-bit, which are divided into non thread safe and thread safe. If the environment you are installing is IIS or nginx, please select non thread safe. If the environment you are installing is Apache, please select thread safe. I installed apache locally and chose thread safe. The reason why you can search the difference between non thread safe and thread safe on Baidu is related to the PHP operating mechanism.
②Apache resource download (the latest version when writing the blog is VC15 Apache2.4.28)
There are two download addresses here, just choose one of them, but you need to download Apache2.4 or above, because Apache2.2 version does not support php7. What I chose here is the VC15 Apache2.4.28 version.
Download address: https://www.apachelounge.com/download/
https://www.apachehaus.com/cgi-bin/download.plx#APACHE24VC09
③mysql download (latest at the time of blogging) Version mysql5.7.20)
When I was writing a blog, after decompressing the 64-bit compressed package of mysql5.7.20 downloaded from the official website, there was no my-default.ini file, so I had to create one myself. You can also choose other versions of mysql
The latest version download address: https://dev.mysql.com/downloads/mysql/
Mysql5.6 download address: https://dev.mysql.com/downloads /mysql/5.6.html#downloads 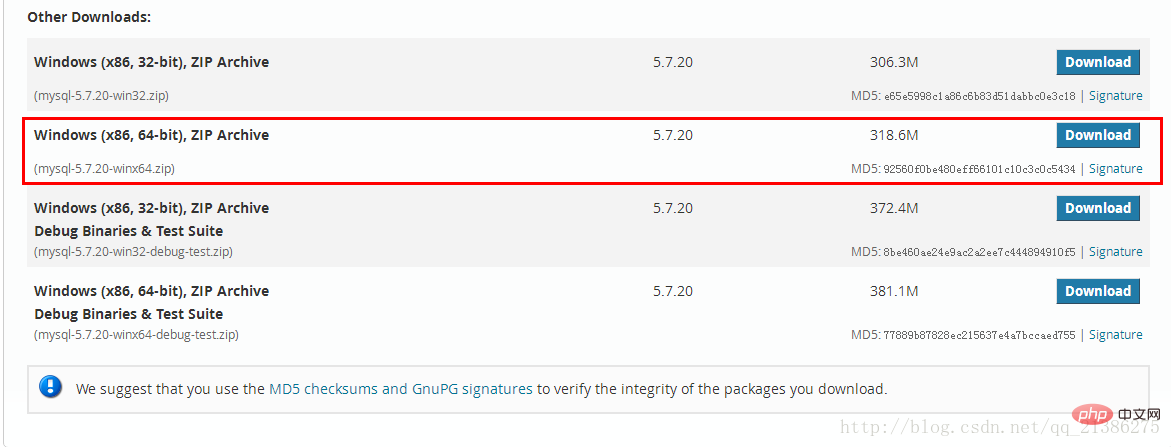
④Since php7 uses the VC14 compilation environment, we also need to download Visual C 2015. This can be tested after the above three installations are completed to see if there are any problems. Install again, because your windows system may have already installed it for you.
Download address: https://www.microsoft.com/en-US/download/details.aspx?id=48145
PS: If you are too lazy to find resources yourself, here is Addresses of resources required for environment construction (the compressed package contains php7.1.10 version compressed package (64-bit, thread safe version), Apache2.4.28 compressed package (64-bit, VC15 version), mysql5.7.20 (64-bit), Visual C 2015 (64-bit), the above resources are all windows versions):
Link: http://pan.baidu.com/s/1eR7N3zk Password: qr4b - Install the required resource package
2. Start the installation
Create a folder to store the contents of your environment that you will build next. The name of the folder I created here is benxiaohai
1. PHP installation
① Create a folder under the benxiaohai folder to store the PHP content, place the downloaded compressed package in the folder, and unzip it. As shown below: 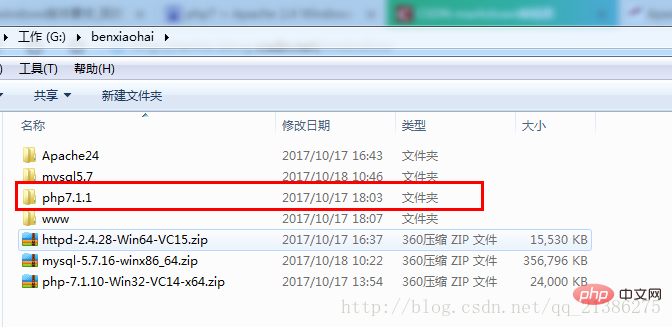
② Modify the configuration file
1) Modify the php.ini-development file in the G:\benxiaohai\php7.1.1 directory and change the G:\benxiaohai\php7.1.1 directory Change the name of the php.ini-development file under to php.ini
2) Modify the extension directory
extension_dir = "G:/benxiaohai/php7.1.1/ext"
3) Enable related extensions
Enable related extensions as needed. I only enabled them as follows Extension:
extension=php_gd2.dllextension=php_curl.dllextension=php_mbstring.dllextension=php_openssl.dllextension=php_mysqli.dllextension=php_pdo_mysql.dll
Note: In php7, the php_mysql.dll extension has been removed and replaced by php_mysqli.dll.
2、安装apache
①将压缩文件httpd-2.4.28-Win64-VC15.zip解压到Apache24目录中,如下图 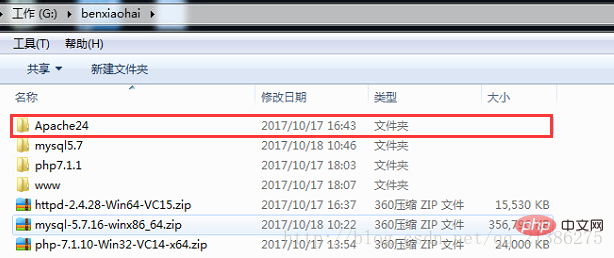
②创建apache服务
打开cmd,输入”G:\benxiaohai\Apache24\Apache24\bin\httpd.exe” -k install -n Apache2.4,路径是你自己安装apache的路径。如下图。回车运行后,当出现The ‘Apache2.4’ service is successfully installed时表示安装成功。 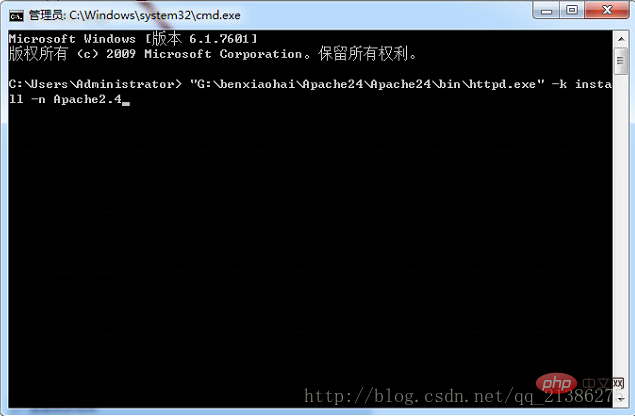
③安装成功后按win+R,输入services.msc回车,你会在服务列表中找到你的Apache2.4服务 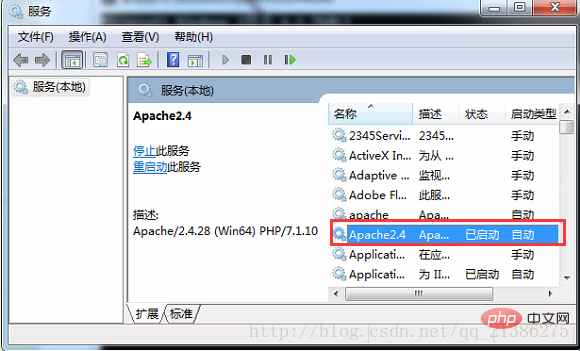
④配置apache
需要配置的文件:G:\benxiaohai\Apache24\Apache24\conf\httpd.conf
1)配置apache安装的目录
ServerRoot "G:/benxiaohai/Apache24/Apache24"
2)配置你php项目的安放目录
DocumentRoot "G:/benxiaohai/www"<Directory "G:/benxiaohai/www">
3)加载php模块
在文件最后边添加如下配置
#php7 support
LoadModule php7_module "G:/benxiaohai/php7.1.1/php7apache2_4.dll"AddHandler application/x-httpd-php .php#configure the path to php.ini
PHPIniDir "G:/benxiaohai/php7.1.1"
4)修改域名配置
ServerName localhost:80
或者
ServerName 1270.0.1:80
5)配置欢迎页(首页)
<IfModule dir_module>
    DirectoryIndex index.html index.php index.htm
</IfModule>⑥启动apache
在apache安装目录下点击ApacheMonitor.exe,启动apache,如下图 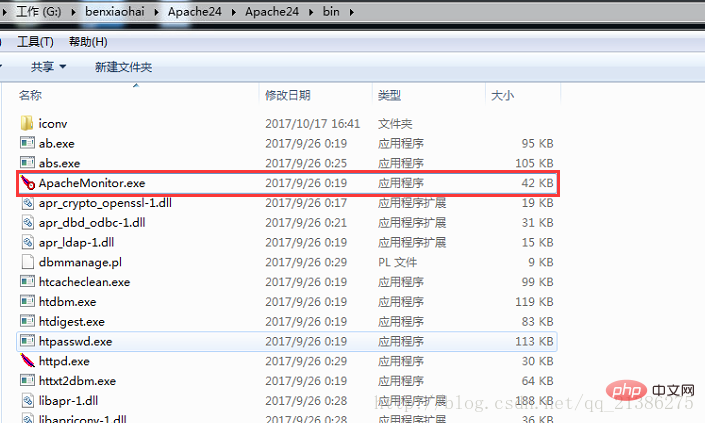
⑦在上面配置php项目的安放目录下建一个test.php文件并在里边写入如下代码
<?phpphpinfo();
⑧打开浏览器,输入localhost/test.php,看到如下界面,就说明你安装成功了! 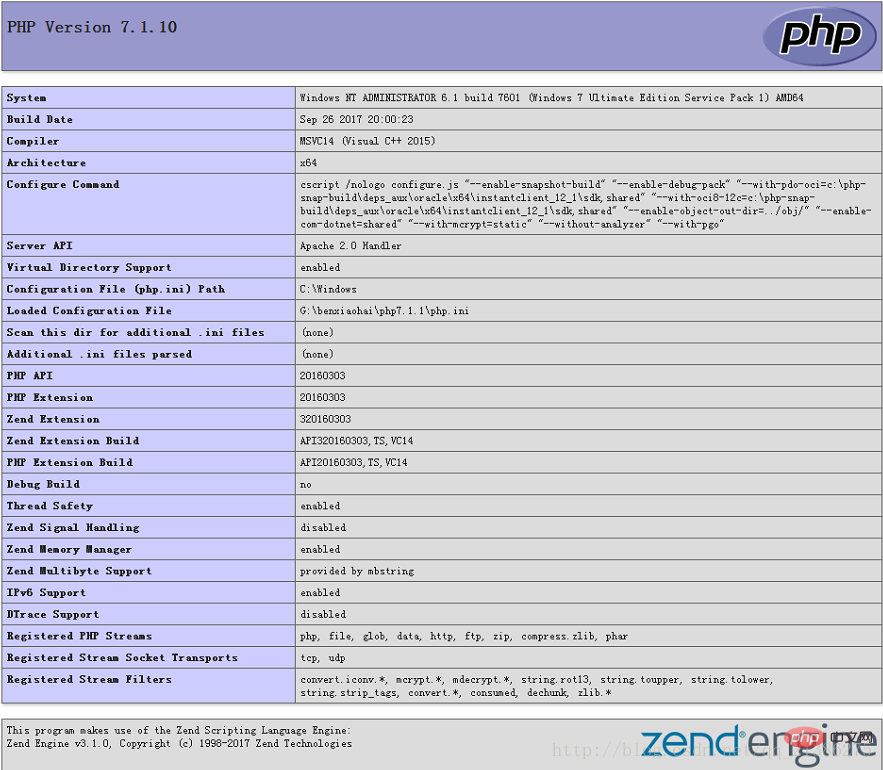
3、mysql5.7.20数据库安装
在官网下载的mysql5.7.20的64位压缩包中,解压后里边缺少my-default.ini文件,需自己创建
①将下载好的压缩包解压到mysql5.7目录下,如下图 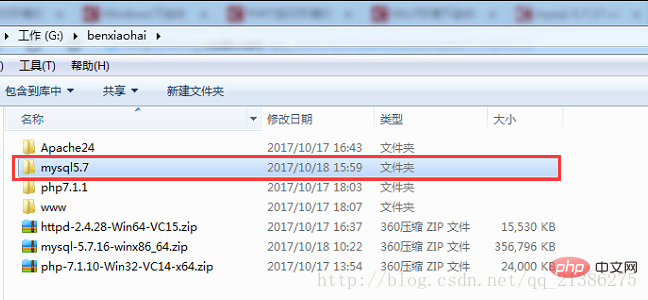
②修改my-default.ini文件
复制一份my-default.ini文件 ,并将其改名为my.ini,并添加如下配置
sql_mode=NO_ENGINE_SUBSTITUTION,STRICT_TRANS_TABLES basedir = G:/benxiaohai/mysql5.7/mysql-5.7.20-winx64
datadir = G:/benxiaohai/mysql5.7/mysql-5.7.20-winx64/data
character_set_server=utf8
port = 3306
注:这里的data文件夹本来是不存在的,mysql会自动生成。
③添加环境变量,如下图,将mysql的解压目录添加到环境变量path中,我的是G:\benxiaohai\mysql5.7\mysql-5.7.20-winx64\bin,注意分号问题 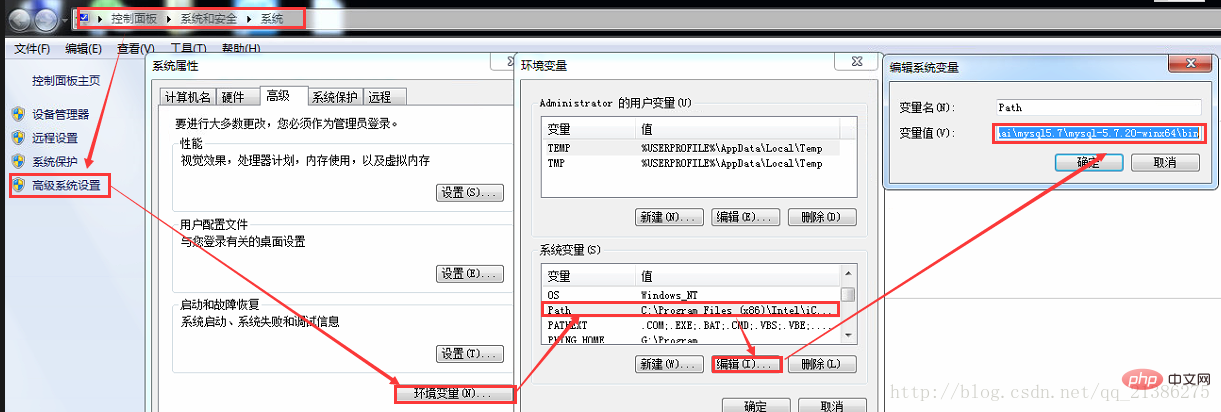
④安装
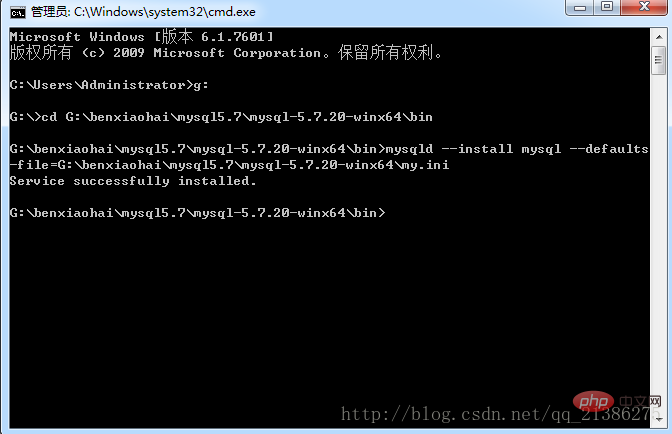
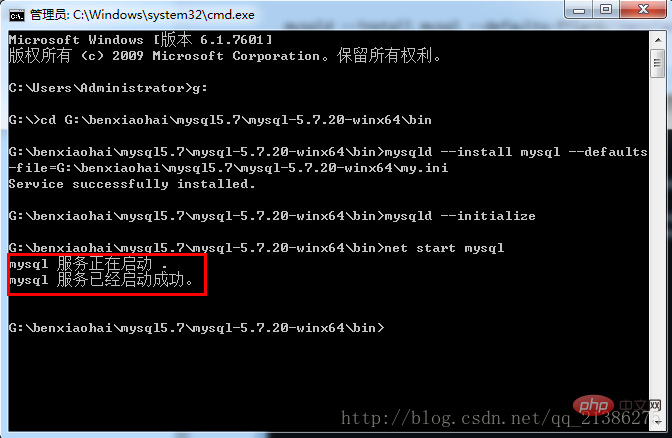
1)打开cmd,将路径转换到你安装mysql的路径下,然后服务安装命令,其中mysql是服务名称,my.ini是你上面复制的my-default.ini文件,当出现Service successfully installed.时表示服务安装成功,如下图
mysqld --install mysql --defaults-file=G:\benxiaohai\mysql5.7\mysql-5.7.20-winx64\my.ini
2)执行生成data文件指令(mysql初始化数据表数据,以及你以后创建表的数据目录)
mysqld --initialize
3)执行启动服务指令
net start mysql
4)用编辑器打开G:\benxiaohai\mysql5.7\mysql-5.7.20-winx64\data目录下后缀为.err文件,第一次安装用户名一般为root,密码为空或者随机。 
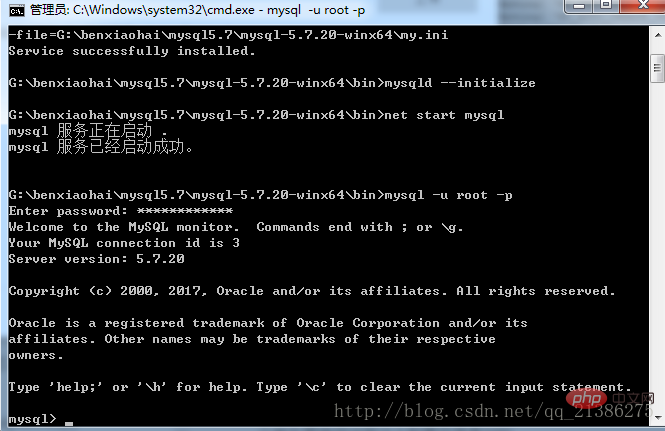
5)登陆,输入如下指令,然后会要你输入密码,如果密码为空直接回车键,如果密码不为空,则输入密码后回车键。出现下图这表示登陆成功,mysql5.7在这里也就安装完成了。
mysql -u root -p
三、在安装过程中遇到的问题
1、启动apache 提示Starting httpd: AH00558
Starting httpd: AH00558: httpd: Could not reliably determine the server’s fully qualified domain name, using localhost.localdomain. Set the ‘ServerName’ directive globally to suppress this message
apache 启动出现这种错误的解决方法:
将 apache 的配置文件httpd.conf中 ServerName 改成可用域名或如下配置
ServerName localhost:80
2、安装完apache后,在浏览器中访问localhost时,一直出现的是IIS页面,这里需要把你本地的IIS服务关掉(本文开头有关闭该服务说明),并清理浏览器缓存后再访问。
3、在安装完apache和php后访问test.php时,出现403。可以从几个方面考虑,大多还是apache的httpd.conf配置问题
①首先要确保线面这个配置目录是对的
DocumentRoot "G:/benxiaohai/www"<Directory "G:/benxiaohai/www">
②其次是配置中对该目录权限配置,下三个配置与其有关,与之前apache版本的权限配置稍有不同,可以注意下
Options Indexes FollowSymLinks
AllowOverride NoneRequire all granted
4、在安装完mysql之后,启动出现如下弹框。这个可以参考这个地址:http://blog.csdn.net/qq_26525215/article/details/53424152解决该问题。 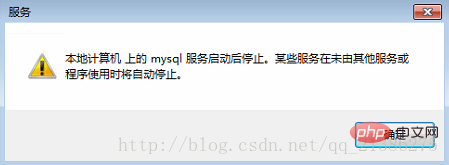
5、另外,在安装apache时要注意80端口是否被占用
6、如果出现提示VCRUNTIME140.dll丢失,可以安装Visual C++ 2015,文中开头有说明。
The above is the detailed content of Introducing the establishment of php7 environment on windows (Apache2.4+MySQL5.7+PHP7). For more information, please follow other related articles on the PHP Chinese website!

Hot AI Tools

Undresser.AI Undress
AI-powered app for creating realistic nude photos

AI Clothes Remover
Online AI tool for removing clothes from photos.

Undress AI Tool
Undress images for free

Clothoff.io
AI clothes remover

Video Face Swap
Swap faces in any video effortlessly with our completely free AI face swap tool!

Hot Article
Hot Tools

Notepad++7.3.1
Easy-to-use and free code editor

SublimeText3 Chinese version
Chinese version, very easy to use

Zend Studio 13.0.1
Powerful PHP integrated development environment

Dreamweaver CS6
Visual web development tools

SublimeText3 Mac version
God-level code editing software (SublimeText3)
Hot Topics
 1387
1387
 52
52

 Can I install mysql on Windows 7
Apr 08, 2025 pm 03:21 PM
Can I install mysql on Windows 7
Apr 08, 2025 pm 03:21 PM
Yes, MySQL can be installed on Windows 7, and although Microsoft has stopped supporting Windows 7, MySQL is still compatible with it. However, the following points should be noted during the installation process: Download the MySQL installer for Windows. Select the appropriate version of MySQL (community or enterprise). Select the appropriate installation directory and character set during the installation process. Set the root user password and keep it properly. Connect to the database for testing. Note the compatibility and security issues on Windows 7, and it is recommended to upgrade to a supported operating system.
 How to speed up the loading speed of PS?
Apr 06, 2025 pm 06:27 PM
How to speed up the loading speed of PS?
Apr 06, 2025 pm 06:27 PM
Solving the problem of slow Photoshop startup requires a multi-pronged approach, including: upgrading hardware (memory, solid-state drive, CPU); uninstalling outdated or incompatible plug-ins; cleaning up system garbage and excessive background programs regularly; closing irrelevant programs with caution; avoiding opening a large number of files during startup.
 How to solve mysql cannot connect to local host
Apr 08, 2025 pm 02:24 PM
How to solve mysql cannot connect to local host
Apr 08, 2025 pm 02:24 PM
The MySQL connection may be due to the following reasons: MySQL service is not started, the firewall intercepts the connection, the port number is incorrect, the user name or password is incorrect, the listening address in my.cnf is improperly configured, etc. The troubleshooting steps include: 1. Check whether the MySQL service is running; 2. Adjust the firewall settings to allow MySQL to listen to port 3306; 3. Confirm that the port number is consistent with the actual port number; 4. Check whether the user name and password are correct; 5. Make sure the bind-address settings in my.cnf are correct.
 How to pull the vertical reference line of PS
Apr 06, 2025 pm 08:18 PM
How to pull the vertical reference line of PS
Apr 06, 2025 pm 08:18 PM
Pull vertical guides in Photoshop: Enable ruler view (View > ruler). Hover the mouse over the vertical edge of the ruler, and then the cursor becomes a vertical line with double arrows and hold and drag the mouse to pull out the reference line. Click Delete by dragging the guide, or hovering it into a cross.
 Solutions to the errors reported by MySQL on a specific system version
Apr 08, 2025 am 11:54 AM
Solutions to the errors reported by MySQL on a specific system version
Apr 08, 2025 am 11:54 AM
The solution to MySQL installation error is: 1. Carefully check the system environment to ensure that the MySQL dependency library requirements are met. Different operating systems and version requirements are different; 2. Carefully read the error message and take corresponding measures according to prompts (such as missing library files or insufficient permissions), such as installing dependencies or using sudo commands; 3. If necessary, try to install the source code and carefully check the compilation log, but this requires a certain amount of Linux knowledge and experience. The key to ultimately solving the problem is to carefully check the system environment and error information, and refer to the official documents.
 Unable to access mysql from terminal
Apr 08, 2025 pm 04:57 PM
Unable to access mysql from terminal
Apr 08, 2025 pm 04:57 PM
Unable to access MySQL from the terminal may be due to: MySQL service not running; connection command error; insufficient permissions; firewall blocks connection; MySQL configuration file error.
 MySQL can't be installed after downloading
Apr 08, 2025 am 11:24 AM
MySQL can't be installed after downloading
Apr 08, 2025 am 11:24 AM
The main reasons for MySQL installation failure are: 1. Permission issues, you need to run as an administrator or use the sudo command; 2. Dependencies are missing, and you need to install relevant development packages; 3. Port conflicts, you need to close the program that occupies port 3306 or modify the configuration file; 4. The installation package is corrupt, you need to download and verify the integrity; 5. The environment variable is incorrectly configured, and the environment variables must be correctly configured according to the operating system. Solve these problems and carefully check each step to successfully install MySQL.
 Is PS slow loading related to other programs that are running?
Apr 06, 2025 pm 06:03 PM
Is PS slow loading related to other programs that are running?
Apr 06, 2025 pm 06:03 PM
The secrets to mastering Office software include: understanding different versions and platforms, correctly installing and configuring, proficient in using the software interface, in-depth understanding of feature operations, application collaboration and sharing functions, utilizing templates and styles, mastering advanced skills, and solving common problems. In addition, you need to choose a version that suits your needs, make good use of templates and styles, develop backup habits, and learn shortcut keys and advanced techniques to improve efficiency.
