 Development Tools
 dreamweaver
 What to do if the Dreamweaver preview interface is garbled in Chinese
What to do if the Dreamweaver preview interface is garbled in Chinese
This article will introduce to you the solution for Chinese garbled characters in the preview interface of Dreamweaver. It has certain reference value. Friends in need can refer to it. I hope it will be helpful to everyone.

Related recommendations: "dreamweaver tutorial"
Solution to Chinese garbled characters in Dreamweaver preview interface
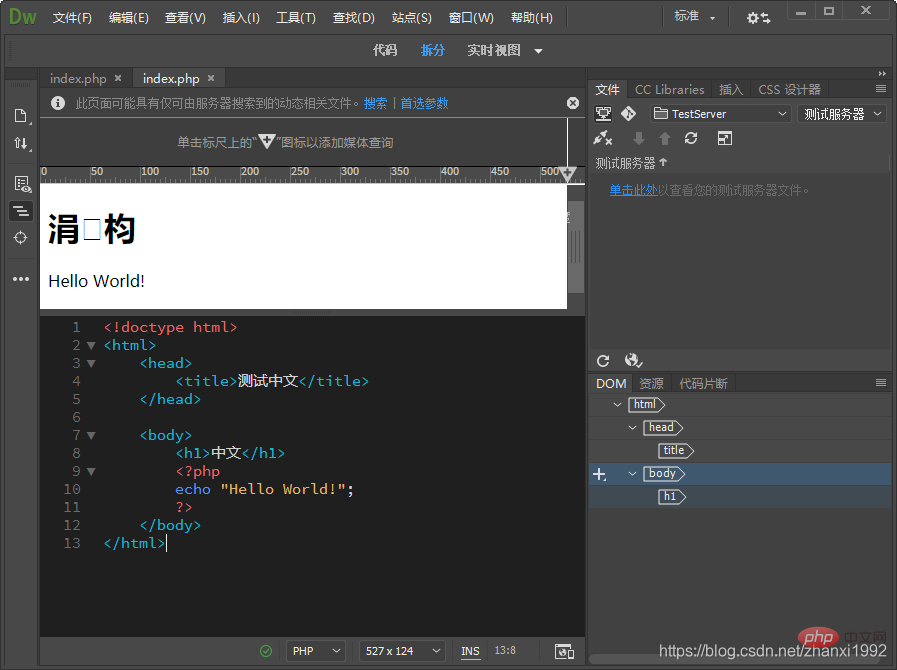
1. Website development often requires dealing with multiple languages, the most common of which is a mix of Chinese and English. It displays normally when using the browser, but garbled characters are displayed in the Dw preview window, seriously affecting the visual effects and development progress. I checked the information online and said that the default file format is Utf-8. After many attempts, I still cannot solve the following problem.

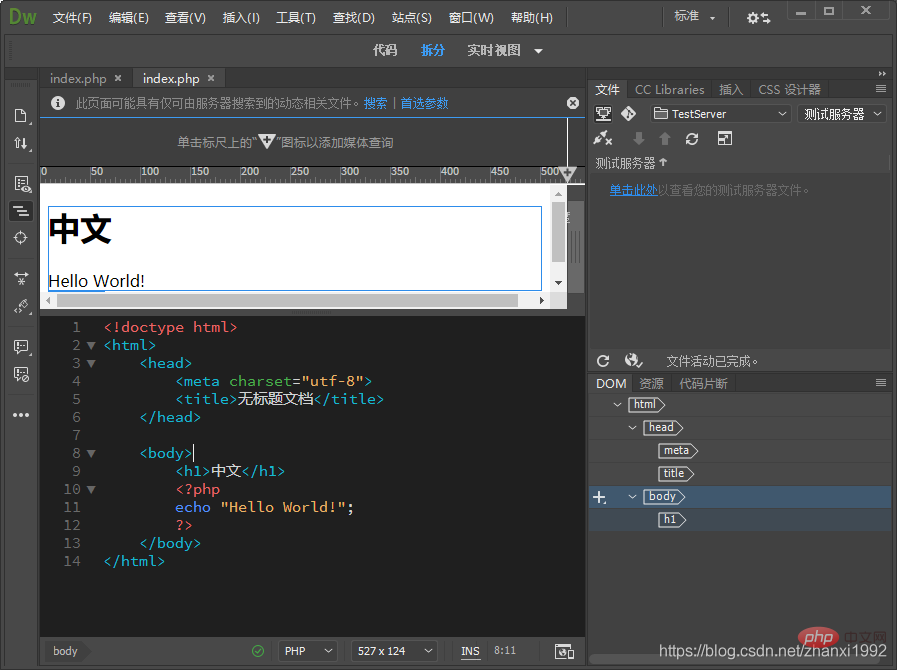
#2. After various tests, it turns out that the problem is not the text encoding format, but that the display encoding format is not specified for the page. Just add the following code to the page, and the final effect is as shown below.
<meta charset="utf-8">

For more programming-related knowledge, please visit: Introduction to Programming! !
The above is the detailed content of What to do if the Dreamweaver preview interface is garbled in Chinese. For more information, please follow other related articles on the PHP Chinese website!

Hot AI Tools

Undresser.AI Undress
AI-powered app for creating realistic nude photos

AI Clothes Remover
Online AI tool for removing clothes from photos.

Undress AI Tool
Undress images for free

Clothoff.io
AI clothes remover

AI Hentai Generator
Generate AI Hentai for free.

Hot Article

Hot Tools

Notepad++7.3.1
Easy-to-use and free code editor

SublimeText3 Chinese version
Chinese version, very easy to use

Zend Studio 13.0.1
Powerful PHP integrated development environment

Dreamweaver CS6
Visual web development tools

SublimeText3 Mac version
God-level code editing software (SublimeText3)

Hot Topics
 1385
1385
 52
52
 How to adjust text position in dreamweaver
Apr 09, 2024 am 02:24 AM
Adjusting the text position in Dreamweaver can be completed by the following steps: Select the text and use the text position adjuster to make horizontal adjustments: left alignment, right alignment, center alignment; 2. Make vertical adjustments: top alignment, bottom alignment, vertical center; 3. Press Shift key and use the arrow keys to fine-tune the position; 4. Use shortcut keys to quickly align: left alignment (Ctrl/Cmd + L), right alignment (Ctrl/Cmd + R), center alignment (Ctrl/Cmd + C).
 How to add video to dreamweaver webpage production
Apr 09, 2024 am 01:42 AM
Embed video using Dreamweaver: Insert a video element. Select and upload a video file. Set video type, URL, size, autoplay and controls. Insert video. Optional: Customize the video appearance.
 How to adjust line spacing in dreamweaver
Apr 09, 2024 am 03:00 AM
Adjusting line spacing in Dreamweaver is a four-step process: select the text, open the Paragraph panel, adjust the Line Spacing options, and finally click OK to apply the changes.
 How to add pictures to dreamweaver
Apr 09, 2024 am 03:30 AM
To insert a picture in Dreamweaver, click the Insert menu and choose Image, then navigate to the picture file and select it. Other methods include dragging and dropping files or inserting HTML code directly. Adjusting properties includes changing size, alignment, adding borders, and entering alt text.
 How to set the web design software Dreamweaver to Chinese
Apr 09, 2024 am 12:39 AM
To set Dreamweaver to Chinese, follow these steps: Open Dreamweaver; change User Interface Language to Simplified Chinese or Traditional Chinese in the preferences; restart Dreamweaver; check the Help menu About Dreamweaver" item to verify the language settings.
 How to set dreamweaver font
Apr 09, 2024 am 02:54 AM
You can set fonts in Dreamweaver by selecting a font, size, and color using the Properties panel. Use CSS to set fonts for your entire website or specific elements. Set the font directly in the HTML code using the "font" tag.
 How to set text size in dreamweaver
Apr 09, 2024 am 02:18 AM
To set text size in Dreamweaver, just: Select the text Go to the Text menu Select Font Size Select the desired size Press Enter to save
 How to export dreamweaver webpage after creating it
Apr 09, 2024 am 01:27 AM
Exporting a web page in Dreamweaver involves the following steps: Export an HTML file: Select Export from the File menu, select HTML, select a file name and location, and click Save. Export CSS and JavaScript files: Choose Export from the File menu, select CSS or JavaScript, select a file name and location, and click Save. Export an image: Right-click the image, select "Export", select the image format and file name, and click "Save".


