本篇文章给大家介绍一下Atom实现块注释(/* */)的方法,了解块注释插件Installation and use of Atom block comment plug-in multi-comment和使用。有一定的参考价值,有需要的朋友可以参考一下,希望对大家有所帮助。

相关推荐:《atom教程》
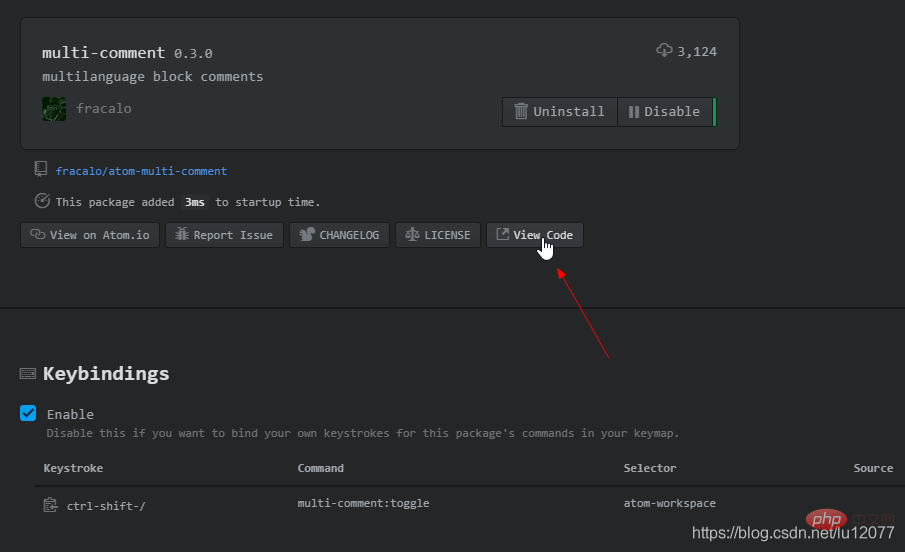
Atom插件:multi-comment
1. Atom - Multi-comment简介:
- a block-comment module built with the focus to interact with the default line-comment-command.
翻译为:
- 使用焦点构建的块注释模块,用于与默认的行注释命令交互。
2. multi-comment插件的安装
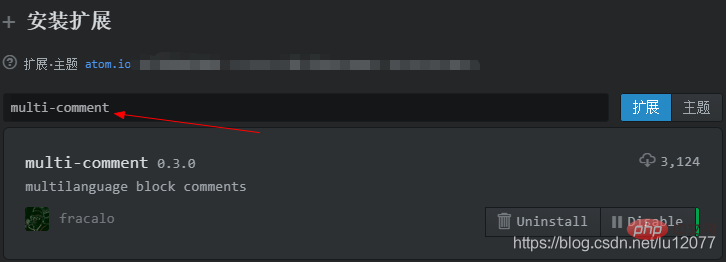
打开Atom,在菜单栏以此打开:Packages(扩展) >> Setting View(设置界面) >> Install Packages/Themes(安装 插件/主题),即可 进入插件/主题安装界面。

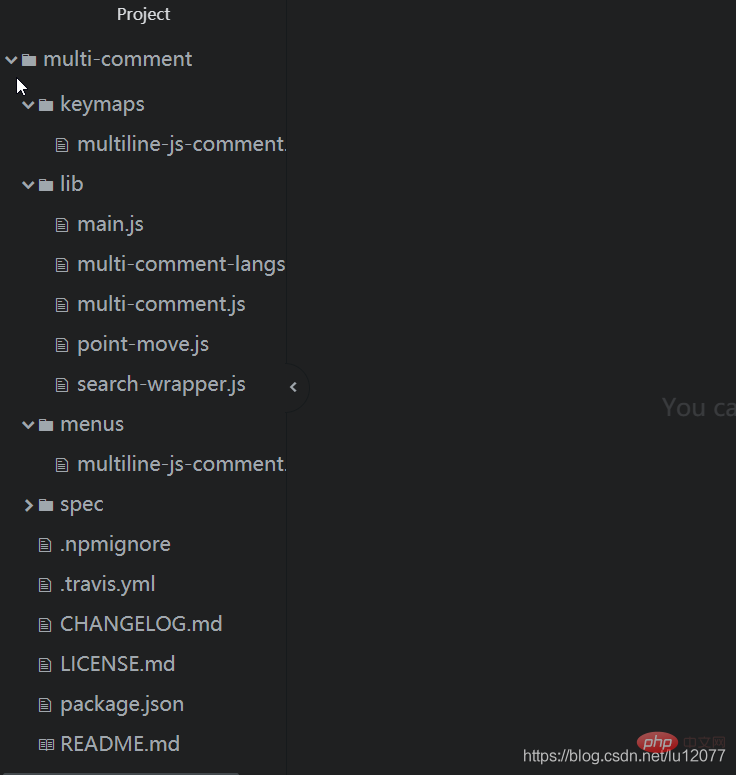
3. multi-comment插件的改造


{
  "atom-workspace": {
    "ctrl-shift-/": "multi-comment:toggle"
}}const languages = [
{
name: 'coffeescript',
test: /^source\.coffee\.?/,
openToken: '###',
closeToken: '###',
/* when used at line start line-scoprDescriptor will override
so we cheat with leading \t */
option: { tab: '\\t' }
},
{
name: 'javascript',
test: /^source\.js\.?/,
openToken: '/*',
closeToken: '*/'
},
{
name: 'java',
test: /^source\.java\.?/,
openToken: '/*',
closeToken: '*/'
},
{
name: 'css',
test: /^source\.css\.?/,
openToken: '/*',
closeToken: '*/',
option: { scanInside: true }
},
{
name: 'php',
test: /html\.php/,
openToken: '/* ',
closeToken: ' */'
},
{
name: 'ruby',
test: /^source\.ruby\.?/,
openToken: '=begin',
closeToken: '=end',
option: { newline: '\\n' }
},
{
name: 'c',
test: /^source\.c\.?/,
openToken: '/*',
closeToken: '*/'
}]; addComment() {
const range = this.editor.getSelectedBufferRange();
const text = this.editor.getTextInBufferRange(range);
const [open, close] =
(this.lang.commentTokens.option && this.lang.commentTokens.option.newline) ?
[`\n${this.lang.commentTokens.open}\n`, `\n${this.lang.commentTokens.close}\n`] :
(this.lang.commentTokens.option && this.lang.commentTokens.option.tab) ?
[`\t${this.lang.commentTokens.open}`, `\t${this.lang.commentTokens.close}`] :
[this.lang.commentTokens.open, this.lang.commentTokens.close];
this.editor.setTextInBufferRange(range, `${open}${text}${close}`);
	// set cursor position
    const landPosition = pointMove(this.editor.getCursorBufferPosition(), - (close.length - 1), this.editor);
    this.editor.setCursorBufferPosition(landPosition);
}将代码:
// set cursor position const landPosition = pointMove(this.editor.getCursorBufferPosition(), - (close.length - 1), this.editor); this.editor.setCursorBufferPosition(landPosition);
修改为:
    if (text === '') {
      // set cursor position
      const landPosition = pointMove(this.editor.getCursorBufferPosition(), - (close.length - 1), this.editor);
      this.editor.setCursorBufferPosition(landPosition);
}加粗样式完成以上修改工作后,想要的插件的效果还没有在Atom中立刻生效,因此需要 先关闭Atom,并重新打开。
此时想要的插件的效果就实现了。
更多编程相关知识,请访问:编程视频!!
The above is the detailed content of Installation and use of Atom block comment plug-in multi-comment. For more information, please follow other related articles on the PHP Chinese website!
 What are the C language programming software?
 The difference between concat and push in JS
 The difference between git and svn
 How to speed up web pages
 Usage of typedef in c language
 What is the purpose of storage management?
 C language random function usage
 How to use define
 How to import data in access