How to install vnc on centos
Method: 1. Use the "yum install..." command to install the VNC service software; 2. Edit the vnc operation script; 3. Set the vnc password and start the service; 4. Open the 5901 port of the firewall; 5. Turn off SELinux and configure the "/etc/selinux/config" file.

#The operating environment of this tutorial: centos7 system, thinkpad t480 computer.
VNC requires a desktop installed on the system. If it is a production environment server and a minimal installation is used during installation, then perform the following operations according to the GNOME desktop.
# 列出的组列表里有GNOME Desktop。
yum grouplist
#安装之
yum groupinstall -y "GNOME Desktop"
# 安装完成后,修改默认启动方式为图形化界面
systemctl set-default graphical.target  //设置成图形模式
# 如果要换回来
systemctl set-default multi-user.target  //设置成命令模式
#然后重启系统即可
Step 1: Install the VNC service software, use the root user to execute the following commands (the following operations are performed under the root user unless otherwise specified):
yum install tigervnc-server -y
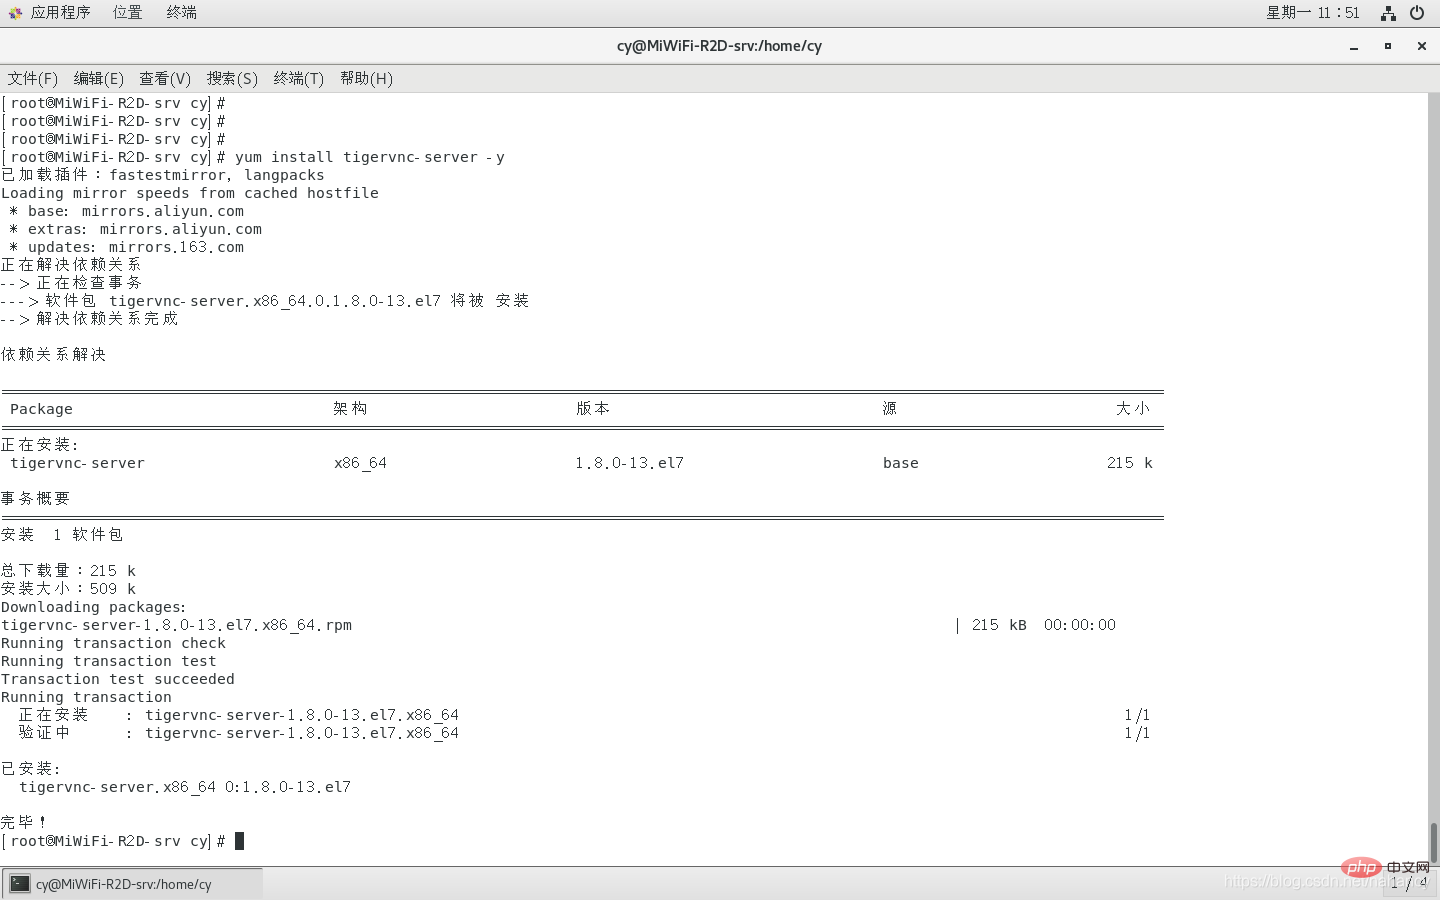
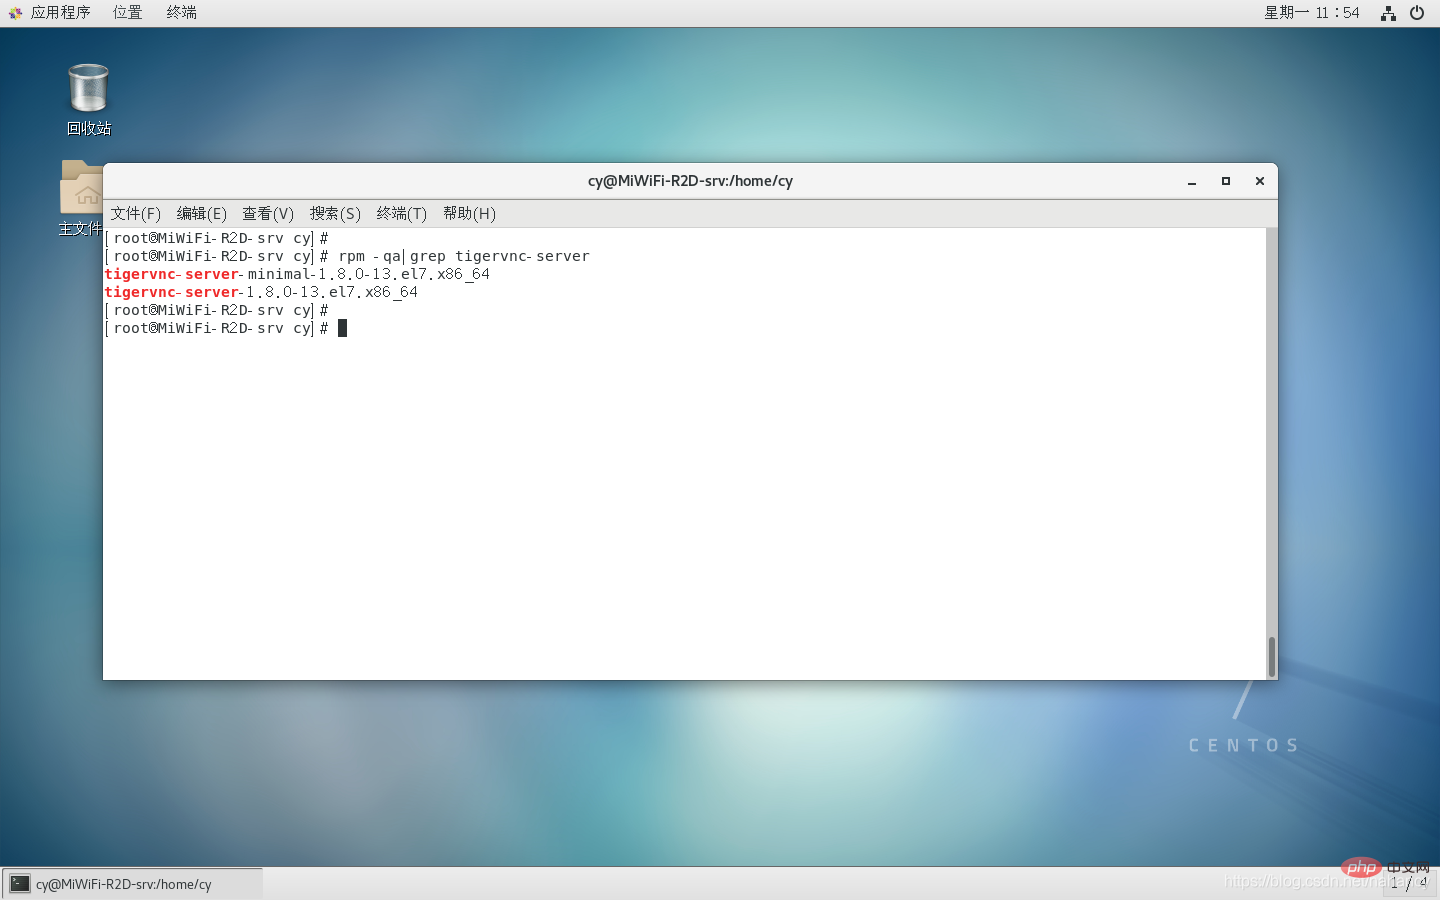
After installation, you can use the following command to verify whether the installation is successful:
rpm -qa|grep tigervnc-server
##Step 2: Copy the startup operation script of vnc , in vncserver@:1.service: 1 means "desktop number", the started port number is 5900, the desktop number is 5901, if there is another one, it is 2, the port number plus 1 is 5902, and so on:
cp /lib/systemd/system/vncserver@.service /etc/systemd/system/vncserver@:1.service
Step 3: Edit /etc/systemd/system/vncserver@:1.service
vim /etc/systemd/system/vncserver@\:1.service
 vnc configuration file before modification
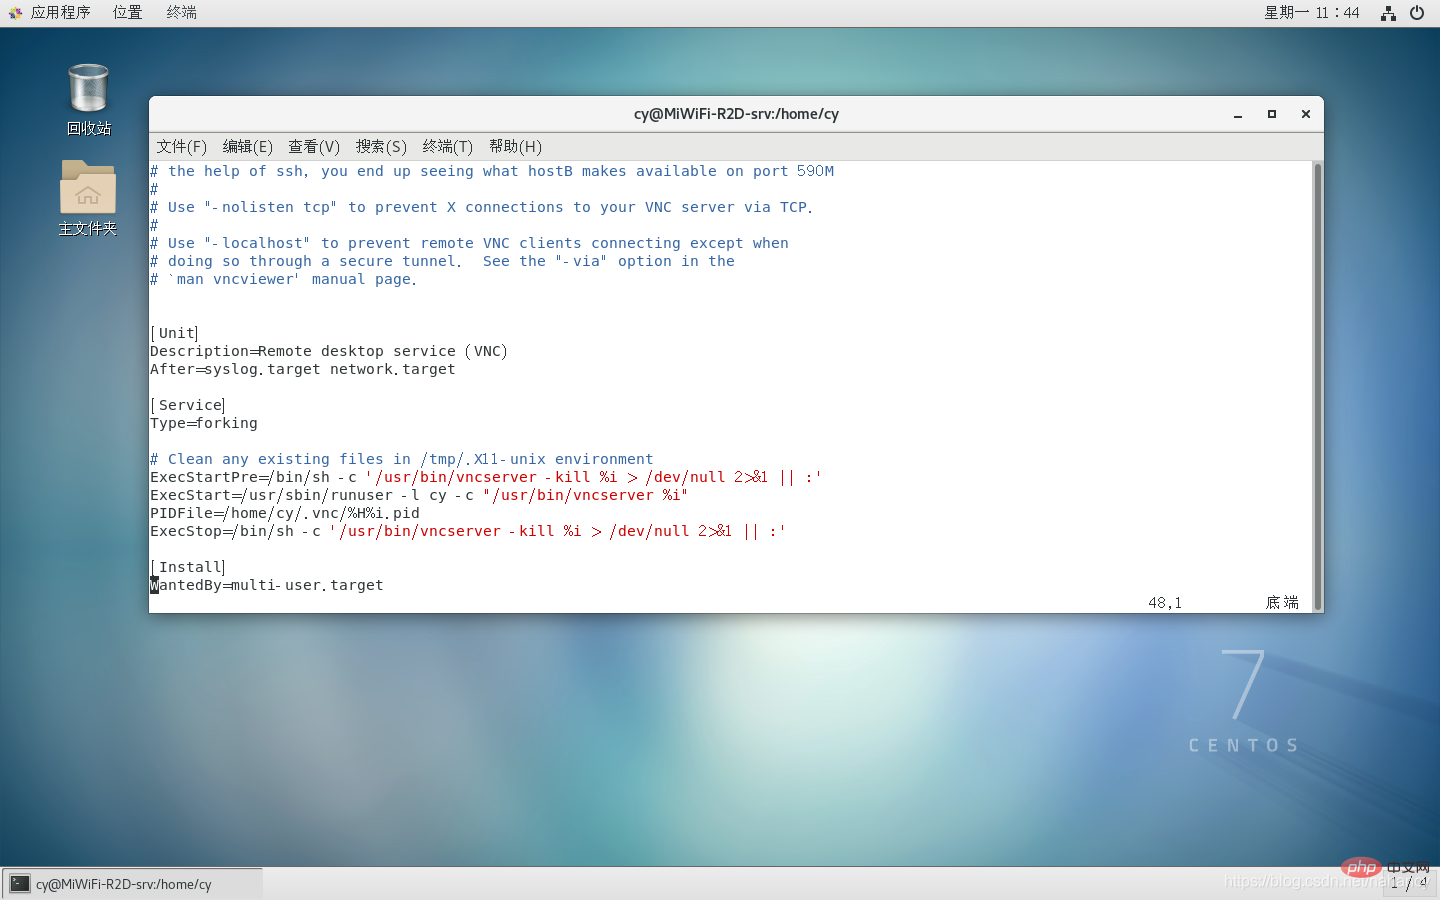 After modifying the vnc configuration file
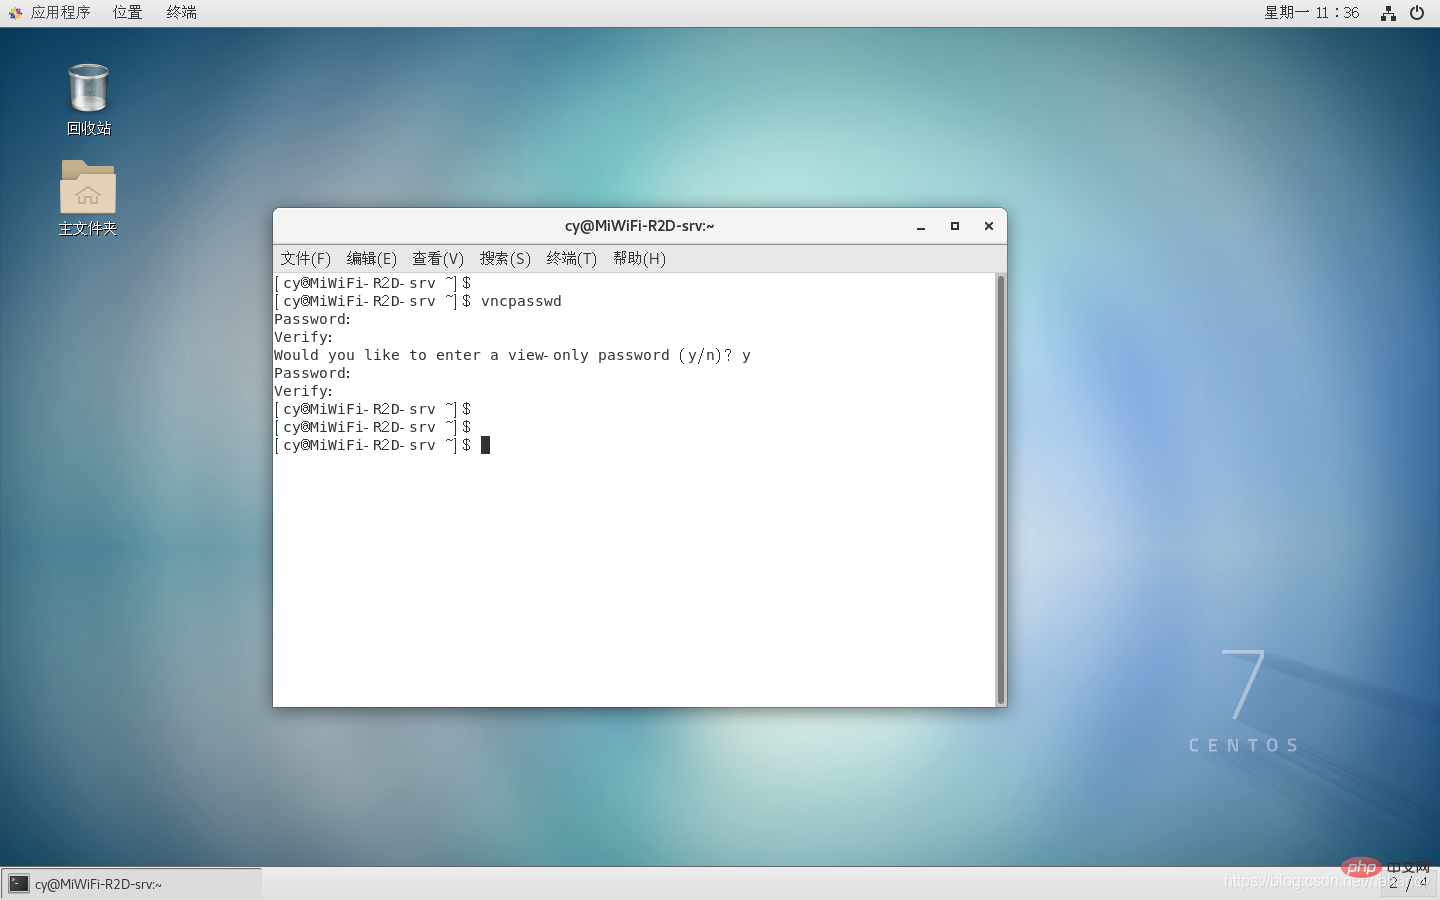
Step 4: Set the vnc password, execute su cy, switch to the cy user just set in the configuration file, execute (this step is performed under the cy user), enter the password twice , after the input is completed, you will be prompted whether to set the view-only password ("View-only password" password, only allows viewing, no control permissions.) This can be set or not:
vncpasswd
Step 5: Start the service:
systemctl start vncserver@\:1.service
systemctl daemon-reload
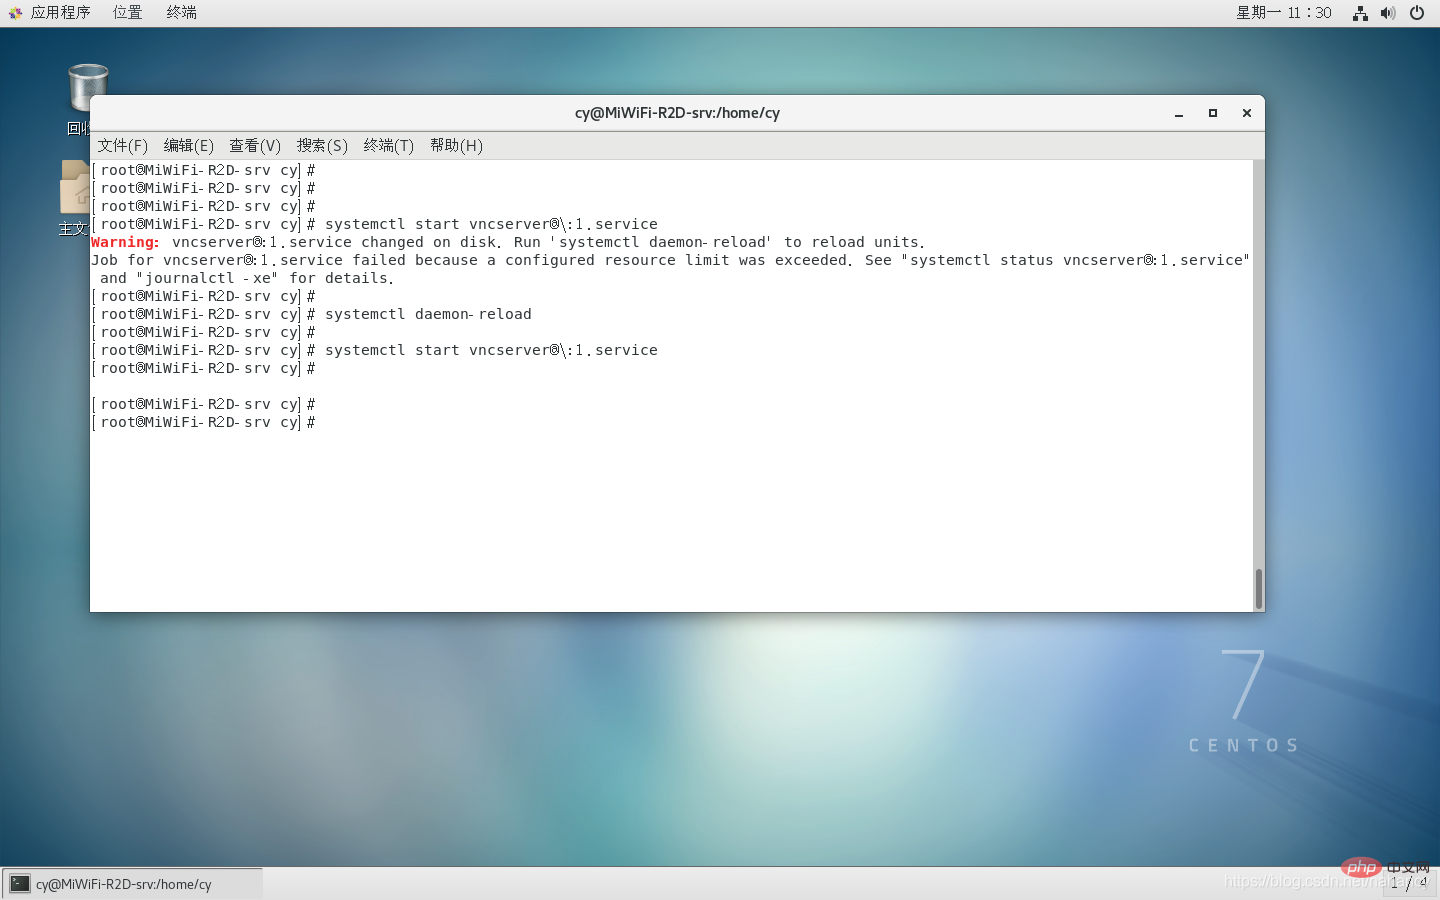
systemctl enable vncserver@\:1.service
Step 6: Check whether the port is listening:
netstat -lnpt|grep Xvnc
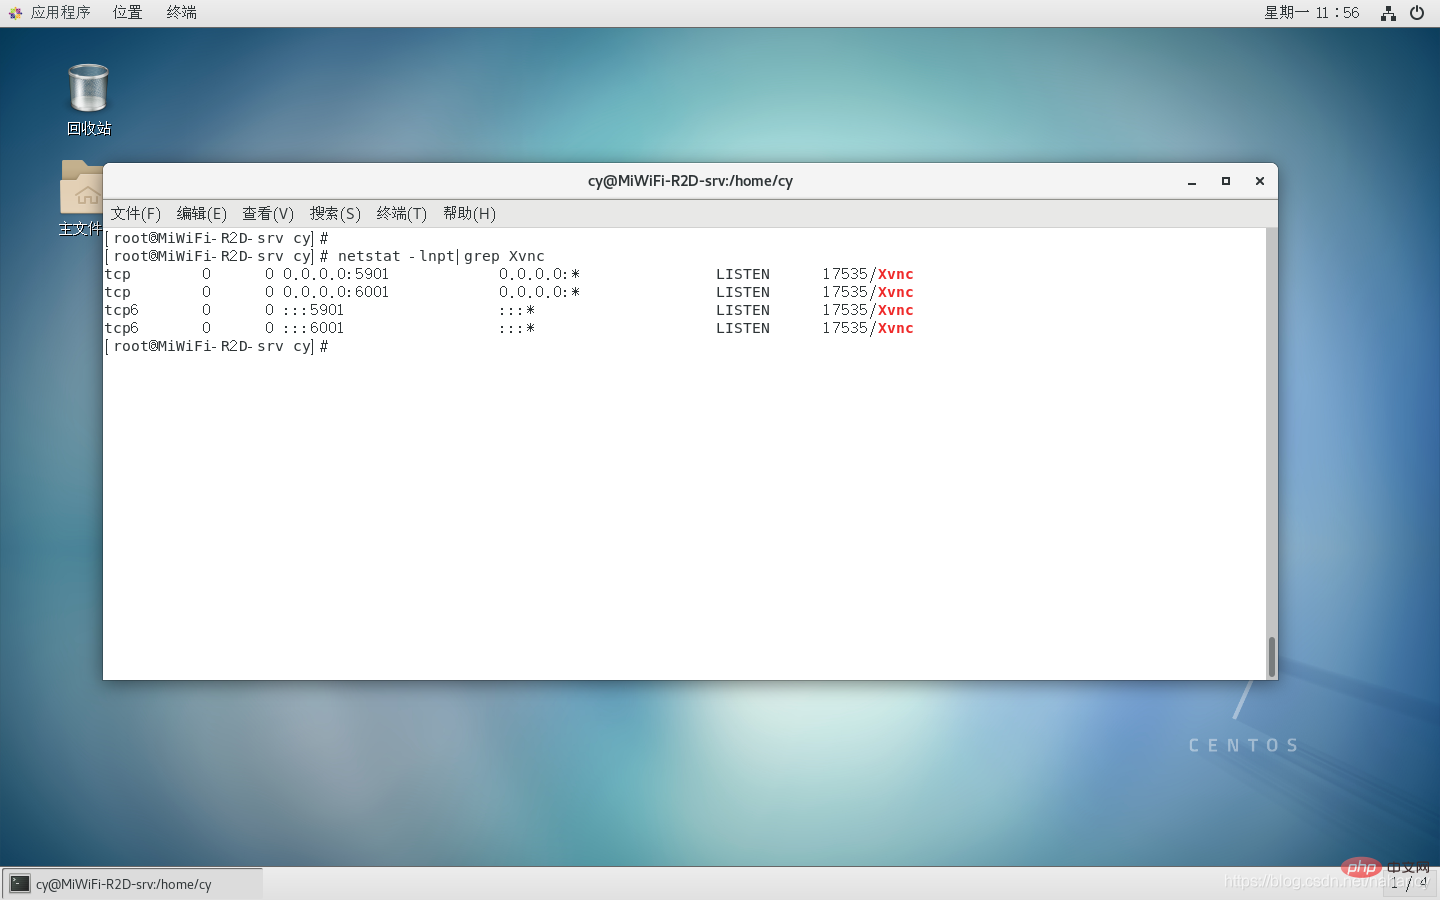 Here we can see that port 5901 has been monitored
 Step 7: Open the 5901 port of the firewall:
firewall-cmd --zone=public --add-port=5901/tcp --permanent

systemctl stop firewalld.service
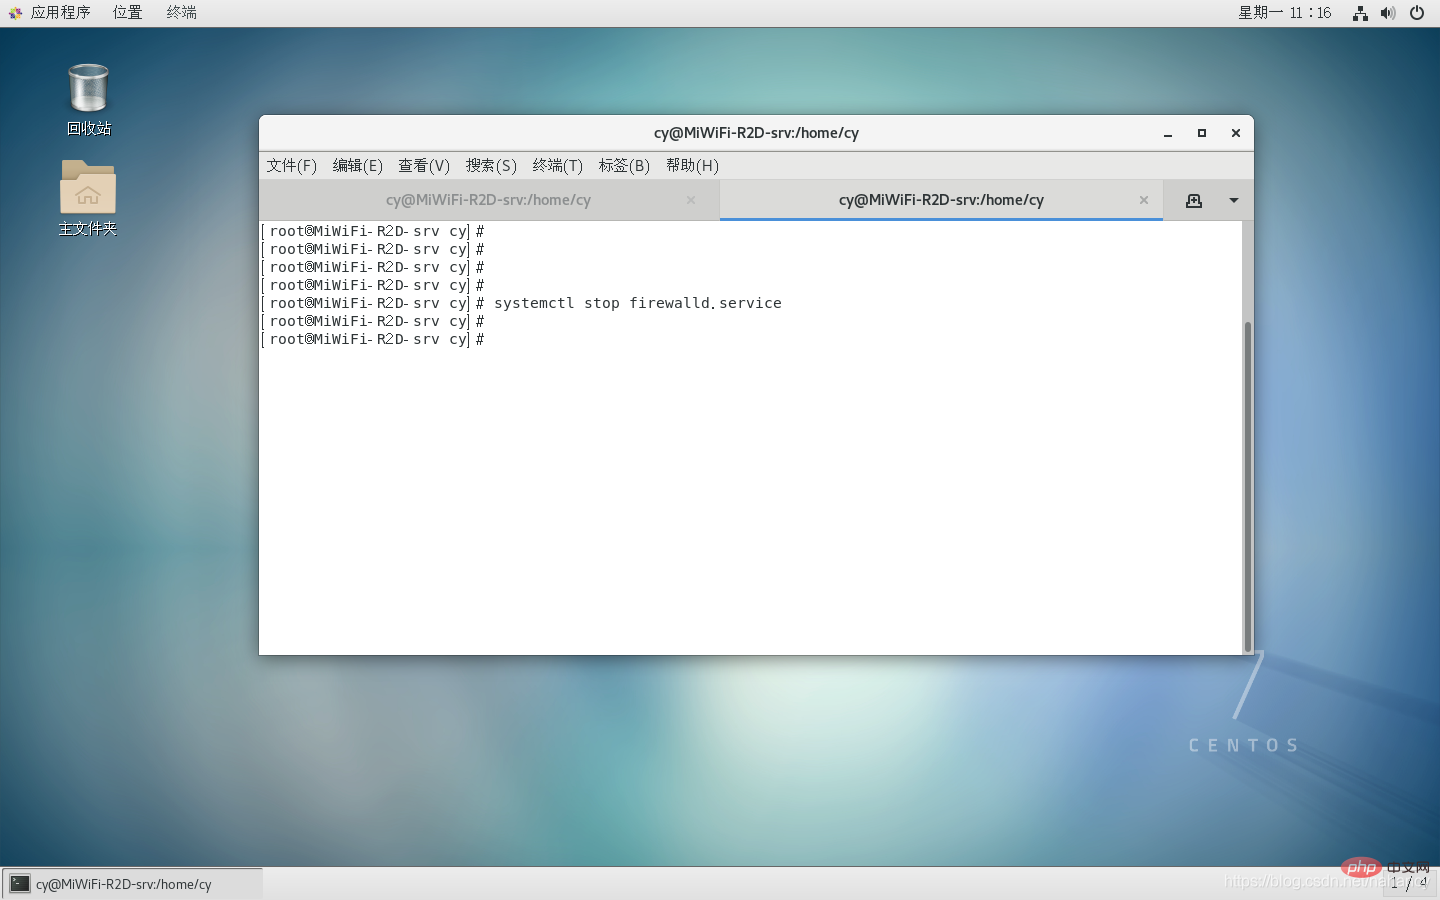
systemctl disable firewalld.service
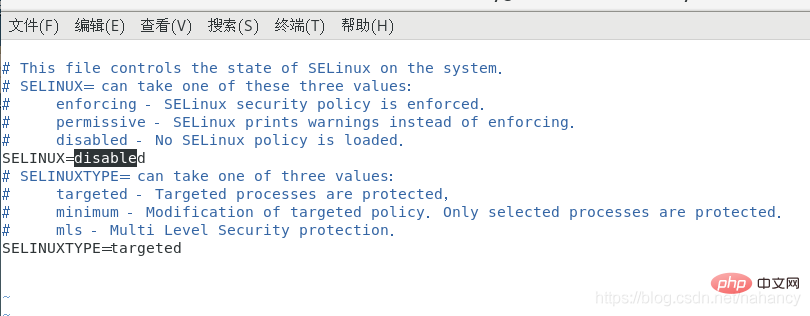
Step 8: Turn off SELinux and edit the /etc/selinux/config file:
vim /etc/selinux/config

Step 9: Enter the server IP:desktop number (such as 192.168.31.100:1) in the vnc client (vnc viewer), and press Enter after input:

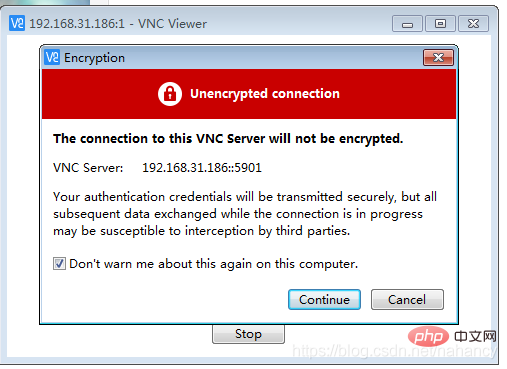
Step 10: After entering the IP, a confirmation will pop up, click contiue:
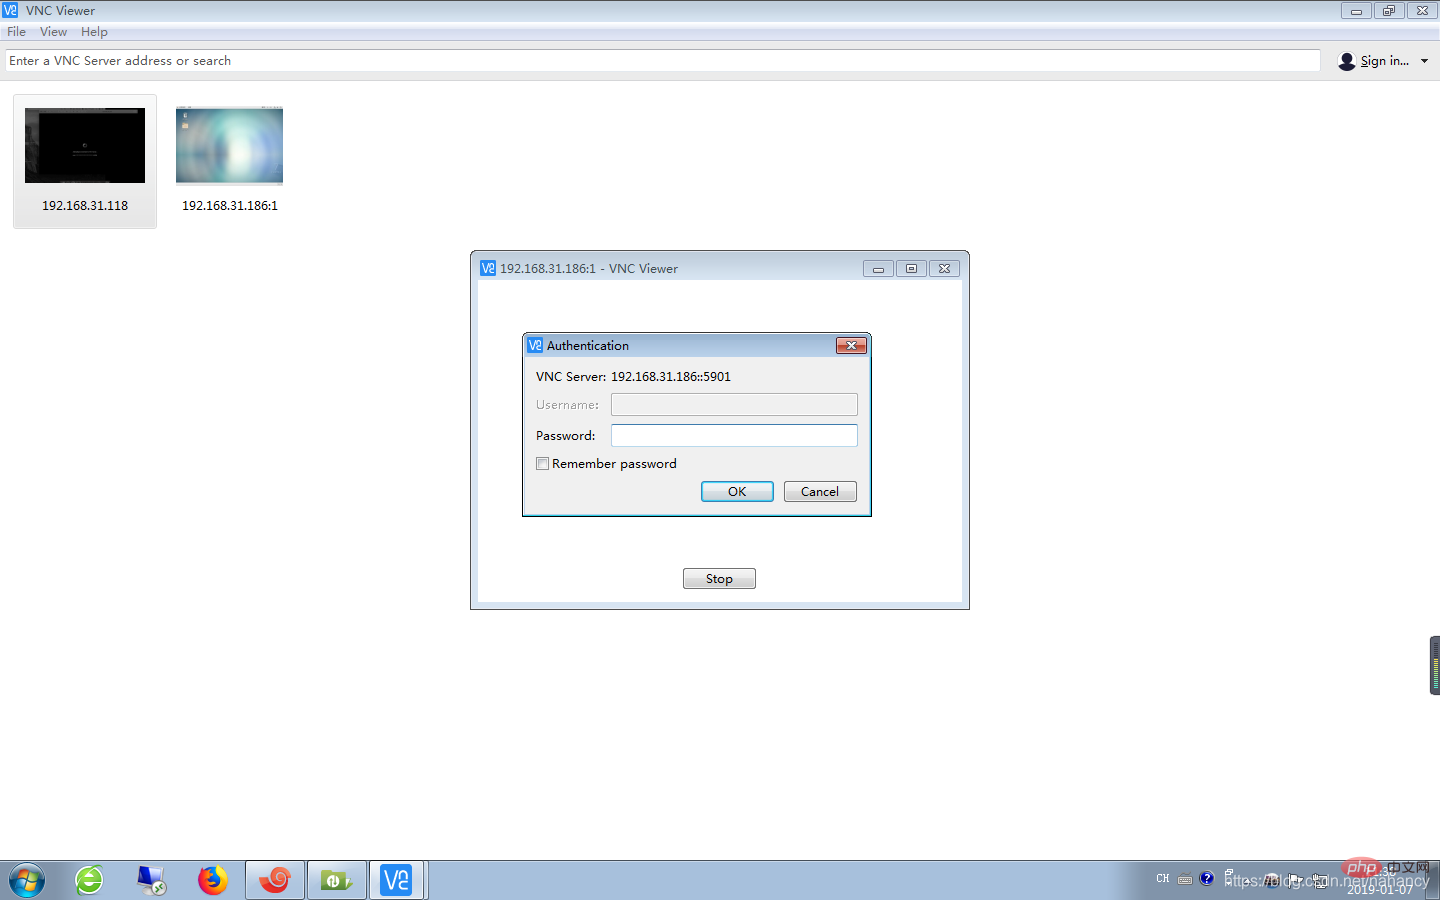
Step 11: Enter the vnc password:
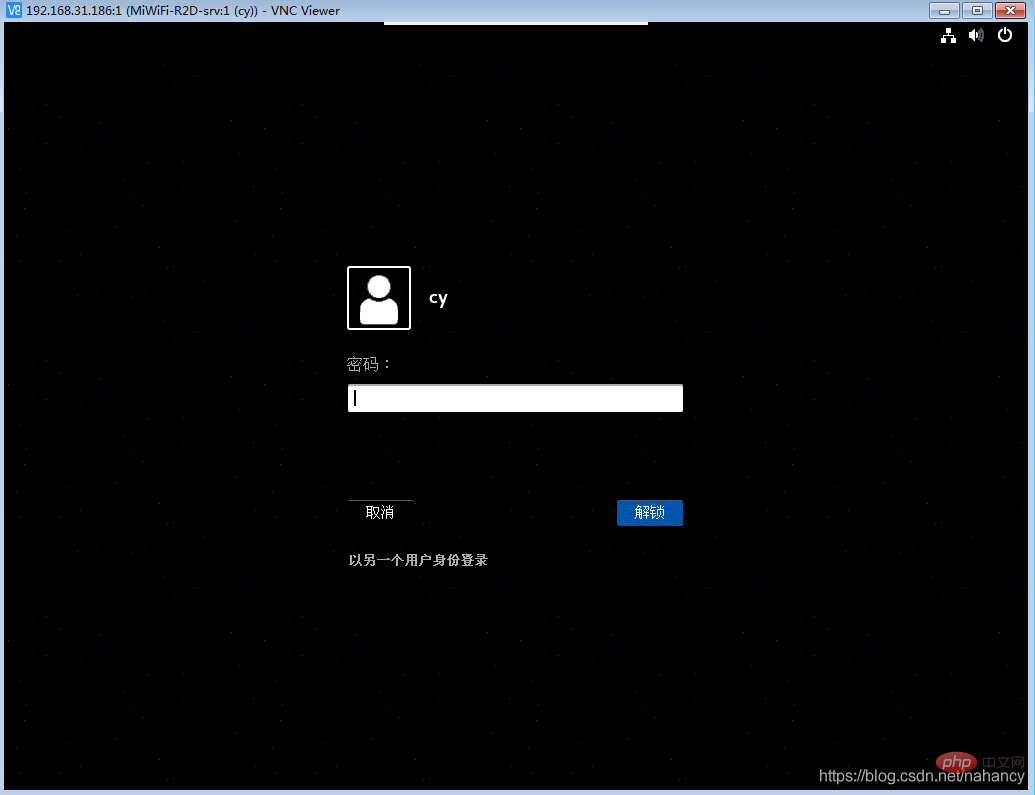
# #Step 12: Log in successfully, enter the password of the remote machine (after successful login, you need to enter the password of the user of the remote machine, if you do not have a password, you can enter the system directly):
Step 13: Successfully enter the remote desktop:

The above is the detailed content of How to install vnc on centos. For more information, please follow other related articles on the PHP Chinese website!

Hot AI Tools

Undresser.AI Undress
AI-powered app for creating realistic nude photos

AI Clothes Remover
Online AI tool for removing clothes from photos.

Undress AI Tool
Undress images for free

Clothoff.io
AI clothes remover

Video Face Swap
Swap faces in any video effortlessly with our completely free AI face swap tool!

Hot Article

Hot Tools

Notepad++7.3.1
Easy-to-use and free code editor

SublimeText3 Chinese version
Chinese version, very easy to use

Zend Studio 13.0.1
Powerful PHP integrated development environment

Dreamweaver CS6
Visual web development tools

SublimeText3 Mac version
God-level code editing software (SublimeText3)

Hot Topics
 1386
1386
 52
52
 How to optimize CentOS HDFS configuration
Apr 14, 2025 pm 07:15 PM
Improve HDFS performance on CentOS: A comprehensive optimization guide to optimize HDFS (Hadoop distributed file system) on CentOS requires comprehensive consideration of hardware, system configuration and network settings. This article provides a series of optimization strategies to help you improve HDFS performance. 1. Hardware upgrade and selection resource expansion: Increase the CPU, memory and storage capacity of the server as much as possible. High-performance hardware: adopts high-performance network cards and switches to improve network throughput. 2. System configuration fine-tuning kernel parameter adjustment: Modify /etc/sysctl.conf file to optimize kernel parameters such as TCP connection number, file handle number and memory management. For example, adjust TCP connection status and buffer size
 Centos stops maintenance 2024
Apr 14, 2025 pm 08:39 PM
CentOS will be shut down in 2024 because its upstream distribution, RHEL 8, has been shut down. This shutdown will affect the CentOS 8 system, preventing it from continuing to receive updates. Users should plan for migration, and recommended options include CentOS Stream, AlmaLinux, and Rocky Linux to keep the system safe and stable.
 How to check CentOS HDFS configuration
Apr 14, 2025 pm 07:21 PM
Complete Guide to Checking HDFS Configuration in CentOS Systems This article will guide you how to effectively check the configuration and running status of HDFS on CentOS systems. The following steps will help you fully understand the setup and operation of HDFS. Verify Hadoop environment variable: First, make sure the Hadoop environment variable is set correctly. In the terminal, execute the following command to verify that Hadoop is installed and configured correctly: hadoopversion Check HDFS configuration file: The core configuration file of HDFS is located in the /etc/hadoop/conf/ directory, where core-site.xml and hdfs-site.xml are crucial. use
 Centos shutdown command line
Apr 14, 2025 pm 09:12 PM
The CentOS shutdown command is shutdown, and the syntax is shutdown [Options] Time [Information]. Options include: -h Stop the system immediately; -P Turn off the power after shutdown; -r restart; -t Waiting time. Times can be specified as immediate (now), minutes ( minutes), or a specific time (hh:mm). Added information can be displayed in system messages.
 What are the backup methods for GitLab on CentOS
Apr 14, 2025 pm 05:33 PM
Backup and Recovery Policy of GitLab under CentOS System In order to ensure data security and recoverability, GitLab on CentOS provides a variety of backup methods. This article will introduce several common backup methods, configuration parameters and recovery processes in detail to help you establish a complete GitLab backup and recovery strategy. 1. Manual backup Use the gitlab-rakegitlab:backup:create command to execute manual backup. This command backs up key information such as GitLab repository, database, users, user groups, keys, and permissions. The default backup file is stored in the /var/opt/gitlab/backups directory. You can modify /etc/gitlab
 Tips for using HDFS file system on CentOS
Apr 14, 2025 pm 07:30 PM
The Installation, Configuration and Optimization Guide for HDFS File System under CentOS System This article will guide you how to install, configure and optimize Hadoop Distributed File System (HDFS) on CentOS System. HDFS installation and configuration Java environment installation: First, make sure that the appropriate Java environment is installed. Edit /etc/profile file, add the following, and replace /usr/lib/java-1.8.0/jdk1.8.0_144 with your actual Java installation path: exportJAVA_HOME=/usr/lib/java-1.8.0/jdk1.8.0_144exportPATH=$J
 What files do you need to modify in HDFS configuration CentOS?
Apr 14, 2025 pm 07:27 PM
When configuring Hadoop Distributed File System (HDFS) on CentOS, the following key configuration files need to be modified: core-site.xml: fs.defaultFS: Specifies the default file system address of HDFS, such as hdfs://localhost:9000. hadoop.tmp.dir: Specifies the storage directory for Hadoop temporary files. hadoop.proxyuser.root.hosts and hadoop.proxyuser.ro
 Centos install mysql
Apr 14, 2025 pm 08:09 PM
Installing MySQL on CentOS involves the following steps: Adding the appropriate MySQL yum source. Execute the yum install mysql-server command to install the MySQL server. Use the mysql_secure_installation command to make security settings, such as setting the root user password. Customize the MySQL configuration file as needed. Tune MySQL parameters and optimize databases for performance.


