
How to create a C language program in visual studio: First open the VS main program and choose to create a new project; then select C in the menu bar; then enter the VS main interface and find the source in the solution manager on the right File, right-click to add, and select New Item; finally select Add C file.

The operating environment of this article: Windows7 system, visual studio2019 version, DELL G3 computer
Open the VS2019 main program and choose to create a new project

Select C, Windows, All Project Types in the filter menu bar, select the empty project, click Next

Configure New Project, choose any project name, and choose a location you know clearly for the project location. It is not recommended to choose the C drive. Choose to put the solution and the project in the same directory, click Create
Recommendation: "c Video tutorial》

Enter the VS main interface, find the source file in the solution manager on the right, right-click to add, and select New Item
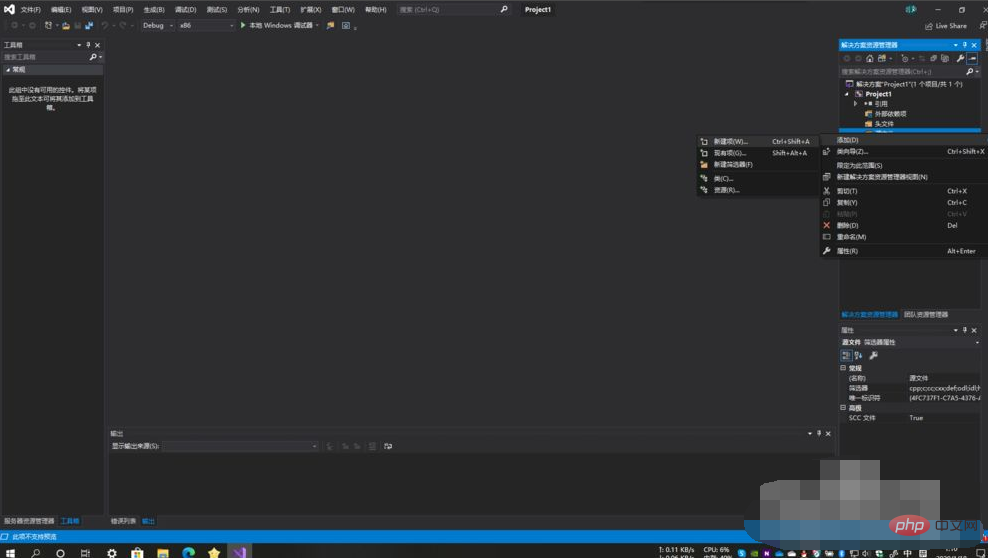
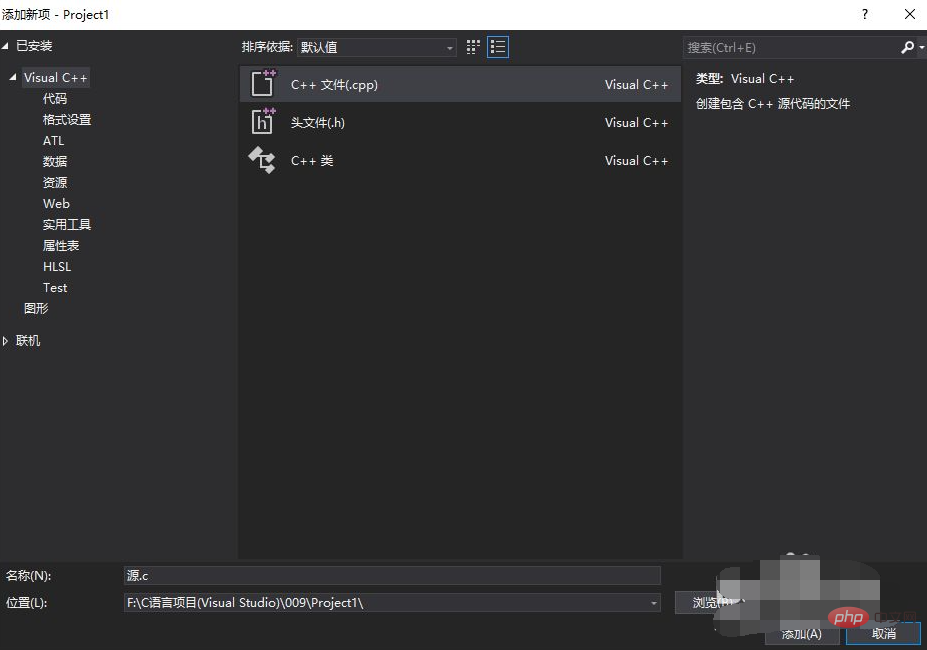
Select the C file (.cpp), change the extension to .c in the name bar below (the original extension is .cpp), and click Add
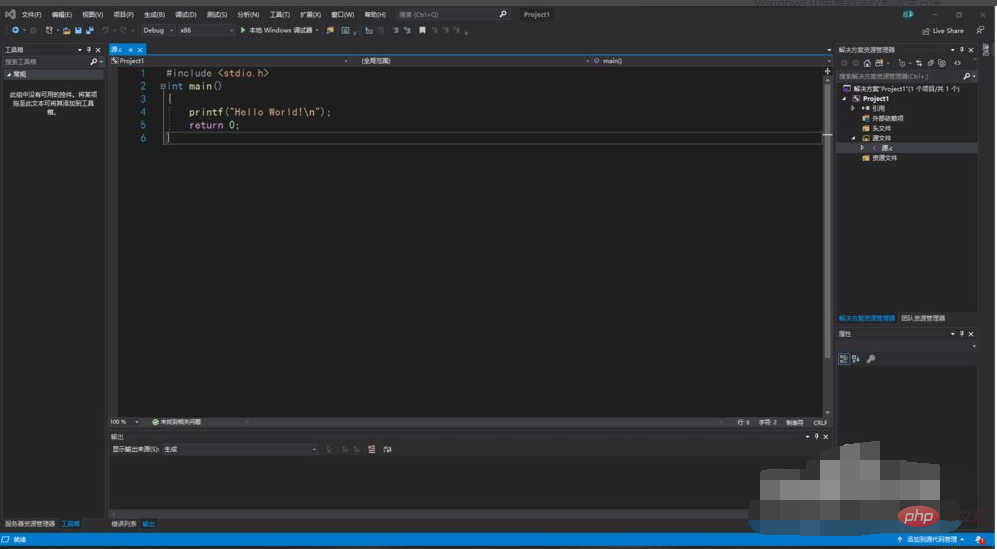
Now you can write C language in the interface. After writing the program, press CTRL F5 to execute the program
Notes
Establish A dedicated folder to save all projects (do not create it on the C drive)
Remember to save the code after writing it! ! !
The above is the detailed content of How to create C language in visual studio. For more information, please follow other related articles on the PHP Chinese website!