

Detailed explanation of how to use springBoot to integrate redis?

This article will show you how to use springBoot to integrate redis. It has certain reference value. Friends in need can refer to it. I hope it will be helpful to everyone.

REmote DIctionary Server (Redis) is a key-value storage system written by Salvatore Sanfilippo.
Redis is an open source log-type Key-Value database written in ANSI C language, abides by the BSD protocol, supports the network, can be memory-based and persistent, and provides APIs in multiple languages.
It is often called a data structure server because the value can be a string, hash, map, list, sets and sorted sets ) and other types. [Related recommendations: Redis video tutorial]
Advantages of reids
The following are some advantages of Redis.
Exceptionally fast - Redis is very fast and can perform approximately 110,000 set (SET) operations per second and approximately 81,000 read/get (GET) operations per second.
Support rich data types - Redis supports most data types commonly used by developers, such as lists, sets, sorted sets, hashes, etc. This makes Redis easy to use to solve various problems, because we know which problems can be better solved using which data types.
Operations are atomic - all Redis operations are atomic, which ensures that the Redis server can receive updated values if two clients access it concurrently.
Multi-utility - Redis is a multi-utility and can be used for multiple use cases such as: caching, message queues (Redis supports publish/subscribe natively), any short-term data in an application, e.g. in a web application Sessions, page hit counts, etc.
Redis installation
Installation under Window
Download address: https://github.com/MSOpenTech/redis/ releases.
Redis supports 32-bit and 64-bit. This needs to be selected according to the actual situation of your system platform. Here we download the Redis-x64-xxx.zip compressed package to the C drive. After decompression, rename the folder to redis.
Open a cmd window and use the cd command to switch directories to C:\redis
Run redis-server.exe redis.windows.conf
If you want to be more convenient, you can put The path of redis is added to the system environment variable, so that you don't have to enter the path again. The following redis.windows.conf can be omitted. If omitted, the default one will be enabled. After input, the following interface will be displayed: 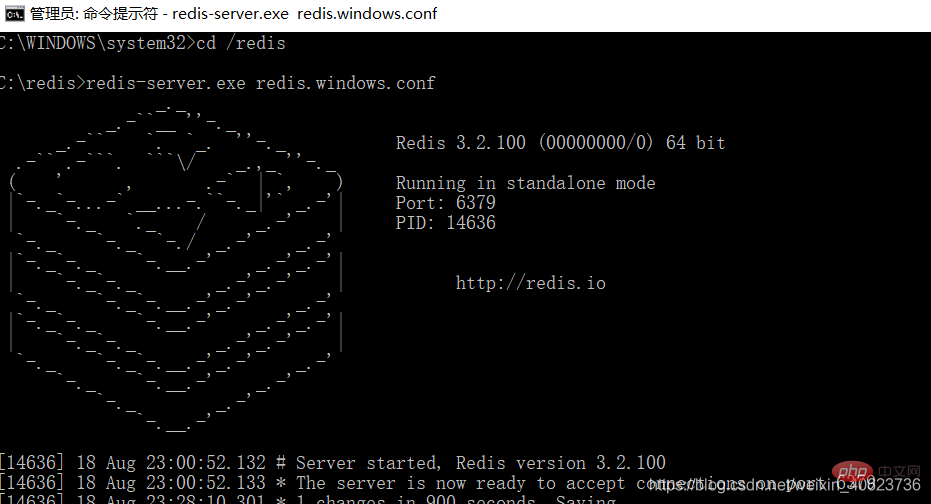
Integrated redis
We still continue to use the project in the previous chapter: Springboot integrated springcloud-config implementation dataSource hot deployment
1. Add dependencies
<!--集成redis-->
<dependency>
    <groupid>org.springframework.boot</groupid>
    <artifactid>spring-boot-starter-redis</artifactid>
    <version>1.4.1.RELEASE</version>
</dependency>
<dependency>
    <groupid>com.alibaba</groupid>
    <artifactid>fastjson</artifactid>
    <version>1.2.3</version>
</dependency>
<dependency>
    <groupid>com.fasterxml.jackson.core</groupid>
    <artifactid>jackson-databind</artifactid>
</dependency>
2. Add redis configuration in the configuration center
spring.redis.host=127.0.0.1
#Redis服务器连接端口
spring.redis.port=6379
#Redis服务器连接密码(默认为空)
spring.redis.password=
#连接池最大连接数(使用负值表示没有限制)
spring.redis.pool.max-active=8
#连接池最大阻塞等待时间(使用负值表示没有限制)
spring.redis.pool.max-wait=-1
#连接池中的最大空闲连接
spring.redis.pool.max-idle=8
#连接池中的最小空闲连接
spring.redis.pool.min-idle=0
#连接超时时间(毫秒)
spring.redis.timeout=30000
3. Configuration class RedisConfig
import java.lang.reflect.Method;
import org.springframework.beans.factory.annotation.Value;
import org.springframework.cache.CacheManager;
import org.springframework.cache.annotation.CachingConfigurerSupport;
import org.springframework.cache.annotation.EnableCaching;
import org.springframework.cache.interceptor.KeyGenerator;
import org.springframework.cloud.context.config.annotation.RefreshScope;
import org.springframework.context.annotation.Bean;
import org.springframework.context.annotation.Configuration;
import org.springframework.data.redis.cache.RedisCacheManager;
import org.springframework.data.redis.connection.RedisConnectionFactory;
import org.springframework.data.redis.connection.jedis.JedisConnectionFactory;
import org.springframework.data.redis.core.RedisTemplate;
import org.springframework.data.redis.core.StringRedisTemplate;
import org.springframework.data.redis.serializer.Jackson2JsonRedisSerializer;
import com.fasterxml.jackson.annotation.PropertyAccessor;
import com.fasterxml.jackson.annotation.JsonAutoDetect;
import com.fasterxml.jackson.databind.ObjectMapper;
@Configuration
@EnableCaching
@RefreshScope
public class RedisConfig extends CachingConfigurerSupport{
    @Value("${spring.redis.host}")
    private String host;
    @Value("${spring.redis.port}")
    private int port;
    @Value("${spring.redis.timeout}")
    private int timeout;
    @Value("${spring.redis.password}")
    private String password;
    @Value("${spring.redis.pool.max-active}")
    private int maxActive;
    @Value("${spring.redis.pool.max-wait}")
    private int maxWait;
    @Value("${spring.redis.pool.max-idle}")
    private int maxIdle;
    @Value("${spring.redis.pool.min-idle}")
    private int minIdle;

    @RefreshScope
    @Bean
    public KeyGenerator wiselyKeyGenerator(){
        return new KeyGenerator() {
            @Override
            public Object generate(Object target, Method method, Object... params) {
                StringBuilder sb = new StringBuilder();
                sb.append(target.getClass().getName());
                sb.append(method.getName());
                for (Object obj : params) {
                    sb.append(obj.toString());
                }
                return sb.toString();
            }
        };
    }

    @RefreshScope
    @Bean
    public JedisConnectionFactory redisConnectionFactory() {
        JedisConnectionFactory factory = new JedisConnectionFactory();
        factory.setHostName(host);
        factory.setPort(port);
        factory.setTimeout(timeout); //设置连接超时时间
        factory.setPassword(password);
        factory.getPoolConfig().setMaxIdle(maxIdle);
        factory.getPoolConfig().setMinIdle(minIdle);
        factory.getPoolConfig().setMaxTotal(maxActive);
        factory.getPoolConfig().setMaxWaitMillis(maxWait);
        return factory;
    }

    @RefreshScope
    @Bean
    public CacheManager cacheManager(RedisTemplate redisTemplate) {
        RedisCacheManager cacheManager = new RedisCacheManager(redisTemplate);
        // Number of seconds before expiration. Defaults to unlimited (0)
        cacheManager.setDefaultExpiration(10); //设置key-value超时时间
        return cacheManager;
    }

    @RefreshScope
    @Bean
    public RedisTemplate<string> redisTemplate(RedisConnectionFactory factory) {
        StringRedisTemplate template = new StringRedisTemplate(factory);
        setSerializer(template); //设置序列化工具,这样ReportBean不需要实现Serializable接口
        template.afterPropertiesSet();
        return template;
    }

    @RefreshScope
    private void setSerializer(StringRedisTemplate template) {
        Jackson2JsonRedisSerializer jackson2JsonRedisSerializer = new Jackson2JsonRedisSerializer(Object.class);
        ObjectMapper om = new ObjectMapper();
        om.setVisibility(PropertyAccessor.ALL, JsonAutoDetect.Visibility.ANY);
        om.enableDefaultTyping(ObjectMapper.DefaultTyping.NON_FINAL);
        jackson2JsonRedisSerializer.setObjectMapper(om);
        template.setValueSerializer(jackson2JsonRedisSerializer);
    }
}</string>4. RedisUtils class
import java.io.Serializable;
import java.util.List;
import java.util.Set;
import java.util.concurrent.TimeUnit;
import org.springframework.beans.factory.annotation.Autowired;
import org.springframework.data.redis.core.HashOperations;
import org.springframework.data.redis.core.ListOperations;
import org.springframework.data.redis.core.RedisTemplate;
import org.springframework.data.redis.core.SetOperations;
import org.springframework.data.redis.core.ValueOperations;
import org.springframework.data.redis.core.ZSetOperations;
import org.springframework.stereotype.Service;
@Service
public class RedisUtils {
    @Autowired
    private RedisTemplate redisTemplate;
    /**
     * 写入缓存
     * @param key
     * @param value
     * @return
     */
    public boolean set(final String key, Object value) {
        boolean result = false;
        try {
            ValueOperations<serializable> operations = redisTemplate.opsForValue();
            operations.set(key, value);
            result = true;
        } catch (Exception e) {
            e.printStackTrace();
        }
        return result;
    }
    /**
     * 写入缓存设置时效时间
     * @param key
     * @param value
     * @return
     */
    public boolean set(final String key, Object value, Long expireTime ,TimeUnit timeUnit) {
        boolean result = false;
        try {
            ValueOperations<serializable> operations = redisTemplate.opsForValue();
            operations.set(key, value);
            redisTemplate.expire(key, expireTime, timeUnit);
            result = true;
        } catch (Exception e) {
            e.printStackTrace();
        }
        return result;
    }
    /**
     * 批量删除对应的value
     * @param keys
     */
    public void remove(final String... keys) {
        for (String key : keys) {
            remove(key);
        }
    }
    /**
     * 批量删除key
     * @param pattern
     */
    public void removePattern(final String pattern) {
        Set<serializable> keys = redisTemplate.keys(pattern);
        if (keys.size() > 0){
            redisTemplate.delete(keys);
        }
    }
    /**
     * 删除对应的value
     * @param key
     */
    public void remove(final String key) {
        if (exists(key)) {
            redisTemplate.delete(key);
        }
    }
    /**
     * 判断缓存中是否有对应的value
     * @param key
     * @return
     */
    public boolean exists(final String key) {
        return redisTemplate.hasKey(key);
    }
    /**
     * 读取缓存
     * @param key
     * @return
     */
    public Object get(final String key) {
        Object result = null;
        ValueOperations<serializable> operations = redisTemplate.opsForValue();
        result = operations.get(key);
        return result;
    }
    /**
     * 哈希 添加
     * @param key
     * @param hashKey
     * @param value
     */
    public void hmSet(String key, Object hashKey, Object value){
        HashOperations<string> hash = redisTemplate.opsForHash();
        hash.put(key,hashKey,value);
    }
    /**
     * 哈希获取数据
     * @param key
     * @param hashKey
     * @return
     */
    public Object hmGet(String key, Object hashKey){
        HashOperations<string>  hash = redisTemplate.opsForHash();
        return hash.get(key,hashKey);
    }
    /**
     * 列表添加
     * @param k
     * @param v
     */
    public void lPush(String k,Object v){
        ListOperations<string> list = redisTemplate.opsForList();
        list.rightPush(k,v);
    }
    /**
     * 列表获取
     * @param k
     * @param l
     * @param l1
     * @return
     */
    public List<object> lRange(String k, long l, long l1){
        ListOperations<string> list = redisTemplate.opsForList();
        return list.range(k,l,l1);
    }
    /**
     * 集合添加
     * @param key
     * @param value
     */
    public void add(String key,Object value){
        SetOperations<string> set = redisTemplate.opsForSet();
        set.add(key,value);
    }
    /**
     * 集合获取
     * @param key
     * @return
     */
    public Set<object> setMembers(String key){
        SetOperations<string> set = redisTemplate.opsForSet();
        return set.members(key);
    }
    /**
     * 有序集合添加
     * @param key
     * @param value
     * @param scoure
     */
    public void zAdd(String key,Object value,double scoure){
        ZSetOperations<string> zset = redisTemplate.opsForZSet();
        zset.add(key,value,scoure);
    }
    /**
     * 有序集合获取
     * @param key
     * @param scoure
     * @param scoure1
     * @return
     */
    public Set<object> rangeByScore(String key,double scoure,double scoure1){
        ZSetOperations<string> zset = redisTemplate.opsForZSet();
        return zset.rangeByScore(key, scoure, scoure1);
}</string></object></string></string></object></string></string></object></string></string></string></serializable></serializable></serializable></serializable>5. Test and modify controller
import java.util.concurrent.TimeUnit;
import org.slf4j.Logger;
import org.slf4j.LoggerFactory;
import org.springframework.beans.factory.annotation.Autowired;
import org.springframework.web.bind.annotation.PathVariable;
import org.springframework.web.bind.annotation.RequestMapping;
import org.springframework.web.bind.annotation.RestController;
import com.chenqi.springboot.redis.RedisUtils;
import com.chenqi.springboot.service.TestService;
@RestController
public class SpringBootController {

    public static final Logger log = LoggerFactory.getLogger(SpringBootController.class);

    @Autowired
    TestService testService;

    @Autowired
    private RedisUtils redisUtils;
    @RequestMapping(value = "/hello/{id}")
    public String hello(@PathVariable(value = "id") String id){
        //查询缓存中是否存在
        boolean hasKey = redisUtils.exists(id);
        String str = "";
        if(hasKey){
            //获取缓存
            Object object =  redisUtils.get(id);
            log.info("从缓存获取的数据"+ object);
            str = object.toString();
        }else{
            //从数据库中获取信息
            log.info("从数据库中获取数据");
            str = testService.test();
            //数据插入缓存(set中的参数含义:key值,user对象,缓存存在时间10(long类型),时间单位)
            redisUtils.set(id,str,10L,TimeUnit.MINUTES);
            log.info("数据插入缓存" + str);
        }
        return str;
    }
}Start the project, visit for the first time: http://localhost:8002/hello/111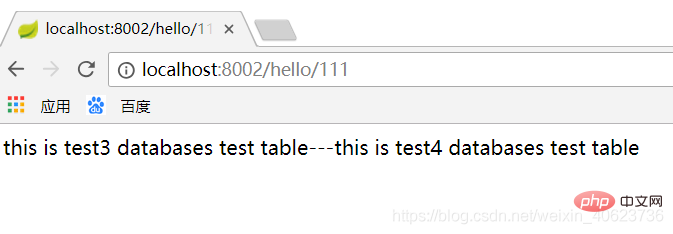

Through the console output, we can see that it is obtained from the database The data is stored in the redis cache.
Let’s refresh the browser again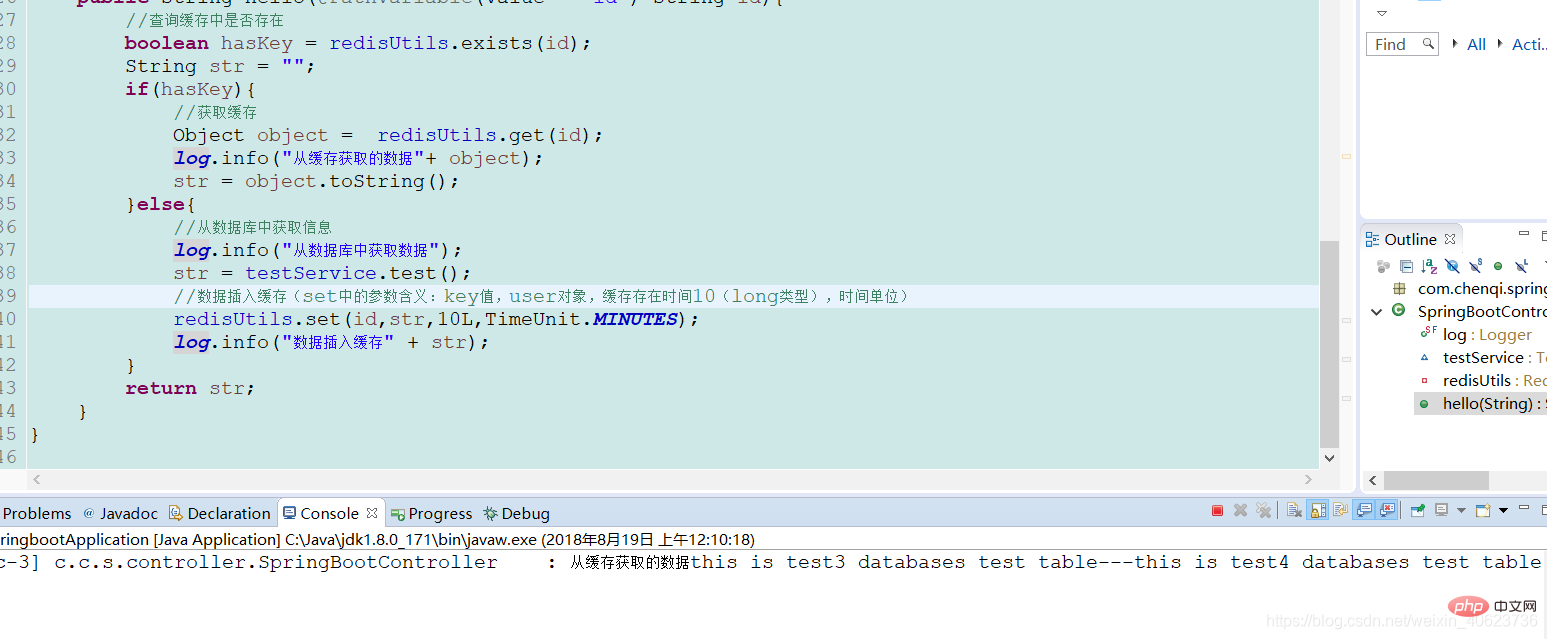
You can see that the second time it is read from the cache, let’s try to refresh the browser continuously
As you can see, everything is obtained from the cache afterwards.
Now our redis is configured.
SpringBoot integrated Redis-demo download
If you are in urgent need of demo, please download it yourself. If you are not in a hurry, you can leave a message in your email address. It will usually be sent within 48 hours.
For more programming related knowledge, please visit: Programming Video! !
The above is the detailed content of Detailed explanation of how to use springBoot to integrate redis?. For more information, please follow other related articles on the PHP Chinese website!

Hot AI Tools

Undresser.AI Undress
AI-powered app for creating realistic nude photos

AI Clothes Remover
Online AI tool for removing clothes from photos.

Undress AI Tool
Undress images for free

Clothoff.io
AI clothes remover

AI Hentai Generator
Generate AI Hentai for free.

Hot Article
Hot Tools

Notepad++7.3.1
Easy-to-use and free code editor

SublimeText3 Chinese version
Chinese version, very easy to use

Zend Studio 13.0.1
Powerful PHP integrated development environment

Dreamweaver CS6
Visual web development tools

SublimeText3 Mac version
God-level code editing software (SublimeText3)
Hot Topics
 1376
1376
 52
52

 How to build the redis cluster mode
Apr 10, 2025 pm 10:15 PM
How to build the redis cluster mode
Apr 10, 2025 pm 10:15 PM
Redis cluster mode deploys Redis instances to multiple servers through sharding, improving scalability and availability. The construction steps are as follows: Create odd Redis instances with different ports; Create 3 sentinel instances, monitor Redis instances and failover; configure sentinel configuration files, add monitoring Redis instance information and failover settings; configure Redis instance configuration files, enable cluster mode and specify the cluster information file path; create nodes.conf file, containing information of each Redis instance; start the cluster, execute the create command to create a cluster and specify the number of replicas; log in to the cluster to execute the CLUSTER INFO command to verify the cluster status; make
 How to implement the underlying redis
Apr 10, 2025 pm 07:21 PM
How to implement the underlying redis
Apr 10, 2025 pm 07:21 PM
Redis uses hash tables to store data and supports data structures such as strings, lists, hash tables, collections and ordered collections. Redis persists data through snapshots (RDB) and append write-only (AOF) mechanisms. Redis uses master-slave replication to improve data availability. Redis uses a single-threaded event loop to handle connections and commands to ensure data atomicity and consistency. Redis sets the expiration time for the key and uses the lazy delete mechanism to delete the expiration key.
 How to view the version number of redis
Apr 10, 2025 pm 05:57 PM
How to view the version number of redis
Apr 10, 2025 pm 05:57 PM
To view the Redis version number, you can use the following three methods: (1) enter the INFO command, (2) start the server with the --version option, and (3) view the configuration file.
 How to view all keys in redis
Apr 10, 2025 pm 07:15 PM
How to view all keys in redis
Apr 10, 2025 pm 07:15 PM
To view all keys in Redis, there are three ways: use the KEYS command to return all keys that match the specified pattern; use the SCAN command to iterate over the keys and return a set of keys; use the INFO command to get the total number of keys.
 What to do if redis-server can't be found
Apr 10, 2025 pm 06:54 PM
What to do if redis-server can't be found
Apr 10, 2025 pm 06:54 PM
Steps to solve the problem that redis-server cannot find: Check the installation to make sure Redis is installed correctly; set the environment variables REDIS_HOST and REDIS_PORT; start the Redis server redis-server; check whether the server is running redis-cli ping.
 How to use redis zset
Apr 10, 2025 pm 07:27 PM
How to use redis zset
Apr 10, 2025 pm 07:27 PM
Redis Ordered Sets (ZSets) are used to store ordered elements and sort by associated scores. The steps to use ZSet include: 1. Create a ZSet; 2. Add a member; 3. Get a member score; 4. Get a ranking; 5. Get a member in the ranking range; 6. Delete a member; 7. Get the number of elements; 8. Get the number of members in the score range.
 How is the key unique for redis query
Apr 10, 2025 pm 07:03 PM
How is the key unique for redis query
Apr 10, 2025 pm 07:03 PM
Redis uses five strategies to ensure the uniqueness of keys: 1. Namespace separation; 2. HASH data structure; 3. SET data structure; 4. Special characters of string keys; 5. Lua script verification. The choice of specific strategies depends on data organization, performance, and scalability requirements.
 How to use the redis counter
Apr 10, 2025 pm 07:00 PM
How to use the redis counter
Apr 10, 2025 pm 07:00 PM
Redis counters provide data structures for storing and operating counters. The specific steps include: Create a counter: Use the INCR command to add 1 to the existing key. Get the counter value: Use the GET command to get the current value. Increment counter: Use the INCRBY command, followed by the amount to be incremented. Decrement counter: Use the DECR or DECRBY command to decrement by 1 or specify the amount. Reset the counter: Use the SET command to set its value to 0. In addition, counters can be used to limit rates, session tracking, and create voting systems.
