

How to set the row height of wps table to automatically adapt to the text

How to set the row height of wps table to automatically adapt to the text: 1. Use wps to open the table document, and then select all tables; 2. Click the "Start" option in the top navigation bar; 3. In the "Start" option In the sub-tool, click the [Rows and Columns] option, and click "Most Suitable Row Height" in the drop-down menu that opens.

The operating environment of this tutorial: windows7 system, WPS Office11.1.0.10314 version, Dell G3 computer.
How to set the row height of wps table to automatically adapt to the text
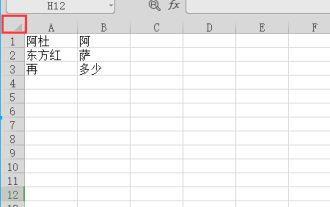
1. Use wps to open the table document and select all tables

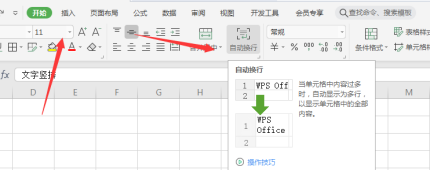
2. Click the "Start" option in the top navigation bar

3. In the sub-tool of the Start option (below the beginning above the table), click [Rows and columns] option, click "Most suitable row height" in the drop-down menu that opens.


After clicking, the wps table content interface will automatically adjust according to the table content.
For more related knowledge, please visit the FAQ column!
The above is the detailed content of How to set the row height of wps table to automatically adapt to the text. For more information, please follow other related articles on the PHP Chinese website!

Hot AI Tools

Undresser.AI Undress
AI-powered app for creating realistic nude photos

AI Clothes Remover
Online AI tool for removing clothes from photos.

Undress AI Tool
Undress images for free

Clothoff.io
AI clothes remover

Video Face Swap
Swap faces in any video effortlessly with our completely free AI face swap tool!

Hot Article
Hot Tools

Notepad++7.3.1
Easy-to-use and free code editor

SublimeText3 Chinese version
Chinese version, very easy to use

Zend Studio 13.0.1
Powerful PHP integrated development environment

Dreamweaver CS6
Visual web development tools

SublimeText3 Mac version
God-level code editing software (SublimeText3)
Hot Topics


 What should I do if a WPS form responds slowly? Why is the WPS form stuck and slow to respond?
Mar 14, 2024 pm 02:43 PM
What should I do if a WPS form responds slowly? Why is the WPS form stuck and slow to respond?
Mar 14, 2024 pm 02:43 PM
What should I do if a WPS form responds very slowly? Users can try to close other programs or update the software to perform the operation. Let this site carefully introduce to users why the WPS form is slow to respond. Why is the WPS table slow to respond? 1. Close other programs: Close other running programs, especially those that take up a lot of system resources. This can provide WPS Office with more computing resources and reduce lags and delays. 2. Update WPSOffice: Make sure you are using the latest version of WPSOffice. Downloading and installing the latest version from the official WPSOffice website can resolve some known performance issues. 3. Reduce file size
 How to make drop-down menu in WPS table
Mar 21, 2024 pm 01:31 PM
How to make drop-down menu in WPS table
Mar 21, 2024 pm 01:31 PM
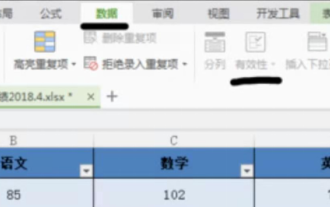
How to make the WPS table drop-down menu: After selecting the cell where you want to set the drop-down menu, click "Data", "Validity" in sequence, and then make the corresponding settings in the pop-up dialog box to pull down our menu. As a powerful office software, WPS has the ability to edit documents, statistical data tables, etc., which provides a lot of convenience for many people who need to deal with text, data, etc. In order to skillfully use WPS software to provide us with a lot of convenience, we need to be able to master various very basic operations of WPS software. In this article, the editor will share with you how to use WPS software. Perform drop-down menu operations in the WPS table that appears. After opening the WPS form, first select the
 How to merge cells in WPS table
Mar 21, 2024 am 09:00 AM
How to merge cells in WPS table
Mar 21, 2024 am 09:00 AM
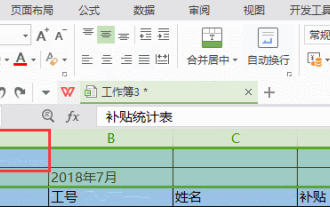
When we use WPS to make our own tables, the header of the table needs to be in a cell. At this time, the question arises, how does WPS merge cells? In this issue, I have brought you the specific operation steps, which are below. Please study them carefully! 1. First, open the WPS EXCEL file on your computer. You can see that the current first line of text is in cell A1 (as shown in the red circle in the figure). 2. Then, if you need to merge the words "Subsidy Statistics Table" into the entire row from A1 to D1, use the mouse to select cell A1 and then drag the mouse to select cell D1. You can see that all cells from A1 to D1 have been selected (as shown in the red circle in the figure). 3. Select A
 How to delete blank rows in WPS table
Mar 20, 2024 pm 01:40 PM
How to delete blank rows in WPS table
Mar 20, 2024 pm 01:40 PM
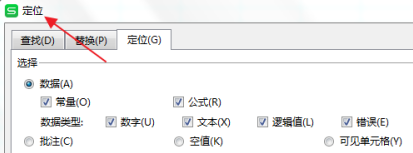
How to delete blank rows in WPS table: After marking the blank space of the cell data, right-click to delete the entire row. Nowadays, WPS software has become one of the office tools frequently used by many people in their daily office work. WPS software has many powerful functions. If you want to use WPS software proficiently for office work, you must master some common operating methods. Among them, how to delete blank rows in WPS tables is a skill that must be mastered. Here, I will share with you how to quickly delete blank rows in WPS tables. In the WPS table, you can first select the data range in which blank rows need to be deleted, and then press the "Ctrl" and "G" keys to open the positioning function window, so that you can quickly locate the data area for the required operation. Then,
 WPS table cannot find the data you are searching for, please check the search option location
Mar 19, 2024 pm 10:13 PM
WPS table cannot find the data you are searching for, please check the search option location
Mar 19, 2024 pm 10:13 PM
In the era dominated by intelligence, office software has also become popular, and Wps forms are adopted by the majority of office workers due to their flexibility. At work, we are required not only to learn simple form making and text entry, but also to master more operational skills in order to complete the tasks in actual work. Reports with data and using forms are more convenient, clear and accurate. The lesson we bring to you today is: The WPS table cannot find the data you are searching for. Why please check the search option location? 1. First select the Excel table and double-click to open it. Then in this interface, select all cells. 2. Then in this interface, click the "Edit" option in "File" in the top toolbar. 3. Secondly, in this interface, click "
 How to modify table row height in vue
Jan 31, 2023 pm 04:11 PM
How to modify table row height in vue
Jan 31, 2023 pm 04:11 PM
How to modify table row height in vue: 1. Open the corresponding vue file; 2. View the table style code; 3. Modify ":row-style="{height:'20px'}" :cell-style="{padding :'0px'}""The table row height can be modified by the attribute value.
 How to automatically wrap and force wrap WPS tables
Mar 20, 2024 pm 07:46 PM
How to automatically wrap and force wrap WPS tables
Mar 20, 2024 pm 07:46 PM
For some novice friends, automatic word wrapping and forced word wrapping in Excel are not clear yet. So today, the editor will tell you about automatic line wrapping and manual line wrapping in Excel! Excel automatic word wrapping function: First, select the cell range to which you want to apply word wrapping, and then click the "Start" - "Alignment" - "Automatically wrap" button. The length of text wrapping in a cell depends on the cell's column width. If you resize the column width, the text will automatically wrap around. Excel forced line wrap shortcut key If you need to wrap the line according to the position you want, you can double-click the cell, position the cursor behind the line break content, and then use the key combination "ALT+Enter". The difference between automatic line wrapping and forced line wrapping is explained here.
 How to make WPS table line chart, do you really know how to do it?
Mar 21, 2024 am 08:36 AM
How to make WPS table line chart, do you really know how to do it?
Mar 21, 2024 am 08:36 AM
Using wps tables to process a large amount of data can make our work more efficient. Of course, wps tables can not only process data, but can also formulate line charts and other data based on the data, so that it is more intuitive to view. But for some novices, they don’t know how to make a line chart in a WPS table. Today I will explain to you the detailed steps of making a line chart: 1. First, check [Use Scenarios of Line Charts]. 2. Production method: First select [Data Source-Insert Chart-Line Chart] and click [Chart Elements-Check Trend Line-A dotted line will appear in the chart]. 3. Then in [Insert a column for average in the data source] use [AVERAGE to find the average] drop-down filling method [copy and paste the value first - then fill in the drop-down]