

How to adjust the paper size without changing the layout

Method: 1. Open the word document, find and click the "Page Layout" option in the page navigation bar, and select "Paper Size"; 2. Select the "Other Page Size" option in the drop-down list, and in the pop-up In the window, you can set the paper size according to your needs.
The operating environment of this tutorial: Windows 7 system, Microsoft Office word 2010 version, Dell G3 computer.
1. Open the word software, and then find the page layout option in the menu. Click the page layout option and find the paper size in it.


2. Click Paper Size and find many preset options in its drop-down menu. We click on other page size options, and in the pop-up dialog box, you can set the paper size according to your needs.


Recommended tutorial: "Word Tutorial"
The above is the detailed content of How to adjust the paper size without changing the layout. For more information, please follow other related articles on the PHP Chinese website!

Hot AI Tools

Undresser.AI Undress
AI-powered app for creating realistic nude photos

AI Clothes Remover
Online AI tool for removing clothes from photos.

Undress AI Tool
Undress images for free

Clothoff.io
AI clothes remover

AI Hentai Generator
Generate AI Hentai for free.

Hot Article
Hot Tools

Notepad++7.3.1
Easy-to-use and free code editor

SublimeText3 Chinese version
Chinese version, very easy to use

Zend Studio 13.0.1
Powerful PHP integrated development environment

Dreamweaver CS6
Visual web development tools

SublimeText3 Mac version
God-level code editing software (SublimeText3)
Hot Topics
 1378
1378
 52
52

 What are the operating skills for excel typesetting?
Mar 20, 2024 pm 05:01 PM
What are the operating skills for excel typesetting?
Mar 20, 2024 pm 05:01 PM
In order to achieve the visual effect of the entire document, both word and excel files need to be typed. However, many novice friends do not know how to perform excel typesetting. Below, we will share some typesetting operation skills, hoping to give you some Inspiration on operational skills! 1. First, we create and open an excel form and enter some simple content to facilitate demonstration operations. 2. We find the print preview function menu in the menu bar above the file. 3. Click the print preview function, and we find that the table is asymmetrical when it is not typeset. We need to find the page setup function in the menu bar above the document. 4. Click Page Settings and find the margin function in the function menu that opens. 5. Click
 Analysis and solutions to the causes of misaligned typography in WordPress
Mar 05, 2024 am 11:45 AM
Analysis and solutions to the causes of misaligned typography in WordPress
Mar 05, 2024 am 11:45 AM
Analysis of causes and solutions to misaligned typography in WordPress When building a website using WordPress, you may encounter misaligned typography, which will affect the overall beauty and user experience of the website. There are many reasons for typography misalignment, which may be caused by theme compatibility issues, plug-in conflicts, CSS style conflicts, etc. This article will analyze common causes of misaligned typography in WordPress and provide some solutions, including specific code examples. 1. Reason Analysis Theme Compatibility Issues: Some WordPress
 Basic operations of excel table layout
Mar 20, 2024 pm 03:50 PM
Basic operations of excel table layout
Mar 20, 2024 pm 03:50 PM
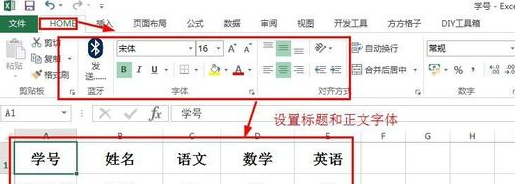
When everyone uses Excel for data processing, it is indispensable to format and beautify the data, so that it will be more beautiful when shown to others or printed out. Today I will introduce to you the basic operations of excel table formatting. I hope it will be helpful to those who have just started learning. Help for those new to Excel. 1. First select the text - click Start - typesetting the table text: Generally, the title font size is set to 14~16, black Song font, bold, and centered; the main text is generally set to 12 size, Song font, centered. Tips: If the content is small, you can set a larger font. 2. Set the appropriate row height and column width: Select the entire table - drag to uniformly adjust the row height and column width. You can also click Start - Format - Set the row height and column width - For the title row or
 Discuz Editor: an efficient post layout tool
Mar 10, 2024 am 09:42 AM
Discuz Editor: an efficient post layout tool
Mar 10, 2024 am 09:42 AM
Discuz Editor: An efficient post layout tool. With the development of the Internet, online forums have become an important platform for people to communicate and share information. In the forum, users can not only express their opinions and ideas, but also discuss and interact with others. When publishing a post, a clear and beautiful format can often attract more readers and convey more accurate information. In order to facilitate users to quickly type and edit posts, the Discuz editor came into being and became an efficient post typesetting tool. Discu
 CSS Positions layout method to implement responsive image layout
Sep 26, 2023 pm 01:37 PM
CSS Positions layout method to implement responsive image layout
Sep 26, 2023 pm 01:37 PM
CSSPositions layout method to implement responsive image layout In modern web development, responsive design has become an essential skill. In responsive design, image layout is one of the important considerations. This article will introduce how to use CSSPositions layout to implement responsive image layout and provide specific code examples. CSSPositions is a layout method of CSS that allows us to position elements arbitrarily in the web page as needed. In responsive image layout,
 Poe's new features are so powerful! Even with zero programming skills, you can create a meme editor in 10 minutes
Aug 02, 2024 am 12:23 AM
Poe's new features are so powerful! Even with zero programming skills, you can create a meme editor in 10 minutes
Aug 02, 2024 am 12:23 AM
Editor of Machine Power Report: Is it necessary for Sia’s domestic large models to catch up quickly? Recently, Poe, an AI chat platform owned by Quora, a Q&A community in North America, launched a new feature called “Previews”. With this real-time preview feature, users can directly view and use web applications generated in Poe chat. That is to say, in Poe, you can chat with some LLMs who are very good at coding, such as Claude-3.5-Sonnet, GPT-4, Gemini1.5Pro. Code snippets, web design, games and other content generated during the chat can be previewed in this window and can be used for hands-on experience. When I tried it for the first time, the editor with zero programming knowledge was scared.
 How to beautify PPT layout
Mar 26, 2024 pm 03:11 PM
How to beautify PPT layout
Mar 26, 2024 pm 03:11 PM
1. Improved layout utilization and the page will not look empty. 2. Highlight key information on the page, which is helpful for the audience to read and remember. Example 1: Example 2:
 How to use two pictures to layout the cover image in WPS
Mar 28, 2024 pm 01:21 PM
How to use two pictures to layout the cover image in WPS
Mar 28, 2024 pm 01:21 PM
1. Click the picture in the Insert tab, select the local picture, and insert the two pictures you want to create. 2. Adjust the size of the picture and place it as shown in the picture. 3. Click Shape in the Insert tab, select the diamond shape, and draw the shape on the page. 4. Select the diamond, click Fill in the drawing tool, select [No Fill Color], click the outline, fill the line color with white, and set the line width to 3 points. 5. Then insert a small rhombus, place it in the middle of the big rhombus, fill it with white, and set it to no lines. 6. Finally, enter the title in the diamond shape, so that the cover is just done.
