
This article will introduce to you how to install jdk for newbies. It has certain reference value. Friends in need can refer to it. I hope it will be helpful to everyone.

JDK Introduction
JDK is a Java language software development toolkit, mainly used for java applications on mobile devices and embedded devices . To write Java programs, you must use JDK, which provides an environment for compiling and running Java programs. It is the core of the entire java development.
Prepare JDK
This time I am using JDK1.8 as shown below:

After the download is completed, double-click the .exe in the picture to execute file and complete the installation. The detailed installation steps are as follows:
Notes: The learning stage must be completely consistent with the teacher’s environment. , JDK1.8 must be installed, otherwise it will affect subsequent development and learning
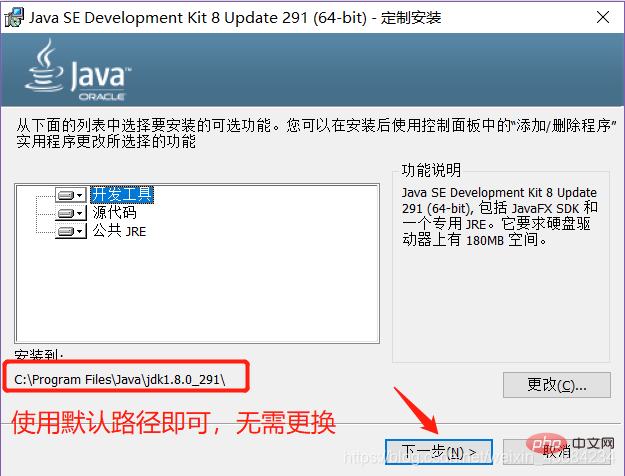
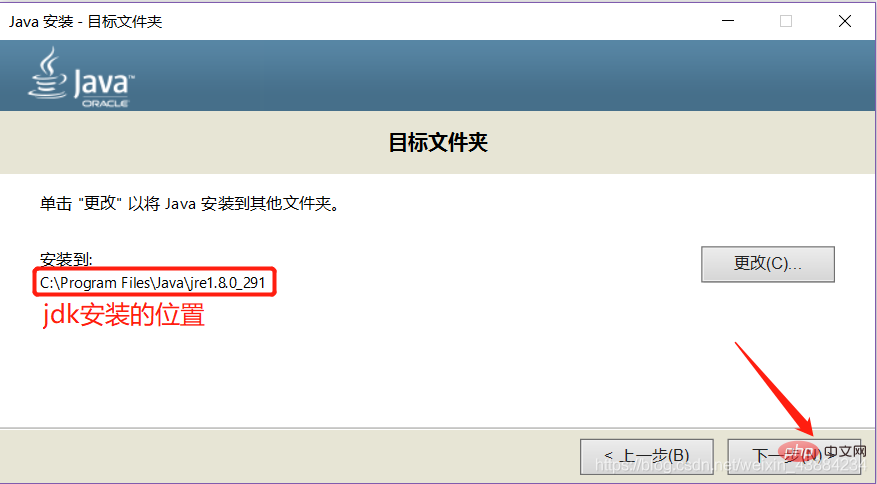
When installing, just select the default option and install to the default directory, that is: C:\Program Files\Java\jdk1.8.0_291
1. Double-click to open the installation software
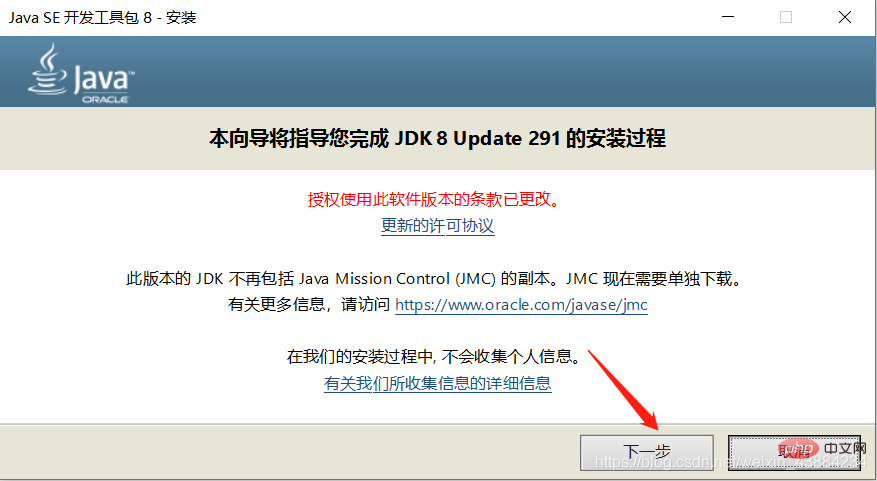
Double-click to install. At present, we do not need to change any configuration, just go to the next step to complete the fool-proof installation
2. Confirm path page
Click the "Next" button in the picture to enter the installation location confirmation page.
3. Installation completed
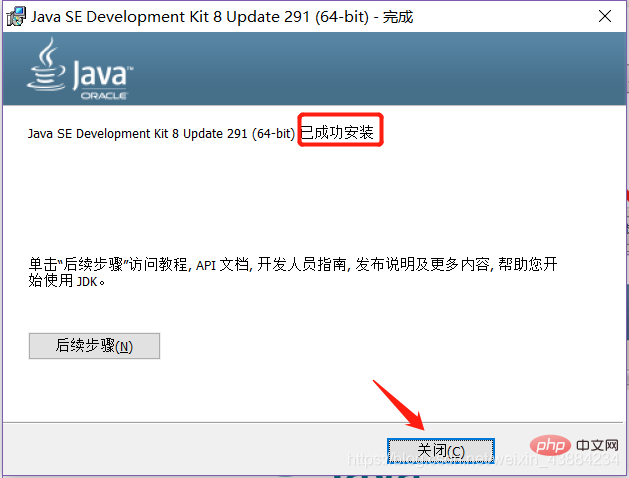
Wait for the installation. After completion, click the "Close" button in the picture, and the JDK installation is complete.

4. Configure environment variables
We configure environment variables to allow the computer to You can find the JDK you just installed
Right-click "My Computer"→"Properties"→"Advanced System Settings"→"Environment Variables" button to open the environment variable configuration dialog box, as follows:

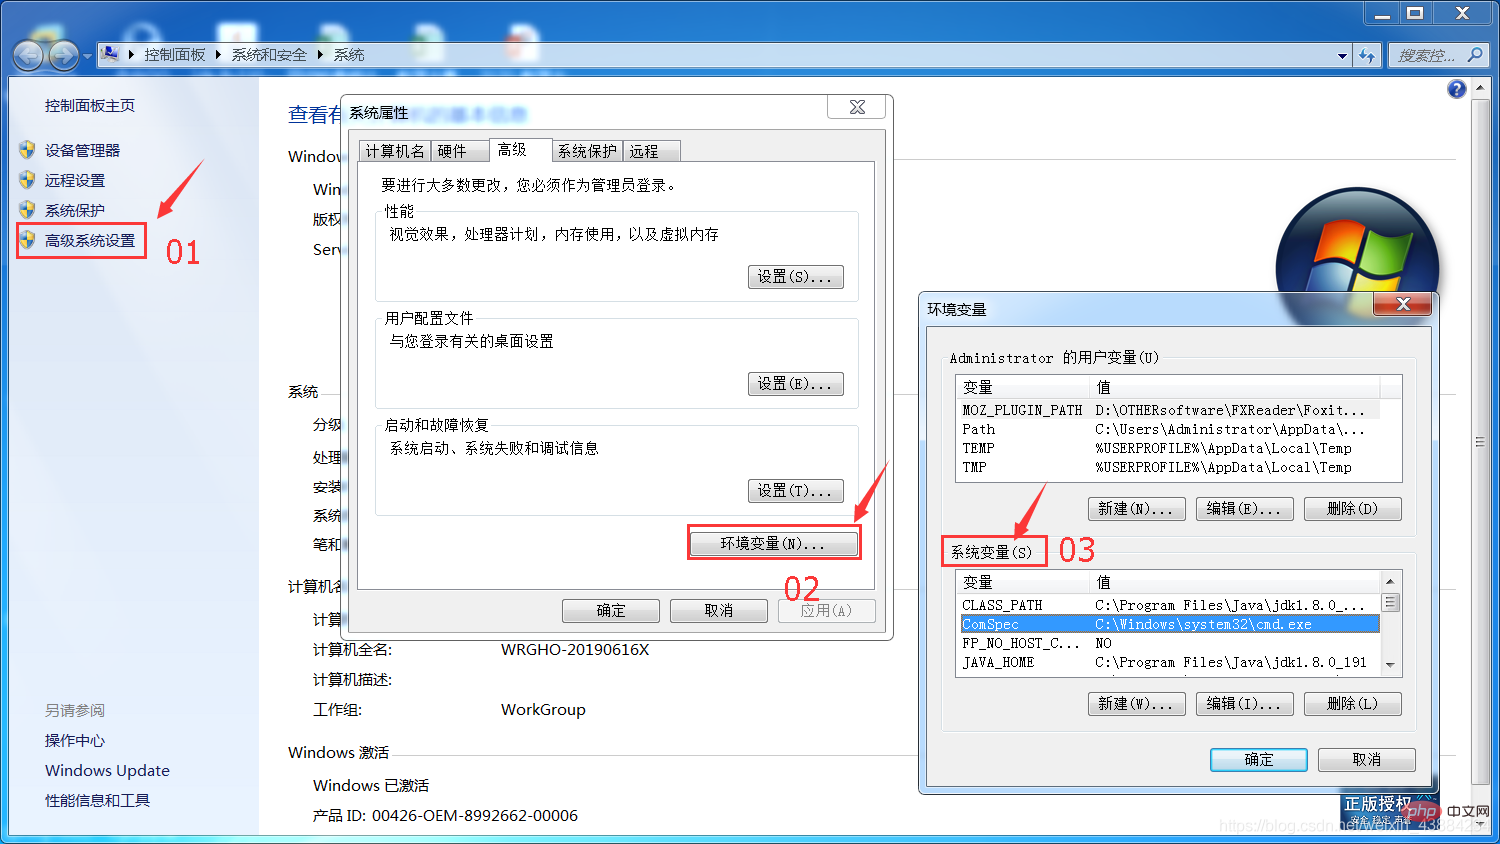
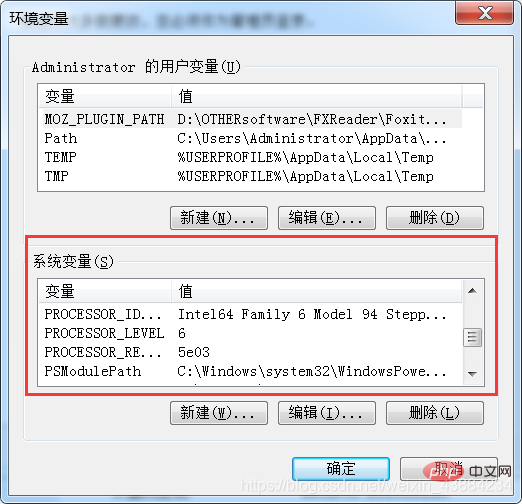
##A device can install multiple JDKs, but environment variables need to be configured to specify which JDK takes effect, and only one JDK can be specified
Environment variable configuration
1. Create a new system Variable JAVA_HOME
Variable value: C:\Program Files\Java\jdk1.8.0_291 (default installed JDK root directory)
2. Modify the system variable Path
Windows10 computer, add a new variable value C:\Program Files\Java\jdk1.8.0_291\bin;
Select the New button on the right and create a new value.
If it is a Windows 7 computer, enter C:\Program Files\Java\jdk1.8.0_291\bin; at the end of the variable value;
Note that it is the same as the previous value; Separate with semicolons, if there is; no need to add semicolons repeatedly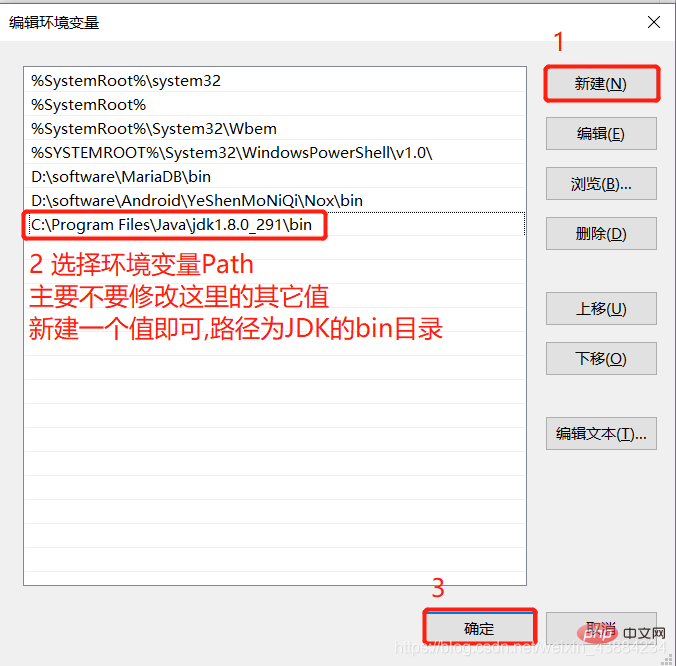
3. Create a new system variable CLASS_PATH
Variable name: CLASS_PATH
Variable value: C:\Program Files\Java \jdk1.8.0_291\lib; (It is the lib directory installed by JDK)
After configuring the 3 environment variables, click OK, as follows: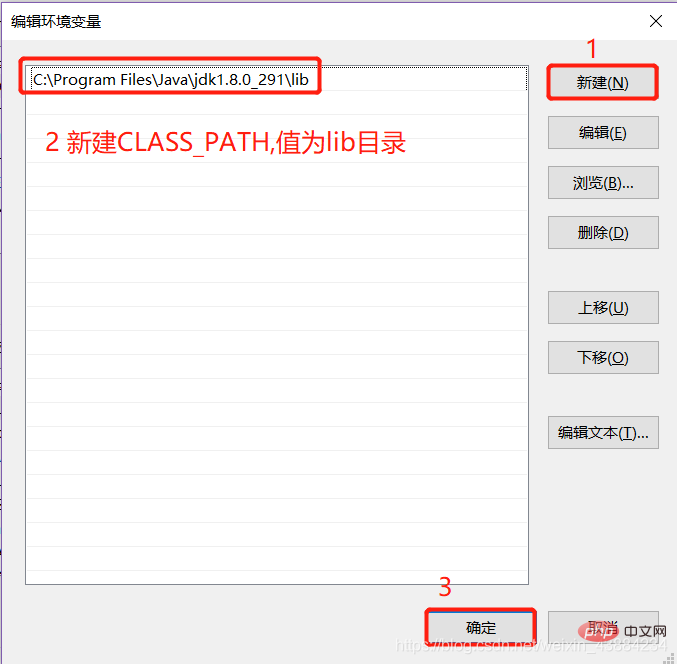
JDK installation configuration test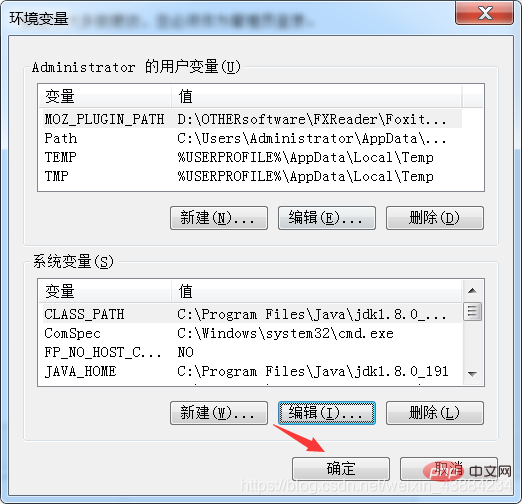
If you want to check whether the JDK is successfully installed and configured, press the "win r" key, enter "cmd" in the pop-up run window, and enter "java -version" in the pop-up window. If the version number is displayed, the configuration is successful.

Log in to Oracle's official website, URL http://www.oracle.com, click "Java 16" at the end of the page Download" button, as follows:

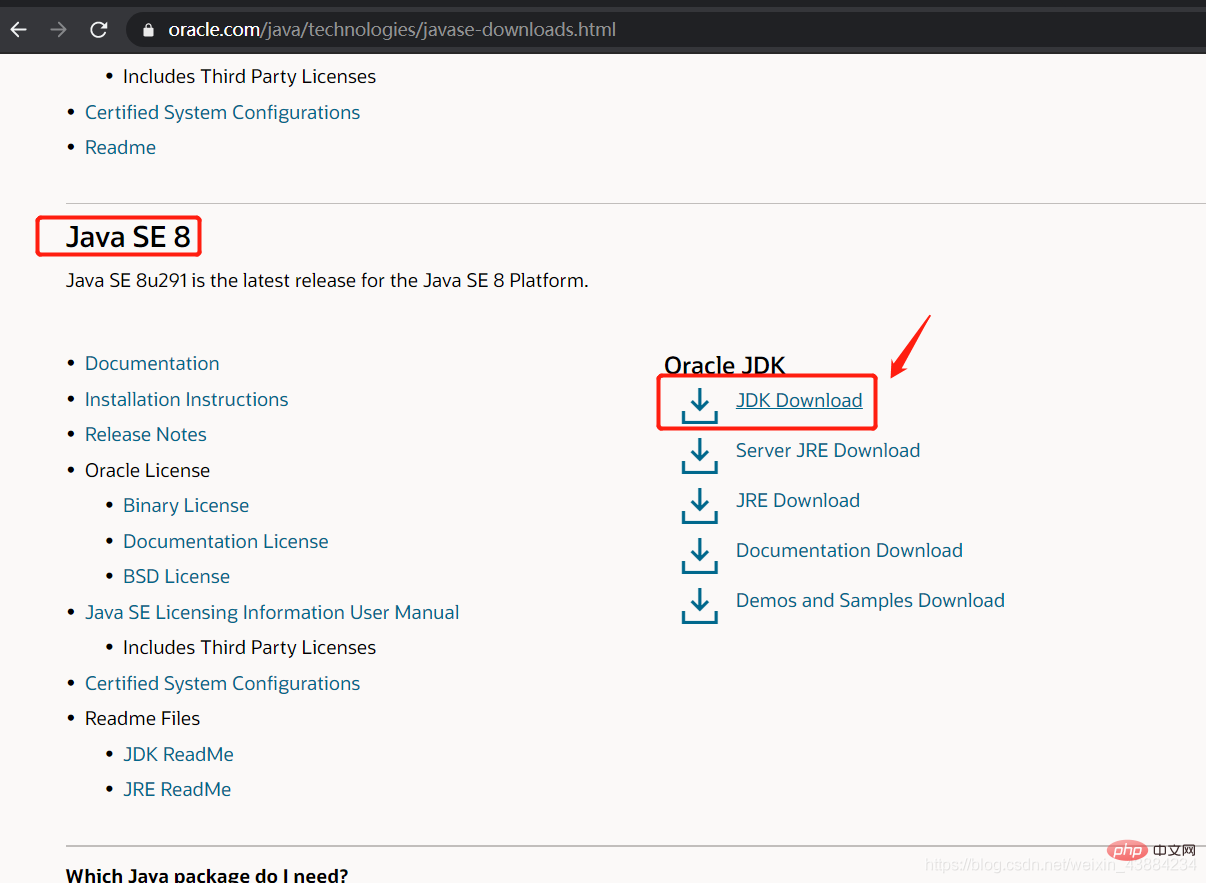
The newly opened page displays the latest JDK version. We are downloading JDK8 this time, so we need to scroll down the page until "Java SE 8" area, select the "JDK Download" button to jump to the download part
You can choose the corresponding version according to the device system, where x86 means 32-bit system, x64 Indicates a 64-bit system, click on the red box on the way to download
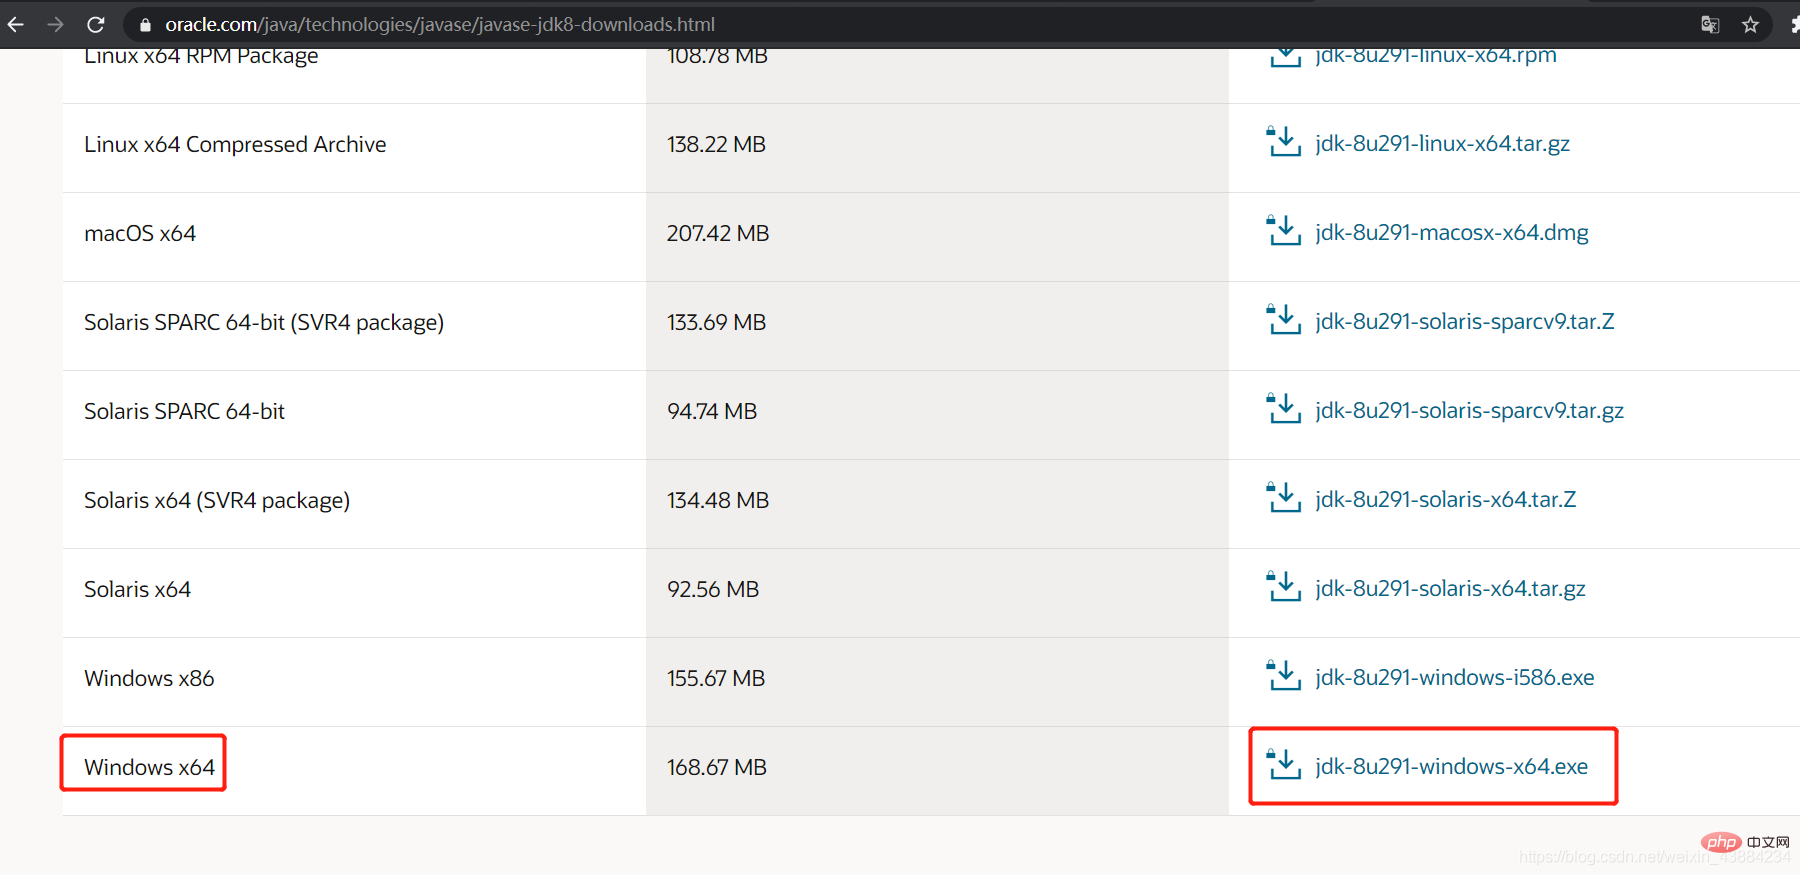
After clicking to download, if you do not have an Oracle account, you need to register one first Account, you can only download after logging in with this account. The operation of registering an account is similar to that of other websites, so I won’t go into details.
Related free learning recommendations: java basic tutorial
The above is the detailed content of How do novices install JAVA JDK. For more information, please follow other related articles on the PHP Chinese website!