

How to set Chinese in vscode

How to set Chinese in vscode: First open vscode and press the shortcut key "Ctrl Shift P"; then enter "configure language" and press Enter; finally select Simplified Chinese to install.

The operating environment of this article: windows7 system, DELL G3 computer, vscode v1.55.2
VScode setting Chinese
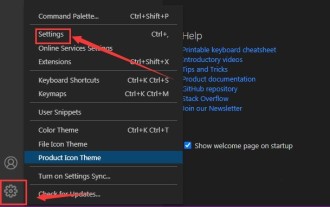
Open vscode, press the shortcut key "Ctrl Shift P"

Enter configure language and press Enter

Choose to install other languages

Select Installation in Simplified Chinese (the place marked with the highlighter)

Restart as prompted
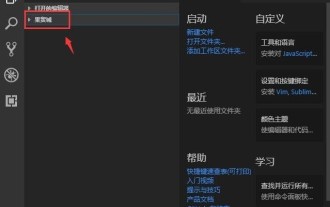
Repeat step 1 , Step 2
Select zh-cn
and follow the prompts to restart.
Recommended: "vscode tutorial"
The above is the detailed content of How to set Chinese in vscode. For more information, please follow other related articles on the PHP Chinese website!

Hot AI Tools

Undresser.AI Undress
AI-powered app for creating realistic nude photos

AI Clothes Remover
Online AI tool for removing clothes from photos.

Undress AI Tool
Undress images for free

Clothoff.io
AI clothes remover

AI Hentai Generator
Generate AI Hentai for free.

Hot Article
Hot Tools

Notepad++7.3.1
Easy-to-use and free code editor

SublimeText3 Chinese version
Chinese version, very easy to use

Zend Studio 13.0.1
Powerful PHP integrated development environment

Dreamweaver CS6
Visual web development tools

SublimeText3 Mac version
God-level code editing software (SublimeText3)
Hot Topics
 1378
1378
 52
52

 How to turn on smart commit in vscode Steps to turn on smart commit in vscode
May 09, 2024 am 10:40 AM
How to turn on smart commit in vscode Steps to turn on smart commit in vscode
May 09, 2024 am 10:40 AM
Step 1: After opening the vscode software interface, click the settings button in the settings menu below. Step 2: Find the Git option under the Extensions column. Step 3: Click to check the enablesmartcommit button.
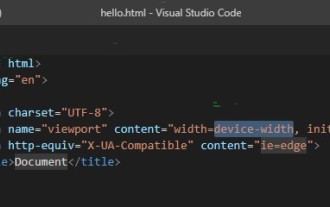 How to run html with vscode How to run html with vscode
May 09, 2024 pm 12:25 PM
How to run html with vscode How to run html with vscode
May 09, 2024 pm 12:25 PM
1. First, use vscode software to write an html program. 2. Then, click the search button and enter openinbrowser. 3. After the installation is complete, you need to restart the software, then right-click on the HTML document and select openindefaultbrowser in the drop-down menu. 4. Finally, the software will open with the default browser.
 How to close the project folder in vscode_How to close the project folder in vscode
May 09, 2024 pm 02:13 PM
How to close the project folder in vscode_How to close the project folder in vscode
May 09, 2024 pm 02:13 PM
1. After opening the interface, click the mouse to select an item that needs to be deleted. 2. Find the close folder option in the file menu in the upper left corner. 3. Finally, find the specific location of the file in the document and right-click to delete it.
 How To Set Up Visual Studio Code (VS Code) for PHP Development
Dec 20, 2024 am 11:31 AM
How To Set Up Visual Studio Code (VS Code) for PHP Development
Dec 20, 2024 am 11:31 AM
Visual Studio Code, also known as VS Code, is a free source code editor — or integrated development environment (IDE) — available for all major operating systems. With a large collection of extensions for many programming languages, VS Code can be c
 How to set the vertical scroll sensitivity value in Vscode. How to set the vertical scroll sensitivity value.
May 09, 2024 pm 02:40 PM
How to set the vertical scroll sensitivity value in Vscode. How to set the vertical scroll sensitivity value.
May 09, 2024 pm 02:40 PM
1. First, after opening the Vscode interface, click the Settings option in the Git menu 2. Then, click the Advanced button in the text editor column 3. Finally, scroll down the page with the mouse and find the vertical scroll sensitivity option in the scroll sensitivity section , just modify the parameters
 How to set search conditions in vscode vscode search condition setting tutorial
May 09, 2024 pm 01:28 PM
How to set search conditions in vscode vscode search condition setting tutorial
May 09, 2024 pm 01:28 PM
1. After opening the interface, click the search icon on the left. 2. Enter the keyword content you need to search in the dialog box. 3. Press the Enter key to display all matching items. 4. Select a directory to search. 5. Right-click the mouse and select the FindinFolder button 6. You can limit the search scope to this directory. After pressing Enter again to query, we can see that the items being searched have been greatly reduced.
 A new era of VSCode front-end development: 12 highly recommended AI code assistants
Jun 11, 2024 pm 07:47 PM
A new era of VSCode front-end development: 12 highly recommended AI code assistants
Jun 11, 2024 pm 07:47 PM
In the world of front-end development, VSCode has become the tool of choice for countless developers with its powerful functions and rich plug-in ecosystem. In recent years, with the rapid development of artificial intelligence technology, AI code assistants on VSCode have sprung up, greatly improving developers' coding efficiency. AI code assistants on VSCode have sprung up like mushrooms after a rain, greatly improving developers' coding efficiency. It uses artificial intelligence technology to intelligently analyze code and provide precise code completion, automatic error correction, grammar checking and other functions, which greatly reduces developers' errors and tedious manual work during the coding process. Today, I will recommend 12 VSCode front-end development AI code assistants to help you in your programming journey.
 How to display type parameters in VSCode Tips for displaying type parameters in VSCode
May 09, 2024 am 11:16 AM
How to display type parameters in VSCode Tips for displaying type parameters in VSCode
May 09, 2024 am 11:16 AM
First, open a Visual Studio Code interface and click the settings icon in the lower left corner. After clicking the settings icon option, a drop-down menu pops up and selects the settings option to enter the settings interface. Click the breadcrumbs option on the left to enter the breadcrumbs interface. Check the Display Type Parameters option. After checking the Display Type Parameters option, the current settings will be automatically saved.
