

Does html5 have new attributes?

html5 has new attributes, such as contextmenu, contentEditable, hidden, draggable, "data-*", placeholder, required, pattern, autofocus, autocomplete, etc.

The operating environment of this tutorial: Windows 7 system, HTML5 version, Dell G3 computer.
HTML5 new attributes
1.1, contextmenu
The function of contextmenu is to specify the right-click menu.
<!DOCTYPE html>
<html>
<head>
<meta charset="UTF-8">
<title></title>
</head>
<body>
<div id="div1" style="height:900px; background: lightgreen;" contextmenu="menuShare">
</div>
<menu id="menuShare" type="context">
<menuitem label="分享到QQ空间" onclick="alert('QQ');"></menuitem>
<menuitem label="分享到朋友圈" onclick="alert('朋友圈');"></menuitem>
<menuitem label="分享到微博" onclick="alert('微博');"></menuitem>
</menu>
</body>
</html>Running effect:

contextmenu In Html5, each element has a new attribute: contextmenu, contextmenu is the context menu, that is, right-click the mouse A menu will appear for the element.
menu To realize that a menu will appear when you right-click an element, you must also understand another new element in HTML5: menu. As the name suggests, menu defines the menu. The menu element attributes: type: menu type attribute. There are three values 1) context: context; 2) toolbar: toolbar; 3) list: list
.
menuitem attributes:
label: the name displayed by the menu item
icon: the icon displayed on the left side of the menu item
onclick: the event triggered by clicking the menu item
1.2 , contentEditable
Specifies whether the content of the element can be edited
Attribute value:
true -----The content of the element can be edited
false -----The element cannot be edited Content
inherit -----Inherit the contenteditable attribute of the parent element
When it is an empty string, the effect is the same as true.
When the contenteditable status of an element is true (the contenteditable attribute is an empty string, or is true, or is inherit and its parent element status is true), it means that the element is editable. Otherwise, the element is not editable.
document.body.contentEditable=true; You can modify the published website
<!DOCTYPE html>
<html>
    <head>
        <meta charset="UTF-8">
        <title>contentEditable属性</title>
    </head>
    <body>
        <h2>contentEditable属性</h2>
        <div contenteditable="true">
            Hello contentEditable
        </div>
    </body>
</html>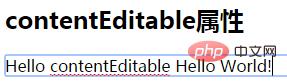
1.3、hidden
The hidden attribute is used to hide the element. Once this attribute is used, the element will not be displayed in the browser
2 Boolean values
true specifies that the element is visible.
false specifies that the element is invisible.
        <div hidden="hidden">
            Hello Hidden
</div>In order to be compatible with some browsers (IE8) that do not support this attribute, you can add the following style to CSS:
*[hidden]{
   display: none;
}var p1=document.querySelector("body #p1");
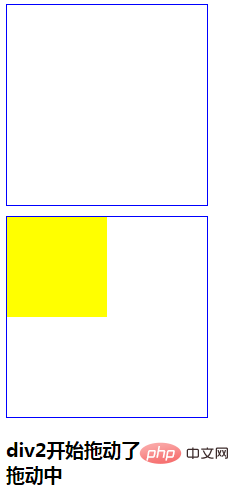
p1.innerHTML+=" +++";1.4, draggable
Specifies whether the element can be dragged
3 enumeration values
true specifies whether the element is draggable.
false specifies that the element is not draggable.
auto uses the browser's default features.
Example:
<!DOCTYPE html><html>

    <head>
        <meta charset="utf-8">
        <script src="Scripts/jquery-1.11.3.min.js" type="text/javascript" charset="utf-8"></script>
        <title></title>
        <style>
            #p1,
            #p3 {
                height: 200px;
                width: 200px;
                border: 1px solid #00f;
                margin-bottom: 10px;
            }
            #p2 {
                height: 100px;
                width: 100px;
                background: yellow;
            }
        </style>
        <script>
            var p1, p2, p3, msg;
            window.onload = function() {
                p1 = document.getElementById("p1");
                p2 = document.getElementById("p2");
                p3 = document.getElementById("p3");
                msg = document.getElementById("msg");

                p2.ondragstart=function(){
                    msg.innerHTML+="p2开始拖动了<br/>";
                }
                p2.ondrag=function(){
                    msg.innerHTML+="拖动中<br/>";
                }
                p2.ondragend=function(){
                    msg.innerHTML+="拖动结束<br/>";
                }

                p1.ondragover = function(e) {
                    e.preventDefault();
                }
                p1.ondrop = function(e) {
                    p1.appendChild(p2);
                }
                p3.ondragover = function(e) {
                    e.preventDefault();
                }
                p3.ondrop = function(e) {
                    p3.appendChild(p2);
                }

                $("#p1").data("name","电池");
                alert($("#p1").data("name"));

                p1.setAttribute("data-order-price",998.7);
                alert(p1.getAttribute("data-order-price"));
            }        </script>
    </head>

    <body>
        <p id="p1" data-order-price="98.5" data-name="充电宝"></p>
        <p id="p3"></p>
        <p id="p2" draggable="true"></p>
        <h3 id="msg"></h3>
</body></html>Run result:
<!DOCTYPE html><html lang="en"><head>
    <meta charset="UTF-8">
    <meta name="viewport" content="width=device-width, initial-scale=1.0">
    <title>Document</title></head><body>
    <p style="height: 300px; background: lightgoldenrodyellow;"  ondrop="ondropEvent(event)" ondragover="ondragoverEvent(event)"></p>
    <img src="img/x.png" width="200" draggable="true" ondragstart="ondragstartEvent(event)"/>
    <img src="img/tv.png" width="200" draggable="true" ondragstart="ondragstartEvent(event)"/>
    <script>
        var target;        function ondragstartEvent(e){
            target=e.target;            //记住当前被拖动的对象            console.log(e.target);
        }        function ondropEvent(e){
            e.preventDefault();
            e.target.appendChild(target);

        }        function ondragoverEvent(e){
            e.preventDefault();
        }    </script></body></html>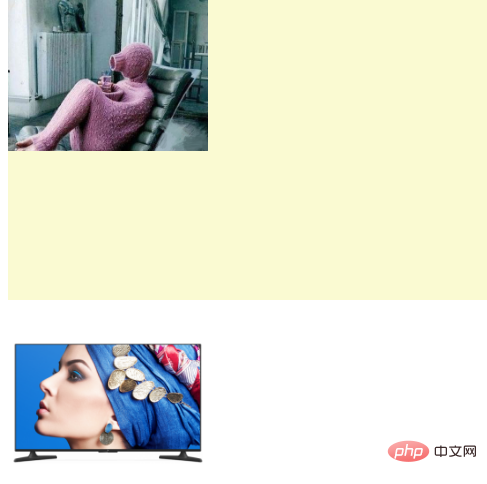
##1.5, data- *
data-*attribute allows users to store data in the form of customized attributes
Value:
getAttribute('data-order-amount')
dataset.orderAmount
The data() method in jQuery can also be accessed
<!DOCTYPE html><html>
<head>
<meta charset="UTF-8">
<title>data-*</title>
<script src="js/jquery-1.11.3.min.js" type="text/javascript" charset="utf-8"></script>
</head>
<body>
<h2>data-*</h2>
<p id="p1" data-student-name="Tom" data-stu='{"a":1,"b":2}'></p>
<button onclick="addData()">添加数据</button>
<button onclick="getData()">获取数据</button>
<script type="text/javascript">
var p1=document.getElementById("p1"); function addData()
{ //给p1添加属性data-student-name,值为rose p1.setAttribute("data-student-name","Rose");
$("#p1").data("stu-mark","99分");
} function getData()
{ //原生JavaScript
//alert(p1.getAttribute("data-student-name"));
//jQuery alert($("#p1").data("student-name"));
alert($("#p1").data("stu").a);
alert($("#p1").data("stu-mark"));
}
var x="{a:1}";
alert(eval("("+x+")").a); </script>
</body></html>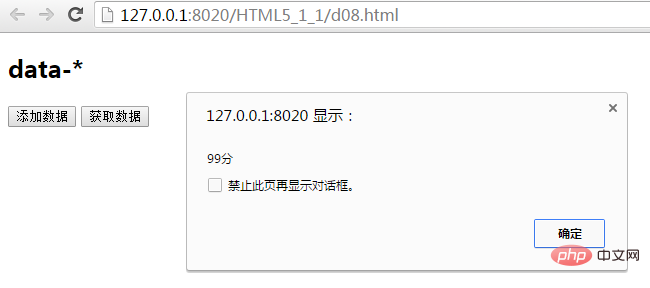
1.6, placeholder attribute
This is a very practical attribute. There is no need to use JS to realize the click to clear the initial value of the form. Browser support is also pretty good. In addition to Firefox, other standard browsers can support it well
            <p>
                <label>邮箱:</label>
                <input type="email" name="mail" id="mail" value="" placeholder="请输入邮箱"/>
            </p>
1.7, requiredRequired attribute
The constraint table unit must enter a value before submitting. <p>
<label>博客:</label>
<input type="url" name="blog" id="blog" value="" required="required"/>
</p>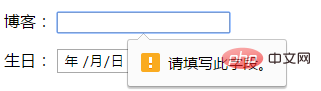
1.8, pattern regular attribute
Constrains the value entered by the user to match the regular expression. <p>
<label>帐号:</label>
<input type="text" required="required" pattern="^[0-9a-zA-Z]{6,16}$" />请输入a-zA-Z0-9且长度6-16位的字符
</p>
1.9, autofocus automatic focus attribute <p>
<label>博客:</label>
<input type="url" name="blog" id="blog" value="" required="required" autofocus="autofocus"/>
</p>Copy after login
Let the specified form element get focus. <p>
<label>博客:</label>
<input type="url" name="blog" id="blog" value="" required="required" autofocus="autofocus"/>
</p>
1.10. autocomplete attribute
When the autocomplete function is set on a form element, the information entered by the user will be recorded. Content, double-clicking the form element will display historical input.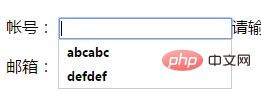
该属性默认是打开的。
1.11、novalidate不验证属性
novalidate 属性规定在提交表单时不应该验证 form 或 input 域。
<form action="demo_form.asp" method="get" novalidate="true">
<button formnovalidate="formnovalidate" >提交</button>
1.12、multiple多选属性
multiple 属性规定输入域中可选择多个内容,如:email 和 file
<input type="file" multiple="multiple” />
            <p>
                <label>相片:</label>
                <input type="file" multiple="multiple"/>
            </p>
        HTML5新的表单元素


        HTML5新的表单元素
推荐教程:html视频教程
The above is the detailed content of Does html5 have new attributes?. For more information, please follow other related articles on the PHP Chinese website!

Hot AI Tools

Undresser.AI Undress
AI-powered app for creating realistic nude photos

AI Clothes Remover
Online AI tool for removing clothes from photos.

Undress AI Tool
Undress images for free

Clothoff.io
AI clothes remover

Video Face Swap
Swap faces in any video effortlessly with our completely free AI face swap tool!

Hot Article
Hot Tools

Notepad++7.3.1
Easy-to-use and free code editor

SublimeText3 Chinese version
Chinese version, very easy to use

Zend Studio 13.0.1
Powerful PHP integrated development environment

Dreamweaver CS6
Visual web development tools

SublimeText3 Mac version
God-level code editing software (SublimeText3)
Hot Topics
 1386
1386
 52
52

 Table Border in HTML
Sep 04, 2024 pm 04:49 PM
Table Border in HTML
Sep 04, 2024 pm 04:49 PM
Guide to Table Border in HTML. Here we discuss multiple ways for defining table-border with examples of the Table Border in HTML.
 HTML margin-left
Sep 04, 2024 pm 04:48 PM
HTML margin-left
Sep 04, 2024 pm 04:48 PM
Guide to HTML margin-left. Here we discuss a brief overview on HTML margin-left and its Examples along with its Code Implementation.
 Nested Table in HTML
Sep 04, 2024 pm 04:49 PM
Nested Table in HTML
Sep 04, 2024 pm 04:49 PM
This is a guide to Nested Table in HTML. Here we discuss how to create a table within the table along with the respective examples.
 HTML Table Layout
Sep 04, 2024 pm 04:54 PM
HTML Table Layout
Sep 04, 2024 pm 04:54 PM
Guide to HTML Table Layout. Here we discuss the Values of HTML Table Layout along with the examples and outputs n detail.
 HTML Input Placeholder
Sep 04, 2024 pm 04:54 PM
HTML Input Placeholder
Sep 04, 2024 pm 04:54 PM
Guide to HTML Input Placeholder. Here we discuss the Examples of HTML Input Placeholder along with the codes and outputs.
 HTML Ordered List
Sep 04, 2024 pm 04:43 PM
HTML Ordered List
Sep 04, 2024 pm 04:43 PM
Guide to the HTML Ordered List. Here we also discuss introduction of HTML Ordered list and types along with their example respectively
 Moving Text in HTML
Sep 04, 2024 pm 04:45 PM
Moving Text in HTML
Sep 04, 2024 pm 04:45 PM
Guide to Moving Text in HTML. Here we discuss an introduction, how marquee tag work with syntax and examples to implement.
 HTML onclick Button
Sep 04, 2024 pm 04:49 PM
HTML onclick Button
Sep 04, 2024 pm 04:49 PM
Guide to HTML onclick Button. Here we discuss their introduction, working, examples and onclick Event in various events respectively.
