How to combine two text boxes
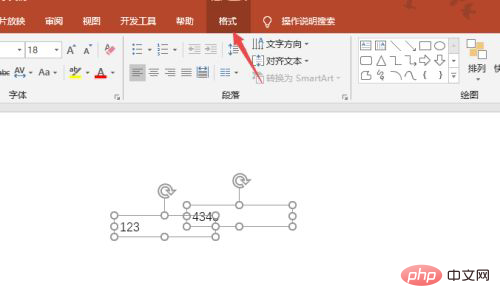
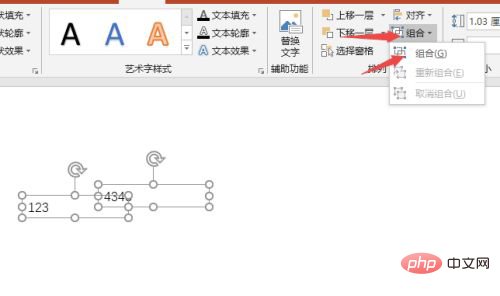
Method: 1. Open the ppt presentation document that needs to be operated and select one of the text boxes; 2. Move the text box closer to another text box; 3. Press and hold the "ctrl" key on the keyboard. Click on another text box; 4. Click the "Format" - "Combination" option at the top of the page and select "Combination" in the drop-down list.

The operating environment of this tutorial: Windows 7 system, Microsoft PowerPoint 2019 version, Dell G3 computer.
1. The first step is to open a ppt document containing two text boxes and click on one of the text boxes;
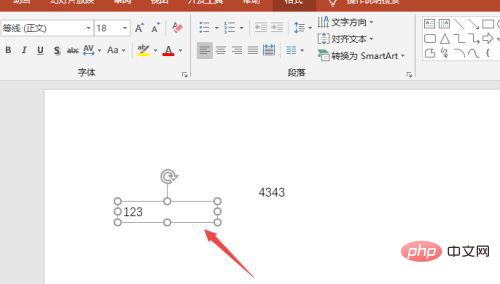
2. The second step , move the text box close to another text box;
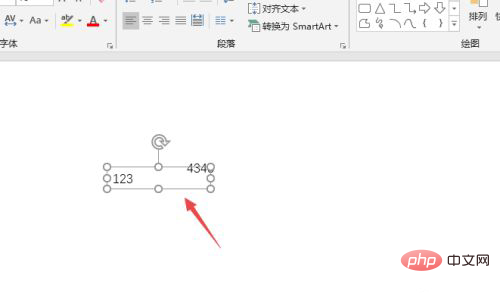
3. Step 3, then press the Ctrl key, and then click on another text box;
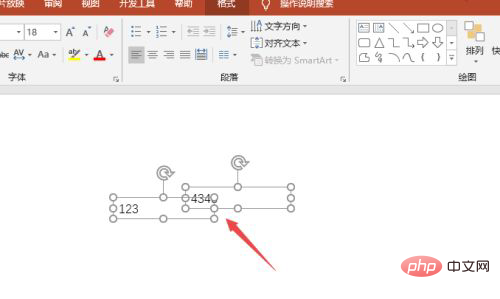
4. Step 4, click Format - Combination, then click Combination;
For more computer-related knowledge, please visit the FAQ column!
The above is the detailed content of How to combine two text boxes. For more information, please follow other related articles on the PHP Chinese website!

Hot AI Tools

Undresser.AI Undress
AI-powered app for creating realistic nude photos

AI Clothes Remover
Online AI tool for removing clothes from photos.

Undress AI Tool
Undress images for free

Clothoff.io
AI clothes remover

AI Hentai Generator
Generate AI Hentai for free.

Hot Article

Hot Tools

Notepad++7.3.1
Easy-to-use and free code editor

SublimeText3 Chinese version
Chinese version, very easy to use

Zend Studio 13.0.1
Powerful PHP integrated development environment

Dreamweaver CS6
Visual web development tools

SublimeText3 Mac version
God-level code editing software (SublimeText3)

Hot Topics
 How to set a picture as the background in OneNote
May 14, 2023 am 11:16 AM
Onenote is one of the best note-taking tools offered by Microsoft. Combined with Outlook and MSTeams, Onenote can be a powerful combination for increasing productivity at work and in personal creative productivity. We have to take notes in a different format, which may be more than just writing things down. Sometimes we need to copy images from different sources and do some editing in our daily work. Images pasted on Onenote can go a long way if you know how to apply the changes. Have you ever encountered a problem when using Onenote that images pasted on Onenote cannot allow you to work easily? This article will look at using images effectively on Onenote. we can
 How to hide text until clicked in Powerpoint
Apr 14, 2023 pm 04:40 PM
How to hide text before any click in PowerPoint If you want text to appear when you click anywhere on a PowerPoint slide, setting it up is quick and easy. To hide text before clicking any button in PowerPoint: Open your PowerPoint document and click the Insert menu. Click on New Slide. Choose Blank or one of the other presets. Still in the Insert menu, click Text Box. Drag a text box onto the slide. Click the text box and enter your
 How to make a calendar in Word
Apr 25, 2023 pm 02:34 PM
How to Make a Calendar in Word Using Tables If you want to create a calendar that fits your specifications exactly, you can do everything from scratch using tables in Word. This allows you to design the exact layout you want for your calendar. Create a calendar using tables in Word: Open a new Word document. Press Enter a few times to move the cursor down the page. Click the Insert menu. In the ribbon, click the table icon. Click and hold the upper left square and drag out a 7×6 table. Write the day of the week on the first line. Use another calendar as a reference to fill in the days of the month. Highlight any date outside the current month. In the main menu, click the text color icon and select Gray. For the current month, start with
 What are the types of html text boxes?
Oct 12, 2023 pm 05:38 PM
HTML text box types include single line text box, password text box, number text box, date text box, time text box, file upload text box, multi-line text box, etc. Detailed introduction: 1. The single-line text box is the most common type of text box, used to accept single-line text input. The user can enter any text in the text box, such as user name, password, email address, etc.; 2. The password text box is used To accept password input, when the user enters the password, the content in the text box will be hidden to protect the user's privacy; 3. Numeric text box, etc.
 How to combine two graphics in PPT
Mar 20, 2024 pm 05:00 PM
Hello everyone, today I will share with my friends the specific steps of how to combine two graphics in PPT. If you follow these steps, you will learn the operation step by step, and you can draw inferences in the future. The details of the steps are below. Friends, come and take a serious look! 1. First, open a PPT document on your computer, and then create a new PPT slide (as shown in the picture below). 2. Next, find [Shape] in the upper menu bar item [Insert], and select the shape to be imported in the drop-down box of the shape (as shown in the red circle in the figure below). 3. Use the insert function of PPT to insert the triangle and circle shapes into the PPT in sequence, and adjust the size and position of the shapes (as shown by the red arrow in the picture below). 4
 How to add line breaks in HTML textbox?
Sep 04, 2023 am 11:05 AM
To add a newline character to an HTML text area, we can use the HTML newline tag to insert a newline character anywhere. Alternatively, we can also use the CSS property "white-space:pre-wrap" to automatically add line breaks to the text. This is particularly useful when displaying preformatted text in a text area. So let’s discuss ways to add line breaks. Method creates a text area in HTML and assigns it an id. Create a button that, when clicked, will split the text of the text area using line breaks. Now create a function that separates text into newlines. The code of this function is -functionreplacePeriodsWithLineBreaks()
 How to write HTML scroll bar text box code
Feb 19, 2024 pm 07:38 PM
Title: How to write HTML text box code with scroll bar The text box in HTML is one of the commonly used user input controls. In some cases, when the text content is too long, the text box will be displayed incompletely. At this time, we can add a scroll bar to the text box to support scrolling. This article will introduce in detail how to write HTML text box code with scroll bar effect, and give specific code examples. 1. Use the textarea element to create a text box. In HTML, we use the textarea element to create a text box.
 How to set the color of the text box border
Jul 28, 2023 am 10:08 AM
How to set the border color of a text box: 1. Select the text or paragraph to which you want to add a border; 2. In the "Paragraph" or "Font" group of the "Home" tab, click the "Border" button; 3. From the drop-down menu Select a border style; 4. Click the "Border Color" button and select the color you want in the pop-up menu; 5. Click the "OK" button to apply the border style and color.


