本篇文章给大家分享centos7下部署运行一个php项目有一定的参考价值,有需要的朋友可以参考一下,希望对大家有所帮助。
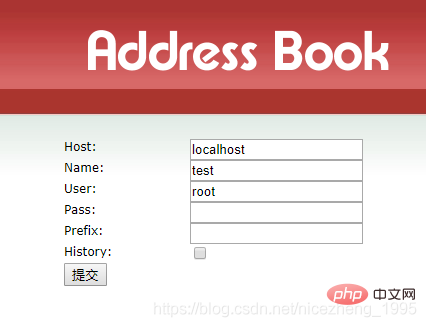
因为要做web方向的测试,所以选择了一个测试网站addressbook.

Nginx + php-fpm +centos7
首先我先要在chrome上打开,但是服务器站点部署在linux上,而chrome装在windows上,所以选择桥接模式。
Centos7桥接模式设置:
首先选择 桥接模式
ip addr 获取虚拟机ip地址
关闭虚拟机防火墙
systemctl stop firewalld.service
禁止fireware开机启动
systemctl disable firewalld.service
ping xxxx
刚开始启动nginx时一直报错,最后发现是端口占用问题,解除80端口占用。
先查看80端口是否被占用,然后启动nginx
接着启动nginx:
/usr/local/nginx/sbin/nginx
检查是否启动成功:
打开浏览器访问此机器的 IP,如果浏览器出现 Welcome to nginx! 则表示 Nginx 已经安装并运行成功。
centos安装nginx以及配置:https://www.jianshu.com/p/9a6c96ecc8b8
为了方便可以进行配置以采用以下命令启动:
service nginx reload    重新加载配置

service nginx start 启动Nginx
如果nginx启动失败,就先强行杀死nginx进程:
pkill nginx
但是每次要进行到相应的路径来启动Nginx太麻烦了,这里可以在etc/init.d目录下创建一个启动脚本,通过这个脚本来启动Nginx,这样启动Nginx会方便很多
在etc/init.d目录下创建nginx脚本
vim /etc/init.d/nginx
#!/bin/sh

#

# nginx - this script starts and stops the nginx daemin

#

# chkconfig:  - 85 15

# description:  Nginx is an HTTP(S) server, HTTP(S) reverse \

#              proxy and IMAP/POP3 proxy server

# processname: nginx

# config:      /usr/local/nginx/conf/nginx.conf

# pidfile:    /usr/local/nginx/logs/nginx.pid

# Source function library.

. /etc/rc.d/init.d/functions

# Source networking configuration.

. /etc/sysconfig/network

# Check that networking is up.

[ "$NETWORKING" = "no" ] && exit 0

nginx="/usr/local/nginx/sbin/nginx"

prog=$(basename $nginx)

NGINX_CONF_FILE="/usr/local/nginx/conf/nginx.conf"

lockfile=/var/lock/subsys/nginx

start() {

[ -x $nginx ] || exit 5

[ -f $NGINX_CONF_FILE ] || exit 6

echo -n $"Starting $prog: "

daemon $nginx -c $NGINX_CONF_FILE

retval=$?

echo

[ $retval -eq 0 ] && touch $lockfile

return $retval

}

stop() {

echo -n $"Stopping $prog: "

killproc $prog -QUIT

retval=$?

echo

[ $retval -eq 0 ] && rm -f $lockfile

return $retval

}

restart() {

configtest || return $?

stop

start

}

reload() {

configtest || return $?

echo -n $"Reloading $prog: "

killproc $nginx -HUP

RETVAL=$?

echo

}

force_reload() {

restart

}

configtest() {

$nginx -t -c $NGINX_CONF_FILE

}

rh_status() {

status $prog

}

rh_status_q() {

rh_status >/dev/null 2>&1

}

case "$1" in

start)

rh_status_q && exit 0

$1

;;

stop)

rh_status_q || exit 0

$1

;;

restart|configtest)

$1

;;

reload)

rh_status_q || exit 7

$1

;;

force-reload)

force_reload

;;

status)

rh_status

;;

condrestart|try-restart)

rh_status_q || exit 0

;;

*)

echo $"Usage: $0 {start|stop|status|restart|condrestart|try-restart|reload|force-reload|configtest}"

exit 2

esac我们启动php-fpm,并设置php-fpm开机自启
service php-fpm start

chkconfig php-fpm on
nginx配置文件地址路径:
vim /usr/local/nginx/conf/nginx.conf
php-fpm配置
vim /etc/php-fpm.d/www.conf
[...]
listen = /var/run/php-fpm/php-fpm.sock
[...]
listen.owner = nobody
listen.group = nobody
[...]
user = nginx
group = nginx
[...]
编辑nginx配置文件:vim /etc/nginx/nginx.conf
server {
 28         listen 80;
 29         server_name _;
 30         root /usr/addressbook;
 31         index index.php index.html index.htm;
 32
 33         location / {
 41              try_files $uri $uri/ =404;
 42         }
 43         location ~ \.php$ {
 44         try_files $uri =404;
 45         fastcgi_pass 127.0.0.1:9000;
 46         fastcgi_param SCRIPT_FILENAME $document_root$fastcgi_script_name;
 47         fastcgi_index index.php; include fastcgi_params;
 48         }
 49     }
50 }同时php-fpm配置文件也要更改:
listen =/var/run/php-fpm/php-fpm.sock
listen = 127.0.0.1:9000
重新加载:
systemctl reload php-fpm

推荐学习:《PHP视频教程》
The above is the detailed content of Teach you step by step how to deploy and run a php project under centos7 (share). For more information, please follow other related articles on the PHP Chinese website!