
The previous article "Quickly understand how to use PS layer masks (picture and text introduction)" introduced the simple use of PS layer masks and synthesized them in just a few steps A beautiful picture. The following article will introduce you to a little PS trick to see how to use PS polar coordinates to create cool special effects.

#How to use PS polar coordinates? Polar coordinates are one of the filters of PS. It can transform a flat image into a spherical effect. With a little modification, you can create a perfect panorama. Today I will teach you how to use PS polar coordinates and teach you how to create a cool space!
The specific operations are as follows:
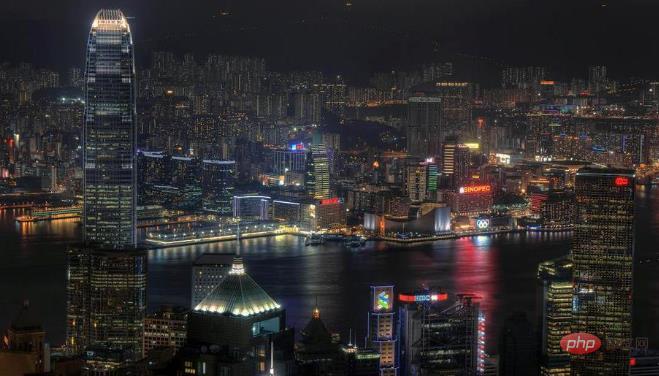
1. The picture we choose here is a panoramic picture at night. So first you have to crop the image. Intercept the places where the lights are denser and the light is brighter. Note that the proportion of the sky is as small as possible.
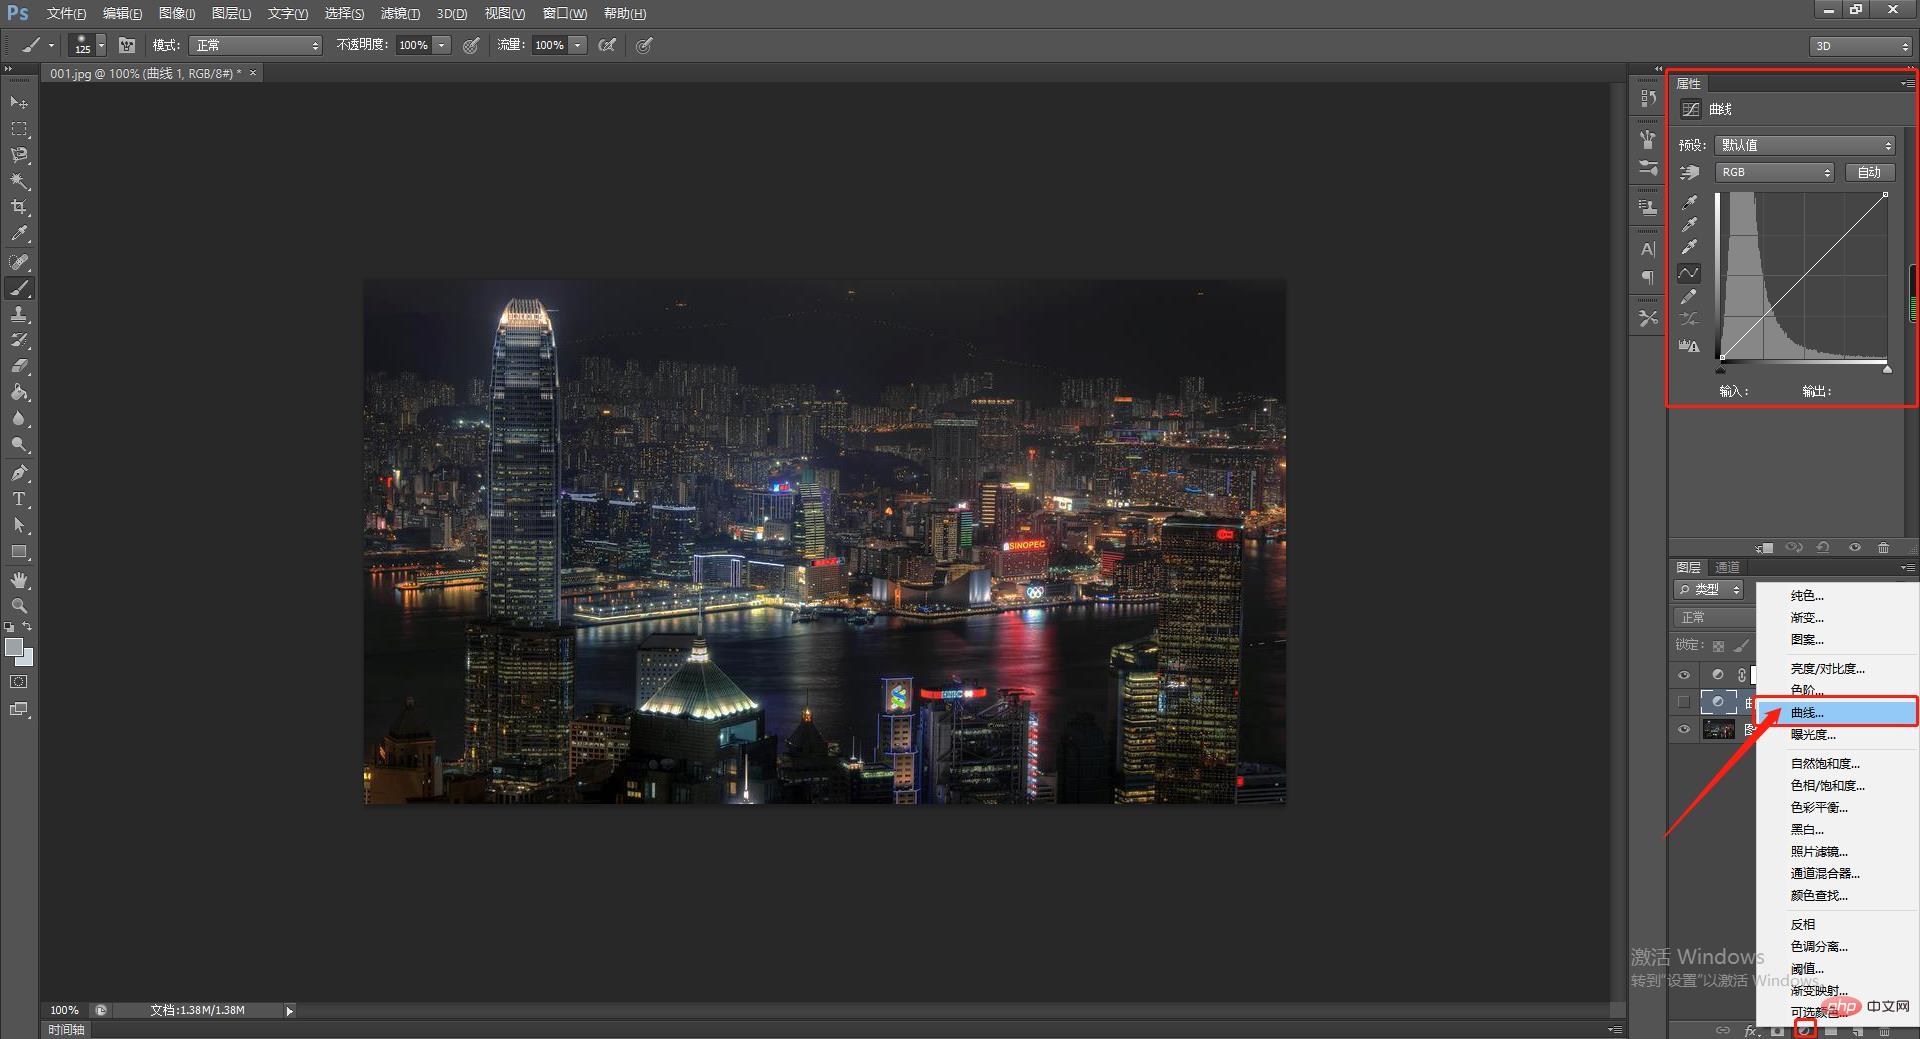
#2. Next, we adjust the overall tone of the picture. The original work was underexposed and didn't have the brightly lit effect we wanted, so we had to adjust the exposure. There are many ways to adjust, here we use the curve tool to adjust.
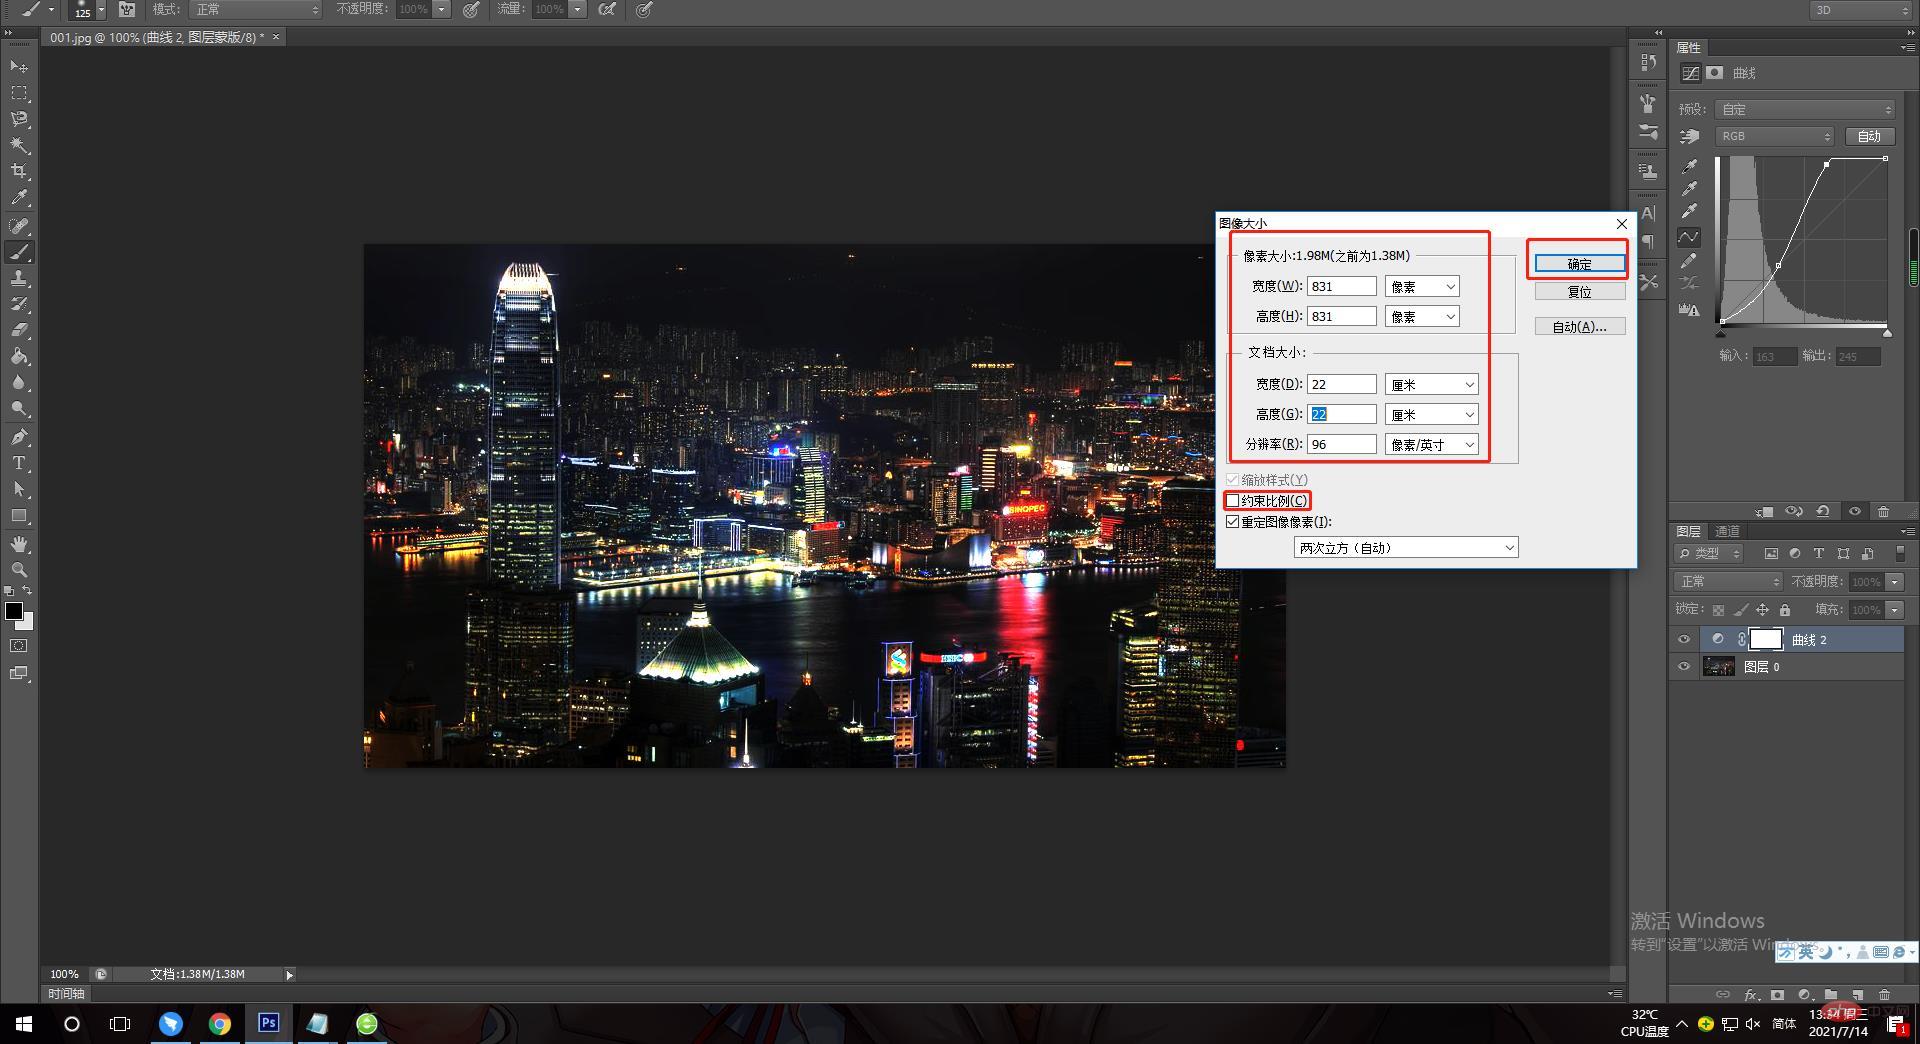
#3. We need to transform the picture so that the work becomes a complete square picture. Select "Image - Image Size", remove the constraint ratio option in the dialog box, change the aspect ratio to a square, and adjust the size to your personal preference.
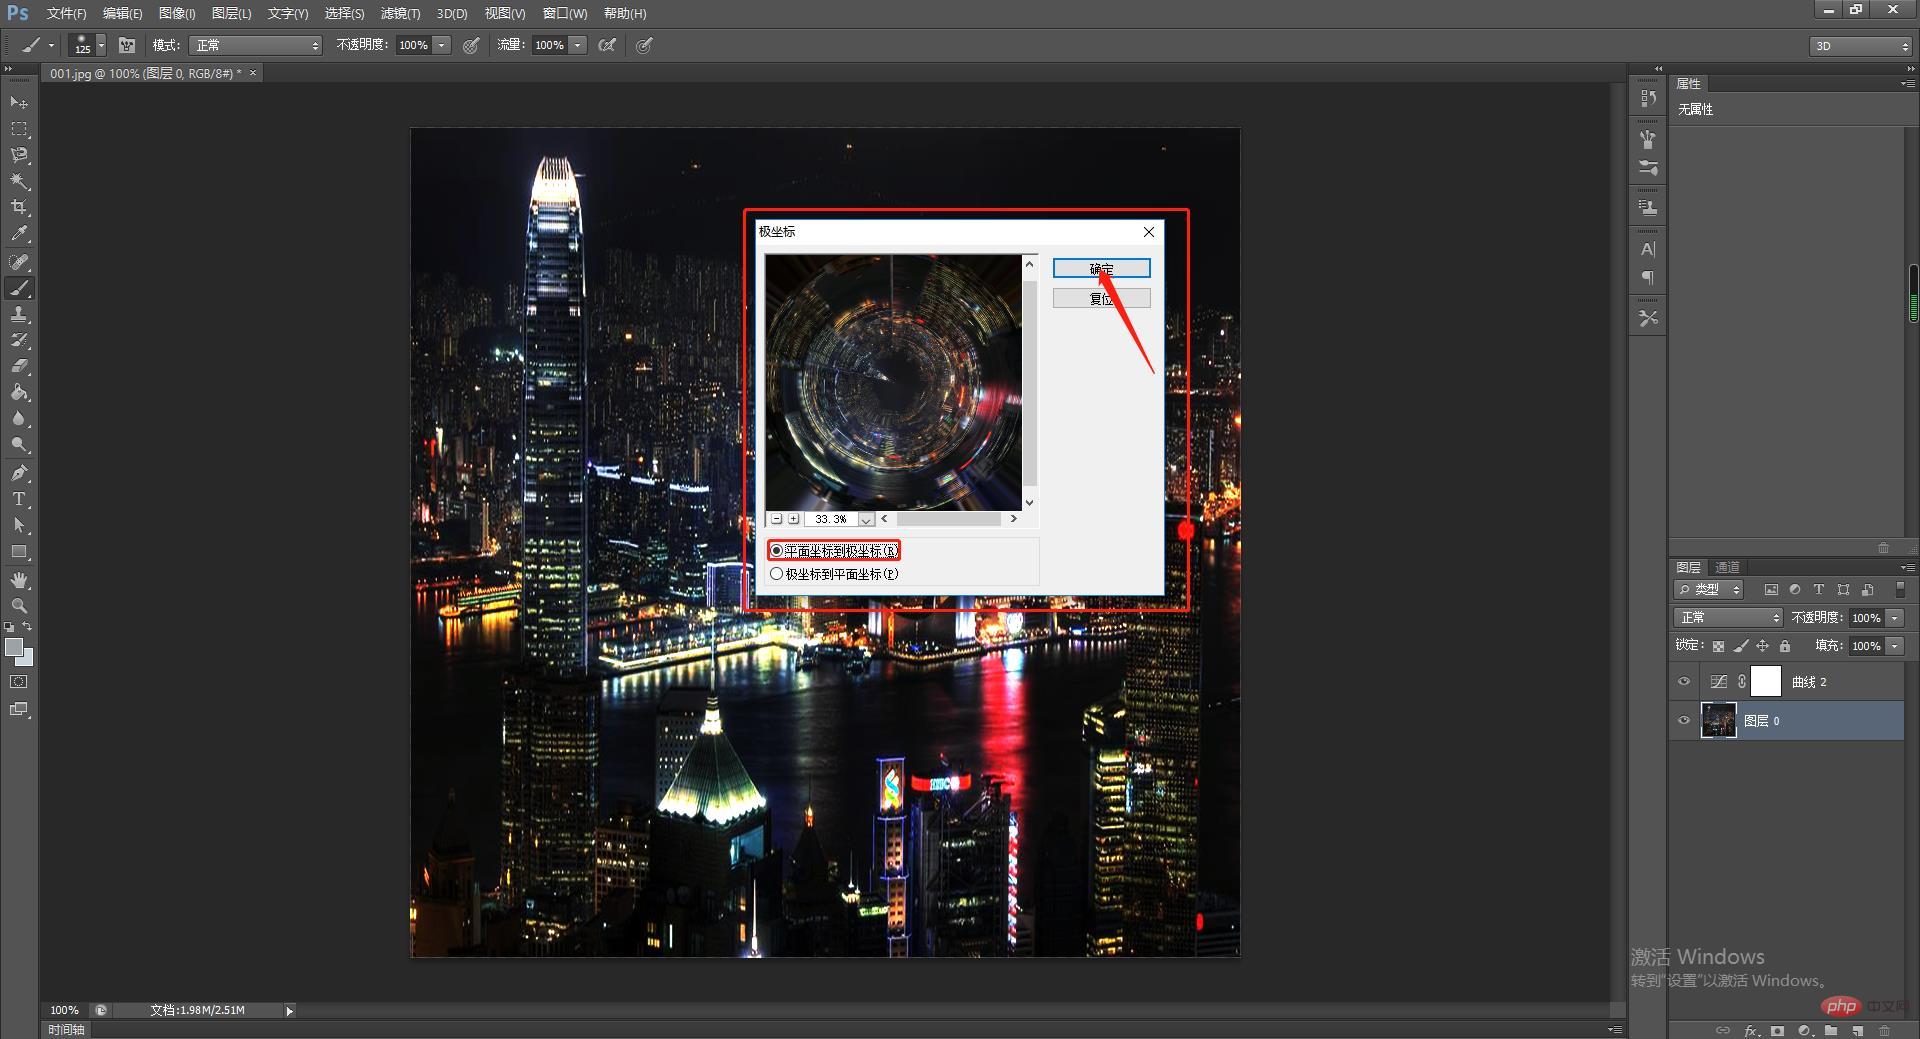
#4. The next step is the most important step in processing the work, which is to use "polar coordinates" to deform the work image. The method is to select "Polar Coordinates" in "Filter-Distort" in the menu bar. In the selection box that appears, select the default "Planar to Polar Coordinates".
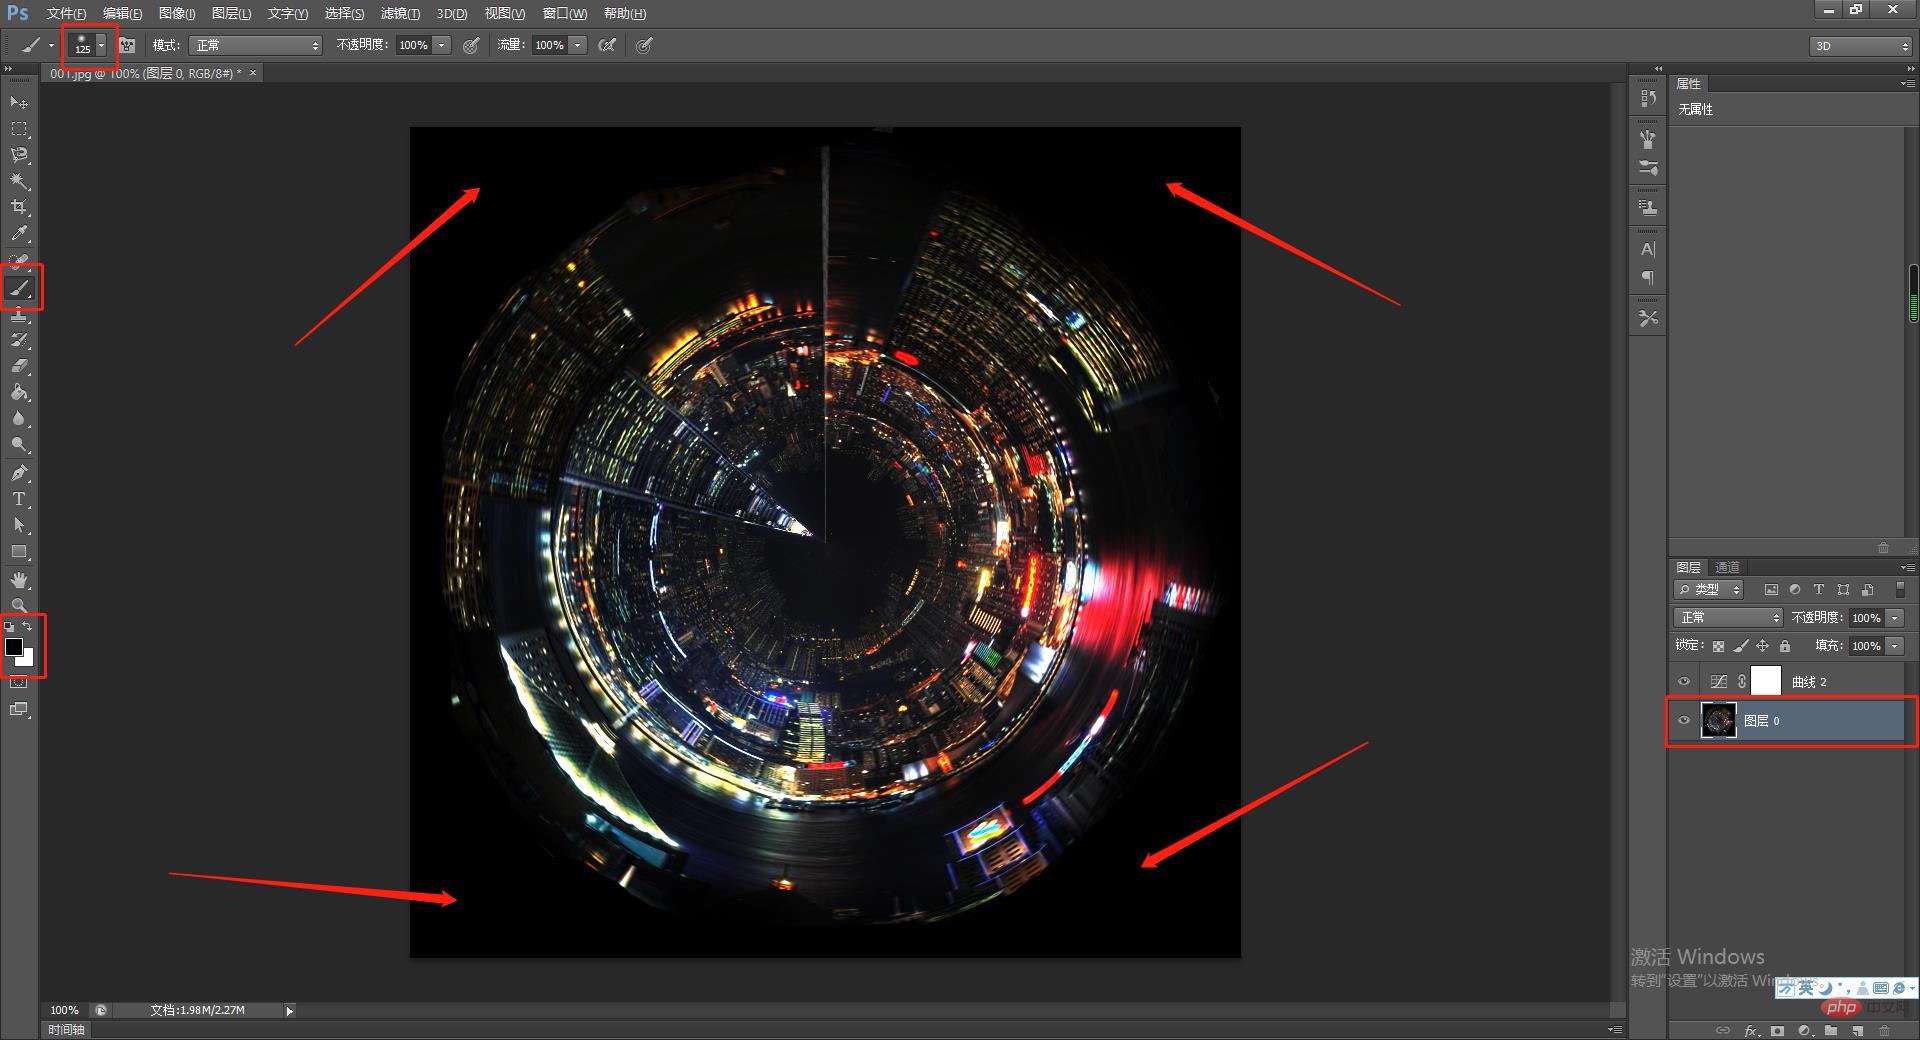
# 5. The generated image may have flaws in the center and edges of the screen. Radial lines will appear on the edges. We can set the foreground color to black and use the brush tool to slowly paint the edges. The center part uses the "Clone Stamp" tool.
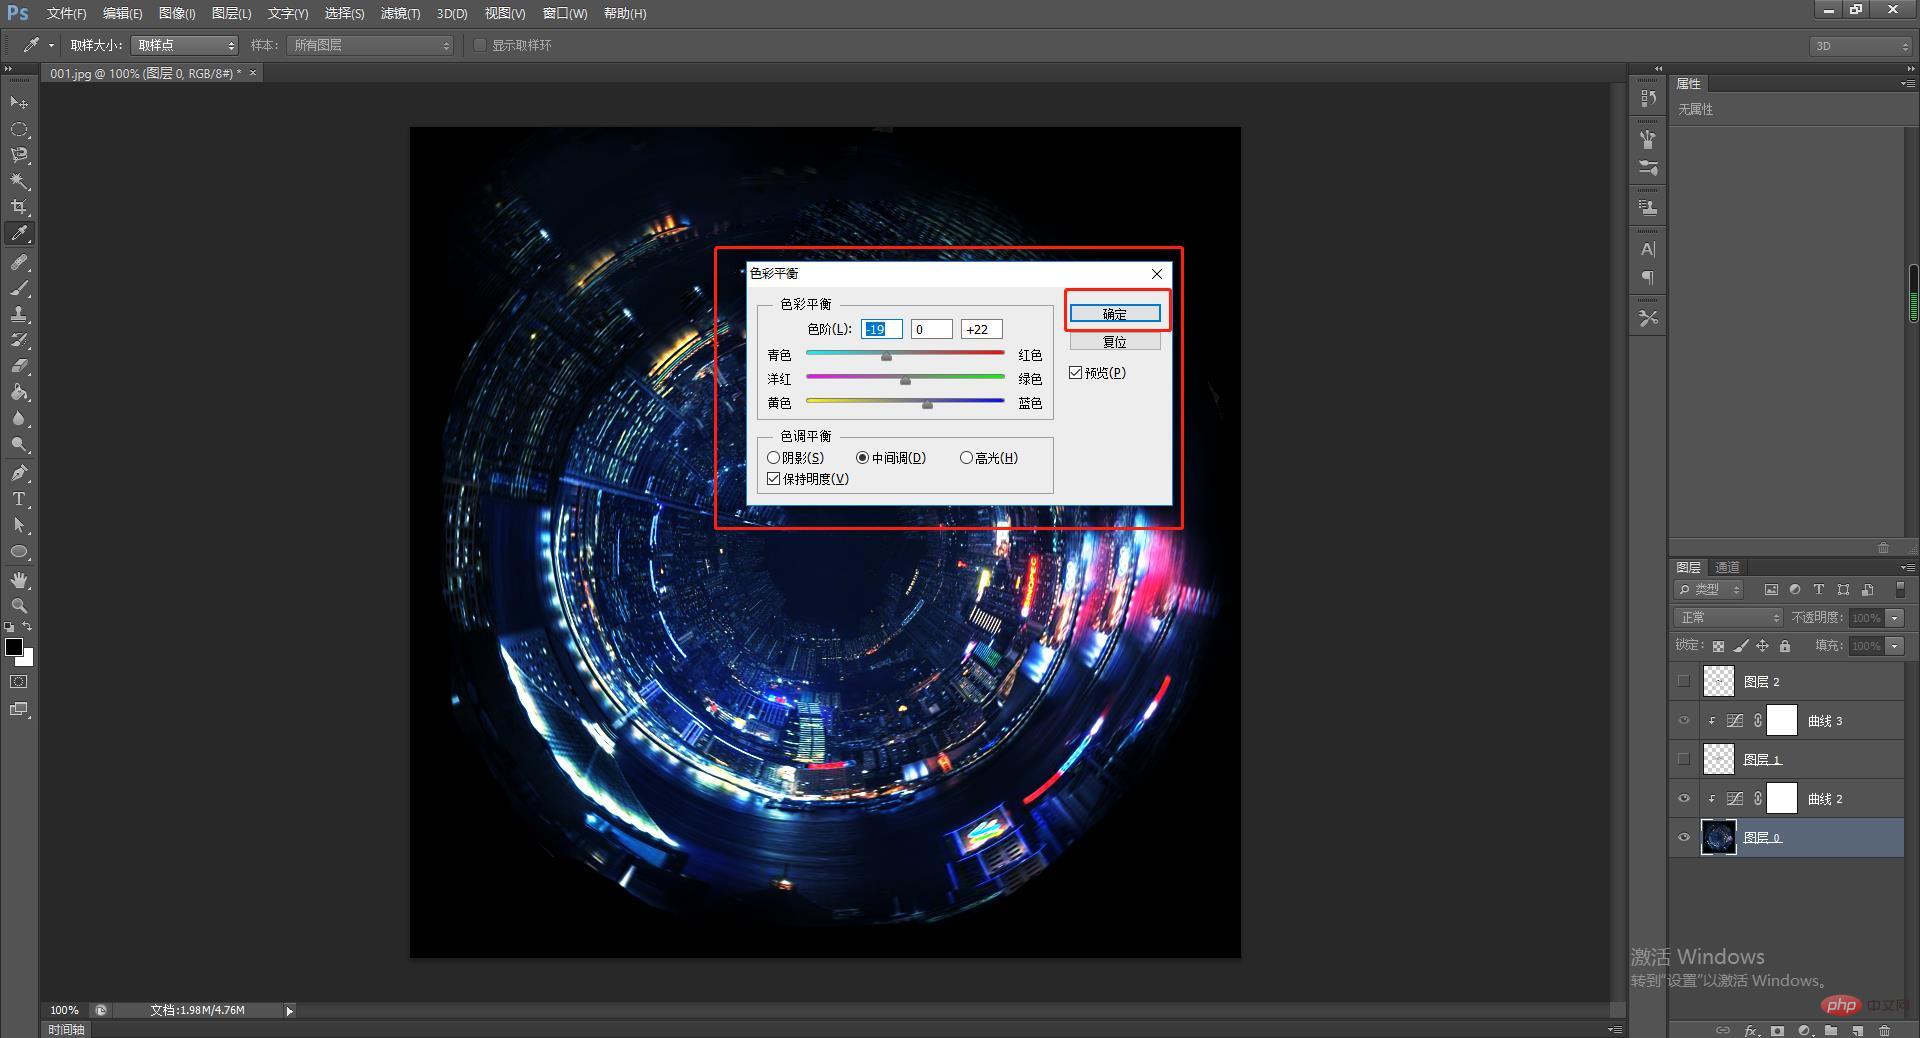
6. In order to create the coldness and magic of the inner earth world, we can change the tone of the work. There are still many methods, here we introduce a simpler method. Select "Image - Edit - Color Balance" and move the adjustment buttons toward cyan and blue.
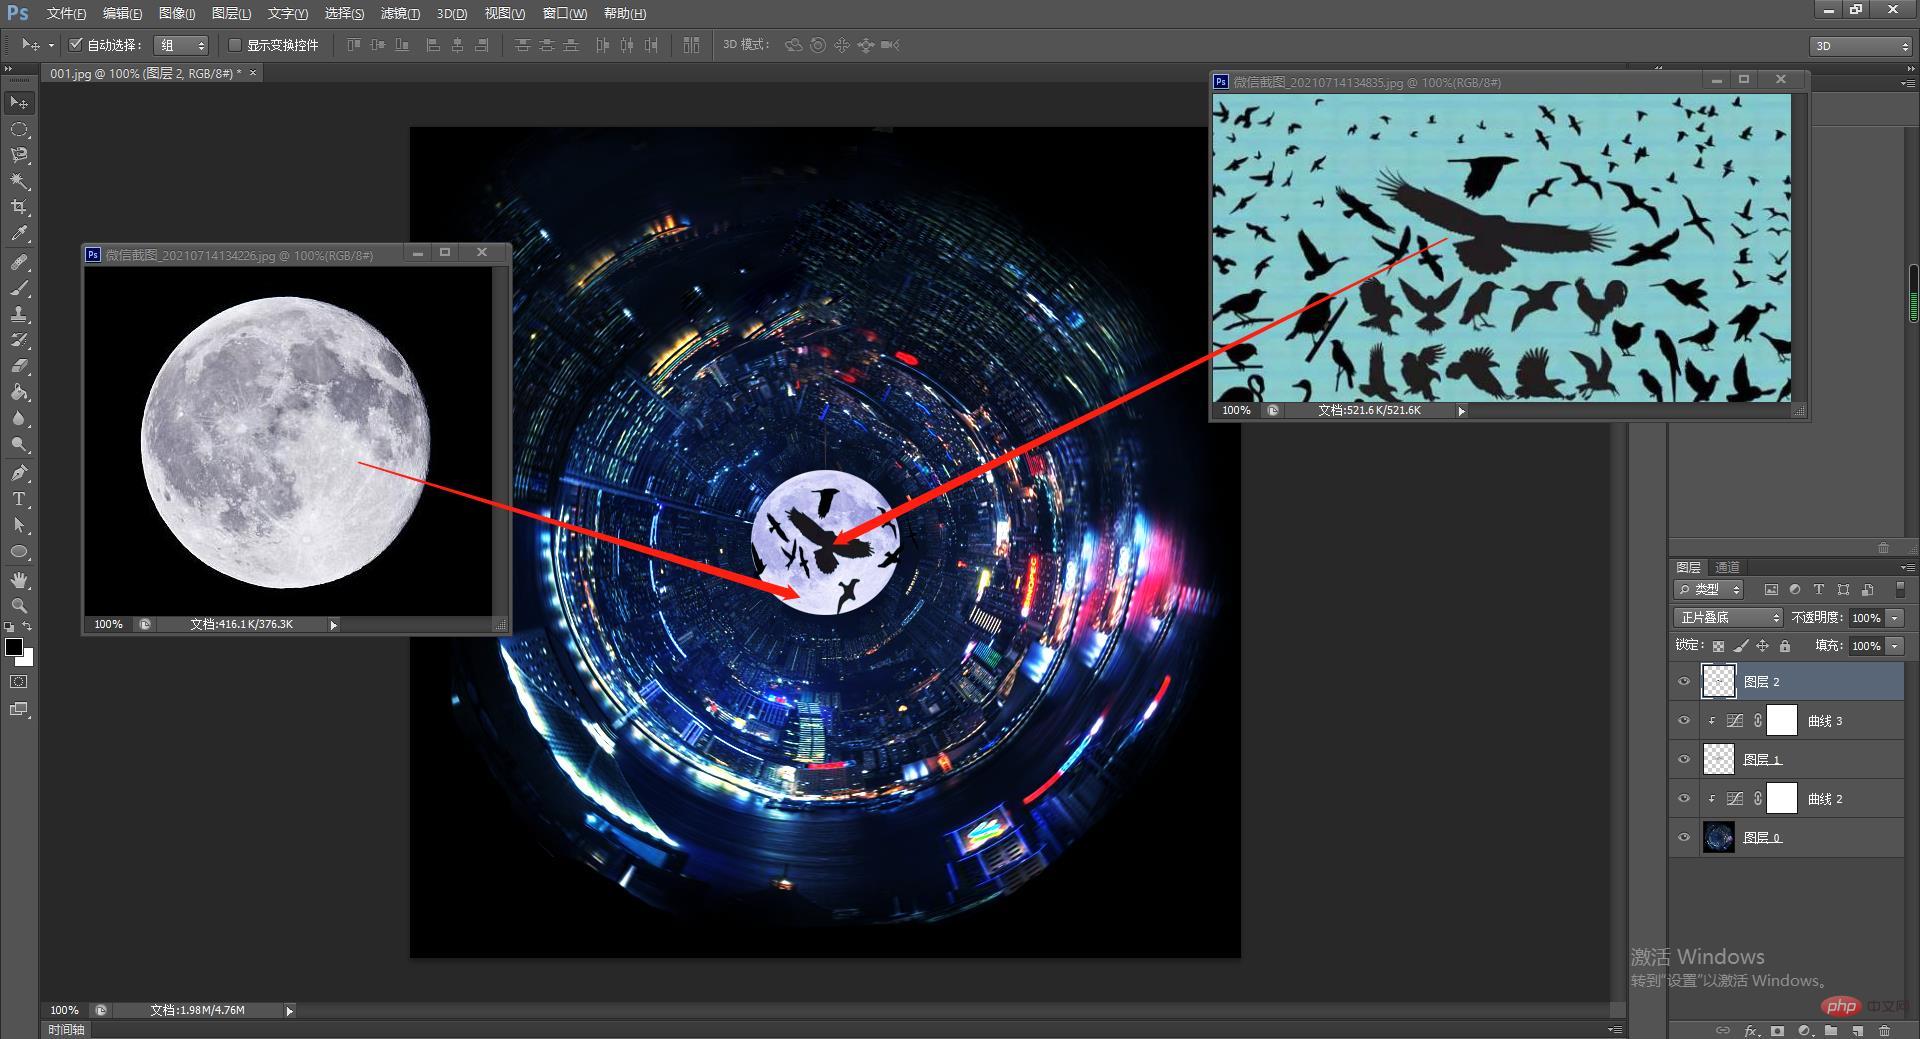
#7. We can add more magical elements to the work to make it look more gorgeous. We downloaded the moon and bird materials from the material library and integrated them into our works.
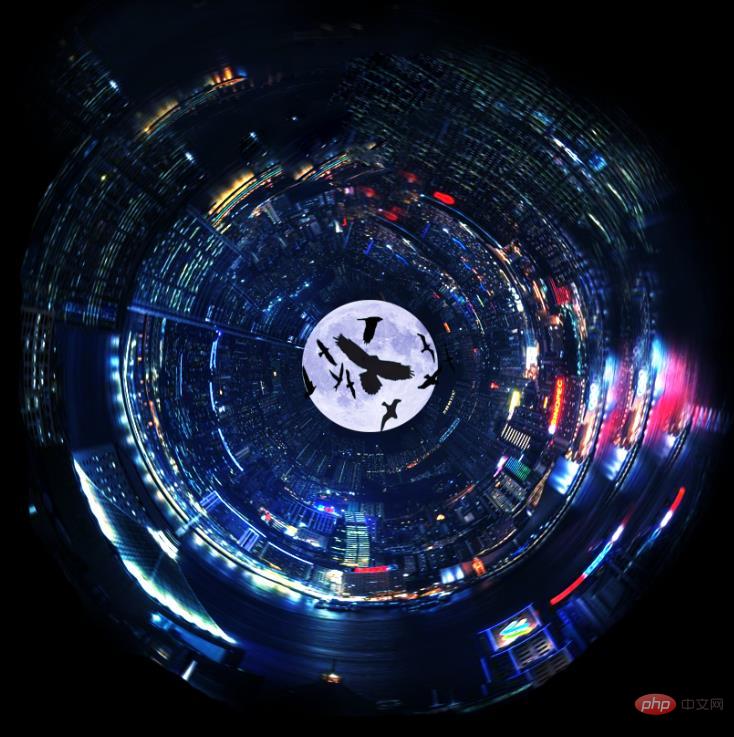
Final effect
The above is the specific operation of using PS polar coordinates to create special effects space Method, don’t you think it’s incredible? In fact, the method is not difficult. You just need to follow the editor's steps step by step. Come and try it, friends.
Recommended learning: PS video tutorial
The above is the detailed content of PS skill sharing: Use polar coordinates to create cool special effects (detailed explanations with pictures and texts). For more information, please follow other related articles on the PHP Chinese website!