
 Development Tools
VSCode
In-depth understanding of the implementation principle of markdown preview in vscode
Development Tools
VSCode
In-depth understanding of the implementation principle of markdown preview in vscode
In-depth understanding of the implementation principle of markdown preview in vscode

vscode’s markdown preview is a function we use all day long. Have you ever thought about how it is implemented? Maybe one day you will receive a request for customized markdown preview. What should you do? [Recommended learning: "vscode tutorial"]
In fact, the overall idea is relatively simple, which is to create a webview panel, set the content to the HTML generated by markdown, and then modify the webview simultaneously when markdown is updated. html will do.
Idea Analysis
Create a webview through vscode.window.createWebviewPanel, specify it to be opened on the side, and then set the html through the webview.html attribute of the panel object.
html is generated through the markdown content of the editor. The editor content is obtained through editor.document.getText(), and then a third-party markdown to html conversion library is called to generate it.
This completes the markdown preview.
After the preview needs to be updated, listen to the events of vscode.workspace.onDidSaveTextDocument and vscode.workspace.onDidChangeTextDocument. When the document is updated and saved, get the content of the editor, regenerate the html, and then set it to the webview.
WebviewPanel supports webview.postMessage(message); to pass messages, and supports a series of commands such as updateHTML, which can be triggered by passing messages.
But how do you know which document updates which webview?
You can maintain a map and record it into the map when creating the webviewPanel. The key is the file path, so that when updating, the corresponding webview can be found and updated.
In this way, the update of markdown content is completed.
In fact, the overall idea is relatively simple. Let’s write down the code.
Code implementation
Let’s take a look at the code of the vscode-markdown-preview-enhanced plug-in. This is It is also a plug-in for previewing markdown. The code is quite simple and can be used for learning.
(The following code is simplified code)
First, the plug-in must specify the triggering conditions, that is, specify activationEvents in package.json:
"activationEvents": [
    "onLanguage:markdown",
    "onCommand:markdown-preview-enhanced.openPreviewToTheSide"
],Here is It is activated when editing markdown content, and one is activated when command is executed.
The specific activation logic is in the active method:
export function activate(context: vscode.ExtensionContext) {

  const contentProvider = new MarkdownPreviewEnhancedView(context);

  context.subscriptions.push(
    vscode.commands.registerCommand(
      "markdown-preview-enhanced.openPreviewToTheSide",
      openPreviewToTheSide,
    ),
  );

  function openPreviewToTheSide(uri?: vscode.Uri) {
    let resource = uri;
    if (!(resource instanceof vscode.Uri)) {
      if (vscode.window.activeTextEditor) {
        resource = vscode.window.activeTextEditor.document.uri;
      }
    }
    contentProvider.initPreview(resource, vscode.window.activeTextEditor, {
      viewColumn: vscode.ViewColumn.Two,
      preserveFocus: true,
    });
  }
}We registered the command, and executing the command will get the url of the current editor, and then preview the markdown.
All the logic of preview is centrally defined in the instance object of MarkdownPreviewEnhancedView, and initPreivew is executed when the command is triggered.
public async initPreview(
    sourceUri: vscode.Uri,
    editor: vscode.TextEditor,
    viewOptions: { viewColumn: vscode.ViewColumn; preserveFocus?: boolean },
) {
    // 创建 webview
    let previewPanel: vscode.WebviewPanel = vscode.window.createWebviewPanel(
        "markdown-preview-enhanced",
        `Preview ${path.basename(sourceUri.fsPath)}`,
        viewOptions
    );

    // 监听 webview 的消息
    previewPanel.webview.onDidReceiveMessage((message) => {});

    // 记录 webview 到 map 中
    this.previewMaps[sourceUri.fsPath] = previewPanel;

    // 拿到编辑器的文本,生成 html
    const text = editor.document.getText();
    engine
      .generateHTMLTemplateForPreview({inputString: text})
      .then((html) => {
        // 设置 html 到 previewPanel
        previewPanel.webview.html = html;
      });
}Create the webviewPanel in initWebivew and save the webviewPanel to the map. The key is the file path of the document. Get the editor text to generate html and set it to webview.html, thus completing the markdown preview.
After this path is passed, we will realize the preview of markdown.
But only previewing once is not enough. After updating the document, it needs to be updated automatically. We continue to add event monitoring in the active method:
  context.subscriptions.push(
    vscode.workspace.onDidSaveTextDocument((document) => {
      if (isMarkdownFile(document)) {
        contentProvider.updateMarkdown(document.uri, true);
      }
    }),
  );

  context.subscriptions.push(
    vscode.workspace.onDidChangeTextDocument((event) => {
      if (isMarkdownFile(event.document)) {
        contentProvider.update(event.document.uri);
      }
    }),
);When monitoring text modification and saving, call the update method to update.
public updateMarkdown(sourceUri: Uri) {

    // 从 map 中根据文件路径取出对应的 webviewPanel
    const previewPanel = this.previewMaps[sourceUri.fsPath];

    // 生成最新的 html 传递给 webview
    const text = document.getText();
    engine
        .parseMD(text)
        .then(({ markdown, html }) => {
            previewPanel.webview.postMessage({
              command: "updateHTML",
              html
            });
        }

}Here is to pass the updateHTML command message to the html content through webview.postMessage, triggering the update of the html content.
In this way, we achieve synchronous refresh of markdown.
Summary
The preview of markdown in vscode is a commonly used but not difficult function to implement. We looked at the source code of the vscode-markdown-preview-enhanced plug-in and clarified the overall Process:
- Create a webviewPanel through vscode.window.createWebviewPanel to display html
- html After getting the text content through editor.document.getText(), generate it through a third-party package and set it to webviewPanel
- Listens to workspace.onDidSaveTextDocument and workspace.onDidChangeTextDocument to get the latest content, and then generates HTML and updates it to the webview by passing the udpateHTML message through webview.postMessage.
- It should be noted that a map needs to be recorded to save the corresponding relationship between uri.fsPath and webviewPanel, so that the text content changes and updates the corresponding webview
Markdown preview is a common but It is not a difficult requirement and is more suitable for entry-level vscode plug-in development. I hope this article can help you clarify your ideas.
For more programming-related knowledge, please visit: Introduction to Programming! !
The above is the detailed content of In-depth understanding of the implementation principle of markdown preview in vscode. For more information, please follow other related articles on the PHP Chinese website!

Hot AI Tools

Undresser.AI Undress
AI-powered app for creating realistic nude photos

AI Clothes Remover
Online AI tool for removing clothes from photos.

Undress AI Tool
Undress images for free

Clothoff.io
AI clothes remover

AI Hentai Generator
Generate AI Hentai for free.

Hot Article
Hot Tools

Notepad++7.3.1
Easy-to-use and free code editor

SublimeText3 Chinese version
Chinese version, very easy to use

Zend Studio 13.0.1
Powerful PHP integrated development environment

Dreamweaver CS6
Visual web development tools

SublimeText3 Mac version
God-level code editing software (SublimeText3)
Hot Topics


 How to view word documents in vscode How to view word documents in vscode
May 09, 2024 am 09:37 AM
How to view word documents in vscode How to view word documents in vscode
May 09, 2024 am 09:37 AM
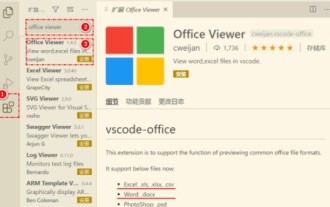
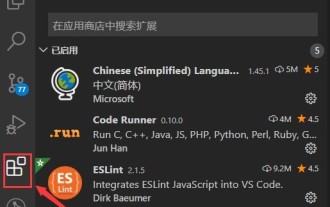
First, open the vscode software on the computer, click the [Extension] icon on the left, as shown in ① in the figure. Then, enter [officeviewer] in the search box of the extension interface, as shown in ② in the figure. Then, from the search Select [officeviewer] to install in the results, as shown in ③ in the figure. Finally, open the file, such as docx, pdf, etc., as shown below
 How to draw a flow chart with vscode_How to draw a flow chart with visual_studio code
Apr 23, 2024 pm 02:13 PM
How to draw a flow chart with vscode_How to draw a flow chart with visual_studio code
Apr 23, 2024 pm 02:13 PM
First, open visual studio code on the computer, click the four square buttons on the left, then enter draw.io in the search box to query the plug-in, click Install. After installation, create a new test.drawio file, then select the test.drawio file, enter the editing mode on the left There are various graphics on the side. You can draw the flow chart by selecting at will. After drawing, click File → Embed → svg and then select Embed. Copy the svg code. Paste the copied svg code into the html code. Open the html web page and you can see it. Click on the picture on the web page to jump to the flow chart. On this page, you can zoom in and out of the flow chart. Here, we choose to click on the pencil pattern in the lower right corner to jump to the web page.
 How to write Maude in Vscode_How to write Maude in Vscode
Apr 23, 2024 am 10:25 AM
How to write Maude in Vscode_How to write Maude in Vscode
Apr 23, 2024 am 10:25 AM
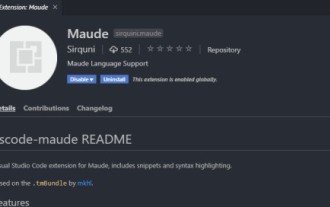
First, you can search for the Maude plug-in in the vscode plug-in manager. Then, create a new file with the extension maude to use maude's code snippets and syntax highlighting. Terminal -> New Terminal can open the vscode built-in terminal in the current folder to run the maude or full-maude program. In maude's official tutorial, there are also examples of http clients, which can be called and run as shown in the figure. If you want to associate files with the fm extension, open settings, search for fileassociations in user settings, and open settings.json. Just add an entry to the file association, that is, the entry from *.fm to maude. But full
 Caltech Chinese use AI to subvert mathematical proofs! Speed up 5 times shocked Tao Zhexuan, 80% of mathematical steps are fully automated
Apr 23, 2024 pm 03:01 PM
Caltech Chinese use AI to subvert mathematical proofs! Speed up 5 times shocked Tao Zhexuan, 80% of mathematical steps are fully automated
Apr 23, 2024 pm 03:01 PM
LeanCopilot, this formal mathematics tool that has been praised by many mathematicians such as Terence Tao, has evolved again? Just now, Caltech professor Anima Anandkumar announced that the team released an expanded version of the LeanCopilot paper and updated the code base. Image paper address: https://arxiv.org/pdf/2404.12534.pdf The latest experiments show that this Copilot tool can automate more than 80% of the mathematical proof steps! This record is 2.3 times better than the previous baseline aesop. And, as before, it's open source under the MIT license. In the picture, he is Song Peiyang, a Chinese boy. He is
 How to enable background updates in vscode How to enable background updates in vscode
May 09, 2024 am 09:52 AM
How to enable background updates in vscode How to enable background updates in vscode
May 09, 2024 am 09:52 AM
1. First, after opening the interface, click the file menu in the upper left corner. 2. Then, click the settings button in the preferences column. 3. Then, in the settings page that jumps, find the update section. 4. Finally, click the mouse to check and enable it. Download and install the new VSCode version button in the background on Windows and restart the program.
 How to add files to vscode workspace How to add files to vscode workspace
May 09, 2024 am 09:43 AM
How to add files to vscode workspace How to add files to vscode workspace
May 09, 2024 am 09:43 AM
1. First, open the vscode software, click the explorer icon, and find the workspace window 2. Then, click the file menu in the upper left corner and find the add folder to workspace option 3. Finally, find the folder location in the local disk , click the add button
 How to disable wsl configuration file in vscode How to disable wsl configuration file in vscode
May 09, 2024 am 10:30 AM
How to disable wsl configuration file in vscode How to disable wsl configuration file in vscode
May 09, 2024 am 10:30 AM
1. First, open the settings option in the settings menu. 2. Then, find the terminal column in the commonly used page. 3. Finally, uncheck the usewslprofiles button on the right side of the column.
 How to set animation smooth insertion in VScode VScode tutorial to set animation smooth insertion
May 09, 2024 am 09:49 AM
How to set animation smooth insertion in VScode VScode tutorial to set animation smooth insertion
May 09, 2024 am 09:49 AM
1. First, after opening the interface, click the workspace interface 2. Then, in the open editing panel, click the File menu 3. Then, click the Settings button under the Preferences column 4. Finally, click the mouse to check the CursorSmoothCaretAnimation button and save Just set it
