 WeChat Applet
 Mini Program Development
 An in-depth explanation of how to implement search functions in mini programs
An in-depth explanation of how to implement search functions in mini programs
How to implement the common search functions of mini programs? The following article will take you step by step to understand the method of implementing the search function in the mini program. I hope it will be helpful to you!

In the process of developing each small program, it will basically be equipped with a search function. So how is the relatively intelligent search function implemented? After a period of study, I have learned a relatively comprehensive search box function, let’s take a look!

Development Preparation
- WeChat Mini Program
- Youzanvant Component Library
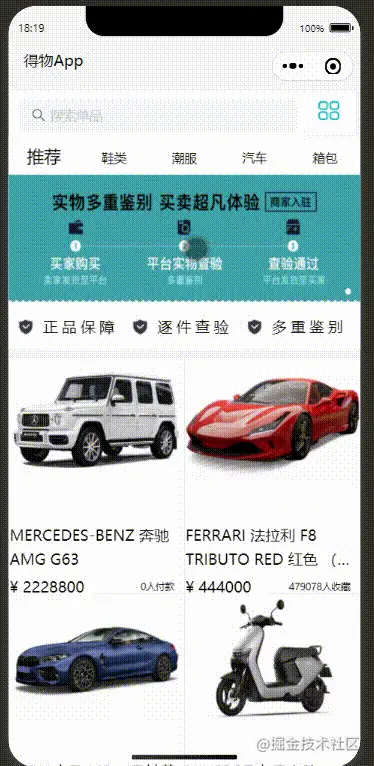
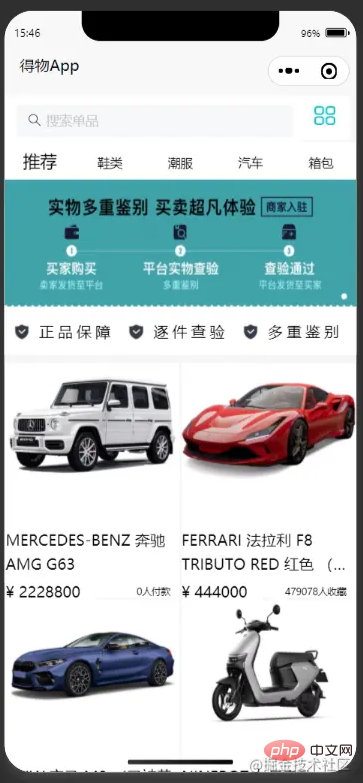
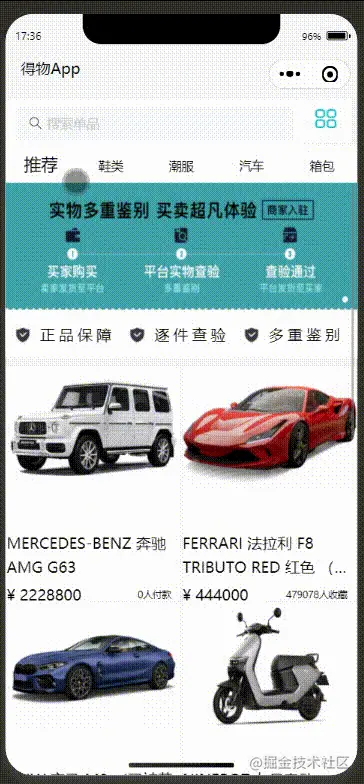
Effect display
Let’s take a look at the effect first

Preliminary preparation
The cloud database imports some data to test the search Frame function

realization
Create three new pages under the directory
index for The first page of the search box
search is the page used for specific searches
hotsearch is the detailed page of the search content
First of all, let’s take a look at the layout of the index on the first page of the search box. Here we mainly introduce the content of the search box. The other content below will not be described in detail here

This is the index.wxml code
      <view class="search_1" bindtap="gotoSearch">
          <van-search
          placeholder="搜索单品" disabled
          />
        </view>
      <view class="search_2">
        <view class="pic" bindtap="list" >
          <image src=""></image>
        </view>
      </view>
    </view>
This is the search.wxml code of the search box
<view class="dewu-search">
<view class="return" >
<view class="return_pic" bindtap="gotoindex">
<image ></image>
</view>
<view class="txt">搜索</view>
</view>
</view>
<van-search
value="{{value}}"
show-action
placeholder="输入商品名称、货号"
bind:clear="onClear"
bind:search="onSearch"
bind:cancel="oncancel"
bind:change="onchange"
bindtap="input"
value="{{value}}"
/>
<block wx:if="results.length > 0">
<van-cell wx:for="{{results}}" wx:key="_id" title="{{item.title}}" size="large" />
</block>
<view class="page1" hidden="{{issuggest==true?'hidden':''}}" >
<view class="bd">
<view class="content">热门搜索</view>
<view class="box">
<view class="items">
<view class="item" wx:for="{{goods}}"
wx:key="index" bindtap="hotsearch" data-id="{{item.id}}"
>
{{item.hot}}
</view>
</view>
</view>
</view>
<view class="last">
<view class="content">搜索历史</view>
<view class="box">
<view class="items">
<view class="item" wx:for="{{historyList}}" wx:key="index" data-id="{{item.id}}" bindtap="gotohistoryList"
wx:key="index">
{{item.hot}}
</view>
</view>
</view>
</view>
</view>
<view class="page2" hidden="{{issuggest==false?'hidden':''}}">
<view class="content1">
<view class="title" wx:for="{{goods1}}" data-id="{{item.id}}"
wx:key="index" bindtap="hotsearch" >
{{item.hot}}
</view>
</view>
</view>
</view>js must first be introduced into the cloud database Data
    const db = wx.cloud.database();
const dewuCollection = db.collection('dewu');To pop up related content when the input box changes, two pages are needed. When there is content input in the input box, the hidden page is displayedhidden="{{ issuggest==false?'hidden':''}}" to determine whether related content pages should appear.
Use indexOf to determine whether e.detail (content of the input box) exists in the cloud database. If it exists, then store this data in an array and connect For the previously searched array, use wx.setStorageSync(); to store the data in the input box into storage, and then wx.getStorageSync() to extract the data.
This is the details page that will pop up when there is data in the input box. Click to jump to the product details page

This is the search box Logic
if(e.detail.length!=0){
this.setData({
issuggest:true,
})
var arr = [];
console.log(this.data.goods.length);
for (var i = 0; i < this.data.goods.length; i++) {
if (this.data.goods[i].hot.indexOf(e.detail)>=0) {
arr.push(this.data.goods[i]);
}
this.setData({
goods1:arr,
})
}
}
else {
console.log('succes');
this.setData({
issuggest:false
})
}
},
async onSearch(e){
var arr1=new Array();
var historyList=new Array();
var storage=new Array();
for (let i = 0; i < this.data.goods.length; i++){
if(e.detail==this.data.goods[i].hot){
arr1.push(this.data.goods[i]);
console.log(arr1);
break
}
else{
arr1.push(e.detail);
console.log(arr1);
}
}
if(arr1.length>1){
this.setData({
storage:arr1.slice(arr1.length-1,arr1.length)
})
}
else{
console.log(arr1,'要存进去的数据');
this.setData({
storage:arr1
})
}
if(this.data.historyList !=[]){
this.data.historyList = this.data.historyList.concat(this.data.storage);//连接
}
else{
this.data.historyList=this.data.storage
}
wx.setStorageSync('historyList', this.data.historyList);
this.setData({
historyList:this.data.historyList
})
},
wx.navigateTo can be used to jump to a detailed page, add a string template, determine the value of the id, and use data to Drive the page and jump to the same page with different data.
wx.navigateTo({
      url: `../hotsearch/hotsearch?id=`+id
})Finally, the data needs to be updated
     wx.showLoading({
       title: '数据加载中...',
     })
     setTimeout(()=>{
      wx.hideLoading()
       this.setData({
          goodsNav: nav,
          goodsList:List,
          recommend:List,
          goods2:this.data.historyList
       })
      },1000)
// console.log(goodsList,'===========');
},Be careful not to forget to introduce the address of the component you need to use in the global json or local page json
    "usingComponents": {
        "van-search":"./miniprogram_npm/@vant/weapp/search/index"
},Extension
This function of automatically jumping to the middle of the navigation bar is also very commonly used

This is the most important part of the wxml codescroll- x="true" Let the navigation bar slide in the horizontal direction scroll-with-animation="true" Let the sliding animate, scroll-into-view="{{scrollTop }}"
<scroll-view scroll-x="true"
scroll-with-animation="true"
style="width:100%;" class="scroll-view_H "
scroll-into-view="{{scrollTop}}">
<view
wx:for="{{goodsNav}}"
wx:key="index"
id="{{item.id}}"
data-index="{{index}}"
data-type="{{item.type}}"
bindtap="changegoods"
class="scroll-view-item_H {{activeNavIndex == index?'active': ''}} "
>
<text>{{item.text}}</text>
</view>
</scroll-view>
</view>This is the event bound to the navigation barlet {index, type} = e.currentTarget.dataset;Extract index and type, and then set A count is used as the first few, and then spliced to id, and the value of id is passed to scrollTop, so that the navigation bar jumps to scrollTopThis value, this value is in the middle
     console.log(e);
    let {index, type} = e.currentTarget.dataset;
    console.log("index=" +index, "type="+type);
    this.setData({
      activeNavIndex:index
    })
    if (type == 'recommend') {
      this.setData({
        goodsList: this.data.recommend
      })
    }
    else {
        let goods = this.data.recommend.filter((good) => good.camptype == type )
        this.setData({
          goodsList: goods
        })
        //console.log(this.data.goods)
      }

      var index1 = e.currentTarget.dataset.index;
      var count = 2;
      var id = "item"+(index1-count);//拼接id
      if(count == 2 && index1 < 3 || count == 3 && index1 < 2 || count == 4 && index1 < 3){
        id = "item0";
      }
      console.log("下标",index1,"---分类id名称",id)
      this.setData({
        scrollTop: id
      })
},The effect can be achieved by adding wxss However, there is a problem with writing like this, that is, when the displayed content is an even number, such as 6, it cannot jump to the middle correctly, and will jump to the position of 3, which will cause a slight deviation. I have not solved this problem yet. , I wonder if anyone knows how to solve this?
Source code
Here is the complete source code of the project. Part of the code is given above. If you are interested, you can check out the complete source code
https: //gitee.com/xinccc/fullstack_huoshan/tree/master/wxapp/dewu
Summary
This is the first time I have written a slightly complete project. Here I mainly introduce the main difficulties I encountered during the development process. Although there are no difficulties in general, It means a lot to me. Having such an experience made me realize that I still have a lot to learn. I am also grateful to the teachers and classmates who helped me with guidance when I had difficulties. If you feel that this article If the article reaches your point, you might as well give me a like, which will be a great encouragement to me. If you guys have any advice, I hope we can discuss and learn together in the comment area.
For more programming-related knowledge, please visit: Introduction to Programming! !
The above is the detailed content of An in-depth explanation of how to implement search functions in mini programs. For more information, please follow other related articles on the PHP Chinese website!

Hot AI Tools

Undresser.AI Undress
AI-powered app for creating realistic nude photos

AI Clothes Remover
Online AI tool for removing clothes from photos.

Undress AI Tool
Undress images for free

Clothoff.io
AI clothes remover

Video Face Swap
Swap faces in any video effortlessly with our completely free AI face swap tool!

Hot Article

Hot Tools

Notepad++7.3.1
Easy-to-use and free code editor

SublimeText3 Chinese version
Chinese version, very easy to use

Zend Studio 13.0.1
Powerful PHP integrated development environment

Dreamweaver CS6
Visual web development tools

SublimeText3 Mac version
God-level code editing software (SublimeText3)

Hot Topics
 1387
1387
 52
52
 Develop WeChat applet using Python
Jun 17, 2023 pm 06:34 PM
With the popularity of mobile Internet technology and smartphones, WeChat has become an indispensable application in people's lives. WeChat mini programs allow people to directly use mini programs to solve some simple needs without downloading and installing applications. This article will introduce how to use Python to develop WeChat applet. 1. Preparation Before using Python to develop WeChat applet, you need to install the relevant Python library. It is recommended to use the two libraries wxpy and itchat here. wxpy is a WeChat machine
 Implement card flipping effects in WeChat mini programs
Nov 21, 2023 am 10:55 AM
Implementing card flipping effects in WeChat mini programs In WeChat mini programs, implementing card flipping effects is a common animation effect that can improve user experience and the attractiveness of interface interactions. The following will introduce in detail how to implement the special effect of card flipping in the WeChat applet and provide relevant code examples. First, you need to define two card elements in the page layout file of the mini program, one for displaying the front content and one for displaying the back content. The specific sample code is as follows: <!--index.wxml-->&l
 Alipay launched the 'Chinese Character Picking-Rare Characters' mini program to collect and supplement the rare character library
Oct 31, 2023 pm 09:25 PM
According to news from this site on October 31, on May 27 this year, Ant Group announced the launch of the "Chinese Character Picking Project", and recently ushered in new progress: Alipay launched the "Chinese Character Picking-Uncommon Characters" mini program to collect collections from the society Rare characters supplement the rare character library and provide different input experiences for rare characters to help improve the rare character input method in Alipay. Currently, users can enter the "Uncommon Characters" applet by searching for keywords such as "Chinese character pick-up" and "rare characters". In the mini program, users can submit pictures of rare characters that have not been recognized and entered by the system. After confirmation, Alipay engineers will make additional entries into the font library. This website noticed that users can also experience the latest word-splitting input method in the mini program. This input method is designed for rare words with unclear pronunciation. User dismantling
 How uniapp achieves rapid conversion between mini programs and H5
Oct 20, 2023 pm 02:12 PM
How uniapp can achieve rapid conversion between mini programs and H5 requires specific code examples. In recent years, with the development of the mobile Internet and the popularity of smartphones, mini programs and H5 have become indispensable application forms. As a cross-platform development framework, uniapp can quickly realize the conversion between small programs and H5 based on a set of codes, greatly improving development efficiency. This article will introduce how uniapp can achieve rapid conversion between mini programs and H5, and give specific code examples. 1. Introduction to uniapp unia
 HTML, CSS and jQuery: Make a data table with search functionality
Oct 26, 2023 am 10:03 AM
HTML, CSS and jQuery: Make a data table with search function In modern web development, data table is a frequently used element. In order to facilitate users to find and filter data, adding search functions to data tables has become an essential function. This article will introduce how to use HTML, CSS and jQuery to create a data table with search function, and provide specific code examples. 1. HTML structure First, we need to create a basic HTML structure to accommodate the data table
 php Elasticsearch: How to use dynamic mapping to achieve flexible search functionality?
Sep 13, 2023 am 10:21 AM
PHPElasticsearch: How to use dynamic mapping to achieve flexible search capabilities? Introduction: Search functionality is an integral part of developing modern applications. Elasticsearch is a powerful search and analysis engine that provides rich functionality and flexible data modeling. In this article, we will focus on how to use dynamic mapping to achieve flexible search capabilities. 1. Introduction to dynamic mapping In Elasticsearch, mapping (mapp
 How to develop powerful search capabilities using PHP and Manticore Search
Aug 06, 2023 am 10:13 AM
Overview of how to develop powerful search functionality using PHP and ManticoreSearch: Search functionality plays a vital role in modern application development. In order to achieve efficient and accurate search capabilities, it is crucial to utilize a suitable search engine. ManticoreSearch is a powerful full-text search engine that provides high-performance and scalable search capabilities. This article will introduce how to use PHP and ManticoreSearch to develop powerful search functions, and
 How to operate mini program registration
Sep 13, 2023 pm 04:36 PM
Mini program registration operation steps: 1. Prepare copies of personal ID cards, corporate business licenses, legal person ID cards and other filing materials; 2. Log in to the mini program management background; 3. Enter the mini program settings page; 4. Select " "Basic Settings"; 5. Fill in the filing information; 6. Upload the filing materials; 7. Submit the filing application; 8. Wait for the review results. If the filing is not passed, make modifications based on the reasons and resubmit the filing application; 9. The follow-up operations for the filing are Can.


