Vue.js method to solve cross-domain problems: 1. Enter the vue project root directory; 2. Find the vue.config.js file and open it with an editor; 3. Set cross-domain in proxy .

The operating environment of this article: windows10 system, vue 2.5.2, thinkpad t480 computer.
To implement cross-domain in vue development, you need to first enter the vue project root directory, find the vue.config.js file, and then set the cross-domain in the proxy:
Tips: If you cannot find it Go to the vue.config.js file and create one yourself.
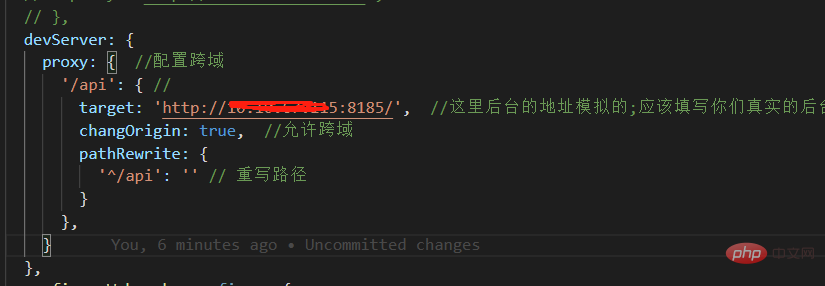
devServer: {
    proxy: {  //配置跨域
      '/api': {
        target: 'http://121.121.67.254:8185/',  //这里后台的地址模拟的;应该填写你们真实的后台接口
        changOrigin: true,  //允许跨域
        pathRewrite: {
          /* 重写路径,当我们在浏览器中看到请求的地址为:http://localhost:8080/api/core/getData/userInfo 时
            实际上访问的地址是:http://121.121.67.254:8185/core/getData/userInfo,因为重写了 /api
           */
          '^/api': ''
        }
      },
    }
},The principle of using proxy in vue for cross-domain is: send the domain name to the local server (start the service of the vue project, loclahost:8080), and then the local server requests the real server.
The following are the steps I took to implement cross-domain development in the vue project:
1. Set the address to be accessed in the proxy, and rewrite the /api empty string, because we The actual requested address does not include /api. This rewriting is very important!!!

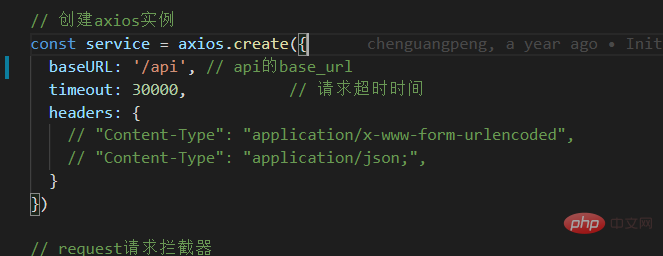
#2. When creating an axios instance, set the baseURL to /api. At this time Our cross-domain has been completed.

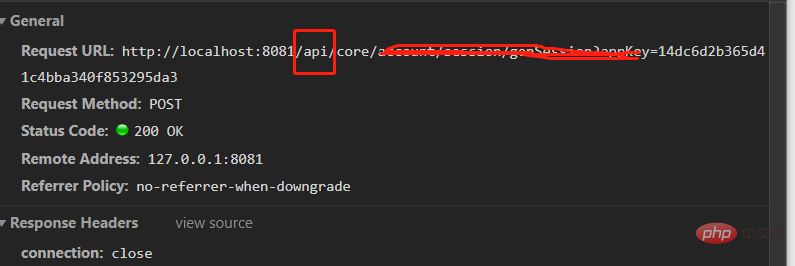
3. If the real address of the request is: http://121.121.67.254:8185/core/getdata/userInfo, but we will see it on the browser Like this: http://localhost:8080/api/core/getData/userInfo, there is an extra /api, but it does not affect our request for data.

Recommended learning: php training
The above is the detailed content of How vue.js solves cross-domain problems. For more information, please follow other related articles on the PHP Chinese website!
 Why does vue.js report an error?
 What are the uses of vue.js slots?
 How to jump with parameters in vue.js
 Latest Bitcoin Quotes
 There is no WLAN option in win11
 How to adjust mouse sensitivity
 What are character constants
 Virtual mobile phone number to receive verification code
 How to stop setInterval