
 Web Front-end
JS Tutorial
JS CSS implements six-level website navigation main menu effect_javascript skills
Web Front-end
JS Tutorial
JS CSS implements six-level website navigation main menu effect_javascript skills
JS CSS implements six-level website navigation main menu effect_javascript skills

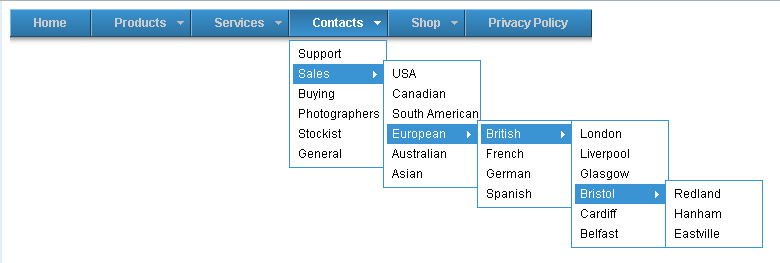
本文实例讲述了JS+CSS实现六级网站导航主菜单效果。分享给大家供大家参考。具体如下:
这是一款JS+CSS实现支持6级的网站导航主菜单,级级相信够大家用了,外观蓝色风格,也是使用最多的一种菜单颜色,而且菜单的兼容性非常好,支持IE6\IE7\IE8,火狐、GG浏览器等不同内核的主流浏览器。
运行效果截图如下:
在线演示地址如下:
http://demo.jb51.net/js/2015/js-css-6l-web-nav-menu-demo/
具体代码如下:
<!DOCTYPE html PUBLIC "-//W3C//DTD XHTML 1.0 Strict//EN"
"http://www.w3.org/TR/xhtml2/DTD/xhtml1-strict.dtd">
<html xmlns="http://www.w3.org/1999/xhtml" xml:lang="en">
<head>
<meta http-equiv="Content-Type" content="text/html; charset=UTF-8" />
<title>CSS六级导航菜单</title>
<style>
.preload1 {background: url(images/blank_over.gif);}
.preload2 {background: url(images/blank_overa.gif);}
#nav {padding:0; margin:0; list-style:none; height:36px; background:#fff; position:relative; z-index:500; font-family:arial, verdana, sans-serif;}
#nav li.top {display:block; float:left;}
#nav li a.top_link {display:block; float:left; height:36px; line-height:27px; color:#ccc; text-decoration:none; font-size:11px; font-weight:bold; padding:0 0 0 12px; cursor:pointer;background: url(images/blank.gif);}
#nav li a.top_link span {float:left; display:block; padding:0 24px 0 12px; height:36px;background:url(images/blank.gif) right top;}
#nav li a.top_link span.down {float:left; display:block; padding:0 24px 0 12px; height:36px; background:url(images/blanka.gif) no-repeat right top;}
#nav li a.top_link:hover {color:#fff; background: url(images/blank_over.gif) no-repeat;}
#nav li a.top_link:hover span {background:url(images/blank_over.gif) no-repeat right top;}
#nav li a.top_link:hover span.down {background:url(images/blank_overa.gif) no-repeat right top;}
#nav li:hover > a.top_link {color:#fff; background: url(images/blank_over.gif) no-repeat;}
#nav li:hover > a.top_link span {background:url(images/blank_over.gif) no-repeat right top;}
#nav li:hover > a.top_link span.down {background:url(images/blank_overa.gif) no-repeat right top;}
#nav li:hover {position:relative; z-index:200;}
#nav ul,
#nav li:hover ul ul,
#nav li:hover ul li:hover ul ul,
#nav li:hover ul li:hover ul li:hover ul ul,
#nav li:hover ul li:hover ul li:hover ul li:hover ul ul
{position:absolute; left:-9999px; top:-9999px; width:0; height:0; margin:0; padding:0; list-style:none;}
#nav li:hover ul.sub
{left:0; top:31px; background: #fff; padding:3px; border:1px solid #3a93d2; white-space:nowrap; width:90px; height:auto; z-index:300;}
#nav li:hover ul.sub li
{display:block; height:20px; position:relative; float:left; width:90px; font-weight:normal;}
#nav li:hover ul.sub li a
{display:block; font-size:11px; height:20px; width:90px; line-height:20px; text-indent:5px; color:#000; text-decoration:none;}
#nav li ul.sub li a.fly{background:#fff url(images/arrow.gif) 80px 7px no-repeat;}
#nav li:hover ul.sub li a:hover {background:#3a93d2; color:#fff;}
#nav li:hover ul.sub li a.fly:hover{background:#3a93d2 url(images/arrow_over.gif) 80px 7px no-repeat; color:#fff;}
#nav li:hover ul li:hover > a.fly {background:#3a93d2 url(images/arrow_over.gif) 80px 7px no-repeat; color:#fff;}
#nav li:hover ul li:hover ul,
#nav li:hover ul li:hover ul li:hover ul,
#nav li:hover ul li:hover ul li:hover ul li:hover ul,
#nav li:hover ul li:hover ul li:hover ul li:hover ul li:hover ul
{left:90px; top:-4px; background: #fff; padding:3px; border:1px solid #3a93d2; white-space:nowrap; width:90px; z-index:400; height:auto;}
</style>
<script type="text/javascript">
stuHover = function() {
 var cssRule;
 var newSelector;
 for (var i = 0; i < document.styleSheets.length; i++)
 for (var x = 0; x < document.styleSheets[i].rules.length ; x++)
  {
  cssRule = document.styleSheets[i].rules[x];
  if (cssRule.selectorText.indexOf("LI:hover") != -1)
  {
   newSelector = cssRule.selectorText.replace(/LI:hover/gi, "LI.iehover");
  document.styleSheets[i].addRule(newSelector , cssRule.style.cssText);
  }
 }
 var getElm = document.getElementById("nav").getElementsByTagName("LI");
 for (var i=0; i<getElm.length; i++) {
 getElm[i].onmouseover=function() {
  this.className+=" iehover";
 }
 getElm[i].onmouseout=function() {
  this.className=this.className.replace(new RegExp(" iehover\\b"), "");
 }
 }
}
if (window.attachEvent) window.attachEvent("onload", stuHover);
</script>
</head>
<body>
<ul id="nav">
 <li class="top"><a href="#nogo1" class="top_link"><span>Home</span></a></li>
 <li class="top"><a href="#nogo2" id="products" class="top_link"><span class="down">Products</span></a>
 <ul class="sub">
  <li><a href="#nogo3" class="fly">Cameras</a>
   <ul>
   <li><a href="#nogo4">Nikon</a></li>
   <li><a href="#nogo5">Minolta</a></li>
   <li><a href="#nogo6">Pentax</a></li>
   </ul>
  </li>
  <li class="mid"><a href="#nogo7" class="fly">Lenses</a>
   <ul>
   <li><a href="#nogo8">Wide Angle</a></li>
   <li><a href="#nogo9">Standard</a></li>
   <li><a href="#nogo10">Telephoto</a></li>
   <li><a href="#nogo11" class="fly">Zoom</a>
    <ul>
    <li><a href="#nogo12">35mm to 125mm</a></li>
    <li><a href="#nogo13">50mm to 250mm</a></li>
    <li><a href="#nogo14">125mm to 500mm</a></li>
    </ul>
   </li>
   <li><a href="#nogo15">Mirror</a></li>
   <li><a href="#nogo16" class="fly">Non standard</a>
    <ul>
    <li><a href="#nogo17">Bayonet mount</a></li>
    <li><a href="#nogo18">Screw mount</a></li>
    </ul>
   </li>
   </ul>
  </li>
  <li><a href="#nogo19">Flash Guns</a></li>
 </ul>
 </li>
 <li class="top"><a href="#nogo22" id="services" class="top_link"><span class="down">Services</span></a>
 <ul class="sub">
  <li><a href="#nogo23">Printing</a></li>
  <li><a href="#nogo25">Retouching</a></li>
 </ul>
 </li>
 <li class="top"><a href="#nogo27" id="contacts" class="top_link"><span class="down">Contacts</span></a>
 <ul class="sub">
  <li><a href="#nogo28">Support</a></li>
  <li><a href="#nogo29" class="fly">Sales</a>
  <ul>
   <li><a href="#nogo30">USA</a></li>
   <li><a href="#nogo31">Canadian</a></li>
   <li><a href="#nogo32">South American</a></li>
   <li><a href="#nogo33" class="fly">European</a>
   <ul>
    <li><a href="#nogo34" class="fly">British</a>
    <ul>
     <li><a href="#nogo35">London</a></li>
     <li><a href="#nogo36">Liverpool</a></li>
     <li><a href="#nogo37">Glasgow</a></li>
     <li><a href="#nogo38" class="fly">Bristol</a>
     <ul>
      <li><a href="#nogo39">Redland</a></li>
      <li><a href="#nogo40">Hanham</a></li>
      <li><a href="#nogo41">Eastville</a></li>
     </ul>
     </li>
     <li><a href="#nogo42">Cardiff</a></li>
     <li><a href="#nogo43">Belfast</a></li>
    </ul>
    </li>
    <li><a href="#nogo44">French</a></li>
    <li><a href="#nogo45">German</a></li>
    <li><a href="#nogo46">Spanish</a></li>
   </ul>
   </li>
   <li><a href="#nogo47">Australian</a></li>
   <li><a href="#nogo48">Asian</a></li>
  </ul>
  </li>
  <li><a href="#nogo49">Buying</a></li>
  <li><a href="#nogo50">Photographers</a></li>
  <li><a href="#nogo51">Stockist</a></li>
  <li><a href="#nogo52">General</a></li>
 </ul>
 </li>
 <li class="top"><a href="#nogo53" id="shop" class="top_link"><span class="down">Shop</span></a>
 <ul class="sub">
  <li><a href="#nogo54">Online</a></li>
  <li><a href="#nogo55">Catalogue</a></li>
  <li><a href="#nogo56">Mail Order</a></li>
 </ul>
 </li>
 <li class="top"><a href="#nogo57" id="privacy" class="top_link"><span>Privacy Policy</span></a></li>
</ul>
</body>
</html>希望本文所述对大家的JavaScript程序设计有所帮助。

Hot AI Tools

Undresser.AI Undress
AI-powered app for creating realistic nude photos

AI Clothes Remover
Online AI tool for removing clothes from photos.

Undress AI Tool
Undress images for free

Clothoff.io
AI clothes remover

Video Face Swap
Swap faces in any video effortlessly with our completely free AI face swap tool!

Hot Article
Hot Tools

Notepad++7.3.1
Easy-to-use and free code editor

SublimeText3 Chinese version
Chinese version, very easy to use

Zend Studio 13.0.1
Powerful PHP integrated development environment

Dreamweaver CS6
Visual web development tools

SublimeText3 Mac version
God-level code editing software (SublimeText3)
Hot Topics
 1386
1386
 52
52

 How to use bootstrap in vue
Apr 07, 2025 pm 11:33 PM
How to use bootstrap in vue
Apr 07, 2025 pm 11:33 PM
Using Bootstrap in Vue.js is divided into five steps: Install Bootstrap. Import Bootstrap in main.js. Use the Bootstrap component directly in the template. Optional: Custom style. Optional: Use plug-ins.
 The Roles of HTML, CSS, and JavaScript: Core Responsibilities
Apr 08, 2025 pm 07:05 PM
The Roles of HTML, CSS, and JavaScript: Core Responsibilities
Apr 08, 2025 pm 07:05 PM
HTML defines the web structure, CSS is responsible for style and layout, and JavaScript gives dynamic interaction. The three perform their duties in web development and jointly build a colorful website.
 How to write split lines on bootstrap
Apr 07, 2025 pm 03:12 PM
How to write split lines on bootstrap
Apr 07, 2025 pm 03:12 PM
There are two ways to create a Bootstrap split line: using the tag, which creates a horizontal split line. Use the CSS border property to create custom style split lines.
 Understanding HTML, CSS, and JavaScript: A Beginner's Guide
Apr 12, 2025 am 12:02 AM
Understanding HTML, CSS, and JavaScript: A Beginner's Guide
Apr 12, 2025 am 12:02 AM
WebdevelopmentreliesonHTML,CSS,andJavaScript:1)HTMLstructurescontent,2)CSSstylesit,and3)JavaScriptaddsinteractivity,formingthebasisofmodernwebexperiences.
 How to insert pictures on bootstrap
Apr 07, 2025 pm 03:30 PM
How to insert pictures on bootstrap
Apr 07, 2025 pm 03:30 PM
There are several ways to insert images in Bootstrap: insert images directly, using the HTML img tag. With the Bootstrap image component, you can provide responsive images and more styles. Set the image size, use the img-fluid class to make the image adaptable. Set the border, using the img-bordered class. Set the rounded corners and use the img-rounded class. Set the shadow, use the shadow class. Resize and position the image, using CSS style. Using the background image, use the background-image CSS property.
 How to set up the framework for bootstrap
Apr 07, 2025 pm 03:27 PM
How to set up the framework for bootstrap
Apr 07, 2025 pm 03:27 PM
To set up the Bootstrap framework, you need to follow these steps: 1. Reference the Bootstrap file via CDN; 2. Download and host the file on your own server; 3. Include the Bootstrap file in HTML; 4. Compile Sass/Less as needed; 5. Import a custom file (optional). Once setup is complete, you can use Bootstrap's grid systems, components, and styles to create responsive websites and applications.
 How to use bootstrap button
Apr 07, 2025 pm 03:09 PM
How to use bootstrap button
Apr 07, 2025 pm 03:09 PM
How to use the Bootstrap button? Introduce Bootstrap CSS to create button elements and add Bootstrap button class to add button text
 How to resize bootstrap
Apr 07, 2025 pm 03:18 PM
How to resize bootstrap
Apr 07, 2025 pm 03:18 PM
To adjust the size of elements in Bootstrap, you can use the dimension class, which includes: adjusting width: .col-, .w-, .mw-adjust height: .h-, .min-h-, .max-h-
