
 Web Front-end
JS Tutorial
One article to understand the three types of content projection in Angular (single slot, multi-slot, conditional)
Web Front-end
JS Tutorial
One article to understand the three types of content projection in Angular (single slot, multi-slot, conditional)
One article to understand the three types of content projection in Angular (single slot, multi-slot, conditional)

This article will take you to understand the content projection in angular, and introduce single-slot content projection, multi-slot content projection, and conditional content projection. I hope it will be helpful to everyone!

[Related tutorial recommendation: "angular tutorial"]
Single slot content projection
Single-slot content projection refers to creating a component into which you can project a component.
zippy-basic.component.ts
import { Component } from '@angular/core';

@Component({
  selector: 'app-zippy-basic',
  template: `
  <h2 id="单插槽内容投影">单插槽内容投影</h2>
  <ng-content></ng-content>
`
})
export class ZippyBasicComponent {}With the ng-content element, users of this component can now project their own messages to the component middle. For example:
app.component.html
<!-- 将 app-zippy-basic 元素包裹的全部内容投影到 zippy-basic 组件中去 -->
<app-zippy-basic>
  <p>单插槽内容投影:投影数据</p>
</app-zippy-basic>
The effect is as follows: 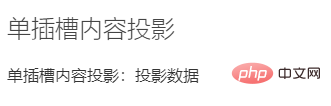
ng-content element is a placeholder, it does not Real DOM elements will be created. Those custom attributes of
ng-contentwill be ignored.
Multi-slot content projection
- The component template contains multiple
ng-contenttags.- In order to distinguish the projected content that can be projected to the corresponding
ng-contenttag, you need to use theselectattribute on theng-contenttag as identification .selectAttributes support any combination of tag names, attributes, CSS classes, and :not pseudo-classes.- The
ng-contenttag without adding theselectattribute will be used as the default slot. All matching projected content will be projected at the position of the ng-content.
zippy-multislot.component.ts
import { Component } from '@angular/core';

@Component({
  selector: 'app-zippy-multislot',
  template: `
  <h2 id="多插槽内容投影">多插槽内容投影</h2>
  <ng-content></ng-content>
  <ng-content select="[question]"></ng-content>
`
})
export class ZippyMultislotComponent {}app.component.html
<!-- 使用 question 属性的内容将投影到带有 `select=[question]` 属性的 ng-content 元素。 -->
<app-zippy-multislot>
  <p question style="color: hotpink;">
    带question属性的p元素
  </p>
  <p style="color: lightgreen">不带question属性的p元素-->匹配到不带select属性的ng-content</p>
  <p>不带question属性的p元素-->匹配到不带select属性的ng-content</p>
</app-zippy-multislot>The effect is as follows: 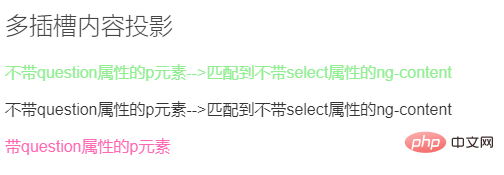
In the previous example, only the second ng-content element has the select attribute defined. As a result, the first ng-content element will receive any other content projected into the component.
Conditional content projection
It is recommended to use the
ng-containertag because it is not required Render real DOM elements.
<ng-container *ngTemplateOutlet="templateRefExp; context: contextExp"></ng-container>
<!-- 等同 -->
<ng-container [ngTemplateOutlet]="templateRefExp" [ngTemplateOutletContext]="contextExp"></ng-container>
| Parameters | Type | Description |
|---|---|---|
| templateRefExp | TemplateRef | null | A string used to define the template reference and the context object of the template |
| contextExp | Object | null | is an object whose key name can be bound using the let statement in the local template. When using $implicit as a key name in a context object, it will be used as the default value. |
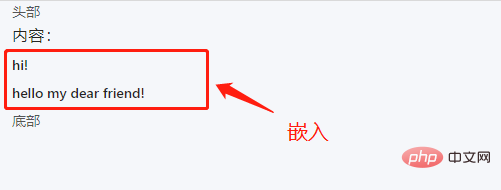
ng-template The #ID of the tag will match templateRefExp, and ng- The content of the template tag is embedded in the specified ngTemplateOutlet.
Example 1:
<header>头部</header>
<main>
	<h3 id="内容">内容:</h3>
	<ng-container [ngTemplateOutlet]="greet"></ng-container>
</main>
<footer>底部</footer>

<ng-template #greet>
	<div>
		<h4 id="hi">hi!</h4>
		<h4 id="hello-nbsp-my-nbsp-dear-nbsp-friend">hello my dear friend!</h4>
	</div>
</ng-template>
Effect:
##ViewChild and ContentChild
- ContentChild
: Relevant to the content sub-node,Operation of the projected content; - ViewChild
: Relevant to the view sub-node,Manipulate your own view content;
In the previous part, we used content projection to allow custom component tags to be embedded in html tags Or customize the component label, so how does it operate the projected content?
First create two components
/**** part-b.component.ts ****/
import { Component, OnInit,Output} from '@angular/core';

@Component({
	selector: 'app-content-part-b',
	templateUrl: './part-b.component.html',
	styleUrls: ['./part-b.component.scss']
})

export class PartBComponent implements OnInit {
	constructor() { }
	ngOnInit() { }

	public func():void{
		console.log("PartB");
	}
}/**** part-a.component.ts ****/
import { Component, OnInit, ContentChild } from '@angular/core';
// 1、引入 part-b 组件
import { PartBComponent } from '../part-b/part-b.component';
@Component({
selector: 'app-content-part-a',
templateUrl: './part-a.component.html',
styleUrls: ['./part-a.component.scss']
})
export class PartAComponent implements OnInit {
// 2、获取投影
@ContentChild(PartBComponent) PartB:PartBComponent
constructor() { }
ngOnInit() {}
ngAfterContentInit(): void {
// 3、调用 part-b 组件的 func() 方法
this.PartB.func();
}
public func() {
console.log('PartA')
}
}Project the content of the
part-b component to part-aIn the component<div class="code" style="position:relative; padding:0px; margin:0px;"><pre class='brush:php;toolbar:false;'> <!-- content.component.html -->
<div>
<div>Content</div>
<div>
<app-content-part-a>
<!-- 投影在part-a组件中的内容 -->
<h1 id="PartA-start">PartA--start</h1>
<app-content-part-b></app-content-part-b>
<span>PartA--end</span>
</app-content-part-a>
</div>
</div></pre><div class="contentsignin">Copy after login</div></div>
ngAfterContentInit()ViewChildIt is related to the initialization of the projected content, so we are concerned with the projected content The operation should be carried out after its initialization is completed.
The
ContentChild operation in the previous part is performed when the incoming content is projected, and ViewChild operates on its own view content Modify the previous part of content.component.html
as follows: <div class="code" style="position:relative; padding:0px; margin:0px;"><pre class='brush:php;toolbar:false;'> <!-- content.component.html -->
<div>
<div>Content</div>
<div>
<!-- 在此处引用模板变量 #partA -->
<app-content-part-a #partA>
<h1 id="PartA-start">PartA--start</h1>
<app-content-part-b></app-content-part-b>
<span>PartA--end</span>
</app-content-part-a>
</div>
</div></pre><div class="contentsignin">Copy after login</div></div><div class="code" style="position:relative; padding:0px; margin:0px;"><pre class='brush:php;toolbar:false;'>/**** content.component.ts ****/
import { Component, OnInit, ViewChild } from &#39;@angular/core&#39;;
@Component({
selector: &#39;app-content&#39;,
templateUrl: &#39;./content.component.html&#39;,
styleUrls: [&#39;./content.component.scss&#39;]
})
export class ContentComponent implements OnInit {
// 2、获取视图 partA
@ViewChild(&#39;partA&#39;) partA: any;
constructor() { }
ngOnInit() {}
ngAfterViewInit(): void {
// 3、调用 part-a 组件的 func() 方法
this.partA.func();
}
}</pre><div class="contentsignin">Copy after login</div></div>
ngAfterContentInit( )ContentChildcorresponds to
ngAfterViewInit()(View node initialization is after initialization of projected content)
and ViewChildThere are also plural forms, namely ContentChildren and ViewChildren. They get a collection of nodes, and there is no difference between the others. is written as follows:
import { Component, OnInit, ContentChild,ContentChildren ,QueryList } from '@angular/core';
import { PartBComponent } from '../part-b/part-b.component';

@Component({
	selector: 'app-content-part-a',
	templateUrl: './part-a.component.html',
	styleUrls: ['./part-a.component.scss']
})
export class PartAComponent implements OnInit {

	@ContentChildren(PartBComponent) PartBs: QueryList<PartBComponent>;

	constructor() { }
	ngOnInit() {}
}For more programming-related knowledge, please visit:
Introduction to ProgrammingThe above is the detailed content of One article to understand the three types of content projection in Angular (single slot, multi-slot, conditional). For more information, please follow other related articles on the PHP Chinese website!

Hot AI Tools

Undresser.AI Undress
AI-powered app for creating realistic nude photos

AI Clothes Remover
Online AI tool for removing clothes from photos.

Undress AI Tool
Undress images for free

Clothoff.io
AI clothes remover

Video Face Swap
Swap faces in any video effortlessly with our completely free AI face swap tool!

Hot Article
Hot Tools

Notepad++7.3.1
Easy-to-use and free code editor

SublimeText3 Chinese version
Chinese version, very easy to use

Zend Studio 13.0.1
Powerful PHP integrated development environment

Dreamweaver CS6
Visual web development tools

SublimeText3 Mac version
God-level code editing software (SublimeText3)
Hot Topics
 1386
1386
 52
52

 Let's talk about metadata and decorators in Angular
Feb 28, 2022 am 11:10 AM
Let's talk about metadata and decorators in Angular
Feb 28, 2022 am 11:10 AM
This article continues the learning of Angular, takes you to understand the metadata and decorators in Angular, and briefly understands their usage. I hope it will be helpful to everyone!
 Detailed explanation of angular learning state manager NgRx
May 25, 2022 am 11:01 AM
Detailed explanation of angular learning state manager NgRx
May 25, 2022 am 11:01 AM
This article will give you an in-depth understanding of Angular's state manager NgRx and introduce how to use NgRx. I hope it will be helpful to you!
 How to install Angular on Ubuntu 24.04
Mar 23, 2024 pm 12:20 PM
How to install Angular on Ubuntu 24.04
Mar 23, 2024 pm 12:20 PM
Angular.js is a freely accessible JavaScript platform for creating dynamic applications. It allows you to express various aspects of your application quickly and clearly by extending the syntax of HTML as a template language. Angular.js provides a range of tools to help you write, update and test your code. Additionally, it provides many features such as routing and form management. This guide will discuss how to install Angular on Ubuntu24. First, you need to install Node.js. Node.js is a JavaScript running environment based on the ChromeV8 engine that allows you to run JavaScript code on the server side. To be in Ub
 An article exploring server-side rendering (SSR) in Angular
Dec 27, 2022 pm 07:24 PM
An article exploring server-side rendering (SSR) in Angular
Dec 27, 2022 pm 07:24 PM
Do you know Angular Universal? It can help the website provide better SEO support!
 How to use PHP and Angular for front-end development
May 11, 2023 pm 04:04 PM
How to use PHP and Angular for front-end development
May 11, 2023 pm 04:04 PM
With the rapid development of the Internet, front-end development technology is also constantly improving and iterating. PHP and Angular are two technologies widely used in front-end development. PHP is a server-side scripting language that can handle tasks such as processing forms, generating dynamic pages, and managing access permissions. Angular is a JavaScript framework that can be used to develop single-page applications and build componentized web applications. This article will introduce how to use PHP and Angular for front-end development, and how to combine them
 Angular + NG-ZORRO quickly develop a backend system
Apr 21, 2022 am 10:45 AM
Angular + NG-ZORRO quickly develop a backend system
Apr 21, 2022 am 10:45 AM
This article will share with you an Angular practical experience and learn how to quickly develop a backend system using angualr combined with ng-zorro. I hope it will be helpful to everyone!
 A brief analysis of how to use monaco-editor in angular
Oct 17, 2022 pm 08:04 PM
A brief analysis of how to use monaco-editor in angular
Oct 17, 2022 pm 08:04 PM
How to use monaco-editor in angular? The following article records the use of monaco-editor in angular that was used in a recent business. I hope it will be helpful to everyone!
 A brief analysis of independent components in Angular and see how to use them
Jun 23, 2022 pm 03:49 PM
A brief analysis of independent components in Angular and see how to use them
Jun 23, 2022 pm 03:49 PM
This article will take you through the independent components in Angular, how to create an independent component in Angular, and how to import existing modules into the independent component. I hope it will be helpful to you!
