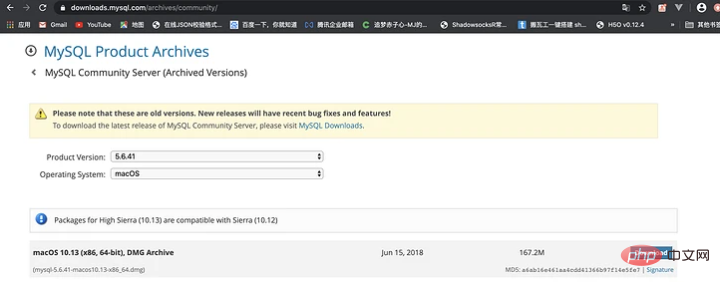
Download address: https://downloads.mysql.com/archives/community/
Baidu network disk download: Link: https://pan .baidu.com/s/1nceFzJKK7_dJh2gUAtVgWw Password: qm5z

##Installation
Double-click the downloaded dmg file and it will The pkg pop-up box pops up, double-click the pkg icon to enter the installation interface, continue all the way on the installation interface, and the installation is successful.Environment variables
The first step is to switch to the root directory in the terminal and edit the ./.bash_profile file➜ ~ cd ~ ➜ ~ vim ./.bash_profile
export PATH=$PATH:/usr/local/mysql/bin
export PATH=$PATH:/usr/local/mysql/support-files
:wq
➜  ~ echo $PATH
/usr/local/bin:/usr/bin:/bin:/usr/sbin:/sbin
➜  ~ source ~/.bash_profile
➜  ~ echo $PATH
/usr/local/bin:/usr/bin:/bin:/usr/sbin:/sbin:/usr/local/mysql/bin:/usr/local/mysql/support-files
➜  ~
Start, stop and check the status of the MYSQL service
Check the service status of MYSQL➜ ~ sudo mysql.server status Password: ERROR! MySQL is not running
➜  ~ sudo mysql.server start
Starting MySQL
.Logging to '/usr/local/mysql/data/mj.local.err'.
 SUCCESS!
➜  ~ sudo mysql.server stop
Shutting down MySQL
. SUCCESS!
➜  ~ sudo mysql.server restart
 ERROR! MySQL server PID file could not be found!
Starting MySQL
. SUCCESS!
Start
The first step is to enter➜ ~ sudo mysql.server start Starting MySQL .Logging to '/usr/local/mysql/data/mj.local.err'. SUCCESS!
➜ ~ mysql -u root -p
Enter password:
Welcome to the MySQL monitor.  Commands end with ; or \g.
Your MySQL connection id is 1
Server version: 5.6.41 MySQL Community Server (GPL)

Copyright (c) 2000, 2018, Oracle and/or its affiliates. All rights reserved.

Oracle is a registered trademark of Oracle Corporation and/or its
affiliates. Other names may be trademarks of their respective
owners.

Type 'help;' or '\h' for help. Type '\c' to clear the current input statement.

mysql>
Initialization settings
Set the initial password, execute the following statement after entering the mysql database, and set the password of the current root user to root➜ ~ mysql -u root -p
Enter password:
Welcome to the MySQL monitor. Commands end with ; or \g.
Your MySQL connection id is 2
Server version: 5.6.41 MySQL Community Server (GPL)
Copyright (c) 2000, 2018, Oracle and/or its affiliates. All rights reserved.
Oracle is a registered trademark of Oracle Corporation and/or its
affiliates. Other names may be trademarks of their respective
owners.
Type 'help;' or '\h' for help. Type '\c' to clear the current input statement.
mysql> set password = password('root');
Query OK, 0 rows affected (0.01 sec)
mysql>mysql> exit Bye ➜ ~
Configuration
Enter the/usr/local/mysql/support-files directory, there is a file my-default in it. cnf
➜  ~ cd /usr/local/mysql/support-files
➜  support-files ll
total 64
-rwxr-xr-x  1 root  wheel   1.1K  6 15  2018 binary-configure
-rw-r--r--  1 root  wheel   773B  6 15  2018 magic
-rw-r--r--  1 root  wheel   1.1K  6 15  2018 my-default.cnf
-rwxr-xr-x  1 root  wheel   894B  6 15  2018 mysql-log-rotate
-rwxr-xr-x  1 root  wheel    10K  6 15  2018 mysql.server
-rwxr-xr-x  1 root  wheel   1.0K  6 15  2018 mysqld_multi.server
➜  support-files
➜  support-files ll
total 64
-rwxr-xr-x  1 root  wheel   1.1K  6 15  2018 binary-configure
-rw-r--r--  1 root  wheel   773B  6 15  2018 magic
-rw-r--r--  1 root  wheel   1.1K  6 15  2018 my-default.cnf
-rwxr-xr-x  1 root  wheel   894B  6 15  2018 mysql-log-rotate
-rwxr-xr-x  1 root  wheel    10K  6 15  2018 mysql.server
-rwxr-xr-x  1 root  wheel   1.0K  6 15  2018 mysqld_multi.server
➜  support-files cp my-default.cnf /Users/a1/Desktop/my.cnf
[mysqld]
default-storage-engine=INNODB
character-set-server=utf8
port = 3306

[client]
default-character-set=utf8
/etc directory and restart MYSQL
➜  /etc cp /Users/a1/Desktop/my.cnf ./
cp: ./my.cnf: Permission denied
➜  /etc sudo cp /Users/a1/Desktop/my.cnf ./
Password:
➜  /etc ll
total 1064
......
-rw-------   1 root  wheel   7.3K  2 29 14:10 master.passwd
-rw-r--r--   1 root  wheel   1.2K  5 17 17:24 my.cnf
-rw-r--r--   1 root  wheel    11B  2 29 14:43 nanorc
-rw-r--r--   1 root  wheel    53B  2 29 14:09 networks
......
➜  /etc
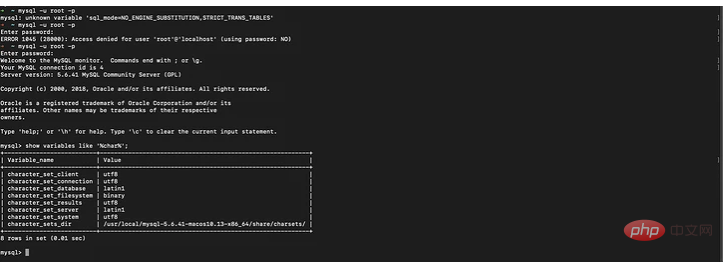
➜  ~ mysql -u root -p
Enter password:
Welcome to the MySQL monitor.  Commands end with ; or \g.
Your MySQL connection id is 4
Server version: 5.6.41 MySQL Community Server (GPL)

Copyright (c) 2000, 2018, Oracle and/or its affiliates. All rights reserved.

Oracle is a registered trademark of Oracle Corporation and/or its
affiliates. Other names may be trademarks of their respective
owners.

Type 'help;' or '\h' for help. Type '\c' to clear the current input statement.

mysql> show variables like '%char%';
+--------------------------+-----------------------------------------------------------+
| Variable_name            | Value                                                     |
+--------------------------+-----------------------------------------------------------+
| character_set_client     | utf8                                                      |
| character_set_connection | utf8                                                      |
| character_set_database   | latin1                                                    |
| character_set_filesystem | binary                                                    |
| character_set_results    | utf8                                                      |
| character_set_server     | latin1                                                    |
| character_set_system     | utf8                                                      |
| character_sets_dir       | /usr/local/mysql-5.6.41-macos10.13-x86_64/share/charsets/ |
+--------------------------+-----------------------------------------------------------+
8 rows in set (0.01 sec)

mysql>
 Note: You cannot log in to the database without entering the password at this time. You must use the modified password to log in to the database. , and the character set encoding information of the database has been modified. At this point, you can happily use the database! ! !
 Recommended study: "


