
 Development Tools
dreamweaver
Teach you step by step how to bind GitHub repository in Dreamweaver
Development Tools
dreamweaver
Teach you step by step how to bind GitHub repository in Dreamweaver
Teach you step by step how to bind GitHub repository in Dreamweaver

How to bind GitHub repository in Dreamweaver? The following article will give you a detailed introduction to the method of binding GitHub warehouse in dreamweaver. I hope it will be helpful to everyone.

Git is a free, open source distributed version control system for agile and efficient handling of any project, small or large.
Quoting teacher Liao Xuefeng: "
What is Git?
Git is currently the most advanced distributed version control system in the world (unique).
What are the characteristics of Git? To put it simply: high-end and classy!
Then what is a version control system?
If you have ever written a long article using Microsoft Word, you must have had this experience :
What should I do if I want to delete a paragraph, but I am afraid that I cannot recover it in the future? There is a way, first "save the current file as..." into a new Word file, and then continue to change it to a certain extent. , then "Save as..." a new file, keep changing like this, and finally your Word document becomes like this:
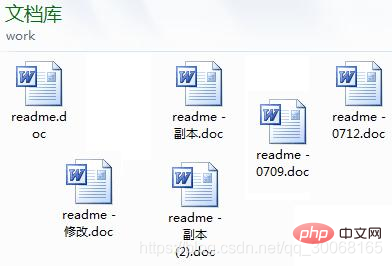
After a week, you want to get it back The deleted text, but I can’t remember which file it was saved in before deletion, so I have to find it one by one, which is really troublesome.
Looking at a bunch of messy files, I want to keep the latest one, and then Delete the other ones, but you are afraid that they will be used someday, so you dare not delete them. It’s really frustrating.
What’s even worse is that some parts need help from your financial colleagues to fill in, so you copy the file to U Give it to her on the disk (you may also send a copy to her via email), and then you continue to modify the Word file. A day later, your colleague will send the Word file to you. At this time, you must think about what to do after sending it to her. What changes did you make during the period of receiving her file? It is really difficult to merge your changes with hers.
So you think, if there is a software, it can not only help me automatically record every time Changes to files can also be edited collaboratively by colleagues, so you don’t have to manage a bunch of similar files yourself, and you don’t need to pass files around. If you want to check a certain change, you only need to take a look in the software. Wouldn't it be very convenient?"
Yes, this is the benefit of Git. Okay, no more nonsense, let’s get straight to the point.
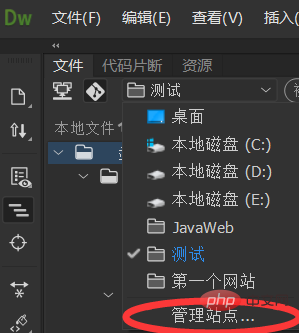
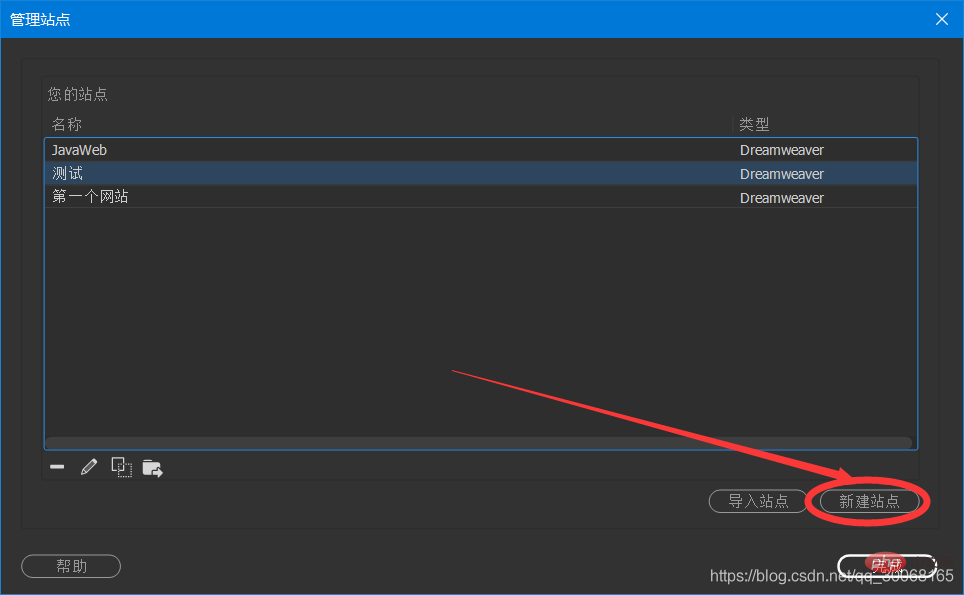
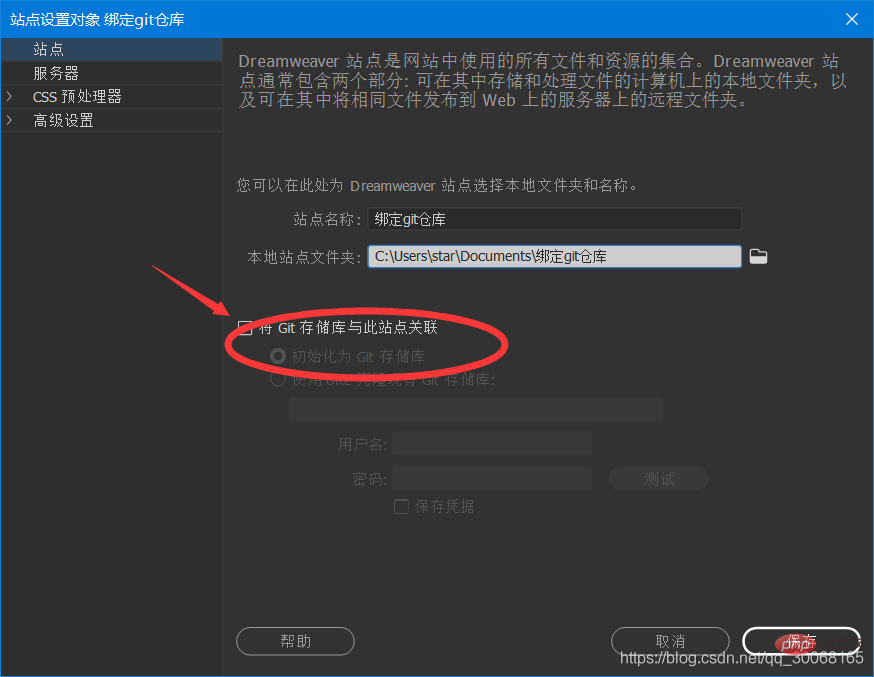
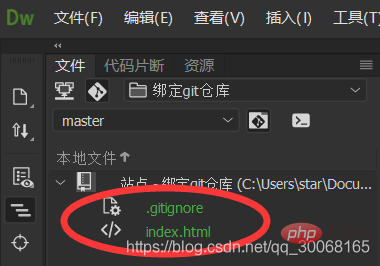
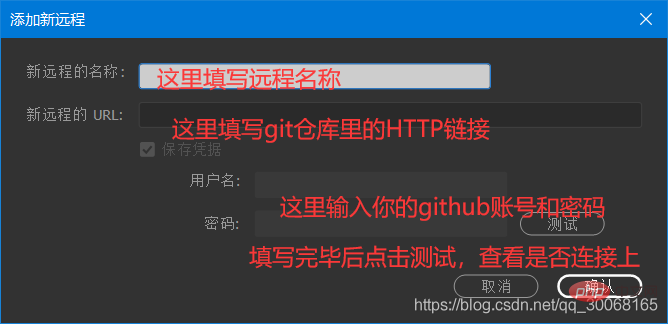
First of all, we open Dreamweaver. Every time we have a website project, we need to create a new site. This is also the case when we bind the github warehouse for the first time. [Related recommendations: "dreamweaver tutorial"]
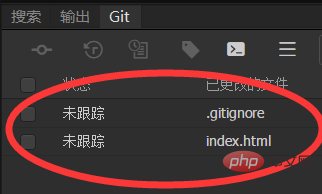

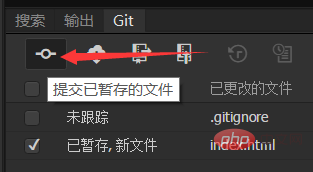

After the submission is completed, you will find that the upload button has a small circle ①
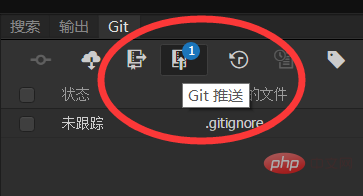
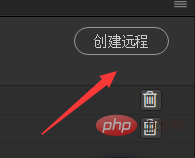
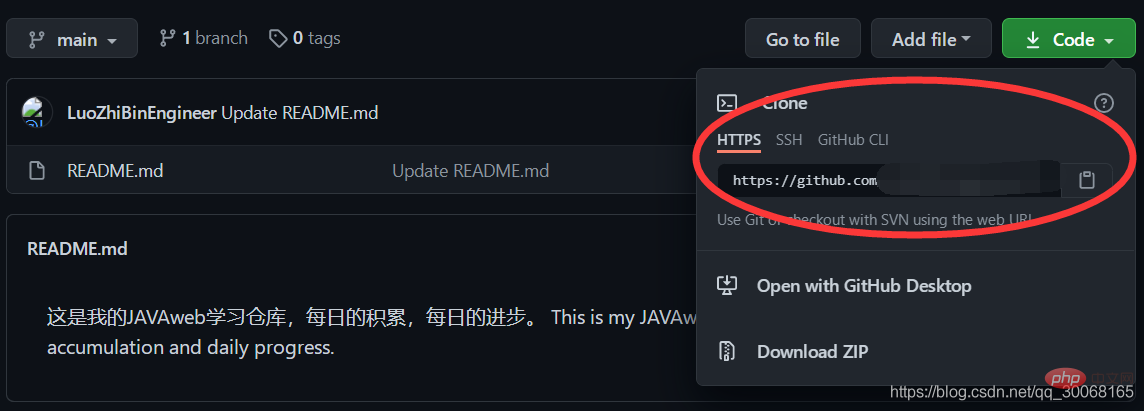
After clicking, a push window will open. Then check whether the branch is consistent with your own warehouse name, otherwise git will create a new branch. The warehouse defaults to main, and the new one created is usually master.
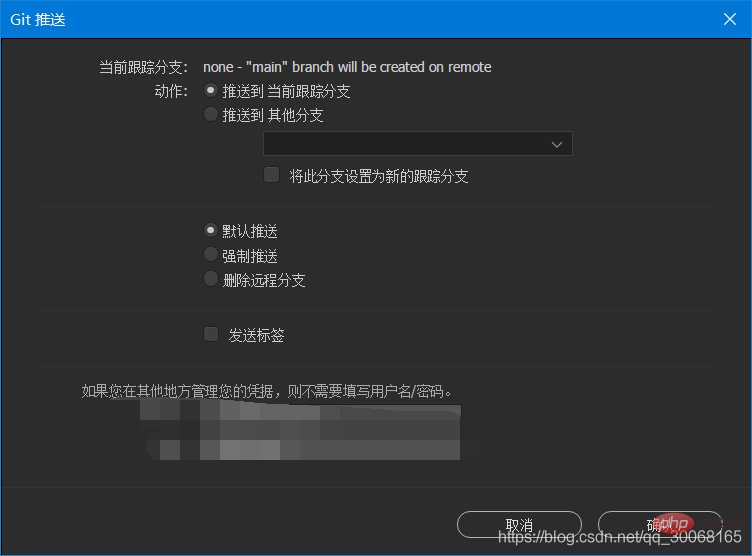
Click Confirm and you’re done!
For more programming-related knowledge, please visit: Programming Teaching! !
The above is the detailed content of Teach you step by step how to bind GitHub repository in Dreamweaver. For more information, please follow other related articles on the PHP Chinese website!

Hot AI Tools

Undresser.AI Undress
AI-powered app for creating realistic nude photos

AI Clothes Remover
Online AI tool for removing clothes from photos.

Undress AI Tool
Undress images for free

Clothoff.io
AI clothes remover

Video Face Swap
Swap faces in any video effortlessly with our completely free AI face swap tool!

Hot Article
Hot Tools

Notepad++7.3.1
Easy-to-use and free code editor

SublimeText3 Chinese version
Chinese version, very easy to use

Zend Studio 13.0.1
Powerful PHP integrated development environment

Dreamweaver CS6
Visual web development tools

SublimeText3 Mac version
God-level code editing software (SublimeText3)
Hot Topics
 1386
1386
 52
52

 How to adjust text position in dreamweaver
Apr 09, 2024 am 02:24 AM
How to adjust text position in dreamweaver
Apr 09, 2024 am 02:24 AM
Adjusting the text position in Dreamweaver can be completed by the following steps: Select the text and use the text position adjuster to make horizontal adjustments: left alignment, right alignment, center alignment; 2. Make vertical adjustments: top alignment, bottom alignment, vertical center; 3. Press Shift key and use the arrow keys to fine-tune the position; 4. Use shortcut keys to quickly align: left alignment (Ctrl/Cmd + L), right alignment (Ctrl/Cmd + R), center alignment (Ctrl/Cmd + C).
 How to add video to dreamweaver webpage production
Apr 09, 2024 am 01:42 AM
How to add video to dreamweaver webpage production
Apr 09, 2024 am 01:42 AM
Embed video using Dreamweaver: Insert a video element. Select and upload a video file. Set video type, URL, size, autoplay and controls. Insert video. Optional: Customize the video appearance.
 How to adjust line spacing in dreamweaver
Apr 09, 2024 am 03:00 AM
How to adjust line spacing in dreamweaver
Apr 09, 2024 am 03:00 AM
Adjusting line spacing in Dreamweaver is a four-step process: select the text, open the Paragraph panel, adjust the Line Spacing options, and finally click OK to apply the changes.
 How to add pictures to dreamweaver
Apr 09, 2024 am 03:30 AM
How to add pictures to dreamweaver
Apr 09, 2024 am 03:30 AM
To insert a picture in Dreamweaver, click the Insert menu and choose Image, then navigate to the picture file and select it. Other methods include dragging and dropping files or inserting HTML code directly. Adjusting properties includes changing size, alignment, adding borders, and entering alt text.
 How to set the web design software Dreamweaver to Chinese
Apr 09, 2024 am 12:39 AM
How to set the web design software Dreamweaver to Chinese
Apr 09, 2024 am 12:39 AM
To set Dreamweaver to Chinese, follow these steps: Open Dreamweaver; change User Interface Language to Simplified Chinese or Traditional Chinese in the preferences; restart Dreamweaver; check the Help menu About Dreamweaver" item to verify the language settings.
 How to set dreamweaver font
Apr 09, 2024 am 02:54 AM
How to set dreamweaver font
Apr 09, 2024 am 02:54 AM
You can set fonts in Dreamweaver by selecting a font, size, and color using the Properties panel. Use CSS to set fonts for your entire website or specific elements. Set the font directly in the HTML code using the "font" tag.
 How to set text size in dreamweaver
Apr 09, 2024 am 02:18 AM
How to set text size in dreamweaver
Apr 09, 2024 am 02:18 AM
To set text size in Dreamweaver, just: Select the text Go to the Text menu Select Font Size Select the desired size Press Enter to save
 How to export dreamweaver webpage after creating it
Apr 09, 2024 am 01:27 AM
How to export dreamweaver webpage after creating it
Apr 09, 2024 am 01:27 AM
Exporting a web page in Dreamweaver involves the following steps: Export an HTML file: Select Export from the File menu, select HTML, select a file name and location, and click Save. Export CSS and JavaScript files: Choose Export from the File menu, select CSS or JavaScript, select a file name and location, and click Save. Export an image: Right-click the image, select "Export", select the image format and file name, and click "Save".
