
 Development Tools
VSCode
A brief discussion on how to build and configure the opencv environment in VSCode
Development Tools
VSCode
A brief discussion on how to build and configure the opencv environment in VSCode
A brief discussion on how to build and configure the opencv environment in VSCode

How to build and configure the opencv environment in
VSCode? The following article will introduce to you how to build and configure the opencv environment in VSCode. I hope it will be helpful to friends in need!
Some time ago I wanted to learn opencv. Since I have always been accustomed to using vscode to write code, I decided to use vscode to build an opencv environment. I read many articles to set up the environment, and then chose the method of one article. The article was indeed detailed, but I felt that there were still some details that were not explained clearly. I later relied on a step from another article to successfully set up the environment. Finish. Therefore, I decided to talk about the steps to build the opencv environment based on this article and my own experience.
[Recommended learning: "vscode introductory tutorial"]
Resource download
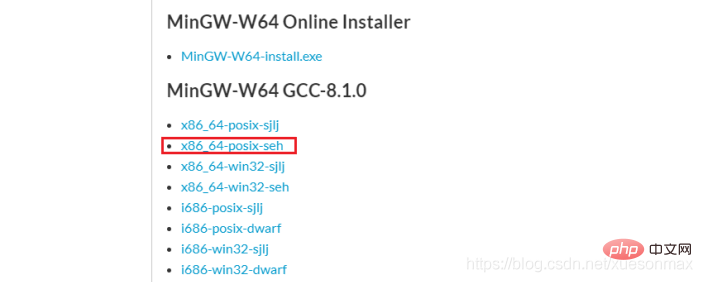
MinGW-w64 offline package download address: https://sourceforge. net/projects/mingw-w64/files/.
The online package download will be very slow, so you can download the offline package directly.
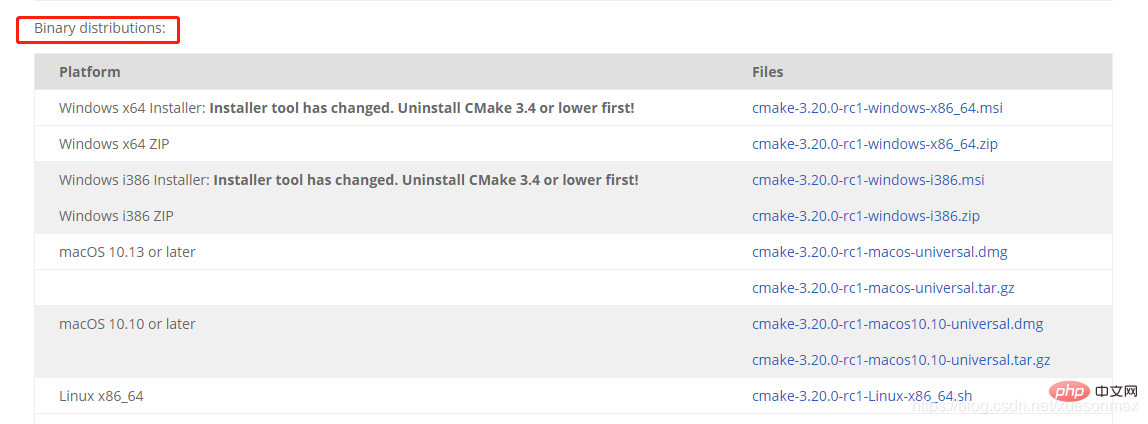
CMake download address: https://cmake.org/download/
CMake needs to select the binary file, that is, the Binary distributions column. Select the file corresponding to your computer to download
opencv library: https://sourceforge.net/projects/opencvlibrary/.
Software installation and configuration environment variables
Install?
MinGW-w64 and CMake do not need to be installed. You only need to unzip it to the storage path of your choice (similar to the installation path)
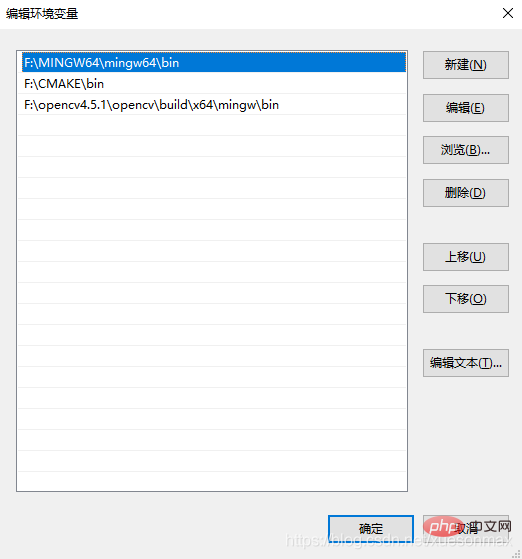
Configure environment variables
Find the following picture MinGW-w64 folder location:
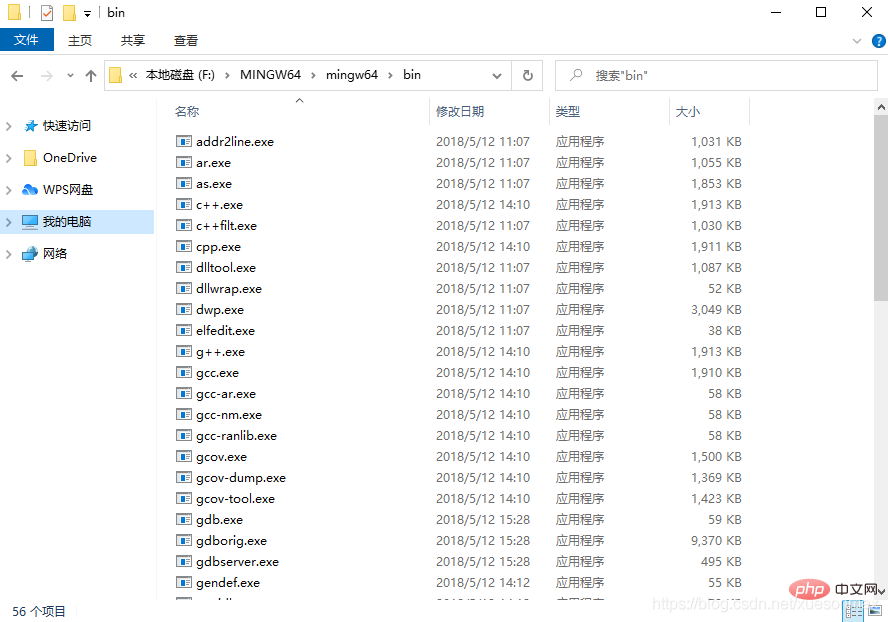
Add this path to the environment variable, as I configured: F:\MINGW64\mingw64\bin.
How to add environment variables: Right-click My Computer->Advanced System Settings->Environment Variables->Select both user variables and system variables. Double-click path to add the path->OK
Find the CMake folder location as shown below:

Add the path to the environment variable, such as my configuration: F:\ CMAKE\bin.
Find the location of the opencv folder in the picture below:
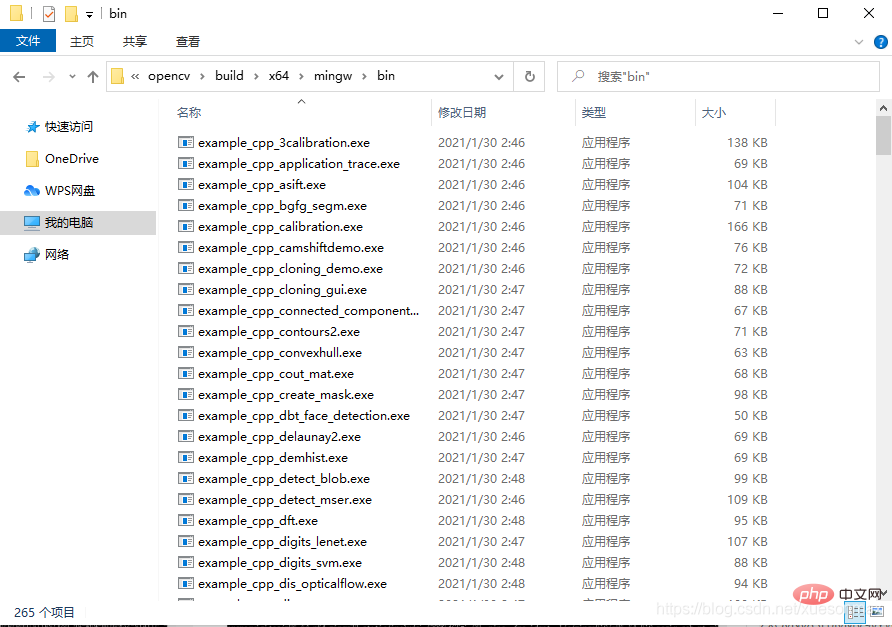
Add the path to the environment variable, such as: F:\opencv4.5.1\opencv\build\ x64\mingw\bin.
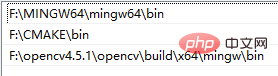
The current environment variable path that should be available
#Check whether the environment variable is added successfully:
win R key and enter cmd to the terminal:
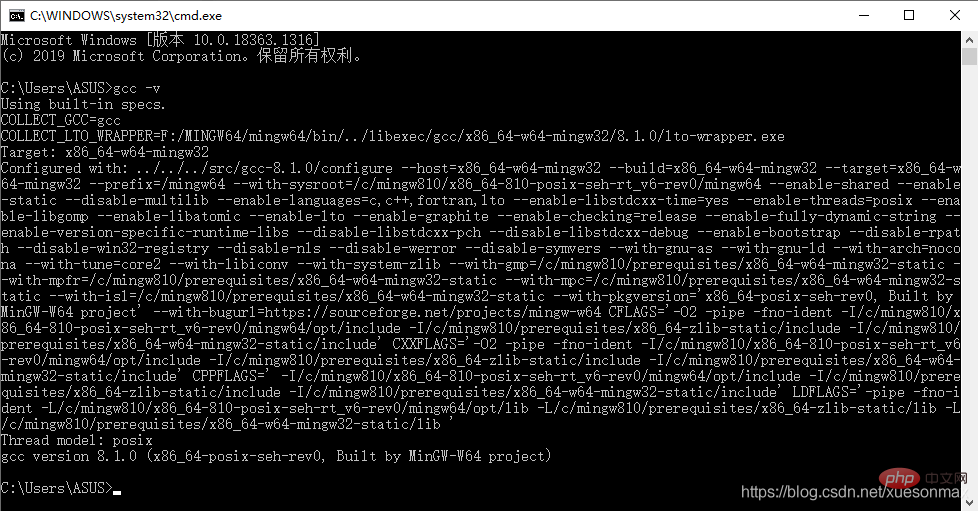

#The commands in the terminal are a bit different. Mine is gcc -v and cmake --version. I don’t know whether it is -v or –version
Generate MakeFiles
Before operating cmake-gui, if you have not climbed over the wall, you must first append the following to the end of the C:\Windows\System32\drivers\etc\hosts file:
151.101.72.133 raw.githubusercontent.com
Because cmake-gui will download some files, these files are on raw.githubusercontent.com. If you do not modify the hosts, many files are likely to fail to download.
Modification method: Open the hosts file in Notepad for editing, or drag it directly to vsocde to open and modify it. If you have modified but cannot save this problem, you can make a copy first, delete the original file, and copy the modified file back to its original location.
Open cmake-gui and select the source file path and MakeFiles saving path (optional path), as shown in the figure:

Click Configure, the pop-up window configuration is as follows:
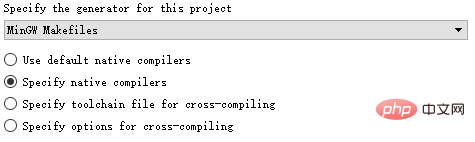
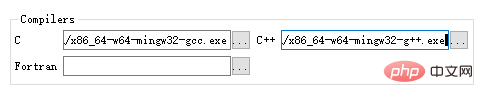
Please note that MinGW is selected in the drop-down box, don’t get sidetracked. Then click Next, select the compilation tool in the MinGW file as follows, and finally click Finish.
执行过程中消息框会出现一堆红色信息,最后显示Configure done,是正常的。如果执行时中断,则存在其他问题。在执行完后,勾选BUILD_opencv_world,WITH_OPENGL和BUILD_EXAMPLES,不勾选WITH_IPP、WITH_MSMF和ENABLE_PRECOMPILED_HEADERS(如果有的话),CPU_DISPATCH选空。如果要编译opencv_contrib,则需要在OPENCV_EXTRA_MODULES_PATH 把路径选择为解压的opencv_contrib文件中的“modules”文件夹。
再次点击Configure,这次执行完后仍有错误如下:
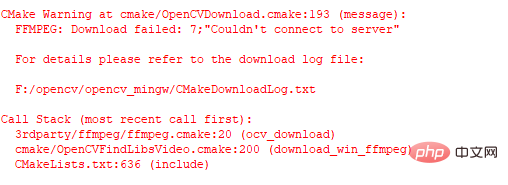
也就是说前面虽然修改了hosts,但是有些文件仍然没有成功下载,解决的方法就是手动下载它们。可以用浏览器访问下载链接,或者使用迅雷等下载器进行下载。CMakeDownloadLog.txt文件中列出了所有丢失文件的下载链接,比如:
1 |
|
一个个访问这些链接,下载后放到OpenCV源文件里.cache的相应子文件夹中替代原缓存文件(下载的文件重命名为相应地缓存文件名并删除原缓存文件)。这样从头到尾下载CMakeDownloadLog.txt中列出的所有丢失文件,之后,再次Configure,理论上不会出现红色的错误消息了。然后点击Generate,正常的话会显示非红色的消息Generate Done。一般翻墙成功的话都可以直接下载成功
编译opencv
CMD到MakeFiles所在文件夹,执行minGW32-make命令,或者使用多线程minGW32-make -j 4命令:

如果报错可查阅下面的网址帮助:
https://blog.huihut.com/2018/07/31/CompiledOpenCVWithMinGW64/
一般问题都是可以通过勾选和去勾选解决的,因为之前就Configure过,因此回头再Configure一下花不了太多时间。
如果同时编译opencv_contrib,可能会报如下错误:

编译完成之后,输入minGW32-make install 来完成装载。
1 |
|
vscode配置
在VScode中安装C/C++扩展,添加以下三个json文件:
launch.json 需要配置miDebuggerPath项。
1 2 3 4 5 6 7 8 9 10 11 12 13 14 15 16 17 18 19 20 21 22 23 24 25 26 |
|
c_cpp_properties.json 需要配置compilerPath项和includePath项。
1 2 3 4 5 6 7 8 9 10 11 12 13 14 15 16 17 18 19 |
|
tasks.json 需要配置command项、args项和options项。
1 2 3 4 5 6 7 8 9 10 11 12 13 14 15 16 17 18 19 20 21 22 23 24 25 26 27 28 29 30 31 32 33 |
|
注意:如果是复制我的文件配置的话记得把opencv4.5.1改为你的对应版本
验证程序:Ctrl+Shift+B编译即可生成对应exe文件,然后F5运行。
1 2 3 4 5 6 7 8 9 10 |
|
更多关于VSCode的相关知识,请访问:vscode教程!!
The above is the detailed content of A brief discussion on how to build and configure the opencv environment in VSCode. For more information, please follow other related articles on the PHP Chinese website!

Hot AI Tools

Undresser.AI Undress
AI-powered app for creating realistic nude photos

AI Clothes Remover
Online AI tool for removing clothes from photos.

Undress AI Tool
Undress images for free

Clothoff.io
AI clothes remover

Video Face Swap
Swap faces in any video effortlessly with our completely free AI face swap tool!
Hot Article
Hot Tools

Notepad++7.3.1
Easy-to-use and free code editor

SublimeText3 Chinese version
Chinese version, very easy to use

Zend Studio 13.0.1
Powerful PHP integrated development environment

Dreamweaver CS6
Visual web development tools

SublimeText3 Mac version
God-level code editing software (SublimeText3)
Hot Topics


 How to define header files for vscode
Apr 15, 2025 pm 09:09 PM
How to define header files for vscode
Apr 15, 2025 pm 09:09 PM
How to define header files using Visual Studio Code? Create a header file and declare symbols in the header file using the .h or .hpp suffix name (such as classes, functions, variables) Compile the program using the #include directive to include the header file in the source file. The header file will be included and the declared symbols are available.
 What computer configuration is required for vscode
Apr 15, 2025 pm 09:48 PM
What computer configuration is required for vscode
Apr 15, 2025 pm 09:48 PM
VS Code system requirements: Operating system: Windows 10 and above, macOS 10.12 and above, Linux distribution processor: minimum 1.6 GHz, recommended 2.0 GHz and above memory: minimum 512 MB, recommended 4 GB and above storage space: minimum 250 MB, recommended 1 GB and above other requirements: stable network connection, Xorg/Wayland (Linux)
 How to solve the problem of vscode Chinese annotations becoming question marks
Apr 15, 2025 pm 11:36 PM
How to solve the problem of vscode Chinese annotations becoming question marks
Apr 15, 2025 pm 11:36 PM
How to solve the problem that Chinese comments in Visual Studio Code become question marks: Check the file encoding and make sure it is "UTF-8 without BOM". Change the font to a font that supports Chinese characters, such as "Song Style" or "Microsoft Yahei". Reinstall the font. Enable Unicode support. Upgrade VSCode, restart the computer, and recreate the source file.
 How to use VSCode
Apr 15, 2025 pm 11:21 PM
How to use VSCode
Apr 15, 2025 pm 11:21 PM
Visual Studio Code (VSCode) is a cross-platform, open source and free code editor developed by Microsoft. It is known for its lightweight, scalability and support for a wide range of programming languages. To install VSCode, please visit the official website to download and run the installer. When using VSCode, you can create new projects, edit code, debug code, navigate projects, expand VSCode, and manage settings. VSCode is available for Windows, macOS, and Linux, supports multiple programming languages and provides various extensions through Marketplace. Its advantages include lightweight, scalability, extensive language support, rich features and version
 vscode terminal usage tutorial
Apr 15, 2025 pm 10:09 PM
vscode terminal usage tutorial
Apr 15, 2025 pm 10:09 PM
vscode built-in terminal is a development tool that allows running commands and scripts within the editor to simplify the development process. How to use vscode terminal: Open the terminal with the shortcut key (Ctrl/Cmd). Enter a command or run the script. Use hotkeys (such as Ctrl L to clear the terminal). Change the working directory (such as the cd command). Advanced features include debug mode, automatic code snippet completion, and interactive command history.
 Common commands for vscode terminal
Apr 15, 2025 pm 10:06 PM
Common commands for vscode terminal
Apr 15, 2025 pm 10:06 PM
Common commands for VS Code terminals include: Clear the terminal screen (clear), list the current directory file (ls), change the current working directory (cd), print the current working directory path (pwd), create a new directory (mkdir), delete empty directory (rmdir), create a new file (touch) delete a file or directory (rm), copy a file or directory (cp), move or rename a file or directory (mv) display file content (cat) view file content and scroll (less) view file content only scroll down (more) display the first few lines of the file (head)
 Where to write code in vscode
Apr 15, 2025 pm 09:54 PM
Where to write code in vscode
Apr 15, 2025 pm 09:54 PM
Writing code in Visual Studio Code (VSCode) is simple and easy to use. Just install VSCode, create a project, select a language, create a file, write code, save and run it. The advantages of VSCode include cross-platform, free and open source, powerful features, rich extensions, and lightweight and fast.
 How to execute code with vscode
Apr 15, 2025 pm 09:51 PM
How to execute code with vscode
Apr 15, 2025 pm 09:51 PM
Executing code in VS Code only takes six steps: 1. Open the project; 2. Create and write the code file; 3. Open the terminal; 4. Navigate to the project directory; 5. Execute the code with the appropriate commands; 6. View the output.
