After Apple released macOS High Sierra, the system finally came with php v7.1. Compared with before, if you want to use For php7, you have to find an additional way (Homebrew or php-osx), which is really convenient.
However, the PHP that comes with the system only has basic configurations. If you want to develop PHP, Xdebug is still necessary. Here is a summary of how to add the Xdebug module to the PHP that comes with the system in macOS High Sierra. [Recommended: PHP7 tutorial]
Basic environment (macOS and PHP information)
- ##macOS High Sierra: v10.13.3
- PHP: v7.1.7
Installing Xdebug
Xdebug official website installation documentation has MAC recommended methods, since the system comes with PHP It isv7.1.7, so when selecting, you need to select the installation package php71-xdebug.

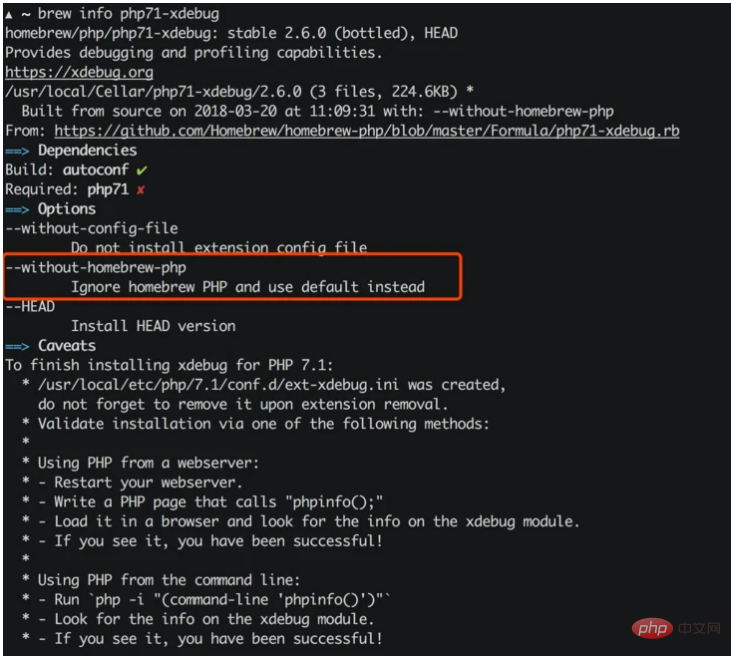
php71-xdebug in brew depends on php71, it is recommended to add --without -homebrew-phpThis parameter, brew will ignore the installation of php71.
brew install php71-xdebug --without-homebrew-php
phpize
grep: /usr/include/php/main/php.h: No such file or directory
grep: /usr/include/php/Zend/zend_modules.h: No such file or directory
grep: /usr/include/php/Zend/zend_extensions.h: No such file or directory
Configuring for:
PHP Api Version:
Zend Module Api No:
Zend Extension Api No:
phpize to not work properly, phpize is used to prepare the compilation environment of the PHP extension library. In theory, the PHP that comes with the system should have phpize, but it is not in /usr/include/php/* The module it needs is found inside, and when searching /usr/include, it is found that this directory does not exist at all.
/usr/include. In systems before OSX v10.10, you need to manually create a soft link to solve the problem:
sudo ln -s /Applications/Xcode.app/Contents/Developer/Platforms/MacOSX.platform/Developer/SDKs/MacOSX.sdk/usr/include /usr/include
sudo will not work):
ln: /usr/include: Operation not permitted
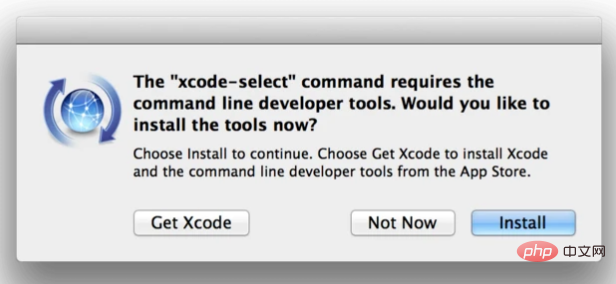
Command Line Tools it provides. The above problems , in fact, it can be solved as long as you install Command Line Tools:
xcode-select --install

brew to install php71-xdebug:
brew install php71-xdebug --without-homebrew-php
To finish installing xdebug for PHP 7.1:
  * /usr/local/etc/php/7.1/conf.d/ext-xdebug.ini was created,
    do not forget to remove it upon extension removal.
  * Validate installation via one of the following methods:
  *
  * Using PHP from a webserver:
  * - Restart your webserver.
  * - Write a PHP page that calls "phpinfo();"
  * - Load it in a browser and look for the info on the xdebug module.
  * - If you see it, you have been successful!
  *
  * Using PHP from the command line:
  * - Run `php -i "(command-line 'phpinfo()')"`
  * - Look for the info on the xdebug module.
  * - If you see it, you have been successful!
Enable Xdebug for PHP
After the above steps, there is Xdebug in the system, but it may not be in thephp.ini configuration file, so Xdebug needs to be added manually Configuration items:
[xdebug]
zend_extension="/usr/local/opt/php71-xdebug/xdebug.so"
xdebug.remote_enable = 1
xdebug.remote_autostart = 1
xdebug.remote_connect_back = 1
xdebug.remote_port = 9000
xdebug.scream = 0
xdebug.show_local_vars = 1
php-fpm:
# 关闭php-fpm
sudo killall php-fpm

# 启动php-fpm
sudo php-fpm
php -i "(command-line 'phpinfo()')" | grep xdebug, you can see the configuration content of Xdebug:
xdebug
...
xdebug.remote_autostart => On => On
xdebug.remote_connect_back => On => On
xdebug.remote_cookie_expire_time => 3600 => 3600
xdebug.remote_enable => On => On
xdebug.remote_handler => dbgp => dbgp
xdebug.remote_host => localhost => localhost
xdebug.remote_log => no value => no value
xdebug.remote_mode => req => req
xdebug.remote_port => 9000 => 9000
xdebug.remote_timeout => 200 => 200
xdebug.scream => Off => Off
...
Visual Studio Code - PHP Debug
VSCode is currently the most popular One of the development tools, although lightweight, it is not inferior to all kinds of IDEs. It is Microsoft's conscience work. Its capabilities can be expanded by installing different plug-ins. Among them is thePHP Debug plug-in. It can be used as a bridge to Xdebug to facilitate debugging PHP directly through Xdebug. The official description is very appropriate:
PHP Debug Adapter for Visual Studio CodeThe guidance on the official website is also quite good:
- Install XDebug
zend_extension=path/ to/xdebug
I highly recommend you make a simple test.phpfile, put aphpinfo();statement in there, then copy the output and paste it into the XDebug installation wizard. It will analyze it and give you tailored installation instructions for your environment.In short:On Windows: Download the appropiate precompiled DLL for your PHP version, architecture (64/32 Bit), thread safety (TS/NTS) and Visual Studio compiler version and place it in your PHP extension folder.
##Configure PHP to use XDebug by adding- On Linux: Either download the source code as a tarball or clone it with git, then compile it.
- to your php.ini.
Enable remote debugging in your php.ini:The path of your php.ini is shown in yourphpinfo()
output under "Loaded Configuration File".There are other ways to tell XDebug to connect to a remote debugger than
remote_autostart, like cookies, query parameters or browser extensions. I recommendremote_autostartbecause it "just works". There are also a variety of other options, like the port (by default 9000), please see the XDebug documentation on remote debugging for more information.- If you are doing web development, don't forget to restart your webserver to reload the settings
- Verify your installation by checking your
phpinfo()output for an XDebug section.
这里需要注意的是它推荐开启Xdebug配置项中的remote_autostart这一项。
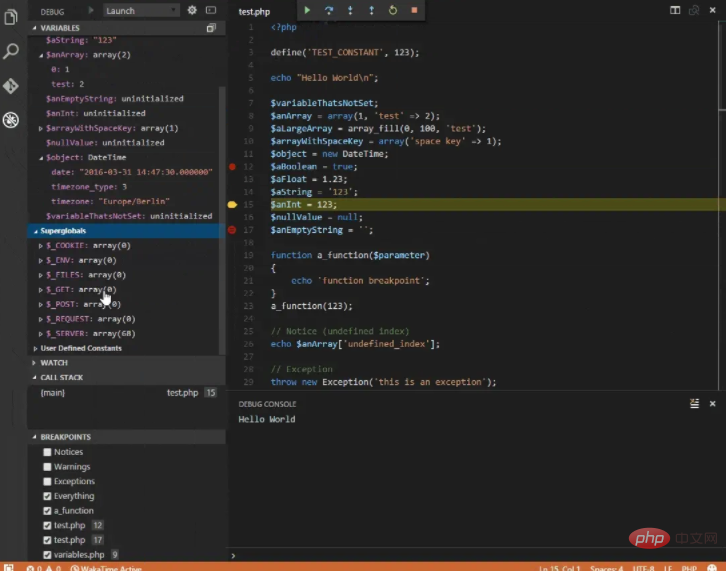
好了,经过上面的操作,你应该可以跟Demo里面一样在VSCode中调试PHP了。


