

Teach you step by step how to write logs in Node.js service

How to write logs in Node service? The following article will give you a practical understanding of how to write logs in the Node.js service. I hope it will be helpful to you!

When using Node to write the server, the most troublesome thing is to troubleshoot positioning problems, because unlike the Chrome browser, We have direct error prompts in dev tool, or we can directly break point debugging.
We often encounter the problem of why the live environment is not working even though the test environment is OK. If there is no log, there is no clue about this problem.
So in this article, let’s talk about how to write logs in the Node service.
Quickly create a koa project
First make sure you have installed it globallykoa2:
npm i koa2 -g
Then execute:
The basic services ofkoa2 -e node-log # 新建一个项目 cd node-log npm i # 安装依赖 npm run start # 启动
are set up. Visit http://localhost:3000/, you can see the following page:

The above is a quick setupkoaService method. This project has a built-in logging library - koa-logger. Let's first take a look at what it does.
koa-logger
This library is relatively simple and records the basic information of the request, such as the request method, URL, time, etc. When used as middleware, note: It is recommended to place it before all middleware. This is related to the onion model of koa. If it is not the first one, the calculated time will be inaccurate.
var logger = require('koa-logger');
app.use(logger());
When we access the response resources, the corresponding log will be output on the console as follows:
  <-- GET /
GET / - 14
  --> GET / 200 19ms 234b
  <-- GET /stylesheets/style.css
GET /stylesheets/style.css - 1
  --> GET /stylesheets/style.css 200 3ms 111b
  <-- GET /favicon.ico
GET /favicon.ico - 1
  --> GET /favicon.ico 404 1ms -
By default, the log is directly through console Output to the console, if we need to perform custom operations on the log, such as writing to a log file, etc. It can be done by something like, for example, I record the time:
app.use(logger((str) => {
  console.log(new Date() + str)
  // redirect koa logger to other output pipe
  // default is process.stdout(by console.log function)
}))Result:
Mon Oct 11 2021 19:28:41 GMT+0800 (China Standard Time)  <-- GET /
GET / - 10ms
Mon Oct 11 2021 19:28:41 GMT+0800 (China Standard Time)  --> GET / 200 20ms 226b
Mon Oct 11 2021 19:28:41 GMT+0800 (China Standard Time)  <-- GET /stylesheets/style.css
Mon Oct 11 2021 19:28:41 GMT+0800 (China Standard Time)  --> GET /stylesheets/style.css 200 4ms 111b
koa-log4js
koa-logger It is relatively lightweight and exposes a relatively flexible interface. But for use in actual business, I personally recommend using koa-log4js. The main reasons are as follows:
koa-loggerIt seems that it only supports the use of middleware, but does not support the function of reporting specific logs.- There are relatively few built-in functions. For example, the classification and placement of logs, etc.
koa-log4js Wraps log4js to support Koa log middleware. Its configuration is consistent with log4js. So if you use log4js, the usage should be consistent.
Use
Installation:
npm i --save koa-log4
Let’s look at the usage first, create a new folder log in the root directory. And create a new folder utils, and create a new file logger.js in it. The code is as follows:
const path = require('path');
const log4js = require('koa-log4');
const RUNTIME_PATH = path.resolve(__dirname, '../');
const LOG_PATH = path.join(RUNTIME_PATH, 'log');

log4js.configure({
  // 日志的输出
  appenders: {
    access: {
      type: 'dateFile',
      pattern: '-yyyy-MM-dd.log', //生成文件的规则
      alwaysIncludePattern: true, // 文件名始终以日期区分
      encoding: 'utf-8',
      filename: path.join(LOG_PATH, 'access.log') //生成文件名
    },
    application: {
      type: 'dateFile',
      pattern: '-yyyy-MM-dd.log',
      alwaysIncludePattern: true,
      encoding: 'utf-8',
      filename: path.join(LOG_PATH, 'application.log')
    },
    out: {
      type: 'console'
    }
  },
  categories: {
    default: { appenders: [ 'out' ], level: 'info' },
    access: { appenders: [ 'access' ], level: 'info' },
    application: { appenders: [ 'application' ], level: 'all'}
  }
});

// getLogger 传参指定的是类型
exports.accessLogger = () => log4js.koaLogger(log4js.getLogger('access')); // 记录所有访问级别的日志
exports.logger = log4js.getLogger('application'); Briefly explain, configure is the configuration of log4js-node (will be explained in detail later), passed through the getLogger function Parameter is the log type, for example access is the access level log.
Then add: <div class="code" style="position:relative; padding:0px; margin:0px;"><pre class='brush:php;toolbar:false;'>const { accessLogger, logger } = require(&#39;./utils/logger&#39;);
app.use(accessLogger())</pre><div class="contentsignin">Copy after login</div></div> to
and routes/index.js to add:
+ const { logger } = require('../utils/logger')

router.get('/', async (ctx, next) => {
+  logger.info('我是首页');
  await ctx.render('index', {
    title: 'Hello Koa 2!'
  })
})Refresh , you can see that two files are output in the log folder:

recorded respectively:
[2021-10-12T10:43:33.914] [INFO] access - ::1 - - "GET / HTTP/1.1" 200 226 "" "Mozilla/5.0 (Macintosh; Intel Mac OS X 10_15_7) AppleWebKit/537.36 (KHTML, like Gecko) Chrome/94.0.4606.71 Safari/537.36"
[2021-10-12T10:43:34.065] [INFO] access - ::1 - - "GET /stylesheets/style.css HTTP/1.1" 200 111 "http://localhost:3000/" "Mozilla/5.0 (Macintosh; Intel Mac OS X 10_15_7) AppleWebKit/537.36 (KHTML, like Gecko) Chrome/94.0.4606.71 Safari/537.36"
[2021-10-12T10:43:33.902] [INFO] application - 我是首页
Next we come Take a look at the configuration of log4js.
level
The main function of log classification is to better display logs (different colors) and selectively place logs, such as to avoid some# in production. Sensitive logs of ##debug were leaked. log4js There are nine levels by default (you can modify it through levels), as follows:
{
  ALL: new Level(Number.MIN_VALUE, "ALL"),
  TRACE: new Level(5000, "TRACE"),
  DEBUG: new Level(10000, "DEBUG"),
  INFO: new Level(20000, "INFO"),
  WARN: new Level(30000, "WARN"),
  ERROR: new Level(40000, "ERROR"),
  FATAL: new Level(50000, "FATAL"),
  MARK: new Level(9007199254740992, "MARK"), // 2^53
  OFF: new Level(Number.MAX_VALUE, "OFF")
} 
只会输出级别相等或者级别高的日志。比如你配置了 WARN,就不会输出 INFO 的日志。
可以在下面配置的 categories 中配置不同的类型日志的日志级别。
categories
日志类别。必须配置默认日志类别,用于没有命中的情况下的兜底行为。该配置为一个对象,key 值为分类名称。比如上述 demo 中:
{
  default: { appenders: [ 'out' ], level: 'info' },
  access: { appenders: [ 'access' ], level: 'info' },
  application: { appenders: [ 'application' ], level: 'all'}
}其中每个类别都有两个配置 appenders 是一个字符串数组,是输出配置(后文中会详解),可以指定多个,至少要有一个。level 是上文日志级别。
appenders
解决了日志分级和分类,接下来是日志落盘,也就是输出日志的问题。对应的配置是 appenders,该配置的 key 值为自定义的名称(可以给 categories 中的 appenders 使用),属性值为一个对象,配置输出类型。如下所示:
// 日志的输出
appenders: {
  access: {
    type: 'dateFile',
    pattern: '-yyyy-MM-dd.log', //生成文件的规则
    alwaysIncludePattern: true, // 文件名始终以日期区分
    encoding: 'utf-8',
    filename: path.join(LOG_PATH, 'access.log') //生成文件名
  },
  out: {
    type: 'console'
  }
}其中,out 指的是通过 console 输出,这个可以作为我们的一个兜底。access 中 type 为 dataFile,指的是输出文件,然后配置文件的命名和输出路径。除了这个类型,详情可以看官网,比如 SMTP 通过邮件发送(这个需要 nodemailer)
总结配置
日志分级、日志分类以及日志落盘,配置上的关系如下:
总结
日志对于我们服务端排查定位问题非常重要,本文通过 koa-logger 和 koa-log4js 讲解了如何上报日志。
koa-logger 比较轻量,记录请求的基本信息,也提供了一定的自定义能力。
koa-log4js 在日志分级、日志分类以及日志落盘上提供了一定的能力,个人认为基本这个更加适用于生产环境。
更多node相关知识,请访问:nodejs 教程!!
The above is the detailed content of Teach you step by step how to write logs in Node.js service. For more information, please follow other related articles on the PHP Chinese website!

Hot AI Tools

Undresser.AI Undress
AI-powered app for creating realistic nude photos

AI Clothes Remover
Online AI tool for removing clothes from photos.

Undress AI Tool
Undress images for free

Clothoff.io
AI clothes remover

AI Hentai Generator
Generate AI Hentai for free.

Hot Article
Hot Tools

Notepad++7.3.1
Easy-to-use and free code editor

SublimeText3 Chinese version
Chinese version, very easy to use

Zend Studio 13.0.1
Powerful PHP integrated development environment

Dreamweaver CS6
Visual web development tools

SublimeText3 Mac version
God-level code editing software (SublimeText3)
Hot Topics
 1379
1379
 52
52

 An article about memory control in Node
Apr 26, 2023 pm 05:37 PM
An article about memory control in Node
Apr 26, 2023 pm 05:37 PM
The Node service built based on non-blocking and event-driven has the advantage of low memory consumption and is very suitable for handling massive network requests. Under the premise of massive requests, issues related to "memory control" need to be considered. 1. V8’s garbage collection mechanism and memory limitations Js is controlled by the garbage collection machine
 How to fix 'Service is not responding' error in Windows.
Apr 27, 2023 am 08:16 AM
How to fix 'Service is not responding' error in Windows.
Apr 27, 2023 am 08:16 AM
The NETSTART command is a built-in command in Windows that can be used to start and stop services and other programs. Sometimes, you may encounter NetHelpmsg2186 error while running this command. Most users who encounter this error try to restart the Windows Update service by running the NETSTARTWUAUSERV command. If the Windows Update service is disabled or not running, your system may be at risk as you will not be able to get the latest updates. Let’s explore in detail why this error occurs and how to bypass it. Okay? What is error 2186? Windows Update service installs the latest critical updates and security features
 Solution to Windows 10 Security Center service being disabled
Jul 16, 2023 pm 01:17 PM
Solution to Windows 10 Security Center service being disabled
Jul 16, 2023 pm 01:17 PM
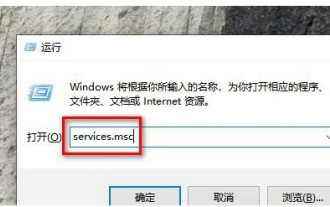
The Security Center service is a built-in computer protection function in the win10 system, which can protect computer security in real time. However, some users encounter a situation where the Security Center service is disabled when booting the computer. What should they do? It's very simple. You can open the service panel, find the SecurityCenter item, then right-click to open its properties window, set the startup type to automatic, and then click Start to start the service again. What to do if the Win10 Security Center service is disabled: 1. Press "Win+R" to open the "Operation" window. 2. Then enter the "services.msc" command and press Enter. 3. Then find the "SecurityCenter" item in the right window and double-click it to open its properties window.
 Detailed graphic explanation of the memory and GC of the Node V8 engine
Mar 29, 2023 pm 06:02 PM
Detailed graphic explanation of the memory and GC of the Node V8 engine
Mar 29, 2023 pm 06:02 PM
This article will give you an in-depth understanding of the memory and garbage collector (GC) of the NodeJS V8 engine. I hope it will be helpful to you!
 Let's talk in depth about the File module in Node
Apr 24, 2023 pm 05:49 PM
Let's talk in depth about the File module in Node
Apr 24, 2023 pm 05:49 PM
The file module is an encapsulation of underlying file operations, such as file reading/writing/opening/closing/delete adding, etc. The biggest feature of the file module is that all methods provide two versions of **synchronous** and **asynchronous**, with Methods with the sync suffix are all synchronization methods, and those without are all heterogeneous methods.
 How to open Remote Desktop Connection Service using command
Dec 31, 2023 am 10:38 AM
How to open Remote Desktop Connection Service using command
Dec 31, 2023 am 10:38 AM
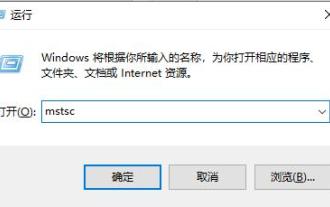
Remote desktop connection has brought convenience to many users' daily lives. Some people want to use commands to connect remotely, which is more convenient to operate. So how to connect? Remote Desktop Connection Service can help you solve this problem by using a command to open it. How to set up the remote desktop connection command: Method 1. Connect remotely by running the command 1. Press "Win+R" to open "Run" and enter mstsc2, then click "Show Options" 3. Enter the IP address and click "Connect". 4. It will show that it is connecting. Method 2: Connect remotely through the command prompt 1. Press "Win+R" to open "Run" and enter cmd2. In the "Command Prompt" enter mstsc/v:192.168.1.250/console
 How to enable audio service in win7
Jul 10, 2023 pm 05:13 PM
How to enable audio service in win7
Jul 10, 2023 pm 05:13 PM
Computers have many system services to support the application of various programs. If the computer has no sound and most audio services are not turned on after troubleshooting hardware problems, how do you enable audio services in win7? Many friends are confused, so for the question of how to enable the audio service in win7, the editor below will introduce how to enable the audio service in win7. How to enable audio service in win7. 1. Find the computer on the computer desktop under Windows 7 system, right-click and select the management option. 2. Find and open the service item under Services and Applications in the computer management interface that opens. Find WindowsAudio on the service interface on the right and double-click to open the modification. 4. Switch to the regular project and click Start to enable the function.
 What is the correct way to restart a service in Linux?
Mar 15, 2024 am 09:09 AM
What is the correct way to restart a service in Linux?
Mar 15, 2024 am 09:09 AM
What is the correct way to restart a service in Linux? When using a Linux system, we often encounter situations where we need to restart a certain service, but sometimes we may encounter some problems when restarting the service, such as the service not actually stopping or starting. Therefore, it is very important to master the correct way to restart services. In Linux, you can usually use the systemctl command to manage system services. The systemctl command is part of the systemd system manager
