

This article will help you quickly understand Vue-Router routing

This article brings you knowledge about Vue-Router routing. Vue Router is the official routing manager of Vue.js. It is deeply integrated with the core of Vue.js and can be very conveniently used for the development of SPA applications. I hope everyone has to help.

1. Quick concept:
1. Backend routing:
1. According to different user URL requests, returns different content, which is essentially the correspondence between the URL request address and the server resource.
2. However, there are performance issues in back-end rendering.
2. Front-end routing:
3. So Ajaxfront-end rendering appears, and front-end rendering can improve performance , but does not support the browser's forward and backward operations.
4. At this time, SPA (Single Page Application) appeared again. The entire website has only one page, and content changes are realized through AjaxPartial Update , while supporting the forward and backward operations of the browser address bar.
5. One of the SPA implementation principles is based on URL address hash (Changes in hash will cause the browser to record changes in access history, but changes in hash will not trigger new URL requests. ). In the process of implementing SPA, the core technical point is front-end routing.
6.Front-end routing displays different page content based on different user events. The essence is the correspondence between user events and event processing functions.
3.Vue Router:
This is the official documentation link. :https://router.vuejs.org/zh/guide/#javascript
Vue Router is the official routing manager of Vue.js. It is deeply integrated with the core of Vue.js and can be very conveniently used for the development of SPA applications.
Its functions are as follows:
1. Support HTML5 history mode or hash mode.
2. Support nested routing.
3. Support routing parameters.
4. Support programmatic routing.
5. Support named routing.
2. Basic usage:
Premise:
The following will demonstrate the basics of Vue Router with an HTML single page Steps for usage. The same principle applies to vue projects. The current basic code of a single page:
nbsp;html>


    <meta>
    <meta>
    <meta>
    <title>Document</title>


    <p>

    </p>
    <script>
        const app = new Vue({
            el:"#app",
            data: {}
        })
    </script>
You can see nothing:
The following are the specific steps to start using:
1. Import related files:
A single page must first import the vue file and vue-router file so that we can use routing.
<script></script>
<script></script>
2. Add routing link:
The following is a tag provided by vue, which will be rendered as a tag by default. There is a to attribute, which will be rendered as a href attribute, and the default value will be rendered as a hash address starting with #. To put it simply, it means that when the user clicks on different content, he will jump to different content, and this label is what the user wants to click on, which is equivalent to the a label.
<router-link>...</router-link>
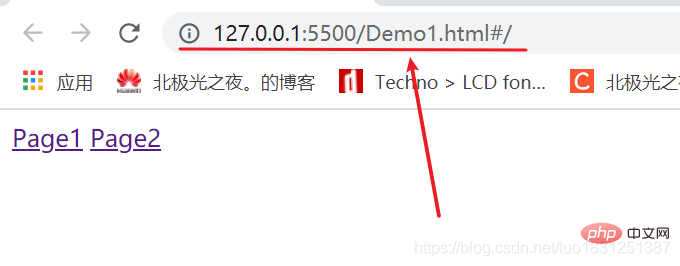
Add a page1 and a page2 link to our single page:
<p>
       <router-link>Page1</router-link>
       <router-link>Page2</router-link>
    </p>
3. Add routing padding:
The following one The label is called routing filling bit, which means that components matched by our routing rules in the future will be rendered to the location of router-view. To put it simply, when the user clicks on the routing link, the content will jump. What we know is that the entire page will not jump, but the content will change in the relevant part of the page. This part is the area where the router-view is displayed.
<router-view></router-view>
Add to our page:
        Page1
       Page2
       <router-view></router-view>
4. Define the routing component:
Since you want to display different content, you must use one The component saves a copy of its content. Next we define the two components page1 and page2 for a single page.
<script>
const Page1 = {
template: '<h1>我是北极光之夜1号'
}
const Page2 = {
template: '<h1>我是北极光之夜2号'
}
const app = new Vue({
el:"#app",
data: {}
})
</script>5. Configure routing rules and create routing instances:
routes is an array of routing rules. Each routing rule is a configuration object, which contains at least two attributes: path and component. Path represents the hash address matched by the current routing rule, and component represents the component to be displayed corresponding to the current routing rule. To put it simply, it means which content component corresponds to the address corresponding to the link you click. The path and the address in the router-link tag must be the same, don't make a mistake.
const router = new VueRouter({
            routes: [
                {path:'/page1',component:Page1 },
                {path:'/page2',component:Page2 }
            ]
})6. Mount the routing to the Vue root instance:
In order for the routing rules to take effect, the routing object must be mounted to the vue instance object.
 const app = new Vue({
            el:"#app",
            data: {},
            router
})7. Effect and single page code:
We are done~

The complete code above:
nbsp;html>Document <script></script> <script></script><script> const Page1 = { template: '<h1>我是北极光之夜1号' } const Page2 = { template: '<h1>我是北极光之夜2号' } const router = new VueRouter({ routes: [ {path:'/page1',component:Page1 }, {path:'/page2',component:Page2 } ] }) const app = new Vue({ el:"#app", data: {}, router }) </script>
Page1 Page2 <router-view></router-view>
3. Route redirection:
Route redirection means that when the user accesses address A, it forces the user to jump to address B, thereby displaying a specific component page.
通过路由规则的redirect属性,指定一个新的路由地址,可以很方便地设置路由的重定向。
{path:'/..',redirect: '/...'}其中path表示重定向的原地址,redirect表示新地址。
比如第二大点的案例中,刚打开的页面如下,在根目录,但我们想一进入就显示page1,那就给根目录重定向。
修改路由规则如下:
const router = new VueRouter({
            routes: [
                {path:'/page1',component:Page1 },
                {path:'/page2',component:Page2 },
                {path:'/',redirect:'/page1'}
            ]
})看效果,我没点击就默认进入page1了:

四.嵌套路由:
功能如下:
- 点击父级路由链接显示模板内容。
- 模板内容中又有子级路由链接。
- 点击子级路由链接显示子级模板内容。
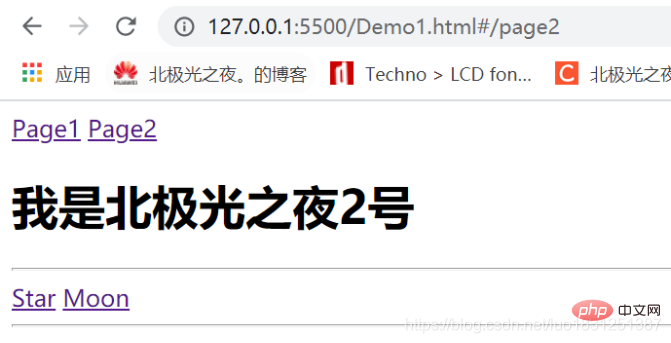
比如我们改进第二大点的案例,当点击page2显示page2内容时,page2里又有两个子路由连接,star和moon,当点击其中一个链接时又能显示对应的star或moon内容。
1.首先给page2组件添加两个子路由链接:
const Page2 = {
            template: `
                 <p>
                 </p><h1 id="我是北极光之夜-号">我是北极光之夜2号</h1>
                 <hr>
                 <router-link>Star</router-link>
                 <router-link>Moon</router-link>
                 <hr>
                 `
}此时页面也把显示子路由链接出来了:
2.给两个子路由链接添加路由填充位:
const Page2 = {
const Page2 = {
            template: `

                 我是北极光之夜2号

                 Star
                 Moon

                 <router-view></router-view>
                 `
}3.设置两个子组件star与moon的内容:
    const Star = {
            template: '<h2 id="我是北极光之夜-号下的star">我是北极光之夜2号下的star</h2>'
        }
        const Moon = {
            template: '<h2 id="我是北极光之夜-号下的Moon">我是北极光之夜2号下的Moon</h2>'
}4.配置路由规则:
page2的规则除了path和component属性外,再添加一个children属性,这个属性以数组表示,数组里存放其子路由的规则,其规则也是一样的,套娃套娃。
const router = new VueRouter({
            routes: [
                {path:'/page1',component:Page1 },
                {
                    path:'/page2',
                    component:Page2,
                    children: [
                        {path: '/page2/star',component:Star},
                        {path: '/page2/moon',component:Moon}
                    ]
                }
            ]
})5.效果与单页面代码:
完整代码:
nbsp;html>Document <script></script> <script></script><script> const Page1 = { template: '<h1>我是北极光之夜1号' } const Page2 = { template: ` <p> <h1>我是北极光之夜2号 <hr/> <router-link to="/page2/star">Star <router-link to="/page2/moon">Moon <hr/> <router-view> ` } const Star = { template: '<h2>我是北极光之夜2号下的star' } const Moon = { template: '<h2>我是北极光之夜2号下的Moon' } const router = new VueRouter({ routes: [ {path:'/page1',component:Page1 }, { path:'/page2', component:Page2, children: [ {path: '/page2/star',component:Star}, {path: '/page2/moon',component:Moon} ] } ] }) const app = new Vue({ el:"#app", data: {}, router }) </script>
Page1 Page2 <router-view></router-view>
五. 动态路由匹配:
1.动态匹配路由基本使用:
如果某些路由规则的一部分是一样的,只有另一部分是动态变化的,那我们可以把这些动态变化的部分形成路由参数,这些参数就叫做动态路由匹配。简单来说,你先看下面这些路由链接,它们都有/page/,就是后面不一样:
 <router-link>Page1</router-link>
   <router-link>Page2</router-link>
   <router-link>Page3</router-link>
那该咋配置路由呢?这样吗:
const router = new VueRouter({
            routes: [
                {path:'/page/1',component:Page},
                {path:'/page/2',component:Page},
                {path:'/page/3',component:Page}
            ]
})这样万一有很多一个个写岂不是太麻烦了,所以引入参数,在动态改变的部分定义为参数,参数前面有一个冒号,那上面可简写成如下,动态部分设为参数 :id 。
const router = new VueRouter({
            routes: [
                {path:'/page/:id',component:Page },
            ]
})在组件可以通过以下语法获取当前路由的参数:
$router.params.参数名称
好,再次修改第二大点的案例完成动态路由匹配:
1.定义路由链接:
   <router-link>Page1</router-link>
   <router-link>Page2</router-link>
   <router-link>Page3</router-link>
   <router-view></router-view>
2.动态配置路由,参数id:
const router = new VueRouter({
    routes: [
        {path:'/page/:id',component:Page1 },
    ]
})3.设置组件内容,并显示当前路由的参数:
const Page1 = {
    template: '<h1 id="我是北极光之夜-号-当前id为-route-params-id">我是北极光之夜1号,当前id为:{{$route.params.id}}</h1>'
}看效果:

2.路由组件传参:
上面的$route与对应路由形成高度耦合,不够灵活啊,所以可以使用props将组件和路由解耦。简单来说,好像也没什么说的,直接看下面实例就能理解了。
2.1 当props为布尔类型:
        const router = new VueRouter({
            routes: [
 // 设置props,如果props为true,router.params会被设置为组件属性
                {path:'/page/:id',component:Page1,props: true },
            ]
        })

        const Page1 = {
// 这时就通过props接收参数,快速简洁的接收参数id和使用它
                    props: ['id'],
                    template: '<h1 id="我是北极光之夜-号-当前id为-id">我是北极光之夜1号,当前id为:{{id}}</h1>'
}能达到一样的效果,且更灵活了,上面记得反过来,先定义组件才配置路由规则,只是为了直观才这样写:

2.2 当props为对象类型:
            const Page1 = {
        // 这时就通过props接收参数,快速简洁的接收参数对象 并显示
                props: ['name','age'],
                template: `<h1>我是北极光之夜1号,当前id为:{{id}}
                            <hr>
                           姓名为:{{name}} ,年龄为:{{age}} </h1>`
                }
             const router = new VueRouter({
                routes: [
            // props为一个参数对象,它会原样设置为组件属性,
            // 里面的自定义的参数都能传过去,但是id传不了了
                    {path:'/page/:id',component:Page1 , props: {name:'auroras',age: 18} }
                ]
})效果,对象props对象里的能获取,id就不行了:
2.3 当props为函数类型:
这个就什么都能获取。
    const Page1 = {
// 这时就通过props接收参数,快速简洁的接收参数
        props: ['name','age','id'],
        template: `<h1>我是北极光之夜1号,当前id为:{{id}}
                    <hr>
                   姓名为:{{name}} ,年龄为:{{age}} </h1>`
        }
     const router = new VueRouter({
        routes: [
    // props为函数,这个对象接收router对象为自己形参,
    // 里面的自定义的参数和id都能传过去
            {path:'/page/:id',
            component:Page1 ,
            props: router => ({id: router.params.id,name:'auroras',age: 18}) }
        ]
})效果:
当前完整代码:
nbsp;html>Document <script></script> <script></script><script> const Page1 = { // 这时就通过props接收参数,快速简洁的接收参数对象 props: ['name','age','id'], template: `<h1>我是北极光之夜1号,当前id为:{{id}} <hr/> 姓名为:{{name}} ,年龄为:{{age}} ` } const router = new VueRouter({ routes: [ // props为函数,这个对象接收router对象为自己形参, // 里面的自定义的参数和id都能传过去 {path:'/page/:id', component:Page1 , props: router => ({id: router.params.id,name:'auroras',age: 18}) } ] }) const app = new Vue({ el:"#app", data: {}, router }) </script>
Page1 Page2 Page3 <router-view></router-view>
六.Vue-Router命名路由:
为更加方便的表示路由的路径,可以给路由规则起一个别名, 即为“命名路由”。继续改进上面的案例讲解用法:
1.首先给路由规则加一个name属性,这个就是别名:
 const router = new VueRouter({
    routes: [
        {
        name: 'user',
        path:'/page/:id',
        component:Page1 ,
        props: router => ({id: router.params.id,name:'auroras',age: 18}) }
    ]
})2.在路由链接中使用:
    Page1
    Page2
    Page3
    <router-view></router-view>
我们把第一个路由链接改进,to前面加上冒号,其中name表示匹配的是哪个路由规则,params表示要传递的参数,看下面是一样的效果:
七.编程式导航:
声明式导航:首先声明式导航是指用户通过点击链接完成导航的方式,比如点击a标签或者路由链接这些完成的跳转。
编程式导航:编程式导航就是说跳转是因为我点击它,它不是链接,但是它在JavaScript里调用了某个API也实现了跳转。
- 常用的编程式导航API如下:
this.$router.push('要跳转的hash地址')
this.$router.go(n)push里直接放要跳转的哈希地址,go方法实现前进和后退,n代表数组,若n为1代表在历史记录中前进一位,-1代表在历史记录中后退一位。
1. this.$router.push(’ '):
重写一个案例,有page1、page2、page3三个路由链接,而在page3里有一个按钮,这个按钮的作用是点击后返回显示page1的内容。这个按钮可不是声明式导航里的链接,就是一个按钮。
1.定义普通的路由链接:
    Page1
    Page2
    Page3
    <router-view></router-view>
2.定义3个组件内容,其中给page3组件里放一个按钮,并绑定点击事件,在事件里通过API导航到page1:
const Page1 = {
    template: `<h1 id="我是北极光之夜-号">我是北极光之夜1号</h1>`
}
const Page2 = {
    template: `<h1 id="我是北极光之夜-号">我是北极光之夜2号</h1>`
}
const Page3 = {
    template: `<p>
            </p><h1 id="我是北极光之夜-号">我是北极光之夜3号</h1>
            <button>返回page1</button>
               `,
    methods: {
        goPage1(){
            this.$router.push('/page/1')
        }
    },

}3.路由规则:
const router = new VueRouter({
                routes: [
                    {path:'/page/1',component: Page1},
                    {path:'/page/2',component: Page2},
                    {path:'/page/3',component: Page3}
                ]
})4.看效果:
5.完整代码:
nbsp;html>Document <script></script> <script></script><script> const Page1 = { template: `<h1>我是北极光之夜1号` } const Page2 = { template: `<h1>我是北极光之夜2号` } const Page3 = { template: `<p> <h1>我是北极光之夜3号 <button @click="goPage1">返回page1 `, methods: { goPage1(){ this.$router.push('/page/1') } }, } const router = new VueRouter({ routes: [ {path:'/page/1',component: Page1}, {path:'/page/2',component: Page2}, {path:'/page/3',component: Page3} ] }) const app = new Vue({ el:"#app", data: {}, router }) </script>
Page1 Page2 Page3 <router-view></router-view>
不止href路径,还可以有以下操作:
//字符串形式(路径的名称)
router.push('/page1')//对象的形式
router.push({path: '/page1'})//也可以传递参数,命名的路由
router.push({name: '/page1',parmas:{id: 1}})//带查询参数,变成 /page1?p=id
//这个挺实用的,比如在某些音乐网页,点击歌单后要导航到另一个该歌单详细界面,此时要带id,详细界面靠此id重新发送请求,请求详细信息
router.push({parh: '/page1',query:{p: 'id' }})2. this.$router.go(n):
改进第1小点的案例,当我page3跳到page1时,page1里又有一个返回的按钮。我们把n设置为-1,他就会在历史记录中后退一位,后退一位就是page3.
修改page1组件内容:
  const Page1 = {
                template: `<p>
                        </p><h1 id="我是北极光之夜-号">我是北极光之夜1号</h1>
                        <button>返回</button>
                           `,
                  methods: {
                    goBack(){
                        this.$router.go(-1)
                    }
            }
}效果:

【相关推荐:《vue.js教程》】
The above is the detailed content of This article will help you quickly understand Vue-Router routing. For more information, please follow other related articles on the PHP Chinese website!

Hot AI Tools

Undresser.AI Undress
AI-powered app for creating realistic nude photos

AI Clothes Remover
Online AI tool for removing clothes from photos.

Undress AI Tool
Undress images for free

Clothoff.io
AI clothes remover

AI Hentai Generator
Generate AI Hentai for free.

Hot Article
Hot Tools

Notepad++7.3.1
Easy-to-use and free code editor

SublimeText3 Chinese version
Chinese version, very easy to use

Zend Studio 13.0.1
Powerful PHP integrated development environment

Dreamweaver CS6
Visual web development tools

SublimeText3 Mac version
God-level code editing software (SublimeText3)
Hot Topics


 How to use echarts in vue
May 09, 2024 pm 04:24 PM
How to use echarts in vue
May 09, 2024 pm 04:24 PM
Using ECharts in Vue makes it easy to add data visualization capabilities to your application. Specific steps include: installing ECharts and Vue ECharts packages, introducing ECharts, creating chart components, configuring options, using chart components, making charts responsive to Vue data, adding interactive features, and using advanced usage.
 The role of export default in vue
May 09, 2024 pm 06:48 PM
The role of export default in vue
May 09, 2024 pm 06:48 PM
Question: What is the role of export default in Vue? Detailed description: export default defines the default export of the component. When importing, components are automatically imported. Simplify the import process, improve clarity and prevent conflicts. Commonly used for exporting individual components, using both named and default exports, and registering global components.
 How to use map function in vue
May 09, 2024 pm 06:54 PM
How to use map function in vue
May 09, 2024 pm 06:54 PM
The Vue.js map function is a built-in higher-order function that creates a new array where each element is the transformed result of each element in the original array. The syntax is map(callbackFn), where callbackFn receives each element in the array as the first argument, optionally the index as the second argument, and returns a value. The map function does not change the original array.
 The difference between event and $event in vue
May 08, 2024 pm 04:42 PM
The difference between event and $event in vue
May 08, 2024 pm 04:42 PM
In Vue.js, event is a native JavaScript event triggered by the browser, while $event is a Vue-specific abstract event object used in Vue components. It is generally more convenient to use $event because it is formatted and enhanced to support data binding. Use event when you need to access specific functionality of the native event object.
 The difference between export and export default in vue
May 08, 2024 pm 05:27 PM
The difference between export and export default in vue
May 08, 2024 pm 05:27 PM
There are two ways to export modules in Vue.js: export and export default. export is used to export named entities and requires the use of curly braces; export default is used to export default entities and does not require curly braces. When importing, entities exported by export need to use their names, while entities exported by export default can be used implicitly. It is recommended to use export default for modules that need to be imported multiple times, and use export for modules that are only exported once.
 The role of onmounted in vue
May 09, 2024 pm 02:51 PM
The role of onmounted in vue
May 09, 2024 pm 02:51 PM
onMounted is a component mounting life cycle hook in Vue. Its function is to perform initialization operations after the component is mounted to the DOM, such as obtaining references to DOM elements, setting data, sending HTTP requests, registering event listeners, etc. It is only called once when the component is mounted. If you need to perform operations after the component is updated or before it is destroyed, you can use other lifecycle hooks.
 What are hooks in vue
May 09, 2024 pm 06:33 PM
What are hooks in vue
May 09, 2024 pm 06:33 PM
Vue hooks are callback functions that perform actions on specific events or lifecycle stages. They include life cycle hooks (such as beforeCreate, mounted, beforeDestroy), event handling hooks (such as click, input, keydown) and custom hooks. Hooks enhance component control, respond to component life cycles, handle user interactions and improve component reusability. To use hooks, just define the hook function, execute the logic and return an optional value.
 What scenarios can event modifiers in vue be used for?
May 09, 2024 pm 02:33 PM
What scenarios can event modifiers in vue be used for?
May 09, 2024 pm 02:33 PM
Vue.js event modifiers are used to add specific behaviors, including: preventing default behavior (.prevent) stopping event bubbling (.stop) one-time event (.once) capturing event (.capture) passive event listening (.passive) Adaptive modifier (.self)Key modifier (.key)
