This article brings you relevant knowledge on how vue solves front-end cross-domain problems in axios requests. I hope it will be helpful to everyone.

There are many solutions to cross-domain problems in normal development. The most common one is that the backend modifies the response header. But the front end can also be solved through reverse proxy. In order to prevent such mistakes from happening next time, record and summarize them.
So now let’s review it and solve it.
1. Why do cross-domain problems occur?
Cross-domain: When the browser requests resources from a webpage of one domain name to another domain name, if the domain name, port, or protocol are different, it is cross-domain.
In the front-end and back-end separation mode, the domain names of the front and back ends are inconsistent, and cross-domain access problems will occur. The cross-domain problem comes from JavaScript's same-origin policy, that is, only if the protocol, host name, and port number (if present) are the same, mutual access is allowed. In other words, JavaScript can only access and operate resources in its own domain, but cannot access and operate resources in other domains. Cross-domain issues are for JS and ajax. Axios is an encapsulation of ajax technology through Promise, and there are also cross-domain problems.
2. Solution
Here I will use the local machine to open two different ports for testing.
Error reported before cross-domain processing is not processed

This is how the request is not processed across domains
 axios.get('http://localhost:8080/getData')
 .then(res => {
   console.log(res)
 })
 .catch(err => {
   console.error(err);
})Reverse proxy
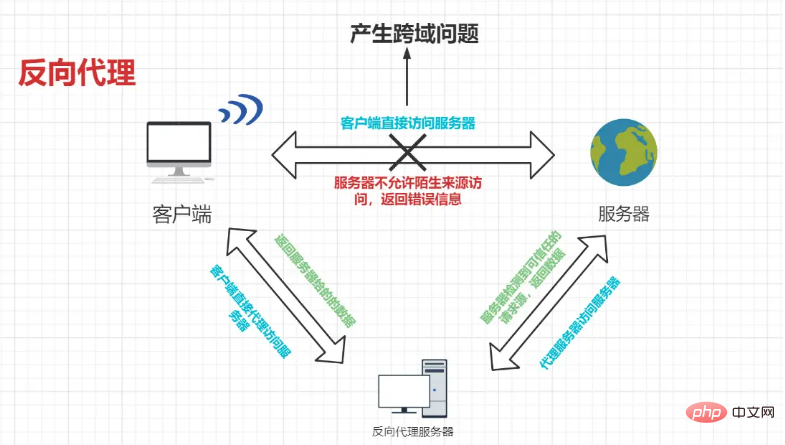
The front end performs reverse proxy to solve cross-domain problems. The schematic diagram is as follows:

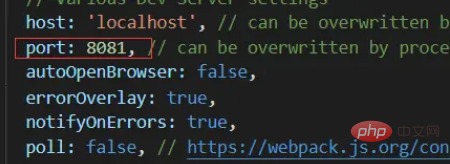
The port of the vue project is 8081

My computer has opened a port 8080, request /getData will put back the json data.
Configure proxy
1. In vue2.0
Modify the index.js file in the config folder and add the following to proxyTable Code:
   proxyTable: {
      '/apis': {
        target: 'http://localhost:8080/',  //要解决跨域的接口的域名
        secure:false,           //如果是https接口,需要配置这个参数
        changeOrigin: true,  // 如果接口跨域,需要进行这个参数配置
        pathRewrite: {
          '^/apis': ''  // 路径重写
        }
      },
},Then write this in axios in the request
 axios.get('apis/getData')
 .then(res => {
   console.log(res)
 })
 .catch(err => {
   console.error(err);
})Analysis:
What follows the target is the public part of the URL that needs to be requested, and then use /apis to proxy This, finally rewrite some paths, and use our proxy's apis as a prefix when making requests.
We can customize this prefix. proxyTable is an object, so we can configure multiple proxies.
Cross-domain solution

2. After the scaffolding of
vue-cli3 is completed in vue3.0 , there is no vue.config.js file in the project directory, you need to manually create
to create a new vue.config.js and configure the following information, which can also be solved.
module.exports = {
    devServer: {
        proxy: {
            '^/api': {
                target: 'http://localhost:8080/',//接口的前缀
                ws:true,//代理websocked
                changeOrigin:true,//虚拟的站点需要更管origin
                pathRewrite:{
                    '^/api':''//重写路径
                }
            }
        }
    }
}Summary:
changeOrigin: true: Turn on the proxy: A fake server will be created locally, then send the requested data and receive the requested data at the same time, so The server and the server can interact with data.
apis is the prefix of the actual request of the interface, which proxies the public part of our actual interface prefix, which is the protocol host name and port number
For example, the request interface is localhost:8080/getData We Just pass in: getData
Then the public domain name is localhost:8080/, we are changing the public domain name localhost:8080/ of the request interface to api/!
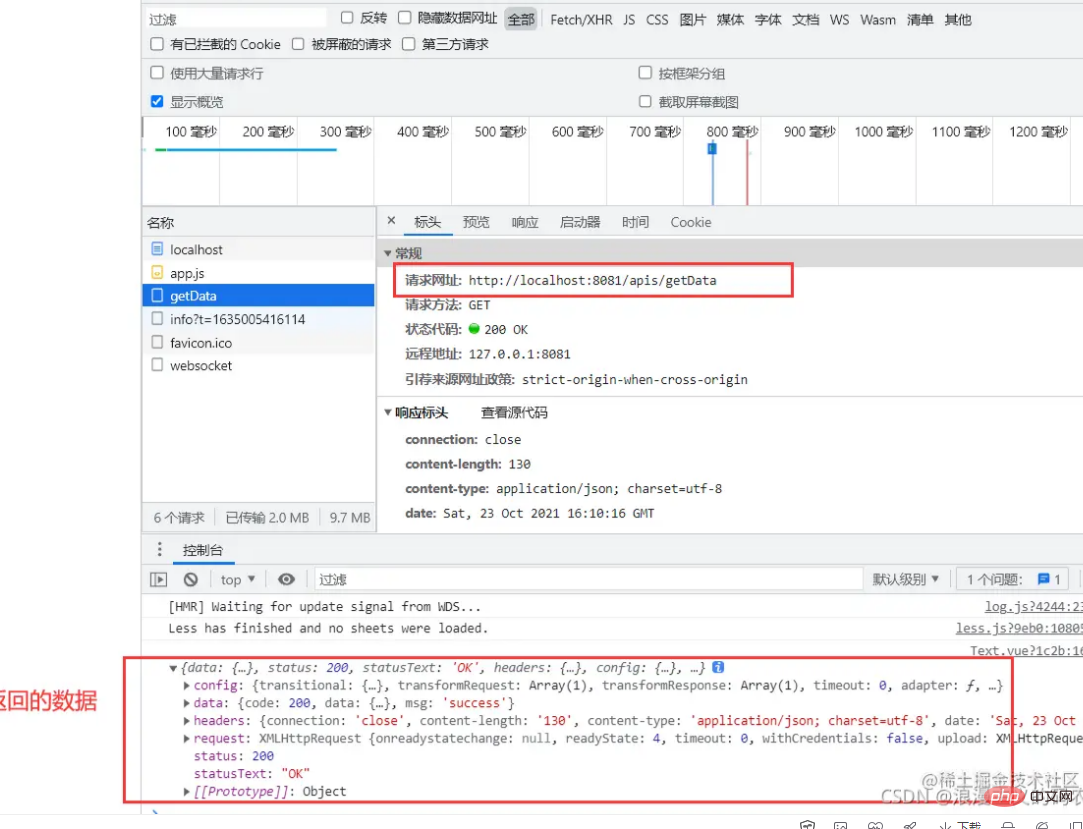
Run the project When you look up, you can see that the path of the interface request is: localhost:8081/apis/getData
. After entering the proxy, the actual request path is: localhost:8080/getData
[Related recommendations: "vue.js tutorial"】
The above is the detailed content of How does vue solve the front-end cross-domain problem in axios request (detailed example). For more information, please follow other related articles on the PHP Chinese website!