
 Development Tools
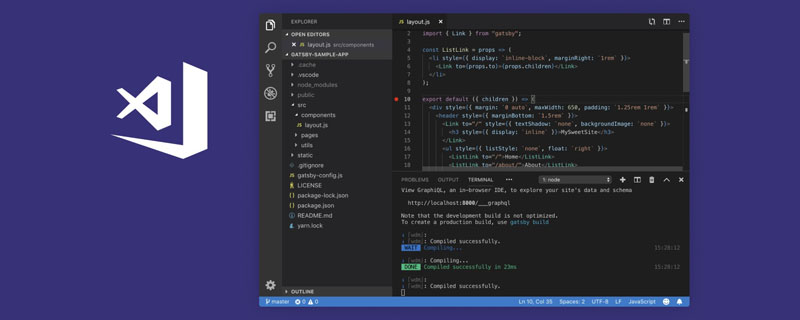
VSCode
Let's talk about how to use snippets in VSCode to improve development efficiency!
Development Tools
VSCode
Let's talk about how to use snippets in VSCode to improve development efficiency!
Let's talk about how to use snippets in VSCode to improve development efficiency!

VSCode支持自定义 snippets,可以极大提高开发效率。下面本篇文章就来给大家通过一个案例来学会 VSCode Snippets,希望对大家有所帮助!
snippets 是片段的意思,VSCode 支持自定义 snippets,写代码的时候可以基于它快速完成一段代码的编写。【推荐学习:《vscode入门教程》】

不只是 VSCode,基本所有的主流编辑器都支持 snipeets。
一个功能被这么多编辑器都支持,那肯定是很有用的,但是这功能大多数人都没用起来。
我之前写的 snippets 文章中讲了 snippets 支持的各种语法和配置方式,但是并没有用这些来做一个真实的案例。
所以,这篇文章就来讲一个真实的 snippets,基本用到了所有的 snippets 语法。能独立把它写出来,就可以说 snippets 已经掌握了。
我们还是先回顾下 VSCode 的 snippets 语法
snippets 基础
snippets 是这样的 json 格式:
{
    "alpha": {
        "prefix": ["a", "z"],
        "body": [
            "abcdefghijklmnopqrstuvwxyz"
        ],
        "description": "字母",
        "scope": "javascript"
    }
}- prefix 是触发的前缀,可以指定多个
- body 是插入到编辑器中的内容,支持很多语法
- description 是描述
- scope 是生效的语言,不指定的话就是所有语言都生效
body 部分就是待插入的代码,支持很多语法,也是一种 DSL(领域特定语言)。
支持通过 $1、$2 指定光标位置:
"$1  xxxx",
"yyyy $2"
可以多光标同时编辑:
"$1 xxxx $1"
可以加上 placeholader,也可以做默认值:
"${1:aaa}  xxxx",
"yyyy ${2:bbb}"
可以提供多个值来选择:
"${1|卡颂,神光,yck|}最帅"
还提供了一些变量可以取:
"当前文件: $TM_FILENAME",
"当前日期: $CURRENT_YEAR/$CURRENT_MONTH/$CURRENT_DATE"
而且还能对变量做正则替换:
"${TM_FILENAME/(.*)\\.[a-z]+/${1:/upcase}/i}"
基本语法过了一遍,大家知道支持啥就行,后面我们来做个真实的案例,把这些用一遍就会了。
通过 command + shift + p,输入 snippets 然后选择一种范围:
snippets 有 project、global、language 3 种生效范围。我个人写 global 级别的比较多,项目和语言级别的也可以。
基础过完了,接下来我们就来写一个 snippets 吧。
实战案例
我最近在做 vue 的项目,写 router-link 比较多,所以封装了个 router-link 代码的 snippets。
我们先写个最简单的版本:
{
"routerLink": {
"prefix": "link",
"body": [
"<router-link to={ name:'xxx', params: {id: 1} } target='_blank'>link</router-link>"
],
"description": "router-link 跳转"
}
}这个没啥好说的,就是根据前缀补全内容:
然后在 name、id、链接文字处加三个光标,也就是 $1、$2、$3:
{
"routerLink": {
"prefix": "link",
"body": [
"<router-link to={ name: $1, params: {id: $2} } target='_blank'>$3</router-link>"
],
"description": "router-link 跳转"
}
}可以按 tab 键快速编辑其中变化的部分:
然后加上 placeholder:
{
"routerLink": {
"prefix": "link",
"body": [
"<router-link to={ name: '${1:RouteName}', params: {id: ${2:id}} } target='_blank'>${3:link}</router-link>"
],
"description": "router-link 跳转"
}
}
其实 target 部分也是可选的,这里我们用多选来做:
选项有两个,就是 target="_blank" 或者空格。
${3| ,target=\"_blank\"|}所以 snippets 就变成了这样:
{
"routerLink": {
"prefix": "link",
"body": [
"${4:link} "
],
"description": "router-link 跳转"
}
}
跳转地址大多数是和当前文件名有关,比如 XxxYyyZzzList 跳转 XxxYyyZzzDetail 的比较多。
所以我们默认值取当前文件名,用 TM_FILENAME 变量(所有可用变量可以在 vscode 官网查):
${1:$TM_FILENAME}现在的 snippets:
{
"routerLink": {
"prefix": "link",
"body": [
"${4:link} "
],
"description": "router-link 跳转"
}
}效果是这样:

确实把文件名填上去了,但是还要手动改,能不能填上去的就是改了之后的呢?
可以,变量支持做 transform,也就是正则替换:
XxxList.vue 要取出 Xxx 来,然后拼上 Detail,这样的正则不难写:
用 js 写是这样的:
'XxxList.vue'.replace(/(.*)List\.vue/,'$1Detail')

在 snippets 里也差不多,只不过用 / 分开:
${TM_FILENAME/(.*)List\\.vue/$1Detail/i所以 snippets 就变成了这样:
{
"routerLink": {
"prefix": "link",
"body": [
"${4:link} "
],
"description": "router-link 跳转"
}
}填入的代码都是替换好了的:

链接的内容我们希望用选中的内容,这个也有变量,就是 TM_SELECTED_TEXT。

最后,我们希望 router-link 这个标签也可以变,而且改的时候开闭标签可以一起改。
这个要用多光标编辑,指定多个 $x 为同一个数字就行。
<${5:router-link}></${5:router-link}>效果就是这样的:

这就是最终的 snippets,所有 snippets 语法都用了一遍。
完整 snippets 如下,大家可以在 VSCode 里用用看,用起来体验还是很爽的:
{
    "routerLink": {
        "prefix": "link",
        "body": [
            "<${5:router-link} to={ name: '${1:${TM_FILENAME/(.*)List\\.vue/$1Detail/i}}', params: {id: ${2:id}} } ${3| ,target=\"_blank\"|}>${4:$TM_SELECTED_TEXT}"
        ],
        "description": "router-link 跳转"
    }
}总结
基本所有主流编辑器都支持 snippets,也就是配置代码片段来提高开发效率,VSCode 也不例外,这是一个很有用的功能。
VSCode snippets 支持 global、project、language 3 种生效范围。我个人用全局的比较多。
它也算是一种 DSL 了,支持很多语法,比如指定光标位置、多光标编辑、placeholder、多选值、变量、对变量做转换等语法。
- 指定光标位置:$x
- 多光标编辑:$x $x
- 指定 placeholder 文本:${x:placeholder}
- 指定多选值:${x|aaa,bbb|}
- 取变量:$VariableName
- 对变量做转换:${VariableName/正则/替换的文本/}
我们写了一个 router-link 的 snippets,综合运用了这些语法,过一遍就会了。
能自己定义适合自己的 snippets,对于提高开发效率是很有帮助的。如果没写过,不妨从今天开始试一下吧。
更多关于VSCode的相关知识,请访问:vscode教程!!
The above is the detailed content of Let's talk about how to use snippets in VSCode to improve development efficiency!. For more information, please follow other related articles on the PHP Chinese website!

Hot AI Tools

Undresser.AI Undress
AI-powered app for creating realistic nude photos

AI Clothes Remover
Online AI tool for removing clothes from photos.

Undress AI Tool
Undress images for free

Clothoff.io
AI clothes remover

Video Face Swap
Swap faces in any video effortlessly with our completely free AI face swap tool!

Hot Article
Hot Tools

Notepad++7.3.1
Easy-to-use and free code editor

SublimeText3 Chinese version
Chinese version, very easy to use

Zend Studio 13.0.1
Powerful PHP integrated development environment

Dreamweaver CS6
Visual web development tools

SublimeText3 Mac version
God-level code editing software (SublimeText3)
Hot Topics
 1387
1387
 52
52

 How to define header files for vscode
Apr 15, 2025 pm 09:09 PM
How to define header files for vscode
Apr 15, 2025 pm 09:09 PM
How to define header files using Visual Studio Code? Create a header file and declare symbols in the header file using the .h or .hpp suffix name (such as classes, functions, variables) Compile the program using the #include directive to include the header file in the source file. The header file will be included and the declared symbols are available.
 What computer configuration is required for vscode
Apr 15, 2025 pm 09:48 PM
What computer configuration is required for vscode
Apr 15, 2025 pm 09:48 PM
VS Code system requirements: Operating system: Windows 10 and above, macOS 10.12 and above, Linux distribution processor: minimum 1.6 GHz, recommended 2.0 GHz and above memory: minimum 512 MB, recommended 4 GB and above storage space: minimum 250 MB, recommended 1 GB and above other requirements: stable network connection, Xorg/Wayland (Linux)
 How to solve the problem of vscode Chinese annotations becoming question marks
Apr 15, 2025 pm 11:36 PM
How to solve the problem of vscode Chinese annotations becoming question marks
Apr 15, 2025 pm 11:36 PM
How to solve the problem that Chinese comments in Visual Studio Code become question marks: Check the file encoding and make sure it is "UTF-8 without BOM". Change the font to a font that supports Chinese characters, such as "Song Style" or "Microsoft Yahei". Reinstall the font. Enable Unicode support. Upgrade VSCode, restart the computer, and recreate the source file.
 How to switch Chinese mode with vscode
Apr 15, 2025 pm 11:39 PM
How to switch Chinese mode with vscode
Apr 15, 2025 pm 11:39 PM
VS Code To switch Chinese mode: Open the settings interface (Windows/Linux: Ctrl, macOS: Cmd,) Search for "Editor: Language" settings Select "Chinese" in the drop-down menu Save settings and restart VS Code
 Common commands for vscode terminal
Apr 15, 2025 pm 10:06 PM
Common commands for vscode terminal
Apr 15, 2025 pm 10:06 PM
Common commands for VS Code terminals include: Clear the terminal screen (clear), list the current directory file (ls), change the current working directory (cd), print the current working directory path (pwd), create a new directory (mkdir), delete empty directory (rmdir), create a new file (touch) delete a file or directory (rm), copy a file or directory (cp), move or rename a file or directory (mv) display file content (cat) view file content and scroll (less) view file content only scroll down (more) display the first few lines of the file (head)
 How to set vscode in Chinese
Apr 15, 2025 pm 09:27 PM
How to set vscode in Chinese
Apr 15, 2025 pm 09:27 PM
There are two ways to set up a Chinese language in Visual Studio Code: 1. Install the Chinese language package; 2. Modify the "locale" settings in the configuration file. Make sure Visual Studio Code version is 1.17 or higher.
 How to set vscode
Apr 15, 2025 pm 10:45 PM
How to set vscode
Apr 15, 2025 pm 10:45 PM
To enable and set VSCode, follow these steps: Install and start VSCode. Custom preferences including themes, fonts, spaces, and code formatting. Install extensions to enhance features such as plugins, themes, and tools. Create a project or open an existing project. Use IntelliSense to get code prompts and completions. Debug the code to step through the code, set breakpoints, and check variables. Connect the version control system to manage changes and commit code.
 How to use VSCode
Apr 15, 2025 pm 11:21 PM
How to use VSCode
Apr 15, 2025 pm 11:21 PM
Visual Studio Code (VSCode) is a cross-platform, open source and free code editor developed by Microsoft. It is known for its lightweight, scalability and support for a wide range of programming languages. To install VSCode, please visit the official website to download and run the installer. When using VSCode, you can create new projects, edit code, debug code, navigate projects, expand VSCode, and manage settings. VSCode is available for Windows, macOS, and Linux, supports multiple programming languages and provides various extensions through Marketplace. Its advantages include lightweight, scalability, extensive language support, rich features and version
