
This article brings you the problem of how to use css to achieve the interstellar 3D travel effect. I hope it will be helpful to everyone.

This technique, I am thinking about CSS 3D animation | How amazing can I create using only CSS? animation? It has also been mentioned, if you are interested you can take a look.
Suppose we have a picture like this:
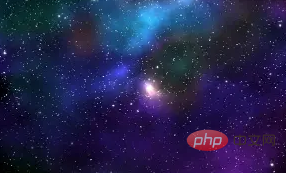
This picture is put aside for later use. Before using this picture, we will first draw such a graph:
<div class="g-container">
  <div class="g-group">
      <div class="item item-right"></div>
      <div class="item item-left"></div>
      <div class="item item-top"></div>
      <div class="item item-bottom"></div>
      <div class="item item-middle"></div>
  </div>
</div>body {
background: #000;
}
.g-container {
position: relative;
}
.g-group {
position: absolute;
width: 100px;
height: 100px;
left: -50px;
top: -50px;
transform-style: preserve-3d;
}
.item {
position: absolute;
width: 100%;
height: 100%;
background: rgba(255, 255, 255, .5);
}
.item-right {
background: red;
transform: rotateY(90deg) translateZ(50px);
}
.item-left {
background: green;
transform: rotateY(-90deg) translateZ(50px);
}
.item-top {
background: blue;
transform: rotateX(90deg) translateZ(50px);
}
.item-bottom {
background: deeppink;
transform: rotateX(-90deg) translateZ(50px);
}
.item-middle {
background: rgba(255, 255, 255, 0.5);
transform: rotateX(180deg) translateZ(50px);
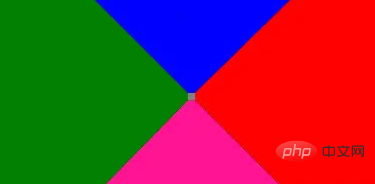
}A total of 5 sub-elements are set, but if you look carefully at the CSS code, 4 of them are set to rotateX/Y(90deg/-90deg ), that is, rotated 90° around the X-axis or Y-axis, it is visually a plane perpendicular to the screen, so visually we cannot see it and can only see a plane.item-middle.
I set different background colors for the five sub-items, and the results are as follows:

Now it seems that it is ordinary, and it is indeed.
However, the time has come to witness the miracle. At this time, we set a very small perspective for the parent element .g-container. For example, set a perspective: 4px and see the effect:
.g-container {
  position: relative;
+ perspective: 4px;
}
// ...其余样式保持不变At this time, the painting style suddenly changed, and the entire effect became like this:
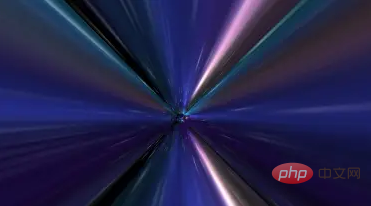
.g-container{
  position: relative;
  perspective: 4px;
  perspective-origin: 50% 50%;
}
.g-group{
  position: absolute;
  // ... 一些定位高宽代码
  transform-style: preserve-3d;
  + animation: move 8s infinite linear;
}
@keyframes move {
  0%{
    transform: translateZ(-50px) rotate(0deg);
  }
  100%{
    transform: translateZ(50px) rotate(0deg);
  }
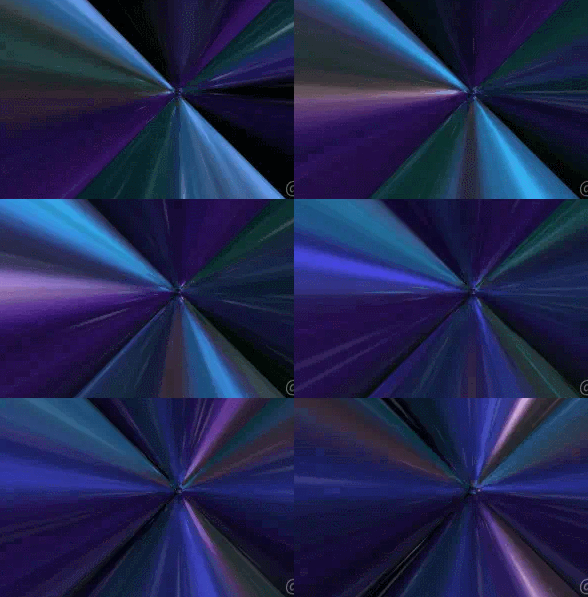
}
<div class="g-container">
  <div class="g-group">
      <div class="item item-right"></div>
      <div class="item item-left"></div>
      <div class="item item-top"></div>
      <div class="item item-bottom"></div>
      <div class="item item-middle"></div>
  </div>
  <!-- 增加一组动画 -->
  <div class="g-group">
      <div class="item item-right"></div>
      <div class="item item-left"></div>
      <div class="item item-top"></div>
      <div class="item item-bottom"></div>
      <div class="item item-middle"></div>
  </div>
</div>.g-container{
perspective: 4px;
position: relative;
// hue-rotate 变化动画,可以让图片颜色一直变换
animation: hueRotate 21s infinite linear;
}
.g-group{
transform-style: preserve-3d;
animation: move 12s infinite linear;
}
// 设置负的 animation-delay,让第二组动画提前进行
.g-group:nth-child(2){
animation: move 12s infinite linear;
animation-delay: -6s;
}
.item {
background: url(https://z3.ax1x.com/2021/08/20/fLwuMd.jpg);
background-size: cover;
opacity: 1;
// 子元素的透明度变化,减少动画衔接时候的突兀感
animation: fade 12s infinite linear;
animation-delay: 0;
}
.g-group:nth-child(2) .item {
animation-delay: -6s;
}
@keyframes move {
0%{
transform: translateZ(-500px) rotate(0deg);
}
100%{
transform: translateZ(500px) rotate(0deg);
}
}
@keyframes fade {
0%{
opacity: 0;
}
25%,
60%{
opacity: 1;
}
100%{
opacity: 0;
}
}
@keyframes hueRotate {
0% {
filter: hue-rotate(0);
}
100% {
filter: hue-rotate(360deg);
}
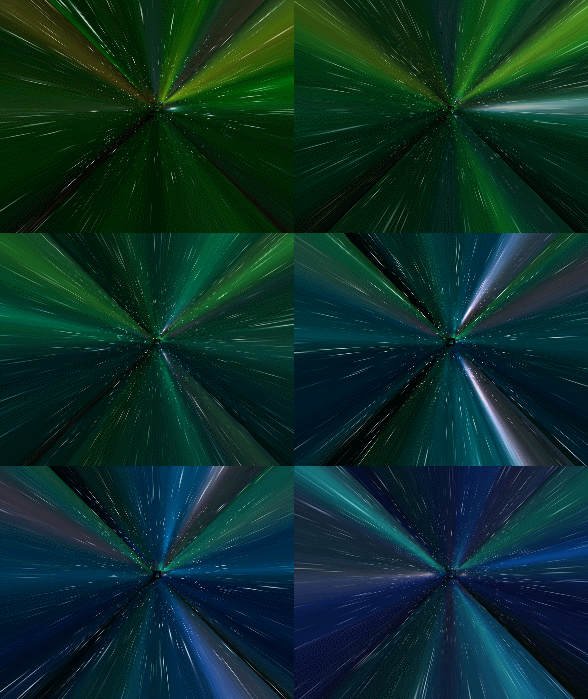
}
Furthermore, I don’t want to use a single picture
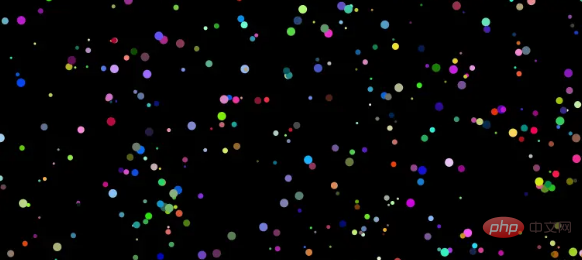
Of course, there will still be comments from readers here. Didn’t you also use one here? Picture resources? Is it possible without that starry sky map? I'm too lazy to look for this picture. Of course, CSS YYDS. Here we try to use box-shadow to replace the actual starry sky map, which is also implemented in a div tag, with the help of the SASS loop function:<div></div>
@function randomNum($max, $min: 0, $u: 1) {
   @return ($min + random($max)) * $u;
}
@function randomColor() {
    @return rgb(randomNum(255), randomNum(255), randomNum(255));
}
@function shadowSet($maxWidth, $maxHeight, $count) {
    $shadow : 0 0 0 0 randomColor();

    @for $i from 0 through $count {
        $x: #{random(10000) / 10000 * $maxWidth};
        $y: #{random(10000) / 10000 * $maxHeight};

        $shadow: $shadow, #{$x} #{$y} 0 #{random(5)}px randomColor();
    }

    @return $shadow;
}
body {
    background: #000;
}
div {
    width: 1px;
    height: 1px;
    border-radius: 50%;
    box-shadow: shadowSet(100vw, 100vh, 500);
}
// 原 CSS,使用了一张星空图
.item {
  position: absolute;
  width: 100%;
  height: 100%;
  background: url(https://z3.ax1x.com/2021/08/20/fLwuMd.jpg);
  background-size: cover;
  animation: fade 12s infinite linear;
}
// 修改后的 CSS 代码
.item {
  position: absolute;
  width: 100%;
  height: 100%;
  background: #000;
  animation: fade 12s infinite linear;
}
.item::after {
  content: "";
  position: absolute;
  top: 0;
  left: 0;
  right: 0;
  bottom: 0;
  width: 1px;
  height: 1px;
  border-radius: 50%;
  box-shadow: shadowSet(100vw, 100vh, 500);
}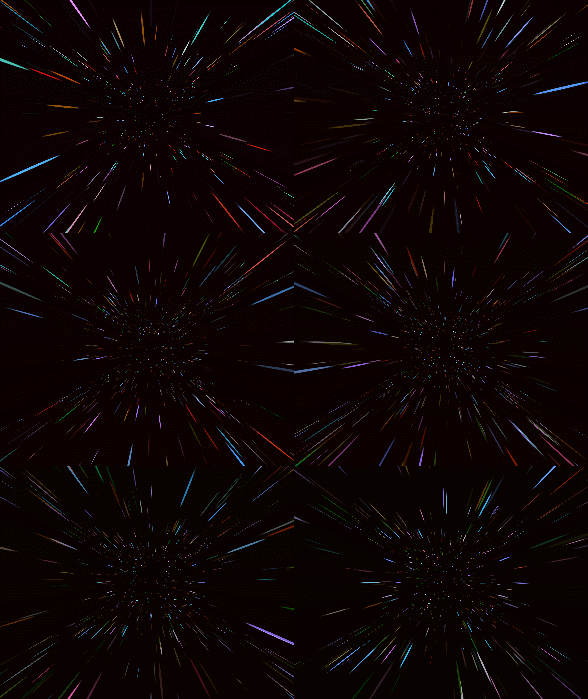
By adjusting the animation time, perspective value, and the translateZ() change distance of each group of elements, you can get various different looks and effects. Interested readers can try it yourself based on the DEMO I gave above.
(Learning video sharing: css video tutorial)
The above is the detailed content of Detailed example of how to use css to achieve 3D shuttle effect. For more information, please follow other related articles on the PHP Chinese website!