In-depth analysis of custom CSS reset styles
This article will give you an in-depth analysis of the custom CSS reset style, study each of the rules, and analyze the reasons for using this rule. I hope it will be helpful to everyone!

Whenever I start a new project, my first priority is to deal with the nooks and crannies of the CSS language. To solve these problems, a custom set of base styles is often used.
For a long time in the past, I used the famous CSS reset style (CSS Reset) from Eric Meyer. As an old and practical CSS code, it has never been updated in the past ten years, and many things have changed dramatically during this time!
Recently, I started using my own custom CSS reset styles. It contains many tips that I have summarized to improve both user experience and CSS development experience. In this article, we will introduce this custom CSS reset style. And study each of these rules in depth. In addition to discussing the function of each rule, we will also analyze the reasons for using this rule in a simple and easy-to-understand manner!
<strong>Background introduction
Historically, the main function of CSS reset style is to clear the browser's default style to ensure the consistency of styles between browsers. consistency. And my CSS reset style is not to solve this problem.
These days, there are minimal differences in layout or spacing between browsers. In general, modern browsers have implemented the CSS specification as faithfully as we would expect. Therefore, dealing with style consistency issues is no longer so important.
Also, I never think it is necessary to remove all default styles from the browser. For example, I would use the <em> tag to set the font style to italic! While there may be different design specifications to adhere to in different projects, I see no point in removing common sense defaults.
My CSS reset style may not meet the classic definition of “CSS reset style”, but from another perspective, this CSS reset style also has more creativity.
<strong>My CSS Reset
No further talk, let’s go directly to the code:
/*
  1. Use a more-intuitive box-sizing model.
*/
*, *::before, *::after {
  box-sizing: border-box;
}
/*
  2. Remove default margin
*/
* {
  margin: 0;
}
/*
  3. Allow percentage-based heights in the application
*/
html, body {
  height: 100%;
}
/*
  Typographic tweaks!
  4. Add accessible line-height
  5. Improve text rendering
*/
body {
  line-height: 1.5;
  -webkit-font-smoothing: antialiased;
}
/*
  6. Improve media defaults
*/
img, picture, video, canvas, svg {
  display: block;
  max-width: 100%;
}
/*
  7. Remove built-in form typography styles
*/
input, button, textarea, select {
  font: inherit;
}
/*
  8. Avoid text overflows
*/
p, h1, h2, h3, h4, h5, h6 {
  overflow-wrap: break-word;
}
/*
  9. Create a root stacking context
*/
#root, #__next {
  isolation: isolate;
}Although the code is shorter, it is included in this small style sheet Got a lot of useful information. let's start!
<strong>1. Box-sizing box model
Before we start, answer a question! What is the width of the .box element (the rectangular area with a pink border) in the code below without additional CSS styling? Is it 200px, 240px, 244px or 0px?
<style>
  .parent {
    width: 200px;
  }
  .box {
    width: 100%;
    border: 2px solid hotpink;
    padding: 20px;
  }
</style>
<div class="parent">
  <div class="box"></div>
</div> sets width: 100% in the style of the .box element, because the width of its parent element .parent is 200px , so 100% here will be parsed as 200px.
So where does this 200px width apply? By default, browsers apply this width to the content box. As we all know, the "content box" mentioned here is the content actually contained in the box in the box model, which is inside the border and padding:

width: 100% Set the content part of the .box box model to 200px; the padding will increase the width by an additional 40px (20px on each side); the border will increase by 4px (each side 2px each). It is not difficult to calculate by addition that the width of the pink border rectangle is 244px. Therefore, the answer to the question mentioned above is 244px.
When we try to squeeze a 244px box into a 200px wide parent container, it overflows:

This behavior looks weird Weird, we can change it with the following setting:
*, *::before, *::after {
  box-sizing: border-box;
}After applying this rule, the percentage of the width will be parsed based on the border-box. In the example above, our pink box is 200px, and the inner content-box will shrink to 156px (200px - 40px - 4px).
In my opinion, this is an essential styling rule because it makes CSS easier to use. We use a wildcard selector (*) to apply it to all elements and pseudo-elements. Completely contrary to public perception, this style setting will not cause performance deterioration. For details, please refer to article * { Box-sizing: Border-box } FTW.
<strong>Inheriting box-sizing
I saw another style setting on the Internet:
html {
  box-sizing: border-box;
}
*, *:before, *:after {
  box-sizing: inherit;
}如果您想在一个已存在的大型项目中迁移使用 border-box,那么这将是一个有用的策略。如果你从零开始一个全新的项目,这是没有必要的。为了简单起见,我在 CSS 重置样式中省略了它。
首先,我们可以创建一个 “legacy” 选择器,将 box-sizing 的值继续保留为 content-box,这也是 box-sizing 属性的默认值:
.legacy {
  box-sizing: content-box;
}然后,当应用程序中存在尚未迁移使用 border-box 时,我们就可以将该类添加到对应的位置,以保持原有样式不被影响:
<body>
  <header class="legacy">
    <nav>
      <!-- Legacy stuff here -->
    </nav>
  </header>
  <main>
    <section>
      <!-- Modern stuff here -->
    </section>
    <aside class="legacy">
      <!-- Legacy stuff here -->
    </aside>
  </main>
</body>为什么要这样做呢?现在,让我们思考一下这个代码段中的元素是如何计算的。
<header>被赋予了legacy,因此它使用了box-sizing: content-box。其子元素
<nav>的样式为box-sizing: inherit。由于其父元素设置为content-box,nav也将设置为content-box。<main>标签没有legacy,因此它从其父级<body>继承;而<body>继承自<html>;<html>已经被设置为border-box。
从本质上讲,每个元素都可以从其父元素获得 box-sizing 属性。如果它有一个设置了 legacy 的祖先,那么它的属性值是 content-box。否则,它将最终从 <html> 标签中继承,其属性值为 border-box。
<strong>2. 移除 margin 的默认值
* {
  margin: 0;
}浏览器会对外边距 (margin) 做出很多常识性假设。例如,h1 在默认情况下要比段落的边距更大。这些假设在那些做文字处理的文档中是合理的,但对于现代 web 应用程序来说可能并不准确。
另外,外边距会在你稍不留神的时候遭遇外边距塌陷的问题,它可真是一个令人讨厌的小机灵鬼呢。而且,我发现自己经常希望元素在默认情况下没有任何外边距。所以我决定把它全部去掉。
当我确实希望向特定的标签添加外边距时,我可以在项目中用自定义样式中来实现。通配符选择器(*)的优先级极低,这条规则很容易被覆盖。
<strong>3. 基于百分比的 height
html, body {  height: 100%;
}复制代码我们在 CSS 中经常会使用百分比来设置高度,很多时候却发现它似乎并没有效果。请看下面的示例:

虽然将 main 元素设置为 height: 100%,但元素的高度根本没有变化!
这里不起作用的原因是,在 CSS 流式布局(CSS 中的主要布局模式)中,height 和 width 的工作原理完全不同。元素的宽度是基于父元素计算的,元素的高度是根据其子元素计算的。这个话题说起来比较复杂,远远超出了本文的范围,本文中不再展开讨论。
在下面的代码示例中,我们将上面的规则应用到代码中,会发现 main 元素的高度变为了 100%:

如果您使用的是像 React 这样的 JavaScript 框架,那么您可能还需要在此规则中添加第三个选择器:框架使用的根元素。
例如,在我的 Next.js 项目中,会将规则做如下更新:
html, body, #__next {
  height: 100%;
}<strong>为什么不使用 vh?
你可能会想:为什么非得使用百分比来设置高度呢?为什么不用 vh 替代呢?
问题是 vh 不能在移动设备上正常工作;在移动设备上浏览器 UI 在上下滑动的时候,视口的可见部分会进行调整,这就导致 100vh 在浏览器中是不固定的,可能会超过屏幕实际的使用面积。
在未来,新的 CSS 单位将解决这个问题。在此之前,我继续使用基于百分比的高度。
<strong>4. 更改 line-height
body {
  line-height: 1.5;
}行高 line-height 控制段落中每行文本之间的垂直间距。它的默认值因浏览器而异,但通常在 1.2 左右。这个没有单位的数字是基于字体大小的比值。它的功能就像 em 一样。line-height 为 1.2 时,每行的行高将比元素的字体大 20%。
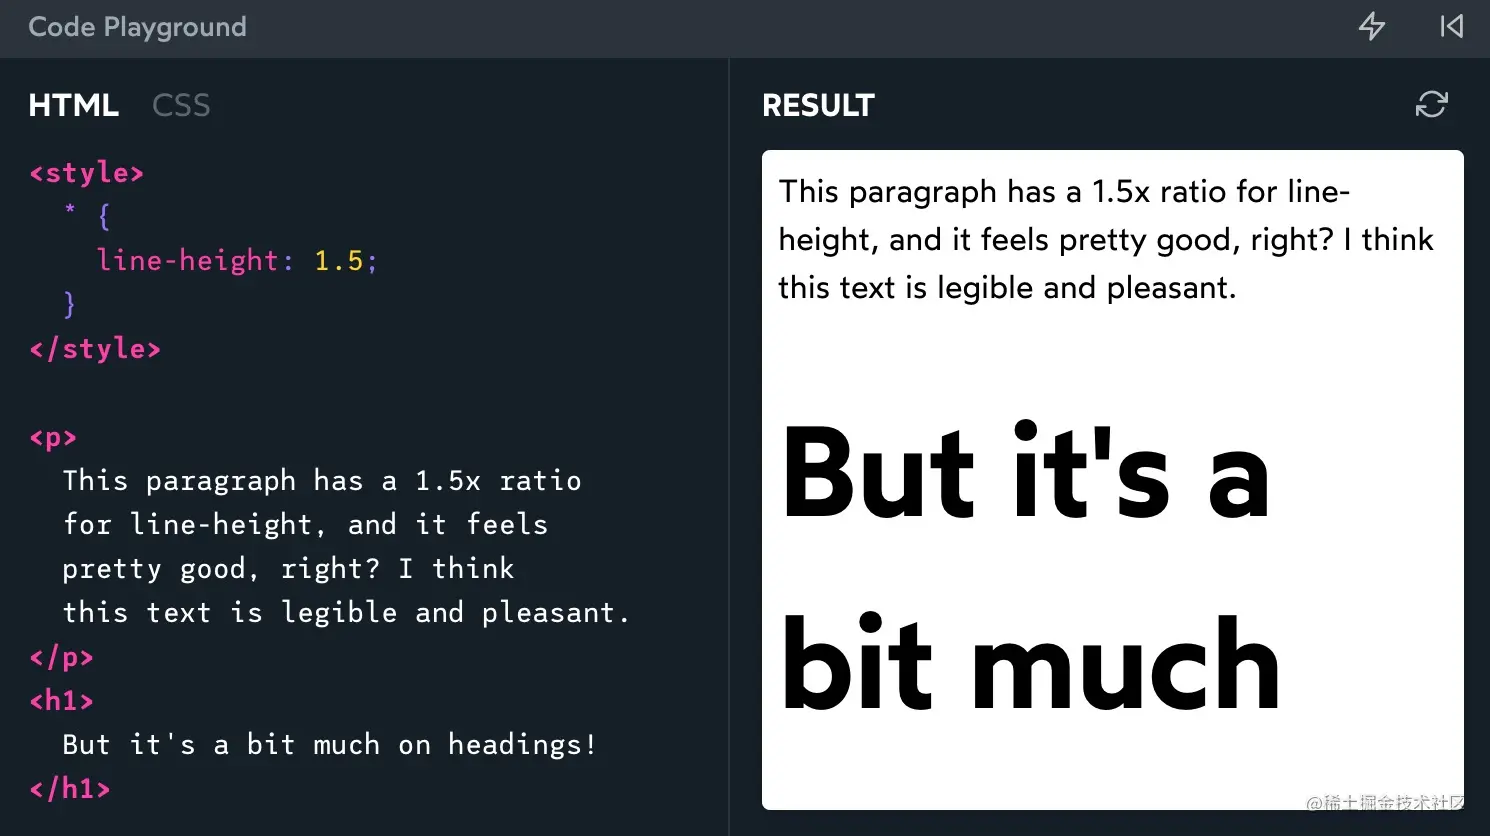
这里带来一个问题,对于那些有阅读障碍的人来说,这些句子排得太近,使阅读变得更困难。WCAG 标准规定,行高应至少为 1.5。
现在,1.5 这个数字会影响标题 (如 h1、h2 等标签) 和其他大字体元素,使它们产生了相当大的行间距:

您可能直观的想到,在标题上重新设置行高。我的理解是,WCAG 标准是针对 “body” 文本,这里只对 body 设置了 1.5 倍行高。
<strong>使用 “calc” 灵活的设置 line-heights
我一直在尝试着另一种设置行高的方法,如下所示:
* {
  line-height: calc(1em + 0.5rem);
}这是一个相当高级的代码片段,虽然它又超出了本文的范围,这里还是会简单做一下介绍。
这个方法并没有用字体的大小值乘以 1.5 这样的数字来计算行高,而是以字体大小作为基数,并为每行添加固定的空间。对于 body 里面的文字段落((paragraphs),每行都将解析为 24px(假设使用的是浏览器的默认字体大小)。
不过,在较大的文本上,此声明会产生更紧的行。下面的示例可以做出验证:

这个在使用时需谨慎,目前我还在试验中。
其中的一个缺点是,我们必须用 * 将其设置在所有元素上,而不是将其应用于 body。这是因为 em 单位不能被子元素很好地继承;它不能使每个元素重新计>算 1em 所对应的值。例如,在这个博客上,因为第三方代码假设行高是可继承的,导致我的代码被它破坏了。
有关这项技术的更多信息,请查看 Kitty Giraudel 的这篇很棒的博文:使用 calc 计算最佳行高。
<strong>5. 设置 font-smoothing
body {
  -webkit-font-smoothing: antialiased;
}这个 CSS 设置存在一点争议。
在 MacOS 计算机上,默认情况下浏览器会使用 “亚像素抗锯齿(subpixel antialiasing)”。这种技术可以利用每个像素内的 R/G/B 灯光使文本更易于阅读。
在过去,这个技术被认为提高了可访问性,因为它改善了文本对比度。你可能读过一篇流行的博文,停止 “修复” 字体平滑,这篇文章并不提倡切换到 “抗锯齿(antialiased)”。
问题是,这篇文章写于 2012 年,那时高 DPI “视网膜(retina)” 显示时代还未来临。今天的像素更小,肉眼根本看不见。LED 像素的物理布局也发生了变化。如果你在显微镜下观察现代显示器,你已经不会看到有序的 R/G/B 线网格了。
在 2018 年发布的 MacOS Mojave 中,苹果公司在操作系统中禁用了亚像素抗锯齿。我猜他们意识到,对现代硬件来说,这个技术的弊大于利。
令人困惑的是,像 Chrome 和 Safari 这样的 MacOS 浏览器,在默认情况下仍然使用亚像素抗锯齿。因此,我们需要将 -webkit-font-smoothing 设置为 antialiased 来显式关闭亚像素抗锯齿。
这两者的区别在于:

MacOS 是唯一使用亚像素抗锯齿的操作系统,因此这个 CSS 规则对 Windows、Linux 或移动设备没有影响。如果您使用的是 MacOS 计算机,则可以尝试运行一下下面的代码示例:

<strong>6. 更改媒体元素的默认值
img, picture, video, canvas, svg {
  display: block;
  max-width: 100%;
}在 CSS 中图像被认为是 “inline” 内联元素,也就意味着它们应该像<em> 或 <strong>那样在段落中间使用。这与我们经常使用图像的方式是不符的。通常,我们使用图片的方式与对待段落、标题或边栏的方式相同,这些都是布局元素。
但是,如果我们布局中试图使用内联元素,就会碰到奇奇怪怪的事情。比如内联元素的 4px 空白间距问题,这个神奇的空白与 line-height 有关系。通过在所有图像上设置 display:block,我们避开了这一类问题。
我还设置了 max-width: 100%,这样做是为了防止大型图像溢出,特别是它们被放在一个不够宽的容器中。
大多数块级元素将自动伸长/收缩以适应其父元素,但像 <img src="/static/imghw/default1.png" data-src="https://img.php.cn/upload/image/648/486/656/1643165727390368.gif" class="lazy" alt="In-depth analysis of custom CSS reset styles" > 这样的媒体元素是特殊的:它们被称为替换元素,并且它们也不遵循相同的规则。
如果图像的 “自身的” 大小为 800 × 600,那么 <img src="/static/imghw/default1.png" data-src="https://img.php.cn/upload/image/648/486/656/1643165727390368.gif" class="lazy" alt="In-depth analysis of custom CSS reset styles" > 元素的宽度也将为 800px,即使我们将其放入一个 500px 宽的父元素中。
这个规则将防止图像超出其容器,我认为这是一个比较明智的做法。
<strong>7. 表单控件的字体继承
input, button, textarea, select {
  font: inherit;
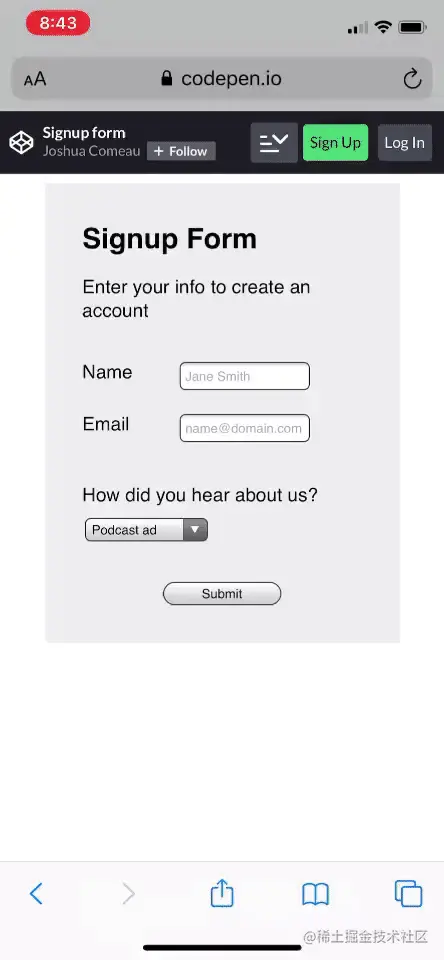
}在默认情况下,按钮和输入框不会从它们的父项继承排版样式。相反,他们有自己怪异的风格。例如,<textarea> 将使用系统默认的 Monospace 字体。文本输入框将使用系统默认的 sans-serif 字体。两者都会选择 microscopically-small 字体大小(Chrome 为 13.333px)。
正如您所想象的,在移动设备上阅读 13px 的文本非常困难。当我们聚焦设置了较小字体的输入框时,浏览器会自动放大,这样文本更容易阅读。
不幸的是,这样的用户体验并不好:

如果要避免这种自动缩放行为,输入的字体大小必须至少为 1rem/16px。有一种方法可以解决这个问题:
input, button, textarea, select {
  font-size: 1rem;
}这修正了自动缩放问题,但这只是一个权宜之计。让我们从根本上来解决这个问题:表单输入不应该有自己的排版样式!
input, button, textarea, select {
  font: inherit;
}font 是一种 CSS 设置字体的简略写法,它设置了一系列与字体相关的属性,如 font-size、font-weight 和 font-family 等。通过把它的值设置为 inherit,可将这些元素与其周围环境中的排版一致。
只要我们没有在 body 中使用令人讨厌的较小的字体,这就一次解决了我们所有的问题。
<strong>8. 设置文字换行
p, h1, h2, h3, h4, h5, h6 {
  overflow-wrap: break-word;
}在 CSS 中,如果没有足够的空间容纳一行中的所有字符,文本将自动换行。
默认情况下,算法将寻找 “软换行” 机会;这些是算法可以对字符进行拆分。在英语中,唯一软换行的机会是空格和连字符,但这因语言而异。
如果一行没有任何软换行机会,并且不适合,则会导致文本溢出:
这可能会导致一些恼人的布局问题。在这里,它添加了一个水平滚动条。在其他情况下,它可能会导致文本与其他元素重叠,或滑到图像/视频后面。
overflow-wrap 属性允许我们调整换行算法,并允许它在找不到软换行机会时使用硬换行:
虽热,这两种解决方案都不是完美的,但至少硬换行不会破坏布局!
感谢 Sophie Alpert 提出了类似的规则!她建议将其应用于所有元素,这可能是一个好主意,但不是我个人测试过的东西。
您还可以尝试添加 hyphens 属性:
p {
  overflow-wrap: break-word;
  hyphens: auto;
}hyphens: aut:自动使用连字符(在支持它们的语言中)表示硬换行。这也使得硬换行更为常见。如果你有非常窄的文本栏,可以使用一下它。在我个人的 CSS 重置样式中并为包含它,但它值得尝试!
<strong>9. Root 堆栈上下文
#root, #__next {
  isolation: isolate;
}最后一个是可选的。通常只有在使用 React 之类的 JavaScript 框架时才需要它。
正如我们在 滚蛋吧,z-index 中看到的那样,isolation 属性允许我们创建新的堆栈上下文,而无需设置 z-index。
这是有益的,因为它允许我们保证某些高优先级元素(模态、下拉列表、工具提示)在应用程序中始终显示在其他元素之上。没有奇怪的堆叠背景错误,没有 层出不穷的 z-index。
为了匹配您使用的框架,您需要根据您的需要来调整选择器。我们希望选择在应用程序中呈现的顶级元素。例如,在 create-react-app 使用的是<div id="root">,因此正确的选择器是 #root 。
最终的可用代码
以下是我的 CSS 重置样式,采用了精简的、可复制的、优美的格式:
/*
  Josh's Custom CSS Reset
  https://www.joshwcomeau.com/css/custom-css-reset/
*/
*, *::before, *::after {
  box-sizing: border-box;
}
* {
  margin: 0;
}
html, body {
  height: 100%;
}
body {
  line-height: 1.5;
  -webkit-font-smoothing: antialiased;
}
img, picture, video, canvas, svg {
  display: block;
  max-width: 100%;
}
input, button, textarea, select {
  font: inherit;
}
p, h1, h2, h3, h4, h5, h6 {
  overflow-wrap: break-word;
}
#root, #__next {
  isolation: isolate;
}请随意复制/粘贴到您自己的项目中!它的发布没有任何限制(不过如果你想保留这篇博文的链接,我将不胜感激!)。
我没有将这个 CSS 重置样式作为 NPM 包发布,因为我觉得你应该拥有自己的重置样式。把它带到你的项目中,随着时间的推移,当你学习新事物或发现新技巧时,可以对它进行调整。如果需要,您可以随时制作自己的 NPM 包,以便于在项目中重用。请记住:代码恒久远,一段永流传;您拥的有这段代码,它应该与您一起成长。
感谢 Andy Bell 分享他的现代 CSS 样式重置。它激发了我的一些灵感,并启发了这篇博文!
深入学习 CSS
我的 CSS 重置样式很短(只有 11 次声明!),但我还是花了整整一篇博文来谈论它们。老实说,我还有很多话要说!我们对一些知识点只简单的提及,并未深入展开。
CSS 看似复杂,其实不然。只有你打破砂锅问到底,才能了解里面到底发生了什么,否则语言总是会感到有点不可预测和不一致。当你的心智模型不完整时,你肯定会遇到一些问题。
不过,如果你花一点时间来学习该语言的实际工作原理,一切都会变得更加直观和可预测。在那些阳光灿烂的日子里,我喜欢自由自在的写 CSS!
(学习视频分享:css视频教程)
The above is the detailed content of In-depth analysis of custom CSS reset styles. For more information, please follow other related articles on the PHP Chinese website!

Hot AI Tools

Undresser.AI Undress
AI-powered app for creating realistic nude photos

AI Clothes Remover
Online AI tool for removing clothes from photos.

Undress AI Tool
Undress images for free

Clothoff.io
AI clothes remover

Video Face Swap
Swap faces in any video effortlessly with our completely free AI face swap tool!

Hot Article

Hot Tools

Notepad++7.3.1
Easy-to-use and free code editor

SublimeText3 Chinese version
Chinese version, very easy to use

Zend Studio 13.0.1
Powerful PHP integrated development environment

Dreamweaver CS6
Visual web development tools

SublimeText3 Mac version
God-level code editing software (SublimeText3)

Hot Topics
 1393
1393
 52
52
 1206
1206
 24
24
 How to use bootstrap in vue
Apr 07, 2025 pm 11:33 PM
Using Bootstrap in Vue.js is divided into five steps: Install Bootstrap. Import Bootstrap in main.js. Use the Bootstrap component directly in the template. Optional: Custom style. Optional: Use plug-ins.
 The Roles of HTML, CSS, and JavaScript: Core Responsibilities
Apr 08, 2025 pm 07:05 PM
HTML defines the web structure, CSS is responsible for style and layout, and JavaScript gives dynamic interaction. The three perform their duties in web development and jointly build a colorful website.
 How to write split lines on bootstrap
Apr 07, 2025 pm 03:12 PM
There are two ways to create a Bootstrap split line: using the tag, which creates a horizontal split line. Use the CSS border property to create custom style split lines.
 Understanding HTML, CSS, and JavaScript: A Beginner's Guide
Apr 12, 2025 am 12:02 AM
WebdevelopmentreliesonHTML,CSS,andJavaScript:1)HTMLstructurescontent,2)CSSstylesit,and3)JavaScriptaddsinteractivity,formingthebasisofmodernwebexperiences.
 How to set up the framework for bootstrap
Apr 07, 2025 pm 03:27 PM
To set up the Bootstrap framework, you need to follow these steps: 1. Reference the Bootstrap file via CDN; 2. Download and host the file on your own server; 3. Include the Bootstrap file in HTML; 4. Compile Sass/Less as needed; 5. Import a custom file (optional). Once setup is complete, you can use Bootstrap's grid systems, components, and styles to create responsive websites and applications.
 How to use bootstrap button
Apr 07, 2025 pm 03:09 PM
How to use the Bootstrap button? Introduce Bootstrap CSS to create button elements and add Bootstrap button class to add button text
 How to resize bootstrap
Apr 07, 2025 pm 03:18 PM
To adjust the size of elements in Bootstrap, you can use the dimension class, which includes: adjusting width: .col-, .w-, .mw-adjust height: .h-, .min-h-, .max-h-
 How to insert pictures on bootstrap
Apr 07, 2025 pm 03:30 PM
There are several ways to insert images in Bootstrap: insert images directly, using the HTML img tag. With the Bootstrap image component, you can provide responsive images and more styles. Set the image size, use the img-fluid class to make the image adaptable. Set the border, using the img-bordered class. Set the rounded corners and use the img-rounded class. Set the shadow, use the shadow class. Resize and position the image, using CSS style. Using the background image, use the background-image CSS property.


