What are the communication modes of docker?
Docker’s communication modes are: 1. Bridge network mode, also known as brigde bridge. When the network is not specified, communication between containers is carried out through the bridge bridge; 2. host Host mode; 3. container network mode; 4. none network mode.

The operating environment of this tutorial: linux5.9.8 system, docker-1.13.1 version, Dell G3 computer.
Four communication modes of docker containers
1. Bridge network mode
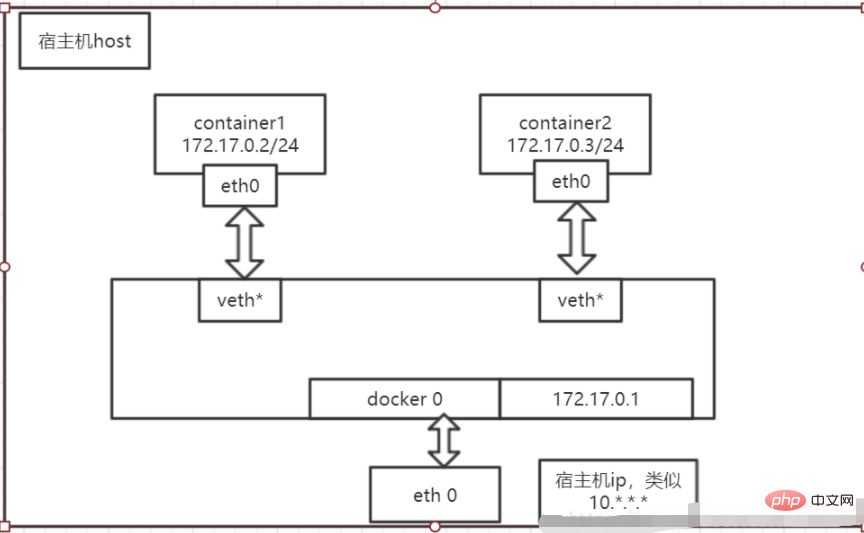
First, By default, when docker runs a container, the host will create a bridge, which is a virtual bridge named docker 0. The default docker 0 ip is 172.17.0.1. The bridge then assigns a virtual subnet ip to the container and uses the network The bridge ip acts as a gateway. Without specifying a network, communication between containers is carried out through the bridge network. Then the bridge communicates with the host image for IP conversion, port mapping, etc.
In fact, students who have experience in network communication should be able to easily understand the principle of this communication by looking at the picture below. , somewhat similar to Layer 3 routing and switching.

#2. Host host mode
If the container specifies the network mode as host, the container will not have its own network namespace. Instead, it shares a network and IP with the host. The container will not virtualize its own network card, IP, etc. Of course, except for network communication, which is bound to the host, the rest of the container content is safely isolated from the host. This is very inconvenient when doing container migration and is not recommended. The principle diagram is as follows,

3. Container network mode:
Analysis: share the network with another running docker container --net=container:containerID
Try not to conflict with the direct port of the container, and adopt the first-come-first-served principle
4, none network mode
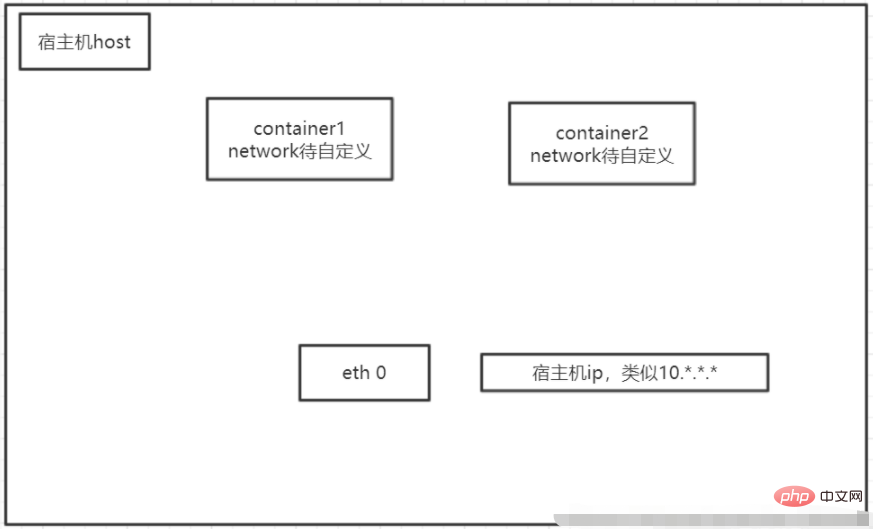
Container specifies the network mode - when net is none, the docker container has its own network namespace, but all network configurations must be configured by yourself, such as ip, network card, etc. This method is very troublesome and is not recommended. The principle diagram is as follows

Summary:
| Docker communication mode | Configuration | Description |
|---|---|---|
| host mode | –net=host | The container and the host share the Network namespace. |
| container mode | –net=container:NAME_or_ID | The container shares the Network namespace with another container. A pod in kubernetes is a Network namespace shared by multiple containers. |
| none mode | –net=none | The container has an independent Network namespace, but no network settings are made for it, such as assigning veth pair and bridge connection, configure IP, etc. |
| bridge mode | –net=bridge | (default is this mode) |
Recommended learning: "docker video tutorial"
The above is the detailed content of What are the communication modes of docker?. For more information, please follow other related articles on the PHP Chinese website!

Hot AI Tools

Undresser.AI Undress
AI-powered app for creating realistic nude photos

AI Clothes Remover
Online AI tool for removing clothes from photos.

Undress AI Tool
Undress images for free

Clothoff.io
AI clothes remover

AI Hentai Generator
Generate AI Hentai for free.

Hot Article

Hot Tools

Notepad++7.3.1
Easy-to-use and free code editor

SublimeText3 Chinese version
Chinese version, very easy to use

Zend Studio 13.0.1
Powerful PHP integrated development environment

Dreamweaver CS6
Visual web development tools

SublimeText3 Mac version
God-level code editing software (SublimeText3)

Hot Topics
 1385
1385
 52
52
 How to create a mirror in docker
Apr 15, 2025 am 11:27 AM
Steps to create a Docker image: Write a Dockerfile that contains the build instructions. Build the image in the terminal, using the docker build command. Tag the image and assign names and tags using the docker tag command.
 How to update the image of docker
Apr 15, 2025 pm 12:03 PM
The steps to update a Docker image are as follows: Pull the latest image tag New image Delete the old image for a specific tag (optional) Restart the container (if needed)
 How to use docker desktop
Apr 15, 2025 am 11:45 AM
How to use Docker Desktop? Docker Desktop is a tool for running Docker containers on local machines. The steps to use include: 1. Install Docker Desktop; 2. Start Docker Desktop; 3. Create Docker image (using Dockerfile); 4. Build Docker image (using docker build); 5. Run Docker container (using docker run).
 How to read the docker version
Apr 15, 2025 am 11:51 AM
To get the Docker version, you can perform the following steps: Run the Docker command "docker --version" to view the client and server versions. For Mac or Windows, you can also view version information through the Version tab of the Docker Desktop GUI or the About Docker Desktop menu.
 How to check the name of the docker container
Apr 15, 2025 pm 12:21 PM
You can query the Docker container name by following the steps: List all containers (docker ps). Filter the container list (using the grep command). Gets the container name (located in the "NAMES" column).
 How to save docker image
Apr 15, 2025 am 11:54 AM
To save the image in Docker, you can use the docker commit command to create a new image, containing the current state of the specified container, syntax: docker commit [Options] Container ID Image name. To save the image to the repository, you can use the docker push command, syntax: docker push image name [: tag]. To import saved images, you can use the docker pull command, syntax: docker pull image name [: tag].
 How to copy files in docker to outside
Apr 15, 2025 pm 12:12 PM
Methods for copying files to external hosts in Docker: Use the docker cp command: Execute docker cp [Options] <Container Path> <Host Path>. Using data volumes: Create a directory on the host, and use the -v parameter to mount the directory into the container when creating the container to achieve bidirectional file synchronization.
 How to change the docker image source in China
Apr 15, 2025 am 11:30 AM
You can switch to the domestic mirror source. The steps are as follows: 1. Edit the configuration file /etc/docker/daemon.json and add the mirror source address; 2. After saving and exiting, restart the Docker service sudo systemctl restart docker to improve the image download speed and stability.


