 WeChat Applet
 Mini Program Development
 Let's talk about how mini programs implement the 'full text collapse” function
Let's talk about how mini programs implement the 'full text collapse” function
How to implement the "full text collapse" function in the mini program? The following is a small program in this article to implement the "full text collapse" function of multi-line text. I hope it will be helpful to everyone!

In small programs, we often encounter the need to implement the "full text collapse" function of multi-line text. I searched on Nuggets and found that it can be implemented using pure css. Personal test: ios is perfect, but it doesn’t work on andriod.
There are many solutions in the small program community. Currently, I saw a big guy in the community using js dynamic calculation to tell me how to implement it. The personal test has generally been effective. After the test, in some special circumstances There will be errors in the calculation, so some codes have to be changed.
1. Requirements
- Located in the lower right corner of the multi-line text, display the "Full Text/Collapse" button
- "Expand" and "Collapse" two states Switching
- When the text does not exceed the specified number of lines, the "Full Text/Collapse" button is not displayed
- In the text display [Full Text] display state, the data is updated and the text is not collapsed
2. Implementation ideas
1. Multi-line text truncation
mainly used line-clamp , the key styles are as follows
.text-clamp3 {
  overflow: hidden;
  display: -webkit-box;
  -webkit-box-orient: vertical;
  -webkit-line-clamp: 3;
}2. Determine whether the text exceeds the specified number of lines and display the full text collapse button
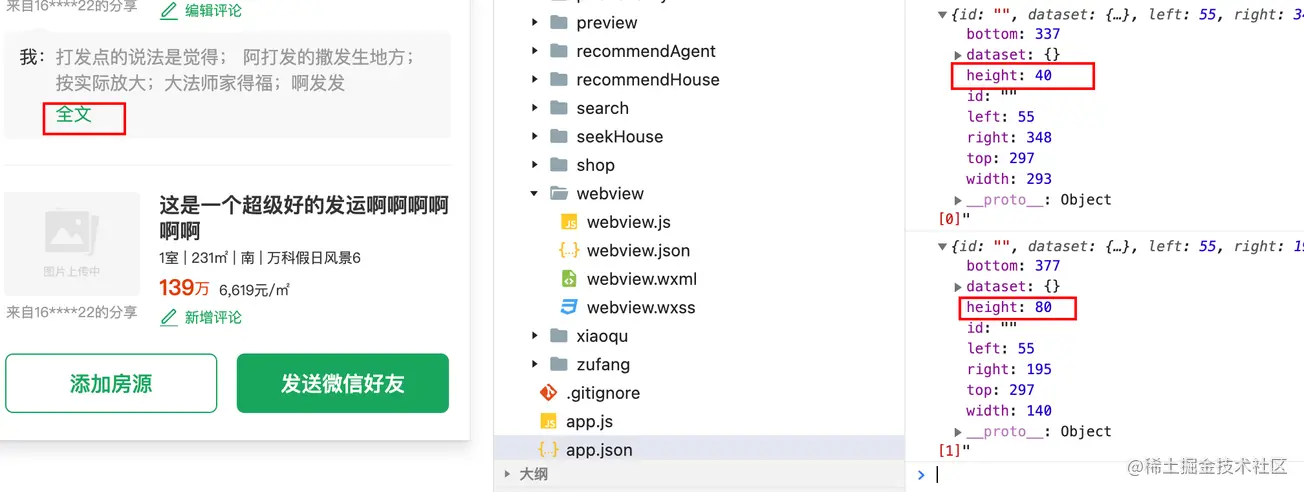
Write two paragraphs of text, one paragraph displays the complete text A, A paragraph displays the text B omitted using line-clamp. Because B has been intercepted, the height of B is relatively small. Comparing the height of two pieces of text, you can know whether the text exceeds two lines
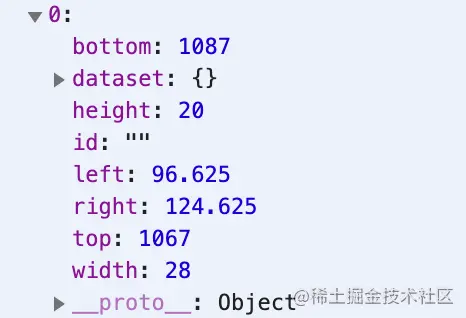
In the mini program, you can usewx.createSelectorQuery()to get the height of the text
js
const query = wx.createSelectorQuery().in(this);
query.selectAll(".showArea, .hideArea").boundingClientRect(res => {
console.log(res, 'res')
}).exec()
3. Code implementation
1. First version
According to the design idea, start the code immediately
foldable.wxml
<view class="content">
<view class="contentInner content-inner-class showArea {{!onFold ? 'text-clamp' + maxLine : ''}}">{{content}}</view>
<view class="contentInner content-inner-class hideArea" style="width: {{width}}px">{{content}}</view>
<view class="foldInner fold-class {{position === 'right' ? 'flex-end' : 'flex'}}" wx:if="{{showFold}}">
<text class="fold" catchtap="handleFold">{{onFold ? unFoldText : onFoldText}}</text>
</view>
</view>foldable.js
/**
 * 长文本内容展开与收起
 * @param {String} content  长文本内容
 * @param {Number} maxLine  最多展示行数[只允许 1-5 的正整数]
 * @param {String} position  展开收起按钮位置[可选值为 left right]
 * @param {Boolean} foldable  点击长文本是否展开收起
 * @param { String } onFoldText 收缩时文字
 * @param { String } unFoldText 展开时文字
 *
 */

Component({
  externalClasses: ['content-inner-class', 'fold-class'],
  properties: {
    content: {
      type: String,
      observer(val) {
        if (this.data.onReady) {
          this.getNodeClientReact()
        }
      }
    },
    maxLine: {
      type: Number,
      value: 1,
      observer(value) {
        if (!(/^[1-5]$/).test(value)) {
          throw new Error(`maxLine field value can only be digits (1-5), Error value: ${value}`)
        } else if (this.data.onReady) {
          this.getNodeClientReact()
        }
      }
    },
    position: {
      type: String,
      value: "left"
    },
    foldable: {
      type: Boolean,
      value: true
    },
    // 收缩时文字
    onFoldText: {
      type: String,
      value: "全文"
    },
    // 展开时文字
    unFoldText: {
      type: String,
      value: "收起"
    },
  },
  data: {
    width: null,
    onFold: false,
    showFold: false,
    onReady: false
  },
  lifetimes: {
    attached() {
      this.getNodeClientReact()
      this.setData({
        onReady: true
      })
    },
  },
  methods: {
    getNodeClientReact() {
      setTimeout(() => this.checkFold(), 10)
    },
    checkFold() {
      const query = this.createSelectorQuery();
      query.selectAll(".showArea, .hideArea").boundingClientRect(res => {
        let showFold = res[0].height < res[1].height;
        this.setData({
          width: res[0].width,
          showFold,
        })
      }).exec()
    },
    handleFold() {
      this.setData({
        onFold: !this.data.onFold
      })
    }
  }
})foldable.wxss
.content {
  width: 100%;
  position: relative;
  overflow: hidden;
}

.contentInner {
  word-break: break-all;
  width: 100%;
  color: #2f3033;
  font-size: 30rpx;
  line-height: 1.35;
}

.hideArea {
  display: -webkit-box;
  overflow: hidden;
  position: fixed;
  top: 100vh;
  left: -100vw;
}

.foldInner {
  padding-top: 10rpx;
  color: #6676bd;
  font-size: 32rpx;
}

.foldInner .fold {
  cursor: pointer;
}

.text-clamp1 {
  overflow: hidden;
  display: -webkit-box;
  -webkit-box-orient: vertical;
  -webkit-line-clamp: 1;
}

.text-clamp2 {
  overflow: hidden;
  display: -webkit-box;
  -webkit-box-orient: vertical;
  -webkit-line-clamp: 2;
}

.text-clamp3 {
  overflow: hidden;
  display: -webkit-box;
  -webkit-box-orient: vertical;
  -webkit-line-clamp: 3;
}

.text-clamp4 {
  overflow: hidden;
  display: -webkit-box;
  -webkit-box-orient: vertical;
  -webkit-line-clamp: 4;
}

.text-clamp5 {
  overflow: hidden;
  display: -webkit-box;
  -webkit-box-orient: vertical;
  -webkit-line-clamp: 5;
}2. Repair version
Under normal circumstances, this method is feasible, but under level text, calculation errors will occur. After testing, the content of the node .hideArea can be positioned under the .showArea node to solve the problem
foldable.wxss
.hideArea {
  display: -webkit-box;
  overflow: hidden;
  /* position: fixed;
  top: 100vh;
  left: -100vw; */
  position: absolute;
  top: 0;
  left: 0;
  z-index: -1;
  color: #fff;
}3. Enhanced version
After the repair, it could have been implemented perfectly, but during the testing process, there was no problem with the first normal rendering. But if the text data is updated, you will find that if the original text increases from one line to two lines, the height calculated using wx.createSelectorQuery() will be twice the actual height. As a result, [Full text] text will appear incorrectly. Then the text increases from two lines to three or more lines without any problem. I don't understand why this miscalculation occurs. (I hope the master can leave a message to inform?)

In order to make up for this pitfall, I introduced the attribute lineHieght.
// foldable.js
Component({
    properties: {
        lineHieght: {
          type: Number,
          observer(value) {
            if (!(/^[0-9]*$/).test(value)) {
              throw new Error(`lineHieght field value can only be digits`)
            }
          }
        }
    }
})The maximum height that can be displayed on the interface can be calculated through lineHieght and the maximum number of displayable lines maxLine.
// 文本可见的最大高度
const maxHeight = this.data.lineHieght * this.data.maxLine;
Of course, we also need to adapt to different devices, and the result calculated through wx.createSelectorQuery() is in px.
So, the row height needs to be changed according to the device size. Because we use the width of 750px as the design draft, we can obtain the device information according to wx.getSystemInfoSync(), and then convert it to the size of px.
// foldable.js
changeRpxToPx(rpxInteger) {
  return wx.getSystemInfoSync().windowWidth / 750 * rpxInteger
}, Therefore, update checkFoldmethod
checkFold() {
  const query = this.createSelectorQuery();
  query.selectAll(".showArea, .hideArea").boundingClientRect(res => {
    let showFold = res[0].height < res[1].height;
    const lineHeightToPx = this.changeRpxToPx(this.data.LineHeight);
    // 展示区域高度(即是可能会被截取的可见文字)
    const showAreaHeight = res[0].height;
    // 隐藏区域的高度(即是完整文本高度,偶然事件会计算错误)
    const hideAreaHeight = res[1].height;
    // 文本可见的最大高度
    const maxHeight = lineHeightToPx * this.data.maxLine;
    // 如果是一行文字,偶然计算错误,用行高判断
    if (this.data.LineHeight && showAreaHeight <= maxHeight) {
      showFold = hideAreaHeight > maxHeight
    }
    this.setData({
      width: res[0].width,
      showFold,
    })
  }).exec()
},4, final version
After the previous version, the basic functions have been accomplish. However, if the text exceeds the maximum number of lines and the text is updated while the full text is expanded, the Full text/Expand button will display an error.


It can be seen from the analysis of the code that the text is updated in the state of expanding the full text. At this time, the .showArea node It is consistent with the height of the .hideArea node. When executing the code let showFold = res[0].height < res[1].height;, false will be returned. , so the button disappears.
So the solution is:
// 如果文本超出最大行数,并且是显示全文的状态下,再次更新了文字
let onFold = false
if (showAreaHeight == hideAreaHeight && showAreaHeight > maxHeight) {
  showFold = true
  onFold = true
}So the final version of the checkFold method is:
checkFold() {
  const query = this.createSelectorQuery();
  query.selectAll(".showArea, .hideArea").boundingClientRect(res => {
    let showFold = res[0].height < res[1].height;
    const lineHeightToPx = this.changeRpxToPx(this.data.LineHeight);
    // 展示区域高度(即是可能会被截取的可见文字)
    const showAreaHeight = res[0].height;
    // 隐藏区域的高度(即是完整文本高度,偶然事件会计算错误)
    const hideAreaHeight = res[1].height;
    // 文本可见的最大高度
    const maxHeight = lineHeightToPx * this.data.maxLine;
    // 如果是一行文字,偶然计算错误,用行高判断
    if (this.data.LineHeight && showAreaHeight <= maxHeight) {
      showFold = hideAreaHeight > maxHeight
    }
    // 如果文本超出最大行数,并且是显示全文的状态下,再次更新了文字
    let onFold = false
    if (showAreaHeight == hideAreaHeight && showAreaHeight > maxHeight) {
      showFold = true
      onFold = true
    }
    this.setData({
      width: res[0].width,
      showFold,
      onFold,
    })
  }).exec()
},4. Code snippets
After many tests and modifications, the code snippet is finally attached:
https://developers.weixin.qq.com/s/GWj19vmC7oxp
If you have better suggestions, please leave a message~~~
[Related learning recommendations: 小program development tutorial]
The above is the detailed content of Let's talk about how mini programs implement the 'full text collapse” function. For more information, please follow other related articles on the PHP Chinese website!

Hot AI Tools

Undresser.AI Undress
AI-powered app for creating realistic nude photos

AI Clothes Remover
Online AI tool for removing clothes from photos.

Undress AI Tool
Undress images for free

Clothoff.io
AI clothes remover

AI Hentai Generator
Generate AI Hentai for free.

Hot Article

Hot Tools

Notepad++7.3.1
Easy-to-use and free code editor

SublimeText3 Chinese version
Chinese version, very easy to use

Zend Studio 13.0.1
Powerful PHP integrated development environment

Dreamweaver CS6
Visual web development tools

SublimeText3 Mac version
God-level code editing software (SublimeText3)

Hot Topics
 Develop WeChat applet using Python
Jun 17, 2023 pm 06:34 PM
With the popularity of mobile Internet technology and smartphones, WeChat has become an indispensable application in people's lives. WeChat mini programs allow people to directly use mini programs to solve some simple needs without downloading and installing applications. This article will introduce how to use Python to develop WeChat applet. 1. Preparation Before using Python to develop WeChat applet, you need to install the relevant Python library. It is recommended to use the two libraries wxpy and itchat here. wxpy is a WeChat machine
 Can small programs use react?
Dec 29, 2022 am 11:06 AM
Mini programs can use react. How to use it: 1. Implement a renderer based on "react-reconciler" and generate a DSL; 2. Create a mini program component to parse and render DSL; 3. Install npm and execute the developer Build npm in the tool; 4. Introduce the package into your own page, and then use the API to complete the development.
 Implement card flipping effects in WeChat mini programs
Nov 21, 2023 am 10:55 AM
Implementing card flipping effects in WeChat mini programs In WeChat mini programs, implementing card flipping effects is a common animation effect that can improve user experience and the attractiveness of interface interactions. The following will introduce in detail how to implement the special effect of card flipping in the WeChat applet and provide relevant code examples. First, you need to define two card elements in the page layout file of the mini program, one for displaying the front content and one for displaying the back content. The specific sample code is as follows: <!--index.wxml-->&l
 Alipay launched the 'Chinese Character Picking-Rare Characters' mini program to collect and supplement the rare character library
Oct 31, 2023 pm 09:25 PM
According to news from this site on October 31, on May 27 this year, Ant Group announced the launch of the "Chinese Character Picking Project", and recently ushered in new progress: Alipay launched the "Chinese Character Picking-Uncommon Characters" mini program to collect collections from the society Rare characters supplement the rare character library and provide different input experiences for rare characters to help improve the rare character input method in Alipay. Currently, users can enter the "Uncommon Characters" applet by searching for keywords such as "Chinese character pick-up" and "rare characters". In the mini program, users can submit pictures of rare characters that have not been recognized and entered by the system. After confirmation, Alipay engineers will make additional entries into the font library. This website noticed that users can also experience the latest word-splitting input method in the mini program. This input method is designed for rare words with unclear pronunciation. User dismantling
 How uniapp achieves rapid conversion between mini programs and H5
Oct 20, 2023 pm 02:12 PM
How uniapp can achieve rapid conversion between mini programs and H5 requires specific code examples. In recent years, with the development of the mobile Internet and the popularity of smartphones, mini programs and H5 have become indispensable application forms. As a cross-platform development framework, uniapp can quickly realize the conversion between small programs and H5 based on a set of codes, greatly improving development efficiency. This article will introduce how uniapp can achieve rapid conversion between mini programs and H5, and give specific code examples. 1. Introduction to uniapp unia
 How to operate mini program registration
Sep 13, 2023 pm 04:36 PM
Mini program registration operation steps: 1. Prepare copies of personal ID cards, corporate business licenses, legal person ID cards and other filing materials; 2. Log in to the mini program management background; 3. Enter the mini program settings page; 4. Select " "Basic Settings"; 5. Fill in the filing information; 6. Upload the filing materials; 7. Submit the filing application; 8. Wait for the review results. If the filing is not passed, make modifications based on the reasons and resubmit the filing application; 9. The follow-up operations for the filing are Can.
 Tutorial on writing a simple chat program in Python
May 08, 2023 pm 06:37 PM
Implementation idea: Establishing the server side of thread, so as to process the various functions of the chat room. The establishment of the x02 client is much simpler than the server. The function of the client is only to send and receive messages, and to enter specific characters according to specific rules. To achieve the use of different functions, therefore, on the client side, you only need to use two threads, one is dedicated to receiving messages, and the other is dedicated to sending messages. As for why not use one, that is because, only
 Introduction to WeChat applet development in Java language
Jun 09, 2023 pm 10:40 PM
WeChat applet is a lightweight application that can be run on the WeChat platform. It does not require downloading and installation, which is convenient and fast. Java language, as a language widely used in enterprise-level application development, can also be used for the development of WeChat applets. In Java language, you can use the SpringBoot framework and third-party toolkits to develop WeChat applets. The following is a simple WeChat applet development process. To create a WeChat mini program, first, you need to register a mini program on the WeChat public platform. After successful registration, you can obtain


