

Does centos not restart when adding fonts?

centos does not need to be restarted when adding fonts. The method of adding fonts is: 1. Use the ll command to enter the shared file with the font; 2. Use the cp command to copy the font file and create a font cache; 3. Set the font style according to the file. There is no need to restart the system during the process of adding fonts.

The operating environment of this article: centos 7 system, Dell G3 computer.
Does centos not need to restart when adding fonts?
centos does not need to restart when adding fonts
The steps for centos to add fonts are as follows:
1. From Remove the font
-
1
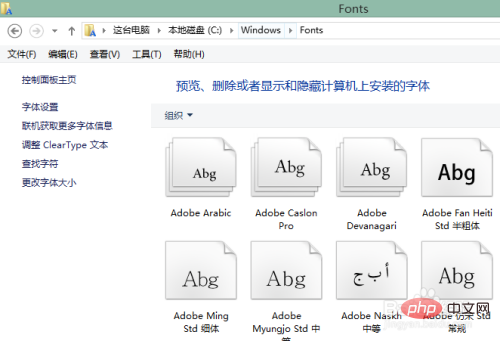
from Windows and enter the C:\Winodws\Fonts directory.

-
2
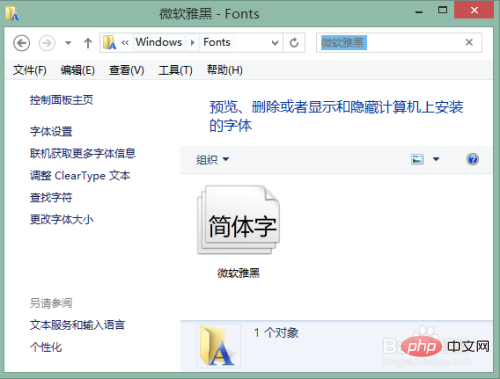
Enter the name of the font you want to add in the search box in the upper right corner (this is Microsoft Yahei) , find it among many fonts.
-
3
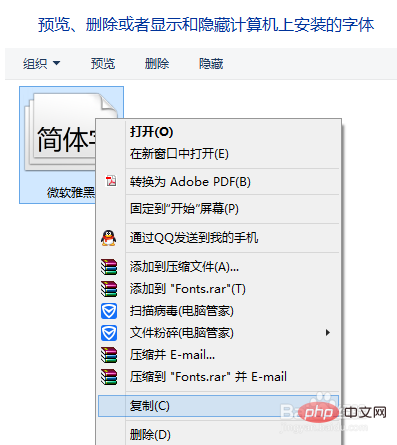
Right-click the mouse on the found font and select "Copy".
-
4
Paste the copied fonts to the shared folder of the VM (method to set up the shared folder in the VM, See my experience "How to share folders with the host in VM").
Note that although only one Microsoft Yahei font appears in the font directory, it actually includes three font files.
END
2. Add fonts to CentOS
-
1
Open the CentOS virtual machine and log in to the desktop.
-
2
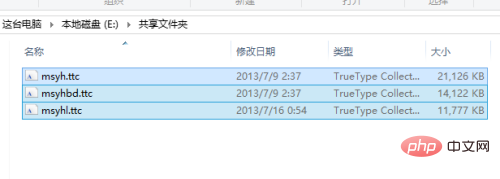
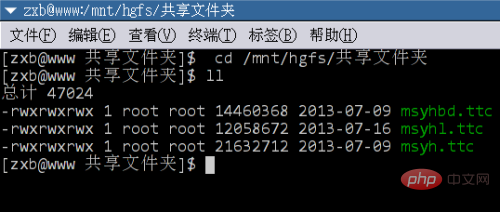
Start the terminal and enter the shared folder directory. At this point, typing the ll command will see the files that were previously copied to the shared directory. (For the method of entering shared folders, please also refer to my experience "How to share folders with the host in VM")
-
3
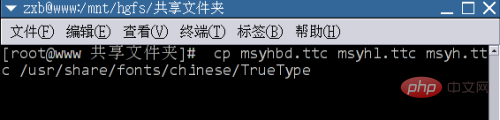
Switch to the root account, and then type the command cp msyhbd.ttc msyhl.ttc msyh.ttc /usr/share/fonts/chinese/TrueType to copy the three fonts to the /usr/share/fonts/chinese/TrueType directory.
-
4
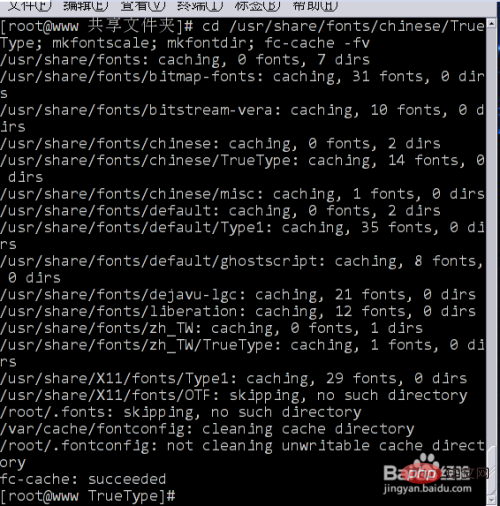
To create a font cache, the command is as follows (; means writing multiple commands in the same line and executing them in sequence):
cd /usr/share/fonts/chinese/TrueType; mkfontscale; mkfontdir; fc-cache -fv. After execution, the font will be installed.
END
3. Set the system font
-
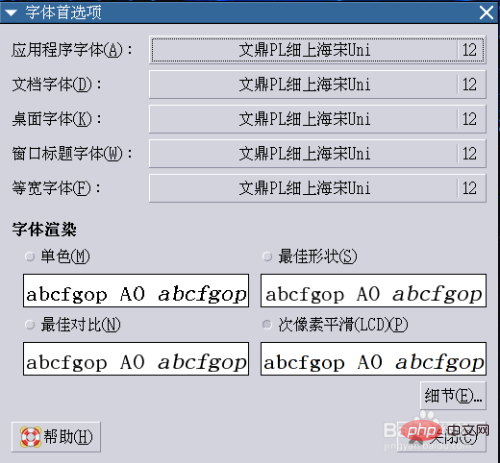
After the font is installed successfully, we can let the system use the newly installed font. Click "System" - "First Items" - "Font" on the graphical interface, and the following setting box will pop up.
-
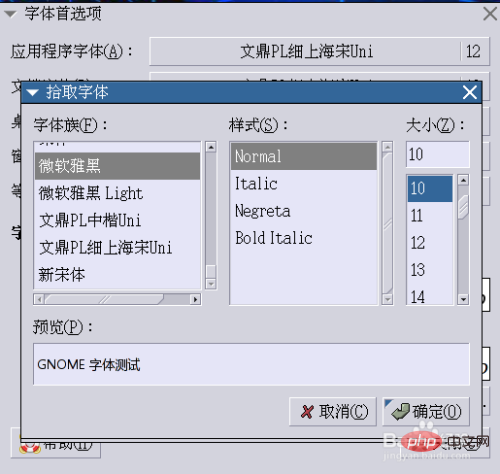
At this time, click on the font after the corresponding entry, and we can set it to the font we just added according to our own preferences.
-
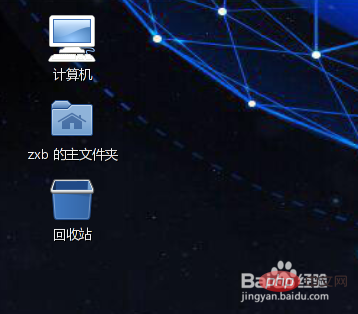
The following is the desktop effect after changing the font.
Recommended tutorial: "centos tutorial"
The above is the detailed content of Does centos not restart when adding fonts?. For more information, please follow other related articles on the PHP Chinese website!

Hot AI Tools

Undresser.AI Undress
AI-powered app for creating realistic nude photos

AI Clothes Remover
Online AI tool for removing clothes from photos.

Undress AI Tool
Undress images for free

Clothoff.io
AI clothes remover

AI Hentai Generator
Generate AI Hentai for free.

Hot Article
Hot Tools

Notepad++7.3.1
Easy-to-use and free code editor

SublimeText3 Chinese version
Chinese version, very easy to use

Zend Studio 13.0.1
Powerful PHP integrated development environment

Dreamweaver CS6
Visual web development tools

SublimeText3 Mac version
God-level code editing software (SublimeText3)
Hot Topics
 1376
1376
 52
52

 How to input Chinese in centos
Apr 07, 2024 pm 08:21 PM
How to input Chinese in centos
Apr 07, 2024 pm 08:21 PM
Methods for using Chinese input in CentOS include: using the fcitx input method: install and enable fcitx, set shortcut keys, press the shortcut keys to switch input methods, and input pinyin to generate candidate words. Use iBus input method: Install and enable iBus, set shortcut keys, press the shortcut keys to switch input methods, and input pinyin to generate candidate words.
 How to read USB disk files in centos7
Apr 07, 2024 pm 08:18 PM
How to read USB disk files in centos7
Apr 07, 2024 pm 08:18 PM
To read U disk files in CentOS 7, you need to first connect the U disk and confirm its device name. Then, use the following steps to read the file: Mount the USB flash drive: mount /dev/sdb1 /media/sdb1 (replace "/dev/sdb1" with the actual device name) Browse the USB flash drive file: ls /media/sdb1; cd /media /sdb1/directory; cat file name
 How to enter root permissions in centos7
Apr 02, 2024 pm 08:57 PM
How to enter root permissions in centos7
Apr 02, 2024 pm 08:57 PM
There are two ways to enter the root authority of CentOS 7: use the sudo command: enter sudo su - in the terminal and enter the current user password. Log in directly as the root user: Select "Other" on the login screen, enter "root" and the root password. Note: Operate carefully with root privileges, perform tasks with sudo privileges, and change the root password regularly.
 SCP usage tips-recursively exclude files
Apr 22, 2024 am 09:04 AM
SCP usage tips-recursively exclude files
Apr 22, 2024 am 09:04 AM
One can use the scp command to securely copy files between network hosts. It uses ssh for data transfer and authentication. Typical syntax is: scpfile1user@host:/path/to/dest/scp -r/path/to/source/user@host:/path/to/dest/scp exclude files I don't think you can when using scp command Filter or exclude files. However, there is a good workaround to exclude the file and copy it securely using ssh. This page explains how to filter or exclude files when copying directories recursively using scp. How to use rsync command to exclude files The syntax is: rsyncav-essh-
 What to do if you forget your password to log in to centos
Apr 07, 2024 pm 07:33 PM
What to do if you forget your password to log in to centos
Apr 07, 2024 pm 07:33 PM
Solutions for forgotten CentOS passwords include: Single-user mode: Enter single-user mode and reset the password using passwd root. Rescue Mode: Boot from CentOS Live CD/USB, mount root partition and reset password. Remote access: Use SSH to connect remotely and reset the password with sudo passwd root.
 How to enable root permissions in centos7
Apr 07, 2024 pm 08:03 PM
How to enable root permissions in centos7
Apr 07, 2024 pm 08:03 PM
CentOS 7 disables root permissions by default. You can enable it by following the following steps: Temporarily enable it: Enter "su root" on the terminal and enter the root password. Permanently enabled: Edit "/etc/ssh/sshd_config", change "PermitRootLogin no" to "yes", and restart the SSH service.
 How to obtain root permissions in centos7
Apr 07, 2024 pm 07:57 PM
How to obtain root permissions in centos7
Apr 07, 2024 pm 07:57 PM
There are several ways to gain root privileges in CentOS 7: 1. Run the command using "su". 2. Use "sudo" to run a single command. 3. Enable the root user and set a password. NOTE: Be cautious when using root privileges as they may damage the system.
 How to enter root permissions in centos
Apr 07, 2024 pm 08:06 PM
How to enter root permissions in centos
Apr 07, 2024 pm 08:06 PM
There are two ways to perform tasks with root privileges in CentOS: 1) Use the sudo command to temporarily obtain root privileges; 2) Log in directly using the root user password. Extreme caution should be used when using root privileges and it is recommended to only use them when necessary.
