Let's talk about the historical storage strategy in VSCode
VSCode has added the function of retaining the local history of files. This article will talk about the history storage strategy in VSCode. I hope it will be helpful to everyone!

Updated VSCode yesterday and found that VSCode also added the function of retaining the local history of files. I recall that not long ago, in order to add a history recording function to Yank Note, I scratched my head and conceived a history storage strategy for a long time. I lament that if VSCode had been released a few months earlier, I would have had a reference. [Recommended study: "vscode introductory tutorial"]
But when I looked at VSCode's historical storage strategy: so crude?
VSCode’s strategy
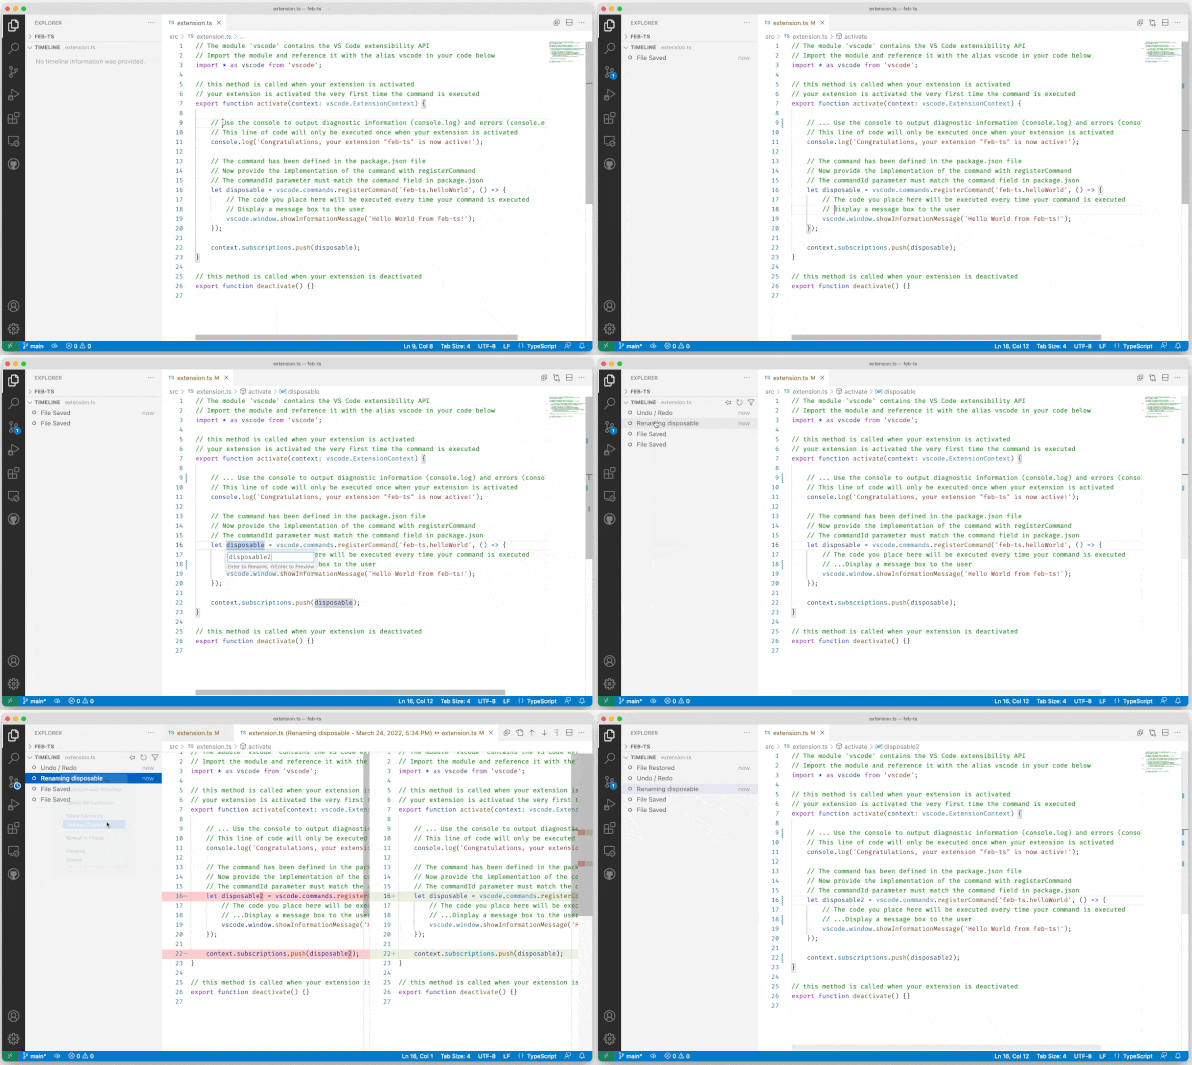
The local history of files can be displayed in the timeline of VSCode 1.66 version. The effect is like this

For this function, VSCode has also added some configurations:
There are also new settings to work with local history:
workbench.localHistory. enabled- Enable or disable local history (default:true).workbench.localHistory.maxFileSize- File size limit when creating a local history entry ( default:256 KB).workbench.localHistory.maxFileEntries- Local history entries limit per file (default:50).workbench.localHistory.exclude- Glob patterns for excluding certain files from local history.workbench.localHistory.mergeWindow- Interval in seconds during which further changes are added to the last entry in local file history (default10s).
Right click on the history entry, there is a menu to find the file directly in the system manager A copy of a historical record.
It can be inferred that VSCode saves a file to a folder within a certain time window (default 10s) for each save/undo operation. Historical records are located through special file naming (retaining time information).
This is too rude, a file is just a version.
Typora’s strategy
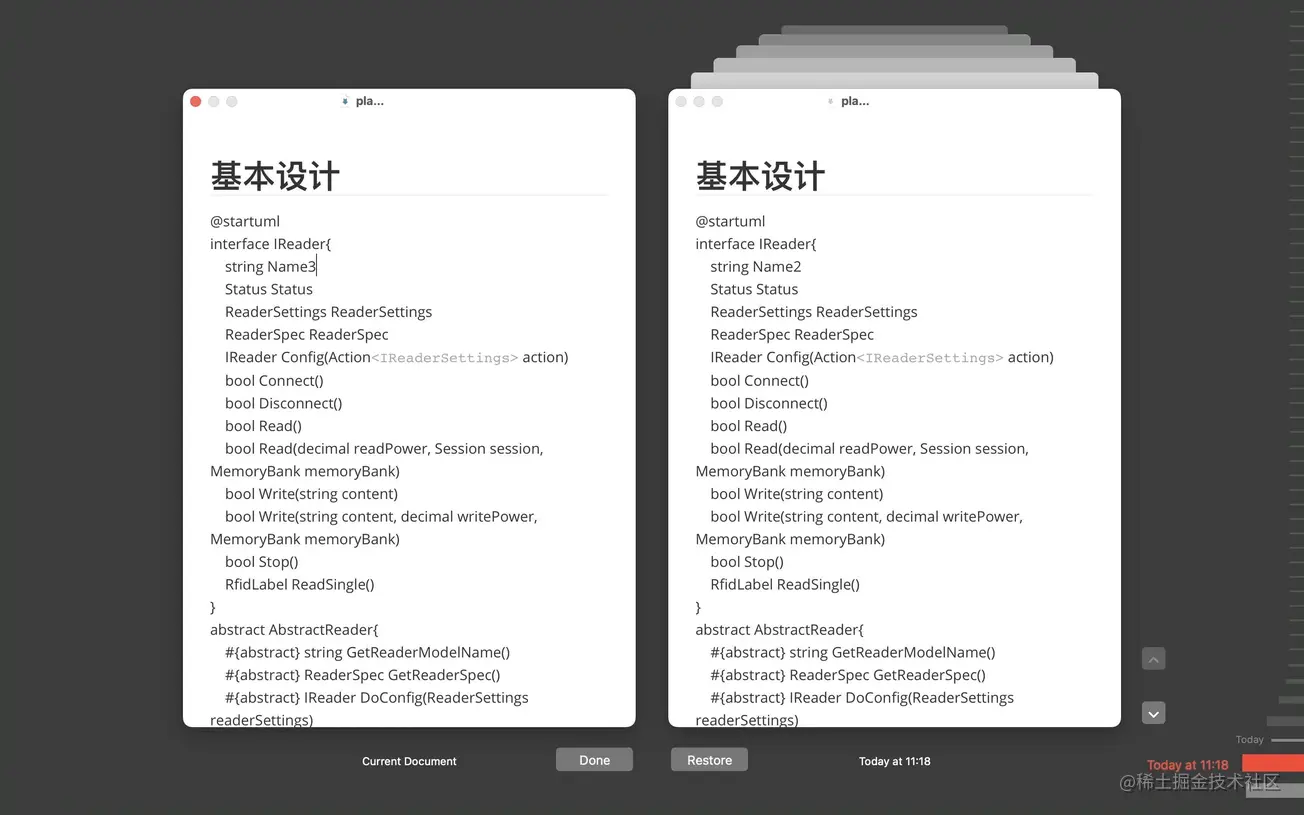
Then let’s talk about Typora’s strategy that was investigated at that time. Typora has a very exquisite file history backtracking interface on macOS

It seems that it should use the system's "time machine" to implement version backtracking. So this feature is no longer available on Windows.
Yank Note’s strategy
The historical version I envision has several goals:
The most important goal is to try to avoid data loss.
Historical records should not occupy too much space. It is best to record incrementally.
In extreme cases, it is necessary to facilitate users to restore data.
Historical records should be able to mark and make notes
For the first goal, I hope to retain the user’s most recent edited version and not discard it. And Yank Note has an automatic saving function, so it has a second goal, not to take up too much space, and not to generate too many files. So the time window file saving strategy that I originally thought of, similar to VSCode, won’t work.
For the third goal, I don’t want to introduce custom formats, such as Git, or databases. Because if the user loses data and it is inconvenient to find the history records in the software (software is damaged, files are accidentally deleted, etc.), the user must be able to enter the history directory and retrieve the files.
Follow-up: A user accidentally deleted a document and the recycle bin could not find it, so he restored it through this method.
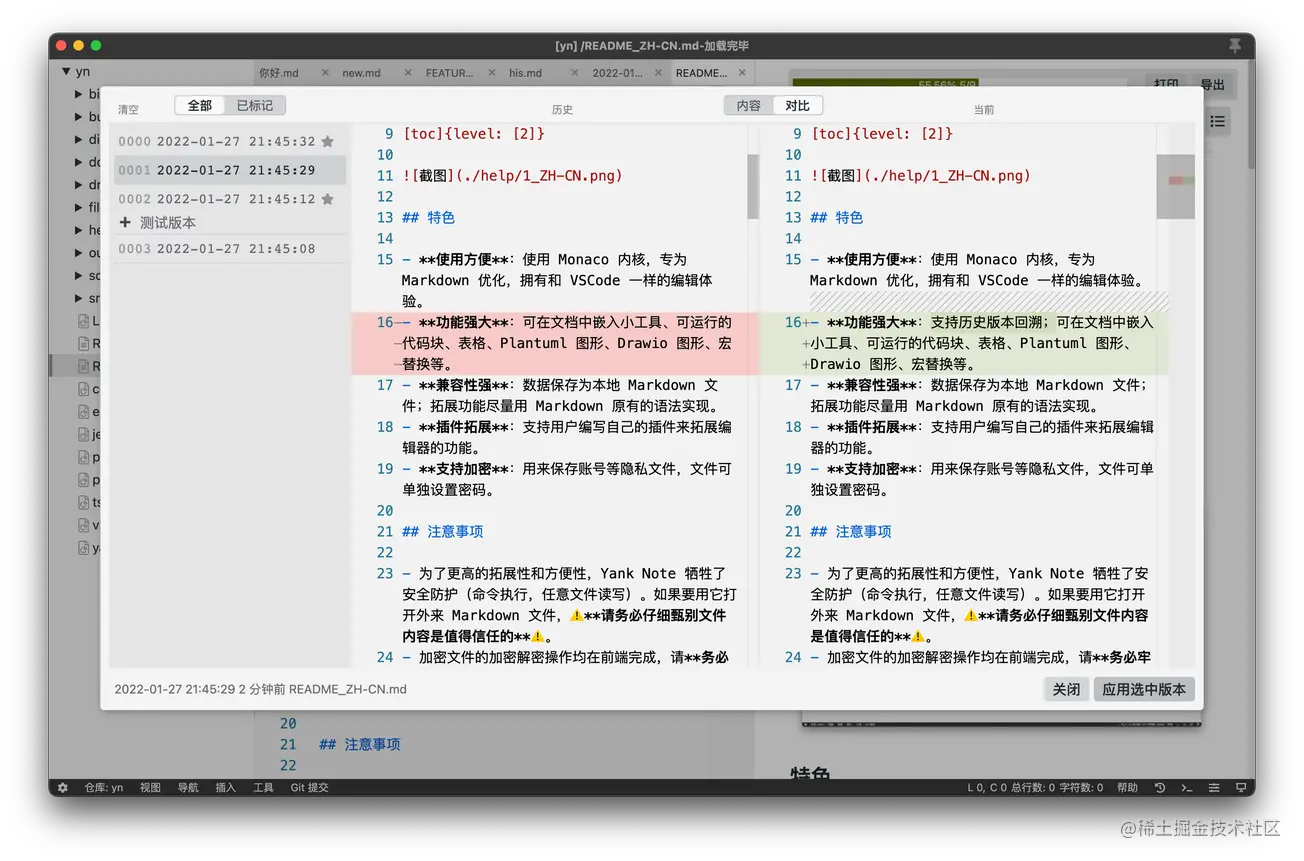
Considering the fourth goal, I finally chose to use zip files to save the historical version of the file, although it will consume a little computing performance in writing and reading history (more than 10 megabytes in size The file history is basically imperceptible), but the final effect is still very good.
Final solution:
Each document is hashed by the file name and path to spell out a zip package file name
Each time Write the file and write a new version of the file into the zip file
Change the name of the zip file simultaneously when moving and renaming the file
The maximum number of historical versions can be limited.
Version notes and tag information can be stored in the compressed notes field.
Usually when editing a file, due to the automatic saving mechanism, the difference between the current version and the previous version is very small, so in theory, a new version file is added to the compressed file, and the compression The overall file size increase should be very small. But later I discovered that this was not the case. Only then did I realize the characteristics of Zip file compression: each file is compressed separately and then packaged together. That is to say, when adding files to the compressed package, they will not be compressed together with other files.
In response to this situation, I adopted a two-compression strategy: the first time, I set the compression rate to 0 and only packaged it, so that the zip package contained the original information of the file. The entire packaged file is compressed once for the second time. Now the compression program can consider the overall information for compression, which achieves the purpose of "incremental update".
Write a script to test later. A file of ordinary length will only occupy 50KB if it saves 1000 versions.
After using it for several months, my history file directory only takes up more than 700 KB of space, and most of the history files in it are only a few KB in size. Looking back at VSCode, the history directory occupied 2M in the past two days.

Further
For historical storage, I also further thought about some preservation strategies
relatively At the last save time, retain:
- Every version in the past 10 minutes
- One version per minute in the past 1 hour
- Every hour in the past 24 hours One version
- Keep one version every day
- Marked backup
But it seems that it is not needed now. The current strategy is simple, each It also met my expectations.
For more knowledge about VSCode, please visit: vscode tutorial! !
The above is the detailed content of Let's talk about the historical storage strategy in VSCode. For more information, please follow other related articles on the PHP Chinese website!

Hot AI Tools

Undresser.AI Undress
AI-powered app for creating realistic nude photos

AI Clothes Remover
Online AI tool for removing clothes from photos.

Undress AI Tool
Undress images for free

Clothoff.io
AI clothes remover

Video Face Swap
Swap faces in any video effortlessly with our completely free AI face swap tool!

Hot Article

Hot Tools

Notepad++7.3.1
Easy-to-use and free code editor

SublimeText3 Chinese version
Chinese version, very easy to use

Zend Studio 13.0.1
Powerful PHP integrated development environment

Dreamweaver CS6
Visual web development tools

SublimeText3 Mac version
God-level code editing software (SublimeText3)

Hot Topics
 How to define header files for vscode
Apr 15, 2025 pm 09:09 PM
How to define header files using Visual Studio Code? Create a header file and declare symbols in the header file using the .h or .hpp suffix name (such as classes, functions, variables) Compile the program using the #include directive to include the header file in the source file. The header file will be included and the declared symbols are available.
 What computer configuration is required for vscode
Apr 15, 2025 pm 09:48 PM
VS Code system requirements: Operating system: Windows 10 and above, macOS 10.12 and above, Linux distribution processor: minimum 1.6 GHz, recommended 2.0 GHz and above memory: minimum 512 MB, recommended 4 GB and above storage space: minimum 250 MB, recommended 1 GB and above other requirements: stable network connection, Xorg/Wayland (Linux)
 How to solve the problem of vscode Chinese annotations becoming question marks
Apr 15, 2025 pm 11:36 PM
How to solve the problem that Chinese comments in Visual Studio Code become question marks: Check the file encoding and make sure it is "UTF-8 without BOM". Change the font to a font that supports Chinese characters, such as "Song Style" or "Microsoft Yahei". Reinstall the font. Enable Unicode support. Upgrade VSCode, restart the computer, and recreate the source file.
 How to use VSCode
Apr 15, 2025 pm 11:21 PM
Visual Studio Code (VSCode) is a cross-platform, open source and free code editor developed by Microsoft. It is known for its lightweight, scalability and support for a wide range of programming languages. To install VSCode, please visit the official website to download and run the installer. When using VSCode, you can create new projects, edit code, debug code, navigate projects, expand VSCode, and manage settings. VSCode is available for Windows, macOS, and Linux, supports multiple programming languages and provides various extensions through Marketplace. Its advantages include lightweight, scalability, extensive language support, rich features and version
 Common commands for vscode terminal
Apr 15, 2025 pm 10:06 PM
Common commands for VS Code terminals include: Clear the terminal screen (clear), list the current directory file (ls), change the current working directory (cd), print the current working directory path (pwd), create a new directory (mkdir), delete empty directory (rmdir), create a new file (touch) delete a file or directory (rm), copy a file or directory (cp), move or rename a file or directory (mv) display file content (cat) view file content and scroll (less) view file content only scroll down (more) display the first few lines of the file (head)
 vscode terminal usage tutorial
Apr 15, 2025 pm 10:09 PM
vscode built-in terminal is a development tool that allows running commands and scripts within the editor to simplify the development process. How to use vscode terminal: Open the terminal with the shortcut key (Ctrl/Cmd). Enter a command or run the script. Use hotkeys (such as Ctrl L to clear the terminal). Change the working directory (such as the cd command). Advanced features include debug mode, automatic code snippet completion, and interactive command history.
 How to switch Chinese mode with vscode
Apr 15, 2025 pm 11:39 PM
VS Code To switch Chinese mode: Open the settings interface (Windows/Linux: Ctrl, macOS: Cmd,) Search for "Editor: Language" settings Select "Chinese" in the drop-down menu Save settings and restart VS Code
 vscode Previous Next Shortcut Key
Apr 15, 2025 pm 10:51 PM
VS Code One-step/Next step shortcut key usage: One-step (backward): Windows/Linux: Ctrl ←; macOS: Cmd ←Next step (forward): Windows/Linux: Ctrl →; macOS: Cmd →


