

Summary of usage of SUBSTITUTE function in Excel

本篇文章给大家带来了关于excel的相关知识,其中主要介绍了SUBSTITUTE函数的相关问题,该函数是Excel最常用的文本函数之一,在数据分析过程中,常用于字符串的整理和清洗,下面一起来看一下,希望对大家有帮助。

相关学习推荐:excel教程
SUBSTITUTE函数的基础语法是:
SUBSTITUTE(要替换的文本,旧文本,新文本,[替换第几个])
最后一个参数,[替换第几个], 是可以省略的。
举几个小栗子,和大家分享下SUBSTITUTE函数的常用技巧和套路。
1,将数据中的某个值替换为另一个值
比如将B列数据里的二班,替换为一班。
C2输入公式,并向下复制填充:
=SUBSTITUTE(B2,"二班","一班")

这里没啥好解释的了,就是将B列中单元格中的“二班”全部替换为“一班”。
2,隐藏手机号的中间5位
C2输入公式,并向下复制填充:
=SUBSTITUTE(B2,MID(B2,4,5),"*****")

先使用MID函数取得B列号码中的中间五位,再用字符串“*****”替换掉这部分内容。
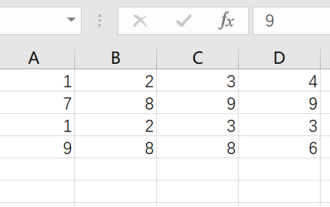
3,对含单位的数据求和
B7输入公式:
=SUMPRODUCT(SUBSTITUTE(B2:B6,"人",)*1)

先用SUBSTITUTE替换掉B列单元格中的“人”,得到文本型数字,乘以1后转换成可以计算的数值,再用SUMPRODUCT函数进行求和。
4,数据分列,将B列数据按顿号进行分列
C2单元格输入公式横向拖动,并向下复制填充。
=TRIM(MID(SUBSTITUTE($B2,"、",REPT(" ",100)),COLUMN(A1)*100-99,100))
REPT(” “,100)
先使用REPT函数,将空格重复100次,得到100个空格。
SUBSTITUTE($B2,”、”,REPT(” “,100))
使用SUBSTITUTE函数将姓名中的的间隔符号顿号替换为100个空格。
MID(SUBSTITUTE($B2,”、”,REPT(” “,100)),COLUMN(A1)*100-99,100)
再使用MID函数,依次从带有空格的新字符串中的第1、第101、第201位……截取长度为100的字符。
这样得到的字符串是带有多余空格的,因此再使用TRIM函数将多余空格删除掉。
5,混合文本中,计算人数个数

B2公式:
=LEN(A2)-LEN(SUBSTITUTE(A2,"、",))+1
LEN(A2)取得A2字符串的长度。
LEN(SUBSTITUTE(A2,”、”,))+1,替换掉人名之间的间隔符,也就是顿号,再用LEN计算该值的长度,最后加1,是因为最后一个人名没有顿号。
用A2数值原有的长度减去被替换掉人名之间间隔符的长度,也就是人名的个数。
6,混合文本中,计算数值最大值。

B2数组公式:
=MAX((SUBSTITUTE(A2,ROW($1:$98),)<>A2)*ROW(1:98))
SUBSTITUTE(A2,ROW($1:$98),)<>A2
依次将数值1到98从A2替换为空,然后把替换后的结果和被替换值(1-98)进行比较 ,如果不相等,则证明A2中存在该数值。
最后将上述部分公式的运算结果,也就是逻辑值TRUE和FALSE,乘以被替换的值(1-98),用MAX函数从中取得最大值。
7,计算某个值在某个范围的最大连续次数

B2数组公式:
=MAX((SUBSTITUTE(PHONETIC(A2:A9),REPT("A",ROW(1:9)),)<>PHONETIC(A2:A9))*ROW(1:9))PHONETIC(A2:A9)
将A2:A9的文本值黏合成一个值,以便SUBSTITUTE函数进行操作。
REPT(“A”,ROW(1:9))
把“A”重复1到9次。
SUBSTITUTE(PHONETIC(A2:A9),REPT(“A”,ROW(1:9)),)<>PHONETIC(A2:A9)
思路回到示例6,SUBSTITUTE函数将REPT函数的运算结果,在PHONETIC函数的运算结果里替换掉,然后和PHONETIC函数的原值进行比较。如果后者存在替换值,则被替换掉,此时和原值不相等,返回FALSE,否则返回TRUE。
最后依然把上述公式返回的逻辑值TRUE和FALSE,分别乘以ROW(1:9),用MAX函数从中取得最大值。
相关学习推荐:excel教程
The above is the detailed content of Summary of usage of SUBSTITUTE function in Excel. For more information, please follow other related articles on the PHP Chinese website!

Hot AI Tools

Undresser.AI Undress
AI-powered app for creating realistic nude photos

AI Clothes Remover
Online AI tool for removing clothes from photos.

Undress AI Tool
Undress images for free

Clothoff.io
AI clothes remover

Video Face Swap
Swap faces in any video effortlessly with our completely free AI face swap tool!

Hot Article
Hot Tools

Notepad++7.3.1
Easy-to-use and free code editor

SublimeText3 Chinese version
Chinese version, very easy to use

Zend Studio 13.0.1
Powerful PHP integrated development environment

Dreamweaver CS6
Visual web development tools

SublimeText3 Mac version
God-level code editing software (SublimeText3)
Hot Topics
 1387
1387
 52
52

 What should I do if the frame line disappears when printing in Excel?
Mar 21, 2024 am 09:50 AM
What should I do if the frame line disappears when printing in Excel?
Mar 21, 2024 am 09:50 AM
If when opening a file that needs to be printed, we will find that the table frame line has disappeared for some reason in the print preview. When encountering such a situation, we must deal with it in time. If this also appears in your print file If you have questions like this, then join the editor to learn the following course: What should I do if the frame line disappears when printing a table in Excel? 1. Open a file that needs to be printed, as shown in the figure below. 2. Select all required content areas, as shown in the figure below. 3. Right-click the mouse and select the "Format Cells" option, as shown in the figure below. 4. Click the “Border” option at the top of the window, as shown in the figure below. 5. Select the thin solid line pattern in the line style on the left, as shown in the figure below. 6. Select "Outer Border"
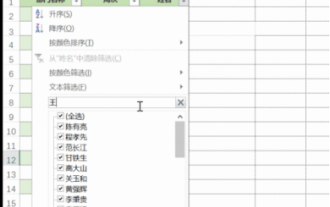 How to filter more than 3 keywords at the same time in excel
Mar 21, 2024 pm 03:16 PM
How to filter more than 3 keywords at the same time in excel
Mar 21, 2024 pm 03:16 PM
Excel is often used to process data in daily office work, and it is often necessary to use the "filter" function. When we choose to perform "filtering" in Excel, we can only filter up to two conditions for the same column. So, do you know how to filter more than 3 keywords at the same time in Excel? Next, let me demonstrate it to you. The first method is to gradually add the conditions to the filter. If you want to filter out three qualifying details at the same time, you first need to filter out one of them step by step. At the beginning, you can first filter out employees with the surname "Wang" based on the conditions. Then click [OK], and then check [Add current selection to filter] in the filter results. The steps are as follows. Similarly, perform filtering separately again
 How to change excel table compatibility mode to normal mode
Mar 20, 2024 pm 08:01 PM
How to change excel table compatibility mode to normal mode
Mar 20, 2024 pm 08:01 PM
In our daily work and study, we copy Excel files from others, open them to add content or re-edit them, and then save them. Sometimes a compatibility check dialog box will appear, which is very troublesome. I don’t know Excel software. , can it be changed to normal mode? So below, the editor will bring you detailed steps to solve this problem, let us learn together. Finally, be sure to remember to save it. 1. Open a worksheet and display an additional compatibility mode in the name of the worksheet, as shown in the figure. 2. In this worksheet, after modifying the content and saving it, the dialog box of the compatibility checker always pops up. It is very troublesome to see this page, as shown in the figure. 3. Click the Office button, click Save As, and then
 How to type subscript in excel
Mar 20, 2024 am 11:31 AM
How to type subscript in excel
Mar 20, 2024 am 11:31 AM
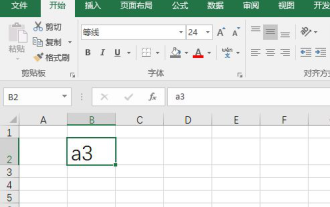
eWe often use Excel to make some data tables and the like. Sometimes when entering parameter values, we need to superscript or subscript a certain number. For example, mathematical formulas are often used. So how do you type the subscript in Excel? ?Let’s take a look at the detailed steps: 1. Superscript method: 1. First, enter a3 (3 is superscript) in Excel. 2. Select the number "3", right-click and select "Format Cells". 3. Click "Superscript" and then "OK". 4. Look, the effect is like this. 2. Subscript method: 1. Similar to the superscript setting method, enter "ln310" (3 is the subscript) in the cell, select the number "3", right-click and select "Format Cells". 2. Check "Subscript" and click "OK"
 How to set superscript in excel
Mar 20, 2024 pm 04:30 PM
How to set superscript in excel
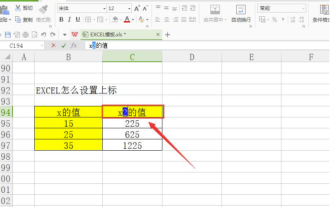
Mar 20, 2024 pm 04:30 PM
When processing data, sometimes we encounter data that contains various symbols such as multiples, temperatures, etc. Do you know how to set superscripts in Excel? When we use Excel to process data, if we do not set superscripts, it will make it more troublesome to enter a lot of our data. Today, the editor will bring you the specific setting method of excel superscript. 1. First, let us open the Microsoft Office Excel document on the desktop and select the text that needs to be modified into superscript, as shown in the figure. 2. Then, right-click and select the "Format Cells" option in the menu that appears after clicking, as shown in the figure. 3. Next, in the “Format Cells” dialog box that pops up automatically
 How to use the iif function in excel
Mar 20, 2024 pm 06:10 PM
How to use the iif function in excel
Mar 20, 2024 pm 06:10 PM
Most users use Excel to process table data. In fact, Excel also has a VBA program. Apart from experts, not many users have used this function. The iif function is often used when writing in VBA. It is actually the same as if The functions of the functions are similar. Let me introduce to you the usage of the iif function. There are iif functions in SQL statements and VBA code in Excel. The iif function is similar to the IF function in the excel worksheet. It performs true and false value judgment and returns different results based on the logically calculated true and false values. IF function usage is (condition, yes, no). IF statement and IIF function in VBA. The former IF statement is a control statement that can execute different statements according to conditions. The latter
 Where to set excel reading mode
Mar 21, 2024 am 08:40 AM
Where to set excel reading mode
Mar 21, 2024 am 08:40 AM
In the study of software, we are accustomed to using excel, not only because it is convenient, but also because it can meet a variety of formats needed in actual work, and excel is very flexible to use, and there is a mode that is convenient for reading. Today I brought For everyone: where to set the excel reading mode. 1. Turn on the computer, then open the Excel application and find the target data. 2. There are two ways to set the reading mode in Excel. The first one: In Excel, there are a large number of convenient processing methods distributed in the Excel layout. In the lower right corner of Excel, there is a shortcut to set the reading mode. Find the pattern of the cross mark and click it to enter the reading mode. There is a small three-dimensional mark on the right side of the cross mark.
 How to insert excel icons into PPT slides
Mar 26, 2024 pm 05:40 PM
How to insert excel icons into PPT slides
Mar 26, 2024 pm 05:40 PM
1. Open the PPT and turn the page to the page where you need to insert the excel icon. Click the Insert tab. 2. Click [Object]. 3. The following dialog box will pop up. 4. Click [Create from file] and click [Browse]. 5. Select the excel table to be inserted. 6. Click OK and the following page will pop up. 7. Check [Show as icon]. 8. Click OK.
