How to customize the video player in Angular
How to customize Video operations? Custom video player? The following article will introduce to you how to customize Video operations in Angular. I hope it will be helpful to you!

The previous article was Angular project implementation of permission control. Recently, I saw others using vue on the Internet to customize video. In addition, the related requirements of angular customization video were implemented not long ago, so I will record it as a communication and reflection. [Related tutorial recommendations: "angular tutorial"]
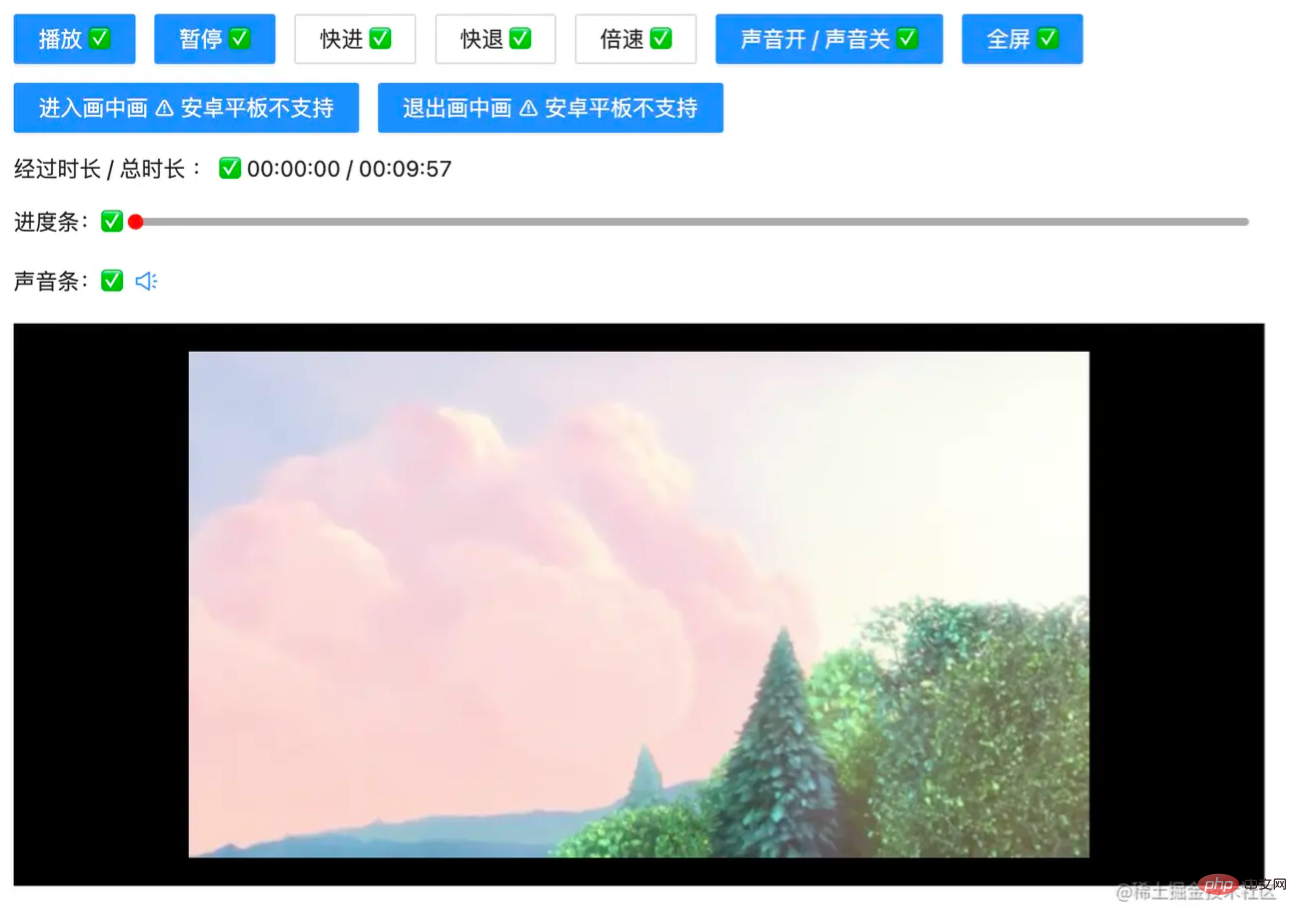
The functions implemented are as follows:
- Play/stop
- Fast rewind/fast forward / Double speed
- Sound on/Sound off
- Enter full screen/Exit full screen
- Enter picture-in-picture/Exit picture-in-picture [Android tablets are not supported and are not recommended]
- Elapsed time/total duration
- Playback progress bar function: supports click and drag progress
- Sound progress bar function: supports click and drag progress
As shown in the picture:

Let’s implement it one by one:
The focus here is not on the layout, let’s simply define it:
<!-- app.component.html -->
<div class="video-page">
<div class="video-tools">
<button nz-button nzType="primary" (click)="play('btn')" style="margin-right: 12px;">播放 ✅</button>
<button nz-button nzType="primary" (click)="pause('btn')">暂停 ✅</button>
<ng-container>
<button nz-button nz-dropdown [nzDropdownMenu]="menuForward" nzPlacement="bottomCenter" style="margin: 0 12px;">快进 ✅</button>
<nz-dropdown-menu #menuForward="nzDropdownMenu">
<ul nz-menu>
<li nz-menu-item (click)="forwardSecond(10)">快进 10 s</li>
<li nz-menu-item (click)="forwardSecond(20)">快进 20 s</li>
</ul>
</nz-dropdown-menu>
</ng-container>
<ng-container>
<button nz-button nz-dropdown [nzDropdownMenu]="menuBack" nzPlacement="bottomCenter">快退 ✅</button>
<nz-dropdown-menu #menuBack="nzDropdownMenu">
<ul nz-menu>
<li nz-menu-item (click)="retreatSecond(10)">快退 10 s</li>
<li nz-menu-item (click)="retreatSecond(20)">快退 20 s</li>
</ul>
</nz-dropdown-menu>
</ng-container>
<ng-container>
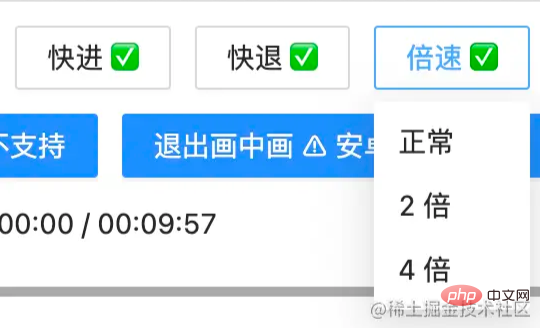
<button nz-button nz-dropdown [nzDropdownMenu]="speedUp" nzPlacement="bottomCenter" style="margin: 0 12px;">倍速 ✅</button>
<nz-dropdown-menu #speedUp="nzDropdownMenu">
<ul nz-menu>
<li nz-menu-item (click)="speedUpVideo(1)">正常</li>
<li nz-menu-item (click)="speedUpVideo(2)">2 倍</li>
<li nz-menu-item (click)="speedUpVideo(4)">4 倍</li>
</ul>
</nz-dropdown-menu>
</ng-container>
<button nz-button nzType="primary" (click)="openOrCloseVoice()">声音开 / 声音关 ✅</button>
<button nz-button nzType="primary" style="margin: 0 12px;" (click)="toFullScreen()">全屏 ✅</button>
<br />
<button nz-button nzType="primary" style="margin-top: 12px;" (click)="entryInPicture()">进入画中画 ⚠️ 安卓平板不支持</button>
<button nz-button nzType="primary" style="margin: 12px 12px 0 12px;" (click)="exitInPicture()">退出画中画 ⚠️ 安卓平板不支持</button>
<br />
<div style="display: flex; justify-content: flex-start; align-items: center; margin: 12px 0;">
经过时长 / 总时长 : ✅ {{ currentTime }} / {{ totalTime }}
</div>
<!-- 进度条 -->
<div style="display: flex; justify-content: flex-start; align-items: center; margin: 12px 0;">
进度条:✅
<div
class="custom-video_control-bg"
(mousedown)="handleProgressDown($event)"
(mousemove)="handleProgressMove($event)"
(mouseup)="handleProgressUp($event)"
>
<div
class="custom-video_control-bg-outside"
id="custom-video_control-bg-outside"
>
<span
class="custom-video_control-bg-inside"
id="custom-video_control-bg-inside"
></span>
<span
class="custom-video_control-bg-inside-point"
id="custom-video_control-bg-inside-point"
></span>
</div>
</div>
</div>
<div style="display: flex; justify-content: flex-start; align-items: center; margin: 12px 0;">
声音条:✅
<div class="custom-video_control-voice">
<span class="custom-video_control-voice-play">
<i nz-icon nzType="sound" nzTheme="outline"></i>
</span>
<div
class="custom-video_control-voice-bg"
id="custom-video_control-voice-bg"
(mousedown)="handleVolProgressDown($event)"
(mousemove)="handleVolProgressMove($event)"
(mouseup)="handleVolProgressUp($event)"
>
<div
class="custom-video_control-voice-bg-outside"
id="custom-video_control-voice-bg-outside"
>
<span
class="custom-video_control-voice-bg-inside"
id="custom-video_control-voice-bg-inside"
></span>
<span
class="custom-video_control-voice-bg-point"
id="custom-video_control-voice-bg-point"
></span>
</div>
</div>
</div>
</div>
</div>
<div class="video-content">
<video id="video" class="video" style="width: 100%" poster="assets/poster.png">
<source type="video/mp4" src="assets/demo.mp4">
Sorry, your browser doesn't support.
</video>
</div>
</div>
angular ant designis used here. I wrote a related article before. Readers who are not familiar with it can go to Angular combined with NG-ZORRO rapid development
Play/Stop
Here directly call the video object methods play() and pause():
// app.component.ts

// 播放按钮事件
play(flag: string | undefined) {
  if(flag) this.videoState.playState = true
  this.videoState.play = true
  this.video.play()
}
// 暂停按钮事件
pause(flag: string | undefined): void {
  if(flag) this.videoState.playState = false
  this.video.pause()
  this.videoState.play = false
}The customized play and pause methods here add a flag, which is helpful for controlling the progress bar to be discussed below. The above code can be more concise , readers can write it down in abbreviation.
Fast rewind/fast forward/double speed
HereFast rewind, fast forward and double speedset different options and pass them through parameters:
// app.component.ts

// 快进指定的时间
forwardSecond(second: number): void {
  this.video.currentTime += second; // 定位到当前的播放时间 currentTime
}

// 后退指定的时间
retreatSecond(second: number): void {
  this.video.currentTime -= second
}

// 倍速
speedUpVideo(multiple: number): void {
  this.video.playbackRate = multiple; // 设定当前的倍速 playbackRate
}
Sound on/Sound off
To switch the sound on and off, use the muted attribute of video:
// app.component.ts

// 开或关声音
openOrCloseVoice(): void {
  this.video.muted = !this.video.muted;
}Enter full screen/exit full screen
The operation of full screen is also very simple. Use webkitRequestFullScreen
// app.component.ts

// 全屏操作
toFullScreen(): void {
  this.video.webkitRequestFullScreen()
}After full screen, press
escExit full screen
Enter picture-in-picture/Exit picture-in-picture
Picture-in-picture is equivalent to pop-up window shrink video~
// app.component.ts

// 进入画中画
entryInPicture(): void {
  this.video.requestPictureInPicture()
  this.video.style.display = "none"
}

// 退出画中画
exitInPicture(): void {
  if(this.document.pictureInPictureElement) {
    this.document.exitPictureInPicture()
    this.video.style.display = "block"
  }
}Settingsvideo## The style of # is to not look obtrusive...
// app.component.ts

// 初始化 video 的相关的事件
initVideoData(): void {
  // 获取视频的总时长
  this.video.addEventListener('loadedmetadata', () => {
    this.totalTime = this.formatTime(this.video.duration)
  })
  // 监听时间发生更改
  this.video.addEventListener('timeupdate', () => {
    this.currentTime = this.formatTime(this.video.currentTime) // 当前播放的时间
  })
}formatTime is the formatting functionPlayback progress bar functionMonitor the mouse
click, move, release Events, divide the video play time and total events to calculate the percentage.
// app.component.ts

// 进度条鼠标按下
handleProgressDown(event: any): void {
  this.videoState.downState = true
  this.pause(undefined);
  this.videoState.distance = event.clientX + document.documentElement.scrollLeft - this.videoState.leftInit;
}
// 进度条 滚动条移动
handleProgressMove(event: any): void {
  if(!this.videoState.downState) return
  let distanceX = (event.clientX + document.documentElement.scrollLeft) - this.videoState.leftInit
  if(distanceX > this.processWidth) { // 容错处理
    distanceX = this.processWidth;
  }
  if(distanceX < 0) { // 容错处理
    distanceX = 0
  }
  this.videoState.distance = distanceX
  this.video.currentTime = this.videoState.distance / this.processWidth * this.video.duration
}
// 进度条 鼠标抬起
handleProgressUp(event: any): void {
  this.videoState.downState = false
  // 视频播放
  this.video.currentTime = this.videoState.distance / this.processWidth * this.video.duration
  this.currentTime = this.formatTime(this.video.currentTime)
  if(this.videoState.playState) {
    this.play(undefined)
  }
} clicks, moves, and releases. However, this time we are dealing with the height of the known sound div.
// app.component.ts

// 声音条 鼠标按下
handleVolProgressDown(event: any) {
  this.voiceState.topInit = this.getOffset(this.voiceProOut, undefined).top
  this.volProcessHeight = this.voiceProOut.clientHeight
  this.voiceState.downState = true //按下鼠标标志
  this.voiceState.distance = this.volProcessHeight - (event.clientY + document.documentElement.scrollTop - this.voiceState.topInit)
}
// 声音 滚动条移动
handleVolProgressMove(event: any) {
  if(!this.voiceState.downState) return
    let disY = this.voiceState.topInit + this.volProcessHeight - (event.clientY + document.documentElement.scrollTop)
    if(disY > this.volProcessHeight - 2) { // 容错处理
      disY = this.volProcessHeight - 2
    }
    if(disY < 0) { // 容错处理
      disY = 0
    }
    this.voiceState.distance = disY
    this.video.volume = this.voiceState.distance / this.volProcessHeight
    this.videoOption.volume = Math.round(this.video.volume * 100)
}
// 声音 鼠标抬起
handleVolProgressUp(event: any) {
  this.voiceState.downState = false //按下鼠标标志
  let voiceRate =  this.voiceState.distance / this.volProcessHeight
  if(voiceRate > 1) {
    voiceRate = 1
  }
  if(voiceRate < 0) {
    voiceRate = 0
  }
  this.video.volume = voiceRate
  this.videoOption.volume = Math.round(this.video.volume * 100); // 赋值给视频声音
}
gif picture To show the effect:

Full screen, sound and picture-in-picture are difficult to capture, andGif
cannot be reflected on
For detailed code, please go to video-ng to get it.
【End】
For more programming-related knowledge, please visit: Introduction to Programming! !
The above is the detailed content of How to customize the video player in Angular. For more information, please follow other related articles on the PHP Chinese website!

Hot AI Tools

Undresser.AI Undress
AI-powered app for creating realistic nude photos

AI Clothes Remover
Online AI tool for removing clothes from photos.

Undress AI Tool
Undress images for free

Clothoff.io
AI clothes remover

Video Face Swap
Swap faces in any video effortlessly with our completely free AI face swap tool!

Hot Article

Hot Tools

Notepad++7.3.1
Easy-to-use and free code editor

SublimeText3 Chinese version
Chinese version, very easy to use

Zend Studio 13.0.1
Powerful PHP integrated development environment

Dreamweaver CS6
Visual web development tools

SublimeText3 Mac version
God-level code editing software (SublimeText3)

Hot Topics
 1386
1386
 52
52
 Let's talk about metadata and decorators in Angular
Feb 28, 2022 am 11:10 AM
This article continues the learning of Angular, takes you to understand the metadata and decorators in Angular, and briefly understands their usage. I hope it will be helpful to everyone!
 Detailed explanation of angular learning state manager NgRx
May 25, 2022 am 11:01 AM
This article will give you an in-depth understanding of Angular's state manager NgRx and introduce how to use NgRx. I hope it will be helpful to you!
 How to install Angular on Ubuntu 24.04
Mar 23, 2024 pm 12:20 PM
Angular.js is a freely accessible JavaScript platform for creating dynamic applications. It allows you to express various aspects of your application quickly and clearly by extending the syntax of HTML as a template language. Angular.js provides a range of tools to help you write, update and test your code. Additionally, it provides many features such as routing and form management. This guide will discuss how to install Angular on Ubuntu24. First, you need to install Node.js. Node.js is a JavaScript running environment based on the ChromeV8 engine that allows you to run JavaScript code on the server side. To be in Ub
 An article exploring server-side rendering (SSR) in Angular
Dec 27, 2022 pm 07:24 PM
Do you know Angular Universal? It can help the website provide better SEO support!
 How to use PHP and Angular for front-end development
May 11, 2023 pm 04:04 PM
With the rapid development of the Internet, front-end development technology is also constantly improving and iterating. PHP and Angular are two technologies widely used in front-end development. PHP is a server-side scripting language that can handle tasks such as processing forms, generating dynamic pages, and managing access permissions. Angular is a JavaScript framework that can be used to develop single-page applications and build componentized web applications. This article will introduce how to use PHP and Angular for front-end development, and how to combine them
 Angular + NG-ZORRO quickly develop a backend system
Apr 21, 2022 am 10:45 AM
This article will share with you an Angular practical experience and learn how to quickly develop a backend system using angualr combined with ng-zorro. I hope it will be helpful to everyone!
 A brief analysis of how to use monaco-editor in angular
Oct 17, 2022 pm 08:04 PM
How to use monaco-editor in angular? The following article records the use of monaco-editor in angular that was used in a recent business. I hope it will be helpful to everyone!
 A brief analysis of independent components in Angular and see how to use them
Jun 23, 2022 pm 03:49 PM
This article will take you through the independent components in Angular, how to create an independent component in Angular, and how to import existing modules into the independent component. I hope it will be helpful to you!


