
This article brings you relevant knowledge about javascript, which mainly introduces related issues about JavaScript WebAPI, including WebAPI background knowledge, obtaining elements, operating elements, operating nodes and some Let’s take a look at the case sharing below. I hope it will be helpful to everyone.

[Related recommendations: javascript video tutorial, web front-end】
JS is divided into three major parts:
WebAPI includes DOM BOM.
DOM stands for Document Object Model .
W3C The standard provides us with a series of functions that allow us to operate:
The structure of a page is a tree structure, called DOM tree.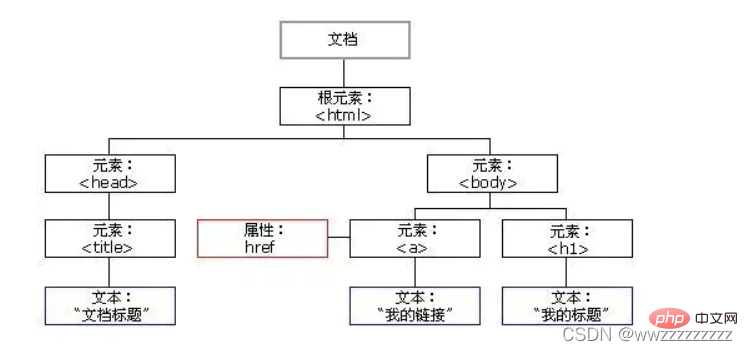
.
to represent.
to represent.
querySelector can completely reuse the CSS selector knowledge learned previously to achieve a faster and more accurate way to obtain Element object
Syntax format:
let element = document.querySelector(selectirs);
Fill in one or more selectors
Usage example:
<p> abc </p>
<p> def </p>
<p><input></p>
<script>
let one = document.querySelector('.one');
console.log(one);
let two = document.querySelector('#two');
console.log(two);
let three = document.querySelector('input');
console.log(three);
</script>Run screenshot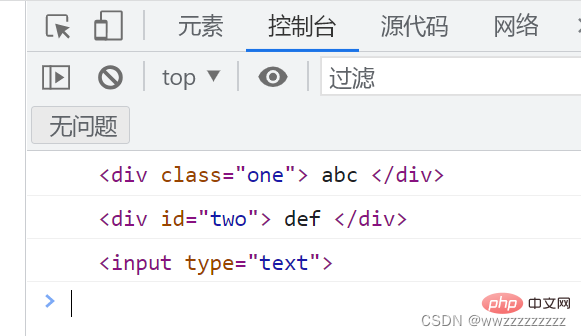 ##2.2 querySelectorAll
<p>123</p>
<p>456</p>
<script>
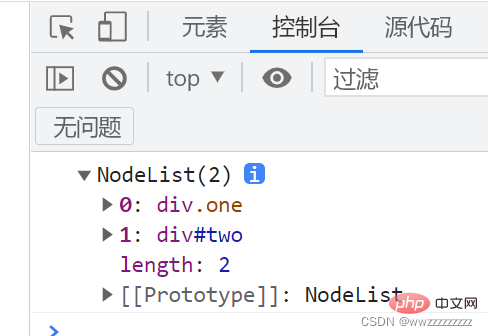
let ps = document.querySelectorAll('p');
console.log(ps);
</script>
 3. Manipulate elements
Attribute represents the "rendered" text content of a node and its descendants
Does not recognize html tags. Is non-standard (initiated by IE). Read The result does not retain line breaks and spaces in the html source code.
Usage example: <p>hello world</p>
<p>hello world</p>
<script>
let p = document.querySelector('.two');
console.log(p);
p.innerText = '<span>world hello';
</script>
:Passed
innerText Unable to get to the p internal html structure, only the text content can be obtained. 2. innerHTML
The property sets or gets the descendants of the element represented by HTML syntax Note
:
<p>hello world</p>
<p>hello world</p>
<script>
let p = document.querySelector('.two');
console.log(p);
p.innerHTML = '<span>world hello';
</script>
innerHTML
Not only can you get the html structure of the page, but you can also modify the structure. And the content you get is retained. Spaces and line breaks 3.2 Get/modify element attributes
Get attributes# through element.properties ##Code example:
<img src="/static/imghw/default1.png" data-src="male.png" class="lazy" alt="Understand JavaScript WebAPI in one article" >
<script>
let img = document.querySelector('img');
img.onclick = function() {
if(img.title.lastIndexOf("男") != -1){
img.src = 'female.png';
img.title = '女';
}else{
img.src = 'male.png';
img.title = '男';
}
}
</script>##3.3 Get/modify form element attributes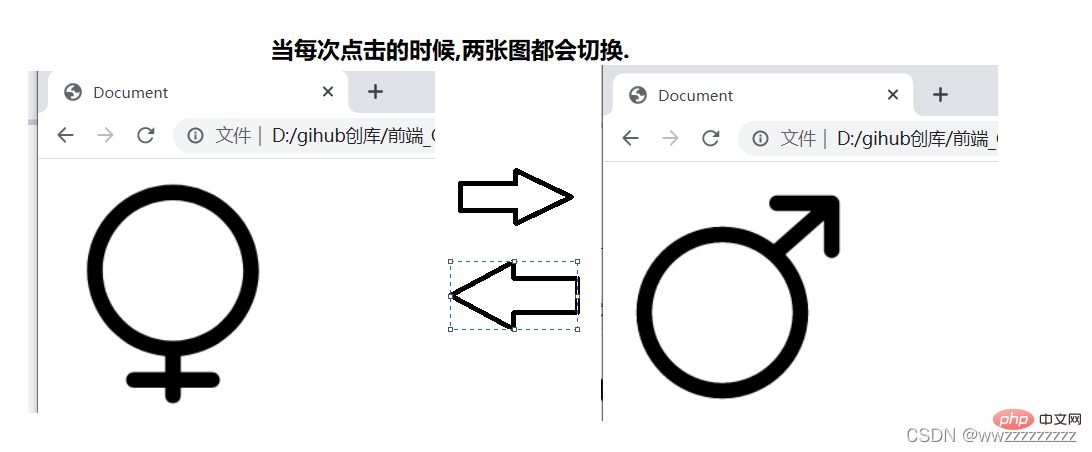 Code example 1: Play pause transition.
<input><script>
let input = document.querySelector('input');
input.onclick = function() {
if(input.value == '播放'){
input.value = '暂停';
}else{
input.value = '播放';
}
}</script>运行截图 CSS 中指定给元素的属性, 都可以通过 JS 来修改 style 中的属性都是使用 驼峰命名 的方式和 CSS 属性对应的. 运行截图: 运行截图: 分为两个步骤: 运行截图:代码示例2: 计数
<input>
<input>
<script>
let one = document.querySelector('#one');
let add = document.querySelector('#add');
add.onclick = function() {
one.value++;
}
</script>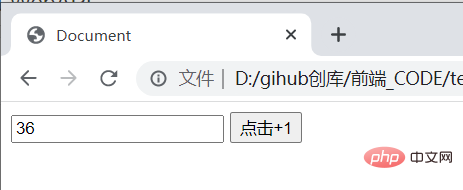
代码示例3: 全选/取消全选按钮
<h3>选择你喜欢玩的游戏</h3>
<input>王者荣耀<br>
<input>和平精英<br>
<input>开心消消乐<br>
<input>我的世界<br>
<input>全选 <script>
let games = document.querySelectorAll('.game');
let all = document.querySelector('.all');
all.onclick = function(){
for (let i = 0; i < games.length; i++) {
games[i].checked = all.checked;
}
}
for (let i = 0; i < games.length; i++) {
games[i].onclick = function() {
all.checked = allChecked();
}
}
function allChecked() {
for (let i = 0; i < games.length; i++) {
if(!games[i].checked){
return false;
}
}
return true;
}
</script>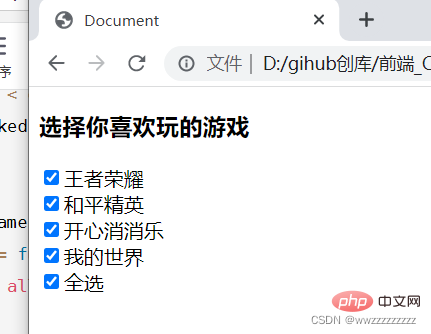
3.4 获取/修改样式属性
例如: font-size => fontSize, background-color => backgroundColor 等1. 行内样式操作
element.style.[属性名] = [属性值];element.style.cssText = [属性名+属性值];
代码示例: 字体变大
<p>你好</p>
<script>
let p = document.querySelector('p');
p.onclick = function() {
let fontSize = parseInt(p.style.fontSize);
fontSize += 10;
p.style.fontSize = fontSize + "px";//注意有单位的要带上单位
}
</script>
2. 类名样式操作
element.className = [CSS 类名];
代码示例: 背景颜色变化
<style>
html,body{
height: 100%;
width: 100%;
}
p {
height: 100%;
width: 100%;
}
.black{
background-color:black;
color: gray;
}
.gray {
background-color: gray;
color: black;
}
</style>
<p>
你好!
</p>
<script>
let p = document.querySelector('p');
p.onclick = function() {
if(p.className.indexOf("black") != -1){
p.className = 'gray';
}else{
p.className = 'black';
}
}
</script>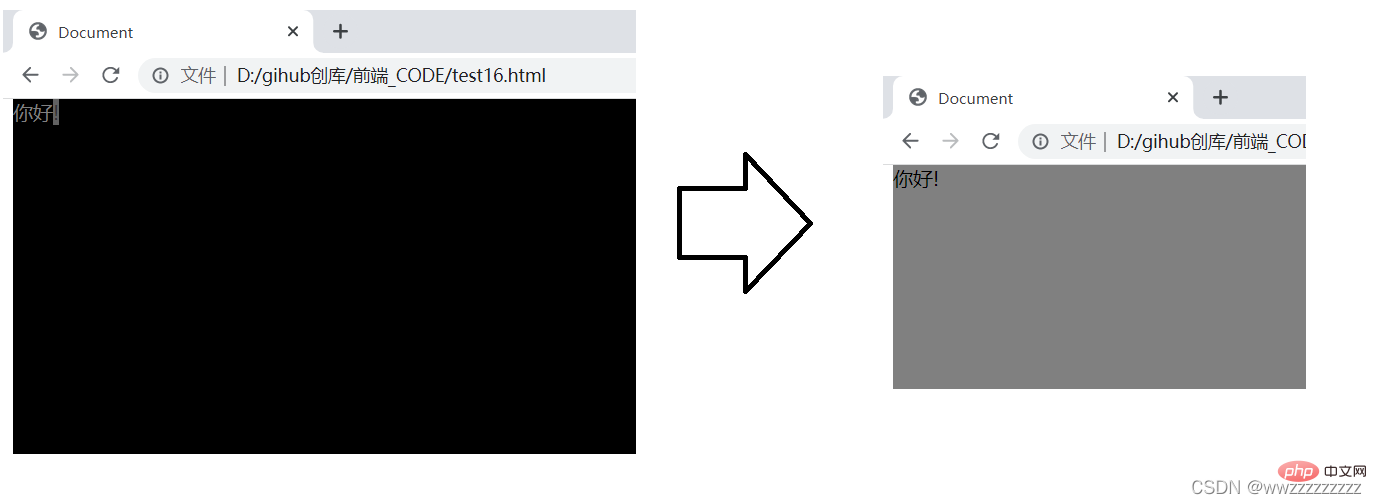
4. 操作节点
4.1 新增节点
① createElement 创建元素节点.
② createTextNode 创建文本节点
③ createComment 创建注释节点
④ createAttribute 创建属性节点
① 使用 appendChild 将节点插入到指定节点的最后一个孩子之后
②使用insertBefore将节点插入到指定节点之前代码示例:
<p>
</p>
<script>
let p = document.createElement('p');
p.id = 'myp';
p.className = 'one';
p.innerHTML = 'hehe';
let test = document.querySelector('.test');
test.appendChild(p);
</script>
代码示例: 当一个节点插入两次,相当于移动.
    <p>
        </p><p>1</p>
        <p>2</p>
        <p>3</p>
        <p>4</p>
运行结果: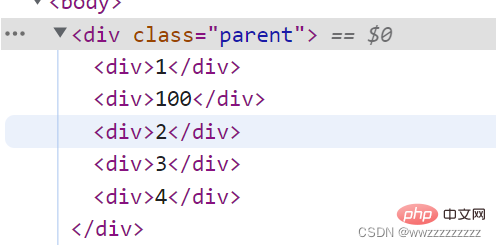
使用 removeChild 删除子节点
oldChild = element.removeChild(child);
注: 如果 child 不是 element 的子节点,会抛异常
<p>
</p><p>1</p>
<p>2</p>
<p>3</p>
<script>
let parent = document.querySelector('.parent');
let childs = document.querySelectorAll('.child');
parent.removeChild(childs[1]);
</script>运行结果: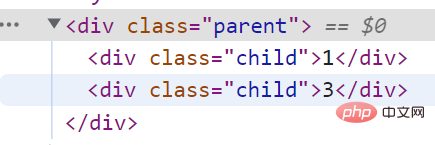
nbsp;html>
<meta>
<meta>
<meta>
<title>猜数字</title>
<p>
</p><p><input></p>
<p>
请输入要猜的数字: <input> <input>
</p>
<p>
已经猜的次数: <span>0</span>
</p>
<p>
结果: <span></span>
</p>
<script>
let guessNum = document.querySelector('.guessNum');
let press = document.querySelector('.press');
let count = document.querySelector('.count');
let result = document.querySelector('.result');
let countCount = 0;
let guessResult = Math.floor(Math.random()*100)+1;
press.onclick = function(){
countCount++;
count.innerHTML = countCount;
guessNumber = parseInt(guessNum.value);
if(guessNumber == guessResult){
result.innerHTML = '猜对了';
result.style = 'color : red';
}else if(guessNumber < guessResult){
result.innerHTML = '猜小了';
result.style = 'color : blue';
}else{
result.innerHTML = '猜大了';
result.style = 'color : orange';
}
}
let again = document.querySelector('.again');
again.onclick = function() {
guessResult = Math.floor(Math.random()*100)+1;
countCount = 0;
count.innerHTML = 0;
guessNum.value = '';
result.innerHTML ='';
}
</script>运行截图: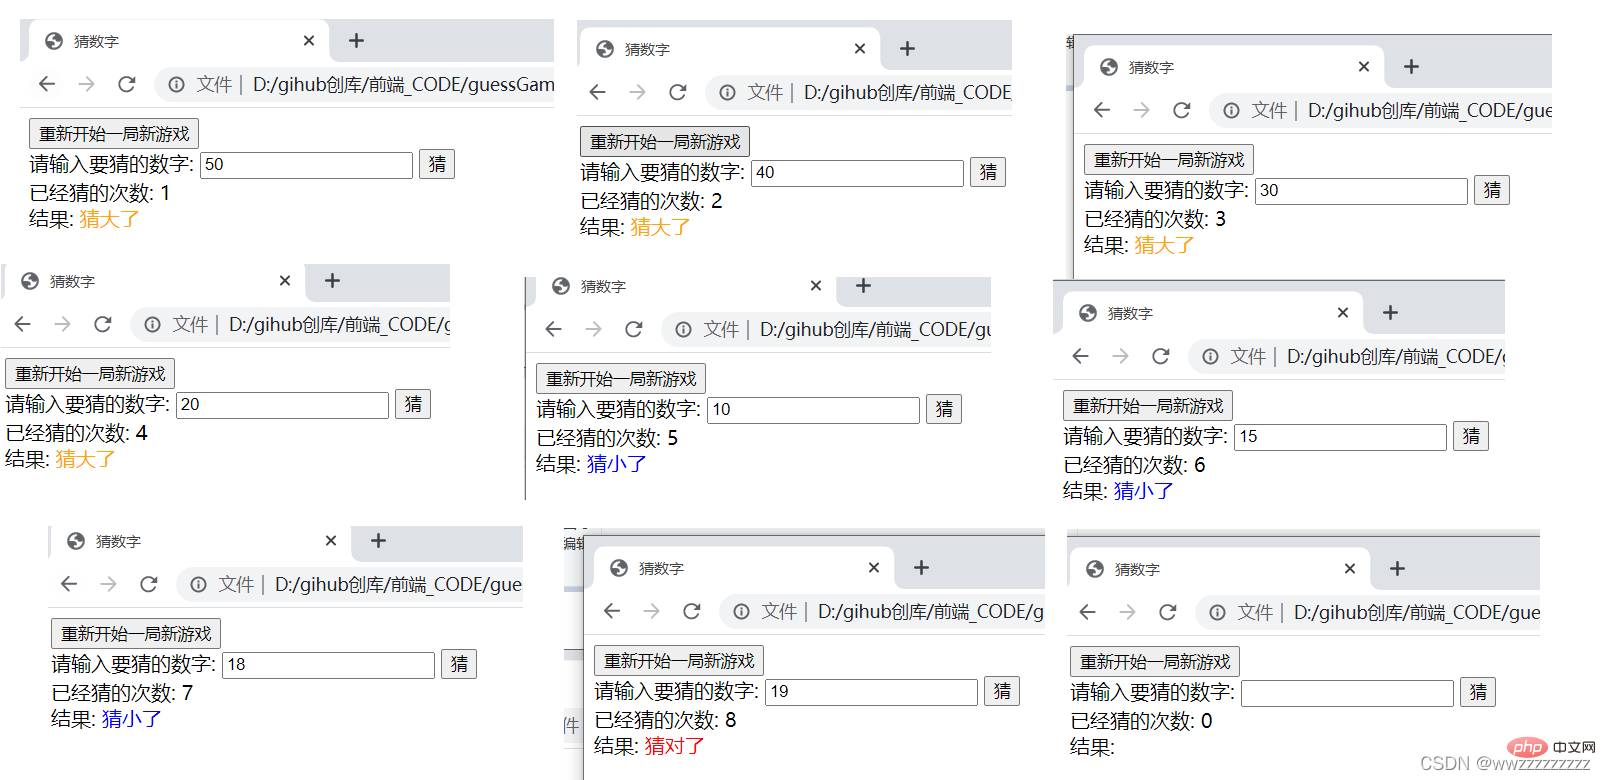
nbsp;html>
<meta>
<meta>
<meta>
<title>表白墙</title>
<p>
</p><p>表白墙</p>
<p>输入后点击提交,会将信息显示在表格中</p>
<p><span>谁:</span><input></p>
<p><span>对谁:</span><input></p>
<p><span>说什么:</span><input></p>
<p><input></p>
<style>
/* 去除浏览器默认样式 */
* {
margin: 0;
padding: 0;
}
/* 设置总宽度 */
.parent {
width: 400px;
margin: 0 auto;
}
/* 涉资表白墙样式 */
#wall {
font-size: 30px;
font-weight: 700;
text-align: center;
margin: 5px;
}
/* 设置提示信息样式 */
#remind{
font-size:13px;
text-align: center;
color:gray;
margin: 5px;
}
/* 设置弹性布局 */
.one {
display: flex;
justify-content: center;
align-items: center;
height: 40px;
}
/* 设置文字内容 */
.two {
width: 100px;
line-height: 40px;
}
/* 设置输入框 */
.one .text{
width: 200px;
height: 20px;
}
/* 提交按钮的设置 */
.one .press{
width: 304px;
height: 40px;
color:white;
background-color: orange;
border-radius: 5px;
border: none;
}
/* 设置鼠标点击的时候改变颜色 */
.one .press:active{
background-color: red;
}
/* 提交之和内容的设置 */
.elem {
text-align: center;
}
</style>
<script>
// 获取到输入框元素
let texts = document.querySelectorAll('.text');
// 获取到提交按钮元素
let press = document.querySelector('.press');
// 设置单击事件
press.onclick = function() {
let user1 = texts[0].value;
let user2 = texts[1].value;
let message = texts[2].value;
// 如果有一个为空,就提交不成功
if(user1=='' || user2=='' || message==''){
return;
}
// 这里都不为空,创建新的节点
let elem = document.createElement('p');
elem.className = 'elem';
elem.innerHTML = user1 + '对' + user2 + '说: ' +message;
// 插入新的节点
let parent = document.querySelector('.parent');
parent.appendChild(elem);
// 提交之后,将输入框置空.
for(let i = 0; i < 3; i++){
texts[i].value='';
}
}
</script>运行截图: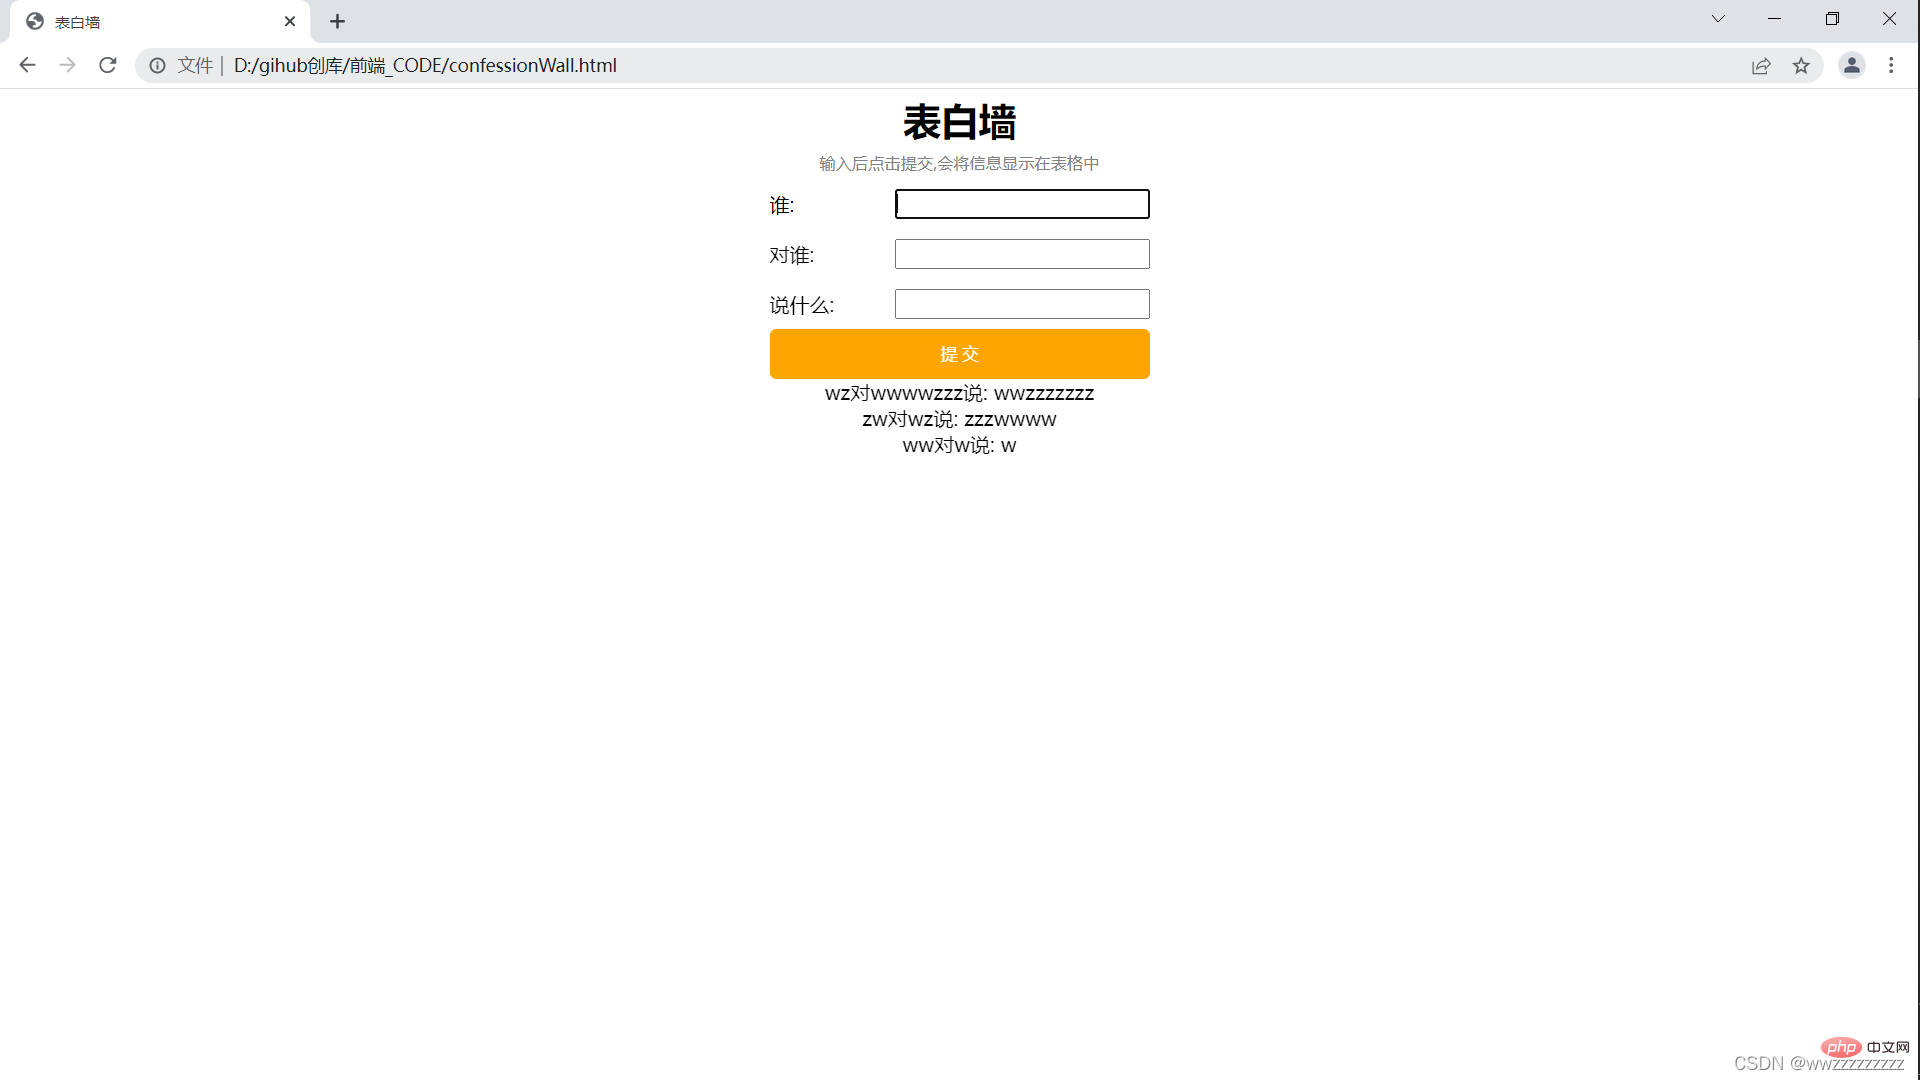
nbsp;html>
<meta>
<meta>
<meta>
<title>待办事项</title>
<p>
</p><p>
<input><input>
</p>
<p>
</p><p>
</p><h3>未完成</h3>
<p>
</p><h3>已完成</h3>
<style>
/* 去除浏览器默认样式 */
* {
margin: 0;
padding: 0;
}
/* 设置宽度 */
.parent {
width: 840px;
margin: 0 auto;
}
/* 设置输入框和新建的样式 */
.one {
height: 50px;
padding: 20px;
}
/* 设置输入框样式 */
.one .text{
height: 50px;
width: 600px;
}
/* 设置提交框样式 */
.one .submit {
background-color: orange;
color: white;
height: 50px;
width: 196px;
border: none;
}
/* 设置点击时的背景 */
.one .submit:active{
background-color: red;
}
/* 设置已完成和未完成的样式 */
.two{
width: 800px;
height: 800px;
display: flex;
margin: 0 auto;
}
/* 设置未完成和已完成字体样式 */
.two h3 {
height: 50px;
text-align: center;
line-height: 50px;
background-color: black;
color: white;
}
/* 设置未完成左边的样式 */
.left {
width: 50%;
height: 100%;
}
/* 设置已完成右边的样式 */
.right {
width: 50%;
height: 100%;
}
/* 新建任务的样式 */
.row {
height: 50px;
display: flex;
align-items: center;
}
/* 新建任务字体的样式 */
.row span {
width: 340px;
}
/* 新建任务的删除按钮样式 */
.row button{
width: 40px;
height: 40px;
}
</style>
<script>
// 首先获取新建按钮元素
let submit = document.querySelector('.submit');
// 设置鼠标单击事件
submit.onclick = function() {
// 获取输入框元素
let text = document.querySelector('.text');
// 判断输入框内容是否为空
if(text.value == '') return;
// 新建代办事项
let row = document.createElement('p');
row.className='row';
let checkBox = document.createElement('input');
checkBox.type='checkbox';
let thing = document.createElement('span');
thing.innerHTML = text.value;
let del = document.createElement('button');
del.innerHTML='删除';
row.appendChild(checkBox);
row.appendChild(thing);
row.appendChild(del);
// 获取左边元素
let left = document.querySelector('.left');
left.appendChild(row);
// 添加节点之后置空
text.value='';
// 设置选择框的鼠标单击事件
checkBox.onclick = function() {
// 如果被选择了就移动已完成
// 如果未完成就移动到未完成
if(checkBox.checked){
let target = document.querySelector('.right');
target.appendChild(row);
}else{
let target = document.q uerySelector('.left');
target.appendChild(row);
}
}
// 设置删除按钮的鼠标单击事件
del.onclick = function() {
// 使用 parentNode 获取到父节点
let parent = row.parentNode;
// 删除该节点
parent.removeChild(row);
}
}
</script>运行截图: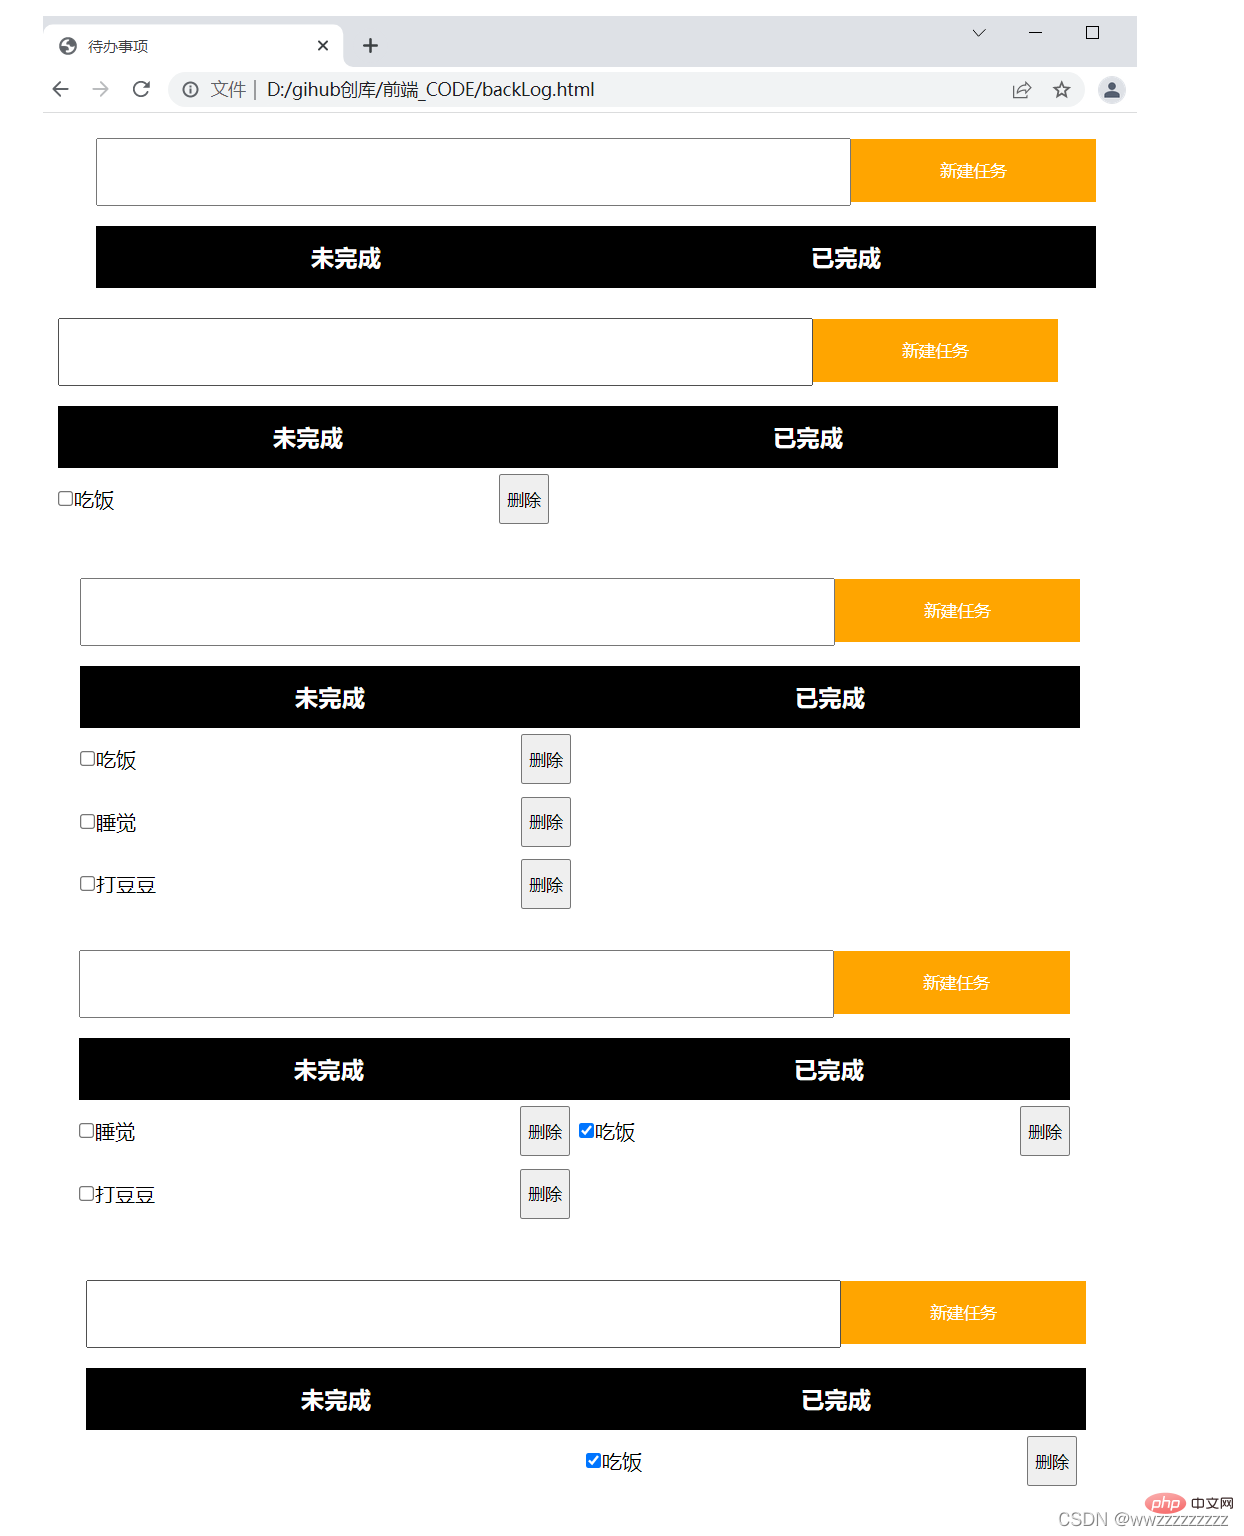
【相关推荐:javascript视频教程、web前端】
The above is the detailed content of Understand JavaScript WebAPI in one article. For more information, please follow other related articles on the PHP Chinese website!