 Development Tools
 VSCode
 Let's talk about how to build a MarkDown writing environment in VSCode
Let's talk about how to build a MarkDown writing environment in VSCode
Typora charges? The following article will introduce to you how to build a MarkDown writing environment in VSCode. It is an open source software and is completely trustworthy! highly recommended!

The MarkDown writing tool I am most accustomed to using is Typora. The WYSIWYG user experience, coupled with the rich themes, makes people unable to help but shout "It smells so good."
But everyone knows that after Typora 1.0, it started to charge. Recently, the Typora installed on my Mac computer has started to prompt me to upgrade. Moreover, when I was sorting out my "Non-Scum Counterattack Manual", Typora was very stuck because the file was too large. So, after much thought, I decided to use VS Code to build a MarkDwon writing environment.
1. VS Code installation
Needless to say, the installation of VS Code is as simple as downloading the corresponding version of the installation package from the official website and installing it. [Recommended learning: "vscode introductory tutorial"]
Official website download address: code.visualstudio.com/Download

This is VS Code installed on my Windows computer. Note that my top bar and sidebar are all in Chinese because the Chinese plug-in is installed:

2. MarkDown plug-in enhancement
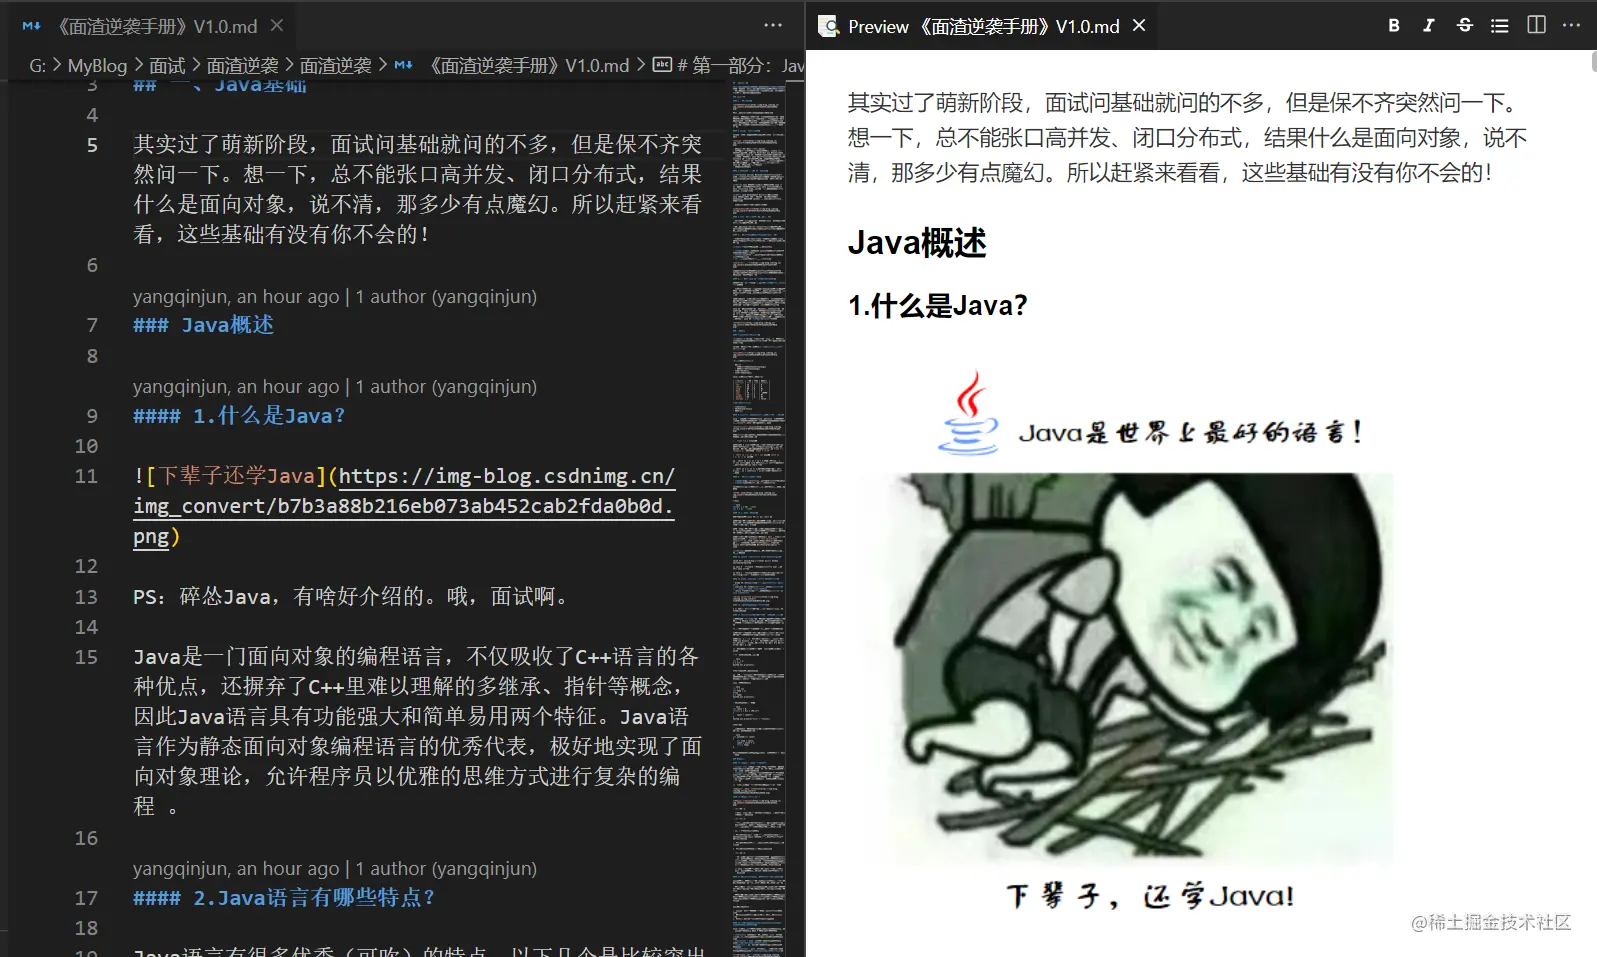
Let’s take a look at the effect of opening the MarkDown file directly with VS Code:

You can open a double-column preview in the upper right corner:

It looks okay, but there is room for improvement, and we can install some plug-ins to make it better.
1. Markdown All in One
Markdown All in One is an all-in-one MardDown enhancement plug-in:

It claims to support all the functions required by Markdown, including keyboard shortcuts, directories, automatic preview, etc. You can take a look at its extension page or the warehouse documentation:
- https: //marketplace.visualstudio.com/items?itemName=yzhang.markdown-all-in-one
- https://github.com/yzhang-gh/vscode-markdown/blob/master/ README.md

2.Markdown Image
Markdown Image is mainly for inserting pictures into MarkDown Extension to support placing images on local or third-party image beds or object storage.
Using this plug-in, you can directly copy local images similar to Typora, and then paste them into MarkDown. The image files are placed locally by default, and can also be configured to support Imgur, seven Niu, SM.MS, Coding and other picture beds.

After installing this plug-in, you can do some configuration, enter the configuration page, search: markdown-image, you can configure the relative path, default image The file is saved in the /res path.

Use the shortcut key Shift Alt V to directly paste the copied image from the clipboard into the document:

3.Markdown Preview Enhanced
Markdown Preview Enhanced is an enhancement to the preview function of VS Code, which can improve the preview experience of VS Code.

After installing this plug-in, click the preview button to use the enhanced preview:

You can also view it in the sidebar The directory is displayed, but after the directory is displayed, the entire interface appears a bit cramped.

It also provides multiple preview themes:

4.Word Count CJK
Word Count CJK is a plug-in used to count the number of Chinese words:

For someone like me who loves long articles, seeing the number of words in the article also gives me a sense of accomplishment.

5.MarkDown Editor
What if we just want the Typora WYSIWYG experience?
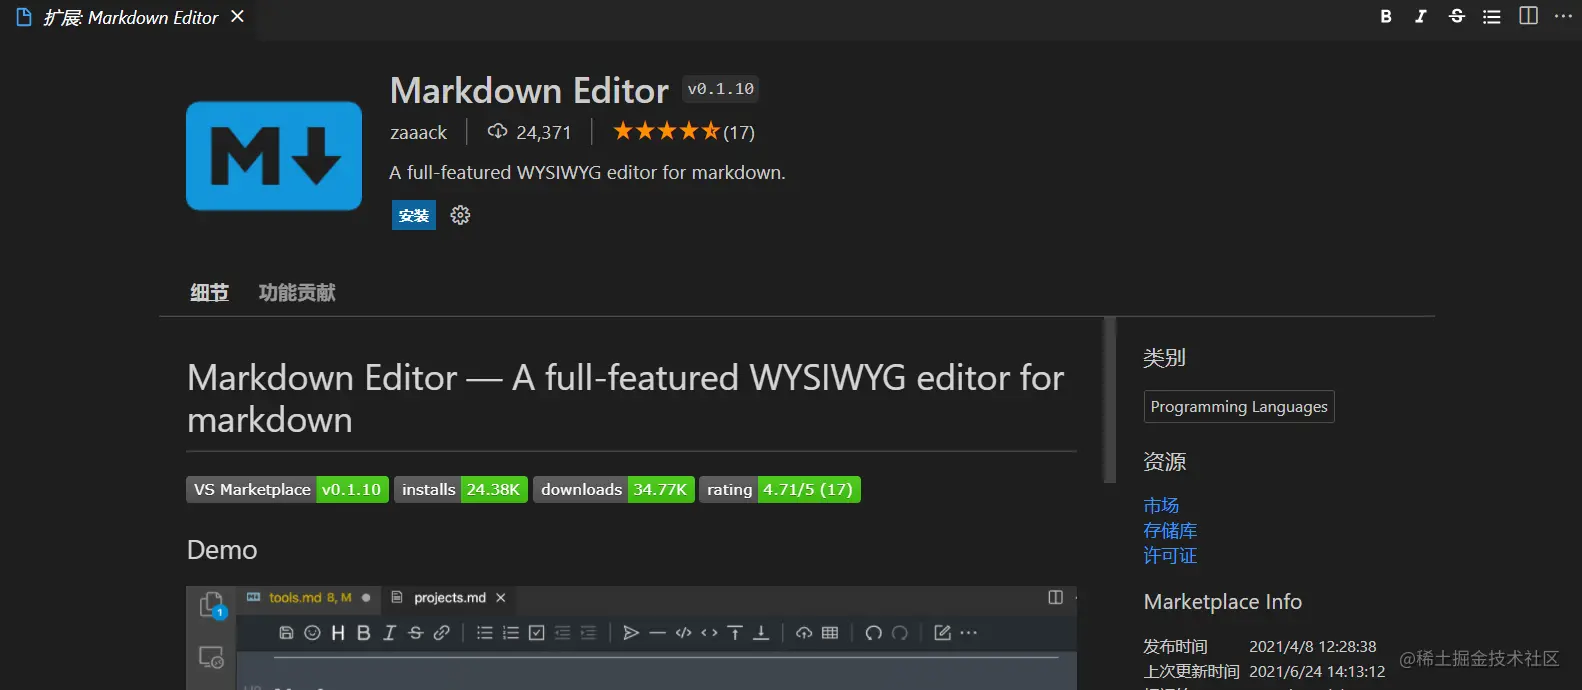
I also found a plug-in MarkDown Editor:

After the installation is completed, select Open with MarkDown Editor for the MD file. MD files can now be opened in WYSIWYG mode.

There are some other plug-ins:
- markdownlint: markdow format check
- Markdown Preview Github Styling: GitHub theme preview
Everyone can also experience it.
3. Picture bed construction
When writing in MarkDown, there is another important requirement, which is the picture bed. The articles we write must be published, in MD The pictures are saved in the form of paths, and the local paths cannot be accessed when published, so we need to connect the MD editor to the picture bed function.
I used Typora PicGo Gitee to build a layout bed before. Later, Gitee had that problem and changed it to Typora PicGo Github. We also followed this The idea is to build a layout bed on VS Code.
1.GitHub warehouse configuration
2.1. Create a new warehouse
Create a new GitHub warehouse:
- Public, necessary, to prevent inaccessibility
- Add a READM file to prevent the warehouse from having a trunk branch
2.2. Generate token
Enter settings
Find developer settings
Create new Personal access tokens, set the time to never expire, and give the repo permissions That’s it
The generated Token must be recorded and will only be displayed once
2. Install and configure PicGo
2.1. Install the PicGO plug-in
Search for PicGo in VS Code , Installation:
##2.2. Configure PicGO
- Open PicGo’s extended configuration
- Configure uploader, select github
- GitHub related configuration, use my configuration For example:
- ##Branch: main, branch
- Path: empty, you can also configure a relative path
- Custome Url: empty,
-
In fact, you can configure a CDN accelerated url, jsDeliver, which is a free CDN. It seems to be unavailable recently. You can also try it. How to use it:
https://cdn.jsdelivr.net/gh/your github username/your warehouse name@released version number Repo: fighter3/picgo-win, username/warehouse format - Token: Just fill in the one you saved before
3. Use
- to open the MD file, paste a picture from somewhere else, use
Ctrl Alt U, you can see the file Successfully uploaded and can preview
Shortcut keys related to image upload:
| OS | Upload pictures from the paste version | Upload pictures from the browser | Upload pictures from the input box |
|---|---|---|---|
| Windows/ Unix | Ctrl Alt U |
Ctrl Alt E |
Ctrl Alt O |
| OsX | Cmd Opt U |
Cmd Opt E |
Cmd Opt O |
Using GitHub as a picture bed is still not ideal overall. Uploading and access are not stable. We can also change the picture bed to seven in the PicGo plug-in. Niu, or Tencent Cloud, Alibaba Cloud, the process is generally similar and relatively simple.
For more knowledge about VSCode, please visit: vscode tutorial!
The above is the detailed content of Let's talk about how to build a MarkDown writing environment in VSCode. For more information, please follow other related articles on the PHP Chinese website!

Hot AI Tools

Undresser.AI Undress
AI-powered app for creating realistic nude photos

AI Clothes Remover
Online AI tool for removing clothes from photos.

Undress AI Tool
Undress images for free

Clothoff.io
AI clothes remover

AI Hentai Generator
Generate AI Hentai for free.

Hot Article

Hot Tools

Notepad++7.3.1
Easy-to-use and free code editor

SublimeText3 Chinese version
Chinese version, very easy to use

Zend Studio 13.0.1
Powerful PHP integrated development environment

Dreamweaver CS6
Visual web development tools

SublimeText3 Mac version
God-level code editing software (SublimeText3)

Hot Topics
 How to view word documents in vscode How to view word documents in vscode
May 09, 2024 am 09:37 AM
First, open the vscode software on the computer, click the [Extension] icon on the left, as shown in ① in the figure. Then, enter [officeviewer] in the search box of the extension interface, as shown in ② in the figure. Then, from the search Select [officeviewer] to install in the results, as shown in ③ in the figure. Finally, open the file, such as docx, pdf, etc., as shown below
 How to draw a flow chart with vscode_How to draw a flow chart with visual_studio code
Apr 23, 2024 pm 02:13 PM
First, open visual studio code on the computer, click the four square buttons on the left, then enter draw.io in the search box to query the plug-in, click Install. After installation, create a new test.drawio file, then select the test.drawio file, enter the editing mode on the left There are various graphics on the side. You can draw the flow chart by selecting at will. After drawing, click File → Embed → svg and then select Embed. Copy the svg code. Paste the copied svg code into the html code. Open the html web page and you can see it. Click on the picture on the web page to jump to the flow chart. On this page, you can zoom in and out of the flow chart. Here, we choose to click on the pencil pattern in the lower right corner to jump to the web page.
 How to write Maude in Vscode_How to write Maude in Vscode
Apr 23, 2024 am 10:25 AM
First, you can search for the Maude plug-in in the vscode plug-in manager. Then, create a new file with the extension maude to use maude's code snippets and syntax highlighting. Terminal -> New Terminal can open the vscode built-in terminal in the current folder to run the maude or full-maude program. In maude's official tutorial, there are also examples of http clients, which can be called and run as shown in the figure. If you want to associate files with the fm extension, open settings, search for fileassociations in user settings, and open settings.json. Just add an entry to the file association, that is, the entry from *.fm to maude. But full
 Caltech Chinese use AI to subvert mathematical proofs! Speed up 5 times shocked Tao Zhexuan, 80% of mathematical steps are fully automated
Apr 23, 2024 pm 03:01 PM
LeanCopilot, this formal mathematics tool that has been praised by many mathematicians such as Terence Tao, has evolved again? Just now, Caltech professor Anima Anandkumar announced that the team released an expanded version of the LeanCopilot paper and updated the code base. Image paper address: https://arxiv.org/pdf/2404.12534.pdf The latest experiments show that this Copilot tool can automate more than 80% of the mathematical proof steps! This record is 2.3 times better than the previous baseline aesop. And, as before, it's open source under the MIT license. In the picture, he is Song Peiyang, a Chinese boy. He is
 How to enable background updates in vscode How to enable background updates in vscode
May 09, 2024 am 09:52 AM
1. First, after opening the interface, click the file menu in the upper left corner. 2. Then, click the settings button in the preferences column. 3. Then, in the settings page that jumps, find the update section. 4. Finally, click the mouse to check and enable it. Download and install the new VSCode version button in the background on Windows and restart the program.
 How to add files to vscode workspace How to add files to vscode workspace
May 09, 2024 am 09:43 AM
1. First, open the vscode software, click the explorer icon, and find the workspace window 2. Then, click the file menu in the upper left corner and find the add folder to workspace option 3. Finally, find the folder location in the local disk , click the add button
 How to disable wsl configuration file in vscode How to disable wsl configuration file in vscode
May 09, 2024 am 10:30 AM
1. First, open the settings option in the settings menu. 2. Then, find the terminal column in the commonly used page. 3. Finally, uncheck the usewslprofiles button on the right side of the column.
 How to set animation smooth insertion in VScode VScode tutorial to set animation smooth insertion
May 09, 2024 am 09:49 AM
1. First, after opening the interface, click the workspace interface 2. Then, in the open editing panel, click the File menu 3. Then, click the Settings button under the Preferences column 4. Finally, click the mouse to check the CursorSmoothCaretAnimation button and save Just set it


