

What are the views of slides?

How to view slides: 1. Normal view, including outline pane and slide pane, which can use various features of the presentation at the same place; 2. Slide browsing view, which can be on the screen See all the slides in the presentation at the same time; 3. Notes page view, which is used to add notes or edit notes to the slides in the presentation; 4. Reading view, which is the final effect of the presentation.

The operating environment of this tutorial: windows10 system, WPS Office2022 version, DELL G3 computer.
What are the viewing modes of slides?
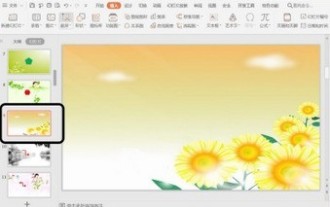
Open PPT, click "View", you can see four view modes on the right side of the menu bar, namely "Normal", "Slide View" ”, “Notes Page” and “Reading View”.

1. Normal view:
Contains three panes: outline pane, slide pane and notes pane. , users can use various features of the presentation in the same place, and drag the pane borders to resize different panes.
Outline view: It contains the outline pane, slide thumbnail pane and slide notes page pane. Displays the text content and organizational structure of the presentation in the outline pane. Objects such as graphics, images, and charts are not displayed. When editing a presentation in outline view, you can adjust the order of each slide. You can adjust the hierarchical level and order of the title within a slide. You can copy or move the text of a slide to other slides
2. Slide browsing view:
You can see all the slides in the presentation on the screen at the same time. These slides are neatly displayed as thumbnails. in the same window. You can see the overall changes in the document after changing the background design, color scheme or template of the slide. You can easily add, delete and move the order of slides between slides, and select animated transitions between slides. ,

3. Notes page view:
It is mainly used to add notes or comments to the slides in the presentation. Note content needs to be edited and modified. The content of the slide cannot be edited in this view mode. After switching to the notes page view, a thumbnail of the content of the current slide is displayed at the top of the page, and a note content placeholder is displayed at the bottom.

4. Reading view:
Reading view is the final effect of the presentation. When the presentation is created to a paragraph, You can use this view to check and make timely modifications if you are not satisfied.

For more related knowledge, please visit the FAQ column!
The above is the detailed content of What are the views of slides?. For more information, please follow other related articles on the PHP Chinese website!

Hot AI Tools

Undresser.AI Undress
AI-powered app for creating realistic nude photos

AI Clothes Remover
Online AI tool for removing clothes from photos.

Undress AI Tool
Undress images for free

Clothoff.io
AI clothes remover

AI Hentai Generator
Generate AI Hentai for free.

Hot Article
Hot Tools

Notepad++7.3.1
Easy-to-use and free code editor

SublimeText3 Chinese version
Chinese version, very easy to use

Zend Studio 13.0.1
Powerful PHP integrated development environment

Dreamweaver CS6
Visual web development tools

SublimeText3 Mac version
God-level code editing software (SublimeText3)
Hot Topics
 1377
1377
 52
52

 How to fix background slideshow not working in Windows 11, 10
May 05, 2023 pm 07:16 PM
How to fix background slideshow not working in Windows 11, 10
May 05, 2023 pm 07:16 PM
On Windows 11/10 systems, some users claim that the slideshow on the desktop background has stopped working. Users are confused as to why photos on their laptop's background screen no longer slide. The reasons for this issue where slideshows are not working are described below. A third-party desktop customization application is installed. In power options, the desktop background slideshow setting is paused. The folder containing the background images is deleted. The screen may turn off after the slideshow is complete. After investigating the above reasons, we have created a list of fixes that will undoubtedly help users resolve the issue. Workaround – A deactivated window may be one of the causes of this issue. So, try activating Windows and check if the issue is resolved. Try to apply it via Settings
 Why does the slideshow have black borders when playing in full screen?
Oct 20, 2023 pm 03:25 PM
Why does the slideshow have black borders when playing in full screen?
Oct 20, 2023 pm 03:25 PM
There may be black borders in the full-screen slideshow due to screen resolution mismatch, image size mismatch, incorrect zoom mode settings, monitor settings issues, slide design issues, etc. Detailed introduction: 1. Screen resolution does not match. A common reason for black borders is that the screen resolution does not match the slide size. When the size of the slide is smaller than the screen resolution, black borders will appear during playback. The solution is to adjust Size the slide so that it matches the screen resolution. In PowerPoint, you can select the "Design" tab, then click "Slide Size" and so on.
 How to create a slideshow with background music on Windows 11?
Apr 21, 2023 am 10:07 AM
How to create a slideshow with background music on Windows 11?
Apr 21, 2023 am 10:07 AM
Slideshows are a great way to organize pictures on your Windows 11 computer. Sometimes, Windows users may face some kind of hardware limitation or system update and they need a way to store their files so that they are not accidentally deleted or lost. Additionally, it makes sorting and displaying photos much easier than having to manually show them to people by scrolling through them one by one. Slideshows are also a great way to bring together photos from different sources (camera, phone, USB drive) into an easy-to-enjoy format. Fortunately, you can use some useful third-party applications to create these slideshows without being forced to use tools like PowerPoint. The app is suitable for business presentations, but Pow
 How to convert PowerPoint to Google Slides?
Apr 22, 2023 pm 03:19 PM
How to convert PowerPoint to Google Slides?
Apr 22, 2023 pm 03:19 PM
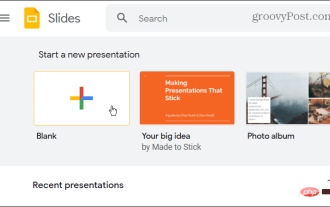
How to Convert PowerPoint to Google Slides One of the easiest ways to convert a complete PowerPoint presentation to Google Slides is to upload it. By uploading a PowerPoint (PPT or PPTX) file to Google Slides, the file will automatically be converted into a format suitable for Google Slides. To convert PowerPoint to Google Slides directly, follow these steps: Sign in to your Google account, go to the Google Slides page, and click on the blank space under the "Start a new presentation" section. In the new presentation page, click File&g
 How to hide text until clicked in Powerpoint
Apr 14, 2023 pm 04:40 PM
How to hide text until clicked in Powerpoint
Apr 14, 2023 pm 04:40 PM
How to hide text before any click in PowerPoint If you want text to appear when you click anywhere on a PowerPoint slide, setting it up is quick and easy. To hide text before clicking any button in PowerPoint: Open your PowerPoint document and click the Insert menu. Click on New Slide. Choose Blank or one of the other presets. Still in the Insert menu, click Text Box. Drag a text box onto the slide. Click the text box and enter your
 Introduction to the method of inserting heptagons into PPT slides
Mar 26, 2024 pm 07:46 PM
Introduction to the method of inserting heptagons into PPT slides
Mar 26, 2024 pm 07:46 PM
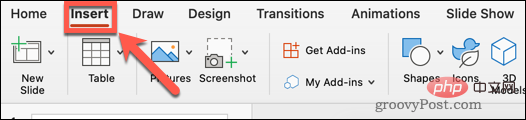
1. Open the PPT slide document, and in the [Outline, Slide] column on the left side of the PPT, click to select the slide where you want to insert the basic [shape]. 2. After selecting, select the [Insert] menu in the function menu bar above the PPT and click. 3. After clicking the [Insert] menu, the [Insert] submenu bar pops up below the function menu bar. Select the [Shape] menu in the [Insert] submenu bar. 4. Click the [Shape] menu to pop up the preset shape type selection page. 5. In the shape type selection page, select the [Heptagon] shape and click. 6. After clicking, move the mouse to the slide editing interface, press the mouse to draw, and release the mouse after the drawing is completed. Complete the insertion of the [heptagon] shape.
 Steps to unify the theme color of PPT slides
Mar 26, 2024 pm 08:51 PM
Steps to unify the theme color of PPT slides
Mar 26, 2024 pm 08:51 PM
1. The color scheme is naturally related to design, so we click on the design toolbar and on the right side, you can see the color options. Point the mouse up, and you can see that the current theme color is: Default design template 1. 2. Click on this option, and the first one is the current color design. To change that, we're going to go down below the panel: New Theme Colors. 3. Click in, and in the column of colors that appear, you can see that there are three accent text colors, all of which are light and almost impossible to display on a light background. Among them is the text color in this example. 4. Click the drop-down arrow on the right side of the color to display the color selection panel. In order not to destroy the overall color matching, choose a dark color in the primary color system to replace the primary color. Replace the other two colors in the same way. 5. Compare the changed color with the original color. On the left is
 How to create a slideshow with background music on Windows 10 and 11?
Apr 23, 2023 pm 09:49 PM
How to create a slideshow with background music on Windows 10 and 11?
Apr 23, 2023 pm 09:49 PM
Slideshows are a great way to organize pictures on your Windows 11 or 10 computer. Sometimes, Windows users may face some kind of hardware limitation or system update, and they need a way to store their files so they don't get accidentally deleted or lost. Additionally, it makes sorting photos and displaying them much easier than showing people one by one by manually scrolling. Slideshows are also a great way to bring together photos from different sources (camera, phone, USB drive) into an easy-to-enjoy format. Fortunately, you can use useful third-party applications to create these slideshows without being forced to use something like PowerPoint. These third-party apps are more advanced: Canva –