Teach you how to implement a 'key wizard' using JavaScript!
JavaScript Weird Skill: Button Wizard
Automated tools such as Button Wizard can free our hands and help us complete many tasks automatically. In many scenarios, we can Greatly improve productivity.
This article will demonstrate: Using JavaScript to implement a "key wizard" to demonstrate the automatic completion of click, focus, input and other operations.
Achieve the effect

As shown in the animation above, the following operations are automatically performed on the page:
1. Click in sequence with one second interval Two buttons;
2. Set focus to the input box;
3. Enter text in the input box;
4. Click to open the link;
Functional Principle
The principle is not complicated. Get the element and execute events such as click and focus setting.
There are two difficulties:
1. For elements without ID and Name, you cannot use getElementById and getElementByName. How to locate them;
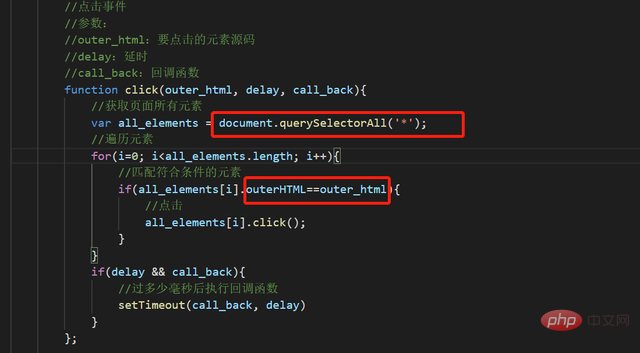
The solution is: use querySelectorAll to obtain All elements of the page, and then accurately locate the elements by matching the source code. The code is as follows:
#2. How to set the delay: After clicking a location, wait a few seconds before performing the next operation.
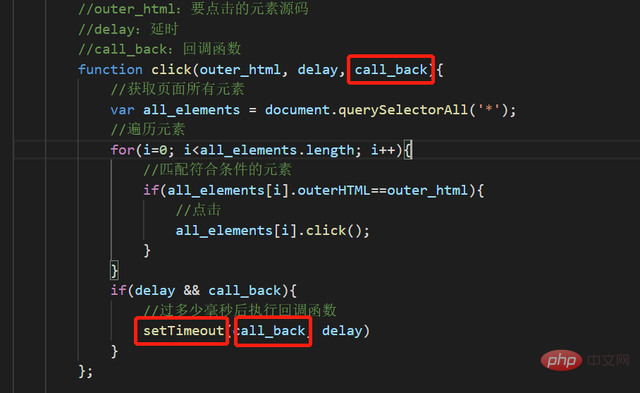
The solution is: use setTimeOut and callback function. The code is as follows:
Detailed explanation of key codes
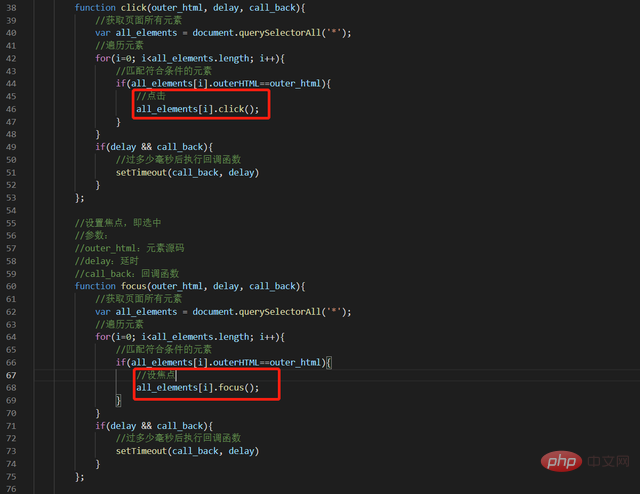
According to the principles described above, prepare the click, focus, and assignment functions, as follows:
When calling, pass in the source code, delay value, and callback function.
That is: operate on the elements of the specified source code, then delay for a certain period of time, and then execute the callback function.

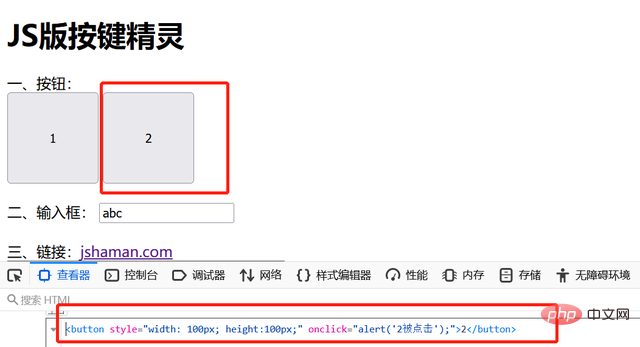
The source code part can be obtained in the page viewer, as shown below:
Complete source code
The complete code of the above example is given here, and it can be run after saving it as html.
<html>
<body>
<script>
document.body.addEventListener("click", function(e) {
console.log('点击:',e.originalTarget);
});
</script>
<h1>JS版按键精灵</h1>
<div>
一、按钮:<br>
<button style="width: 100px; height:100px;" onclick="alert('1被点击');">1</button>
<button style="width: 100px; height:100px;" onclick="alert('2被点击');">2</button>
<br>
<br>
二、输入框:
<input type="text" value="">
<br>
<br>
三、链接:<a href="http://jshaman.com" target="iframe1">jshaman.com</a>
<br>
<iframe name="iframe1"></iframe>
</div>
<br>
<hr>
<button onclick="fun1();">开始自动执行</button>
<br>
依次执行以下操作:<br>
1、点击第一、第二按钮;2、给输入框设置焦点;3、给输入框设置值:abc;4、点击链接;
<br>
</body>
<script>
//点击事件
//参数:
//outer_html:要点击的元素源码
//delay:延时
//call_back:回调函数
function click(outer_html, delay, call_back){
//获取页面所有元素
var all_elements = document.querySelectorAll('*');
//遍历元素
for(i=0; i<all_elements.length; i++){
//匹配符合条件的元素
if(all_elements[i].outerHTML==outer_html){
//点击
all_elements[i].click();
}
}
if(delay && call_back){
//过多少毫秒后执行回调函数
setTimeout(call_back, delay)
}
};
//设置焦点,即选中
//参数:
//outer_html:元素源码
//delay:延时
//call_back:回调函数
function focus(outer_html, delay, call_back){
//获取页面所有元素
var all_elements = document.querySelectorAll('*');
//遍历元素
for(i=0; i<all_elements.length; i++){
//匹配符合条件的元素
if(all_elements[i].outerHTML==outer_html){
//设焦点
all_elements[i].focus();
}
}
if(delay && call_back){
//过多少毫秒后执行回调函数
setTimeout(call_back, delay)
}
};
//设置内容
function setvalue(outer_html, type, value, delay, call_back){
//获取页面所有元素
var all_elements = document.querySelectorAll('*');
//遍历元素
for(i=0; i<all_elements.length; i++){
//匹配符合条件的元素
if(all_elements[i].outerHTML==outer_html){
//点击
all_elements[i][type] = value;
}
}
if(delay && call_back){
//过多少毫秒后执行回调函数
setTimeout(call_back, delay)
}
};
//点击按钮
function fun1(){
//要点击的元素的源码
var outer_html = `<button style="width: 100px; height:100px;" onclick="alert('1被点击');">1</button>`;
click(outer_html, 1000, fun2);
}
//点击按钮
function fun2(){
//要点击的元素的源码
var outer_html = `<button style="width: 100px; height:100px;" onclick="alert('2被点击');">2</button>`;
click(outer_html, 1000, fun3);
}
//给input设置焦点和值
function fun3(){
//要点击的元素的源码
var outer_html = `<input type="text" value="">`;
focus(outer_html);
setvalue(outer_html,"value","abc",1000,call_back_function)
}
//点击链接
function call_back_function(){
var out_html = `<a href="http://jshaman.com" target="iframe1">jshaman.com</a>`;
click(out_html);
console.log("已完成自动点击")
}
</script>
</html>Code security
Open and transparent JavaScript can easily understand the functional logic and can be modified at will. If you want to improve code security, you should protect your code with encryption. For example, you can use JShaman, a professional JavaScript code obfuscation encryption tool. The JavaScript code in the complete source code above will become the following form after being encrypted by JShaman, and its use will not be affected in any way:
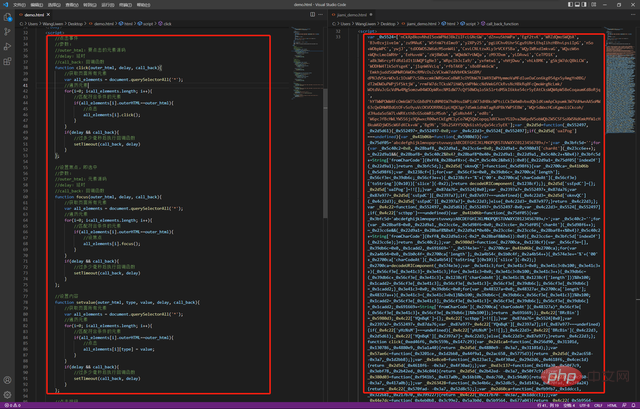
Note: The left side is the original code, the right side is the encrypted code.
Related recommendations: [JavaScript video tutorial]
The above is the detailed content of Teach you how to implement a 'key wizard' using JavaScript!. For more information, please follow other related articles on the PHP Chinese website!

Hot AI Tools

Undresser.AI Undress
AI-powered app for creating realistic nude photos

AI Clothes Remover
Online AI tool for removing clothes from photos.

Undress AI Tool
Undress images for free

Clothoff.io
AI clothes remover

AI Hentai Generator
Generate AI Hentai for free.

Hot Article

Hot Tools

Notepad++7.3.1
Easy-to-use and free code editor

SublimeText3 Chinese version
Chinese version, very easy to use

Zend Studio 13.0.1
Powerful PHP integrated development environment

Dreamweaver CS6
Visual web development tools

SublimeText3 Mac version
God-level code editing software (SublimeText3)

Hot Topics
 1386
1386
 52
52
 How to implement an online speech recognition system using WebSocket and JavaScript
Dec 17, 2023 pm 02:54 PM
How to use WebSocket and JavaScript to implement an online speech recognition system Introduction: With the continuous development of technology, speech recognition technology has become an important part of the field of artificial intelligence. The online speech recognition system based on WebSocket and JavaScript has the characteristics of low latency, real-time and cross-platform, and has become a widely used solution. This article will introduce how to use WebSocket and JavaScript to implement an online speech recognition system.
 WebSocket and JavaScript: key technologies for implementing real-time monitoring systems
Dec 17, 2023 pm 05:30 PM
WebSocket and JavaScript: Key technologies for realizing real-time monitoring systems Introduction: With the rapid development of Internet technology, real-time monitoring systems have been widely used in various fields. One of the key technologies to achieve real-time monitoring is the combination of WebSocket and JavaScript. This article will introduce the application of WebSocket and JavaScript in real-time monitoring systems, give code examples, and explain their implementation principles in detail. 1. WebSocket technology
 How to use JavaScript and WebSocket to implement a real-time online ordering system
Dec 17, 2023 pm 12:09 PM
Introduction to how to use JavaScript and WebSocket to implement a real-time online ordering system: With the popularity of the Internet and the advancement of technology, more and more restaurants have begun to provide online ordering services. In order to implement a real-time online ordering system, we can use JavaScript and WebSocket technology. WebSocket is a full-duplex communication protocol based on the TCP protocol, which can realize real-time two-way communication between the client and the server. In the real-time online ordering system, when the user selects dishes and places an order
 How to implement an online reservation system using WebSocket and JavaScript
Dec 17, 2023 am 09:39 AM
How to use WebSocket and JavaScript to implement an online reservation system. In today's digital era, more and more businesses and services need to provide online reservation functions. It is crucial to implement an efficient and real-time online reservation system. This article will introduce how to use WebSocket and JavaScript to implement an online reservation system, and provide specific code examples. 1. What is WebSocket? WebSocket is a full-duplex method on a single TCP connection.
 JavaScript and WebSocket: Building an efficient real-time weather forecasting system
Dec 17, 2023 pm 05:13 PM
JavaScript and WebSocket: Building an efficient real-time weather forecast system Introduction: Today, the accuracy of weather forecasts is of great significance to daily life and decision-making. As technology develops, we can provide more accurate and reliable weather forecasts by obtaining weather data in real time. In this article, we will learn how to use JavaScript and WebSocket technology to build an efficient real-time weather forecast system. This article will demonstrate the implementation process through specific code examples. We
 How to use insertBefore in javascript
Nov 24, 2023 am 11:56 AM
Usage: In JavaScript, the insertBefore() method is used to insert a new node in the DOM tree. This method requires two parameters: the new node to be inserted and the reference node (that is, the node where the new node will be inserted).
 Simple JavaScript Tutorial: How to Get HTTP Status Code
Jan 05, 2024 pm 06:08 PM
JavaScript tutorial: How to get HTTP status code, specific code examples are required. Preface: In web development, data interaction with the server is often involved. When communicating with the server, we often need to obtain the returned HTTP status code to determine whether the operation is successful, and perform corresponding processing based on different status codes. This article will teach you how to use JavaScript to obtain HTTP status codes and provide some practical code examples. Using XMLHttpRequest
 JavaScript and WebSocket: Building an efficient real-time image processing system
Dec 17, 2023 am 08:41 AM
JavaScript is a programming language widely used in web development, while WebSocket is a network protocol used for real-time communication. Combining the powerful functions of the two, we can create an efficient real-time image processing system. This article will introduce how to implement this system using JavaScript and WebSocket, and provide specific code examples. First, we need to clarify the requirements and goals of the real-time image processing system. Suppose we have a camera device that can collect real-time image data


