 Web Front-end
 JS Tutorial
 Let's talk about how to compress and package html resources in webpack
Let's talk about how to compress and package html resources in webpack
How to compress and package html resources in webpack? The following article will give you a brief introduction to the method of compressing and packaging HTML resources with webpack. I hope it will be helpful to you!

Why do you need to package html resources?
When writing code, the js file under src is introduced. After being packaged by webpack, it is formed An entry file is created. At this time, the name and path of the js file in the html are incorrect, so webpack packaging is needed to replace the path of the js file introduced in the html.
The benefits of using webpack to package html are:
(1) The packaged js file can be automatically introduced into html
(2) HTML packaging It will still be generated in the build folder and put together with the packaged js files. In this way, when going online, we only need to copy the packaged and generated folders to the online environment.
(3) Will Help us compress html files
How to compress and package html resources in webpack
1. Install the plug-in
Webpack can only understand JS and JSON files natively. To support packaging other types of files, you need to install the corresponding plug-ins or loaders.
If we need to package HTML files, we first need to install html-webpack-pluginPlug-in:
npm install html-webpack-plugin -D
The role of this plug-in:
-
By default, an html file is created under the export, and then all JS/CSS resources are imported.
We can also specify an html file ourselves and add resources to this html file
2. Webpack.config.js configuration
Install the html-webpack-plugin plug-in Finally, you need to configure it in the webpack.config.js file:
 // ...
 // 1. 引入插件
 const HtmlWebpackPlugin = require('html-webpack-plugin');

 module.exports = {
   // ...
   // 2. 在plugins中配置插件
   plugins: [
     new HtmlWebpackPlugin({
       template: 'index.html', // 指定入口模板文件(相对于项目根目录)
       filename: 'index.html', // 指定输出文件名和位置(相对于输出目录)
       // 关于插件的其他项配置,可以查看插件官方文档
     })
   ]
}Detailed configuration link: https://www.npmjs.com/package/html-webpack- plugin
Make sure the path and file name of the entry template file are consistent with the configuration, and then you can compile.
3. Configuration of multiple JS entries and multiple HTML situations
When faced with the need to compile multiple HTML files, and the files need to introduce different JS files, but by default, the packaged HTML file will import all packaged JS files, we can specify chunk to allocate JS.
 const path = require('path');
 // 1. 引入插件
 const HtmlWebpackPlugin = require('html-webpack-plugin');
 module.exports = {
   // ...
   // 2. 配置JS入口(多入口)
   entry: {
     vendor: ['./src/jquery.min.js', './src/js/common.js'],
     index: './src/index.js',
     cart: './src/js/cart.js'
   },
   // 配置出口
   output: {
     filename: '[name].js',
     path: path.resolve(__dirname, 'build/js')
   },
   // 3. 配置插件
   plugins: [
     new HtmlWebpackPugin({
       template: 'index.html',
       filename: 'index.html',
       // 通过chunk来指定引入哪些JS文件
       chunk: ['index', 'vendor']
     }),
     // 需要编译多少个HTML,就需要new几次插件
     new HtmlWebpackPlugin({
       template: './src/cart.html',
       filename: 'cart.html',
       chunk: ['cart', 'vendor']
     })
   ]
}Tip: What you need to pay attention to here is how many HTML files you need to compile, how many times you need to new
HtmlWebpackPlugin.
After the above configuration is compiled successfully, the output is as follows:
 build
 |__ index.html # 引入index.js和vendor.js
 |__ cart.html    # 引入cart.js和vendor.js
 |__ js
      |__ vendor.js # 由jquery.min.js和common.js生成
      |__ index.js    # 由index.js生成
|__ cart.js # 由cart.js生成Compressed and packaged html resource example
1. webpack. config.js configuration
const HTMLWebpackPlugin = require('html-webpack-plugin')
...
 plugins: [
    // html-webpack-plugin  html 打包配置 该插件将为你生成一个 HTML5 文件
    new HTMLWebpackPlugin({
      template: "./index.html", // 打包到模板的相对或绝对路径 (打包目标)
      title: '首页', // 用于生成的HTML文档的标题
      hash: true,//true则将唯一的webpack编译哈希值附加到所有包含的脚本和CSS文件中。主要用于清除缓存,
      minify: {  // 压缩html
        collapseWhitespace: true, // 折叠空白区域
        keepClosingSlash: true,  // 保持闭合间隙
        removeComments: true,   // 移除注释
        removeRedundantAttributes: true, // 删除冗余属性
        removeScriptTypeAttributes: true,  // 删除Script脚本类型属性
        removeStyleLinkTypeAttributes: true, // 删除样式链接类型属性
        useShortDoctype: true, // 使用短文档类型
        preserveLineBreaks: true, // 保留换行符
        minifyCSS: true, // 压缩文内css
        minifyJS: true, // 压缩文内js
      }
    }),
  ],
...2. At this time our index.html
<!DOCTYPE html>
<html lang="">
  <head>
    <meta charset="utf-8">
    <meta http-equiv="X-UA-Compatible" content="IE=edge">
    <meta name="viewport" content="width=device-width,initial-scale=1.0">
    <title>webpackDemo</title>
  </head>
  <body>
    <div id="app">
      html 打包配置
    </div>
  </body>
</html>3. At this time our index.js
import './../css/index.less'

function add(x,y) {
 return x+y
}
console.log(add(2,3));3. Console webpack input package , found that there is an extra index.html in the packaged output file, the content is as follows
<!DOCTYPE html>
<html lang="">
  <head>
    <meta charset="utf-8">
    <meta http-equiv="X-UA-Compatible" content="IE=edge">
    <meta name="viewport" content="width=device-width,initial-scale=1.0">
    <title>webpackDemo</title>
  <script defer src="index.js"></script></head>
  <body>
    <div id="app">
      html 打包配置
    </div>
  </body>
</html><script defer src="index.js"></script> is automatic The introduced
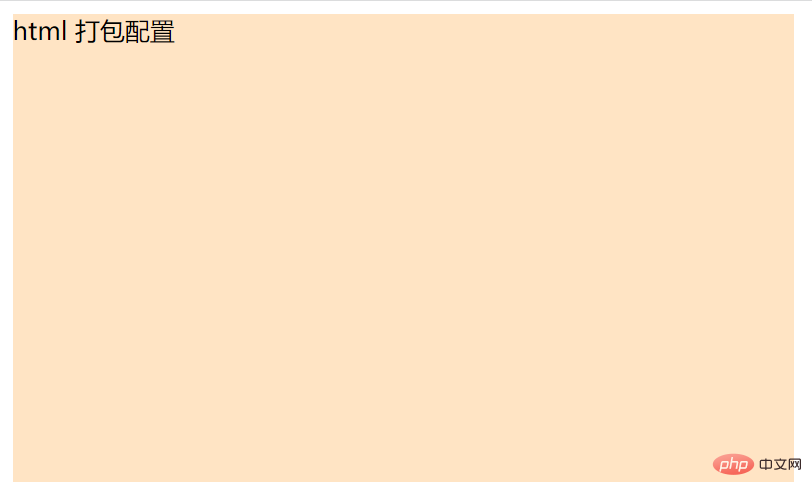
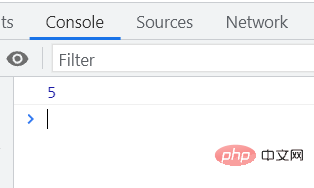
browser opened the packaged output index.html and found that the style had an effect, and the control unit also output normally:


For more programming-related knowledge, please visit: Programming Video! !
The above is the detailed content of Let's talk about how to compress and package html resources in webpack. For more information, please follow other related articles on the PHP Chinese website!

Hot AI Tools

Undresser.AI Undress
AI-powered app for creating realistic nude photos

AI Clothes Remover
Online AI tool for removing clothes from photos.

Undress AI Tool
Undress images for free

Clothoff.io
AI clothes remover

Video Face Swap
Swap faces in any video effortlessly with our completely free AI face swap tool!

Hot Article

Hot Tools

Notepad++7.3.1
Easy-to-use and free code editor

SublimeText3 Chinese version
Chinese version, very easy to use

Zend Studio 13.0.1
Powerful PHP integrated development environment

Dreamweaver CS6
Visual web development tools

SublimeText3 Mac version
God-level code editing software (SublimeText3)

Hot Topics
 1386
1386
 52
52
 VUE3 Getting Started Tutorial: Packaging and Building with Webpack
Jun 15, 2023 pm 06:17 PM
Vue is an excellent JavaScript framework that can help us quickly build interactive and efficient web applications. Vue3 is the latest version of Vue, which introduces many new features and functionality. Webpack is currently one of the most popular JavaScript module packagers and build tools, which can help us manage various resources in our projects. This article will introduce how to use Webpack to package and build Vue3 applications. 1. Install Webpack
 What is the difference between vite and webpack
Jan 11, 2023 pm 02:55 PM
Differences: 1. The startup speed of the webpack server is slower than that of Vite; because Vite does not require packaging when starting, there is no need to analyze module dependencies and compile, so the startup speed is very fast. 2. Vite hot update is faster than webpack; in terms of HRM of Vite, when the content of a certain module changes, just let the browser re-request the module. 3. Vite uses esbuild to pre-build dependencies, while webpack is based on node. 4. The ecology of Vite is not as good as webpack, and the loaders and plug-ins are not rich enough.
 How to use PHP and webpack for modular development
May 11, 2023 pm 03:52 PM
With the continuous development of web development technology, front-end and back-end separation and modular development have become a widespread trend. PHP is a commonly used back-end language. When doing modular development, we need to use some tools to manage and package modules. Webpack is a very easy-to-use modular packaging tool. This article will introduce how to use PHP and webpack for modular development. 1. What is modular development? Modular development refers to decomposing a program into different independent modules. Each module has its own function.
 How does webpack convert es6 to es5 module?
Oct 18, 2022 pm 03:48 PM
Configuration method: 1. Use the import method to put the ES6 code into the packaged js code file; 2. Use the npm tool to install the babel-loader tool, the syntax is "npm install -D babel-loader @babel/core @babel/preset- env"; 3. Create the configuration file ".babelrc" of the babel tool and set the transcoding rules; 4. Configure the packaging rules in the webpack.config.js file.
 Use Spring Boot and Webpack to build front-end projects and plug-in systems
Jun 22, 2023 am 09:13 AM
As the complexity of modern web applications continues to increase, building excellent front-end engineering and plug-in systems has become increasingly important. With the popularity of Spring Boot and Webpack, they have become a perfect combination for building front-end projects and plug-in systems. SpringBoot is a Java framework that creates Java applications with minimal configuration requirements. It provides many useful features, such as automatic configuration, so that developers can build and deploy web applications faster and easier. W
 What files can vue webpack package?
Dec 20, 2022 pm 07:44 PM
In vue, webpack can package js, css, pictures, json and other files into appropriate formats for browser use; in webpack, js, css, pictures, json and other file types can be used as modules. Various module resources in webpack can be packaged and merged into one or more packages, and during the packaging process, the resources can be processed, such as compressing images, converting scss to css, converting ES6 syntax to ES5, etc., which can be recognized by HTML. file type.
 What is Webpack? Detailed explanation of how it works?
Oct 13, 2022 pm 07:36 PM
Webpack is a module packaging tool. It creates modules for different dependencies and packages them all into manageable output files. This is especially useful for single-page applications (the de facto standard for web applications today).
 How to install webpack in vue
Jul 25, 2022 pm 03:27 PM
Webpack in vue is installed using the node package manager "npm" or the npm image "cnpm". Webpack is a static module packaging tool for modern JavaScript applications. It is developed based on node.js. It requires node.js component support when using it. It needs to be installed using npm or cnpm. The syntax is "npm install webpack -g" or "cnpm install webpack -g".


