Detailed explanation of Vue rendering list command: v-for

In the previous article, we learned how to pass v-if and v-show in Vue Render the required DOM elements or templates based on conditions. In actual projects, we often encounter elements such as lists that render arrays or objects in JSON data. In Vue, a v-for instruction is provided to render the list. (Learning video sharing: vue video tutorial)
The role of v-for
v-forCan render elements or template blocks multiple times based on source data. This instruction must use specific syntax alias in expression to provide an alias for the currently traversed element:
<div v-for="alias in expression"> {{ alias }}</div> Generally, aliases are specified for arrays or objects. In addition, they can also be used for indexes. The value specifies an alias. For objects, you can also specify an alias for value. Common situations are as follows:
<div v-for="item in items">{{ item }}</div>
<div v-for="(item, index) in items">{{ item }} {{ index }}</div>
<div v-for="val in object"></div>
<div v-for="(val, key) in object"></div>
<div v-for="(val, key, index) in object"></div>We can also replace in with of as delimiter because it is the closest syntax to JavaScript iterators. The default behavior of
v-for attempts not to change the whole, but to replace elements. To force elements to be reordered, you need to provide a special attribute of key:
<div v-for="itme in items" :key="item.id"> {{ item.text }}</div>Next, let’s look at some usage scenarios of v-for.
An array v-for
Use the v-for command to edit the array option list render. The v-for instruction requires special syntax in the form of item in items, items is the source data array, item is the array element iteration Alias. Let’s look at a simple example:
<!-- Template -->
<ul>
<li v-for="item in items">{{ item }}</li>
</ul>
// JavaScript
var app = new Vue({
el: '#app',
data: {
items: [1, 34, 89, 92, 45, 76, 33]
}
})At this time, each item of the array items is rendered to the corresponding li. When browsing The effect seen by the processor is as follows:
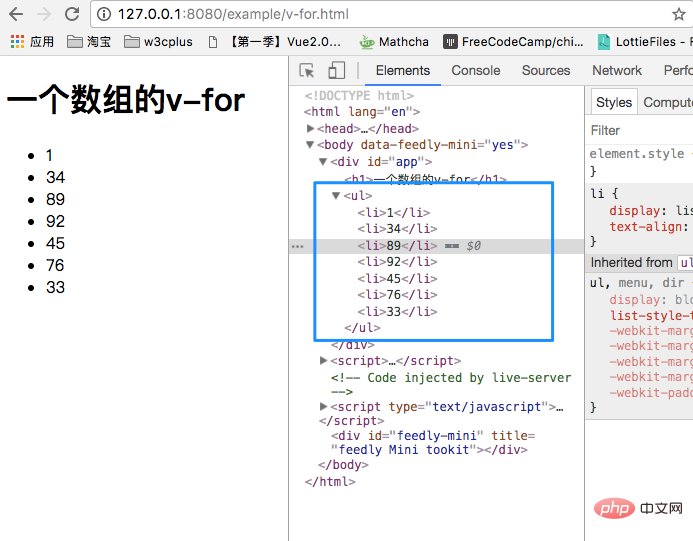
The above example is to iterate each item of the array items through v-for Come out and put it in li. In addition, you can also traverse each index of the array. Based on the above code, let's modify the template:
<ul>
    <li v-for="(item, index) in items">index-{{ index }}: {{ item }}</li>
</ul>At this time, the index number of the array is also traversed:
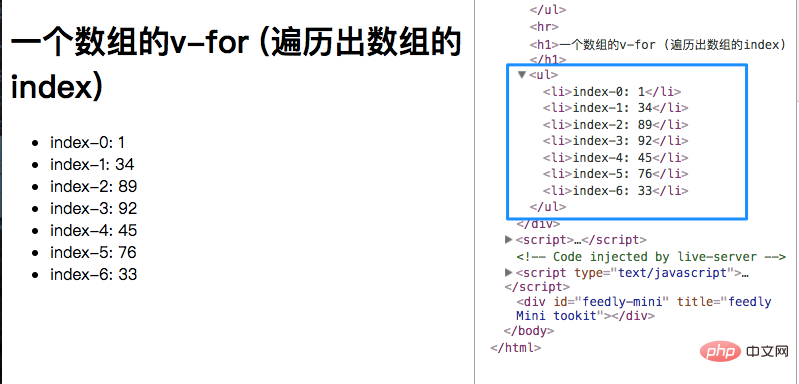
From the above display The column is clear, which element (HTML tag) you need to loop, then v-for is written on that element.
We can already use v-for to output each item of the defined array normally. In order to deepen our learning, we add a requirement based on the above example, which is to sort the output array. At this time, we need to use the computed attribute in Vue.
In Vue, we cannot pollute the source data. If we directly sort the source data items through the sort() method, an error will be reported:
var app = new Vue({
    el: '#app',
    computed: {
        items: function() {
            return this.items.sort()
        }
    },
    data: {
        items: [1, 34, 89, 92, 45, 76, 33]
    }
})
In order not to pollute the source data in Vue, you need to re-declare an object in computed, such as declaring a sortItems object:
var app = new Vue({
    el: '#app',
    computed: {
        sortItems: function() {
            return this.items.sort()
        }
    },
    data: {
        items: [1, 34, 89, 92, 45, 76, 3, 12]
    }
})At this time, our The template also needs to be modified accordingly:
<ul>
    <li v-for="item in sortItems">{{ item }}</li>
</ul>If nothing else happens, the effect you will see will be like this:
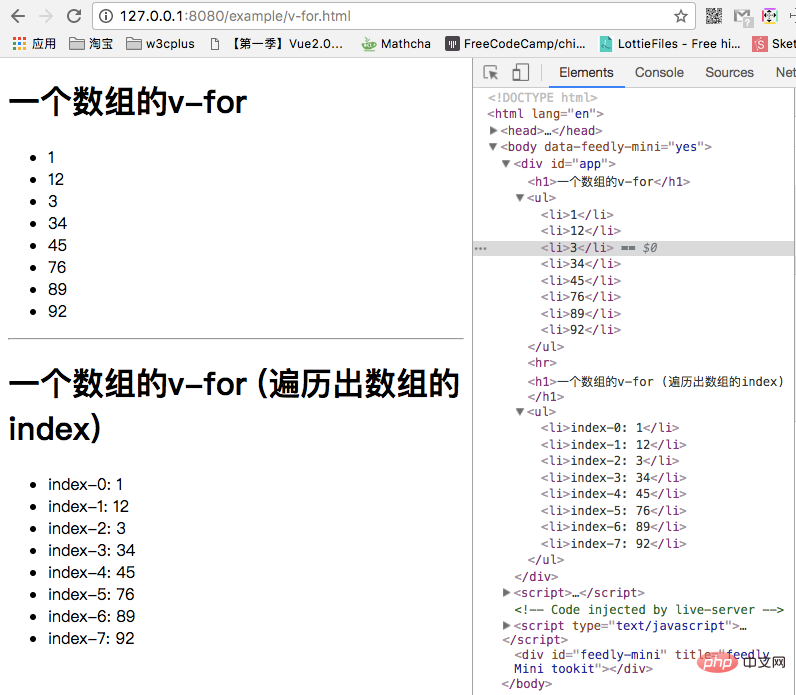
Although there have been changes , but it is not the sorting result we want. Although the result is not what we want, this is not a problem with Vue itself, it is also the same in JavaScript. If we want to truly achieve a sorting effect, we need to add a JavaScript array sorting function:
function sortNumber(a, b) {
    return a - b
}Make a corresponding modification to the code in computed:
computed: {
    sortItems: function() {
        return this.items.sort(sortNumber)
    }
}The output effect of this phase is really a correct sorting effect:
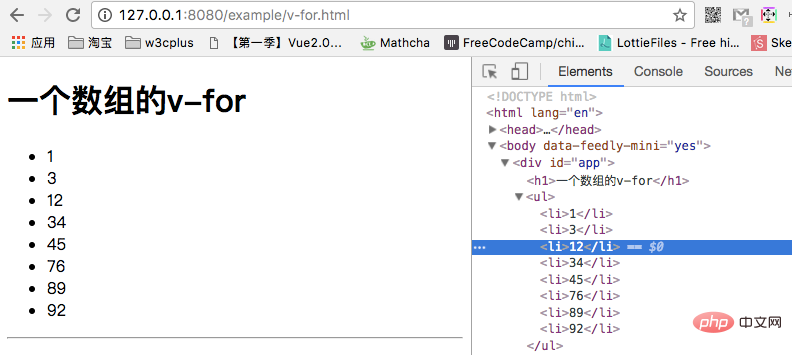
In the above example, what we see is a simple pure For arrays such as numbers, each item in the array can also be an object, for example:
data: {
    objItems: [
        {
            firstName: 'Jack',
            lastName: 'Li',
            age: 34
        },
        {
            firstName: 'Airen',
            lastName: 'Liao',
            age: 18
        }
    ]
}We change the template to:
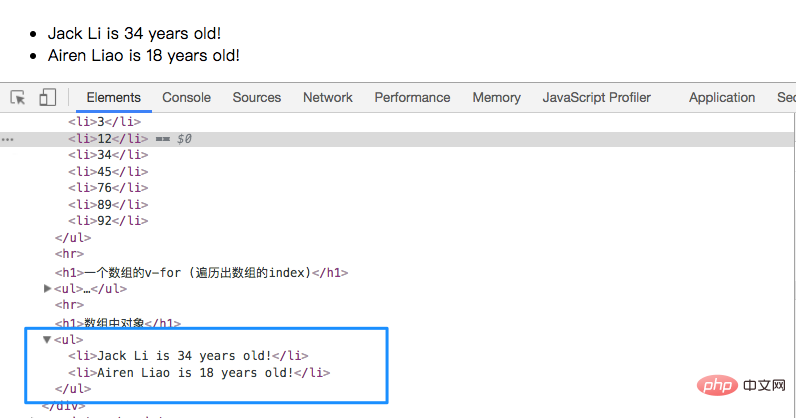
<li v-for="objItem in objItems">{{ objItem.firstName }} {{objItem.lastName}} is {{ objItem.age}} years old!</li>The effect we see at this time is as follows:
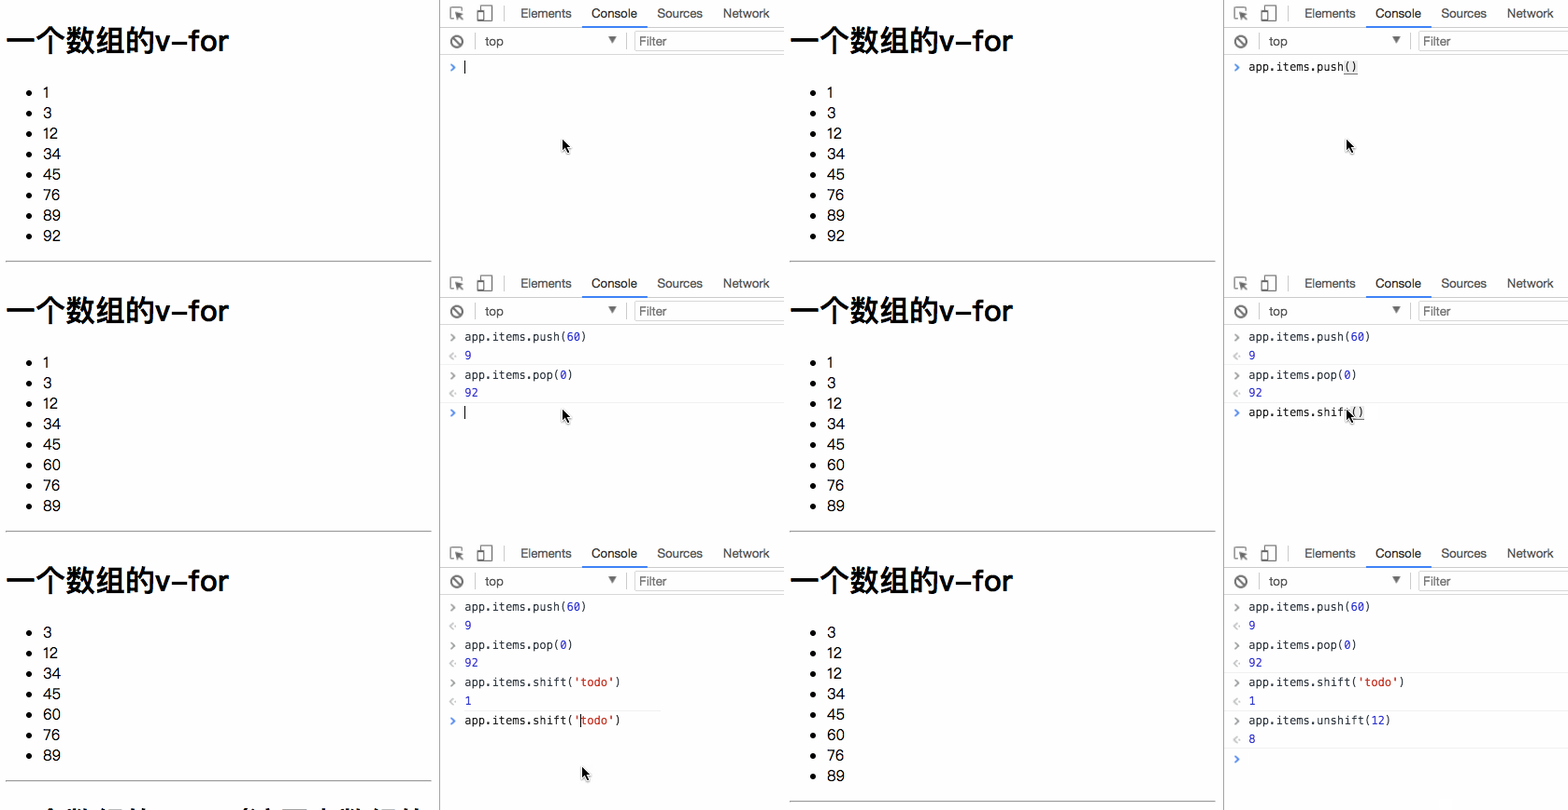
在JavaScript中,我们有很多数组的方法,可以对数组进行操作,这些方法可以修改一个数组。其实,在Vue中同样包含一组观察数组变异方法,这些方法将会触发元素的重新更新(视图更新),这些方法也是JavaScript中数组中常看到的方法:push()、pop()、shift()、unshift()、splice()、sort()、reverse()。我们可以在控制台中简单的看一下前面的示例中items数组调用变异方法的效果:
Vue不但提供了数组变异的方法,还提供了替换数组的方法。变异方法可以通过些方法的调用修改源数据中的数组;除此之外也有对应的非变异方法,比如filter()、concat()和slice()等。这些方法是不会改变源数据中的原始数组,但总是返回一个新数组。当使用这些方法时,可以用新数组替换旧数组。
由于JavaScript的限制,Vue不能检测以下变动的数组:
- 当你利用索引直接设置一个项时,例如
app.items[indexOfItem] = newValue - 当你修改数组的长度时,例如:
app.items.length = newLength
为了解决第一类问题,以下两种方式都可以实现和app.items[indexOfItem = newValue相同的效果,同时也将触发状态更新:
Vue.set(app.items, indexOfItem, newValue)

app.items.splice(indexOfItem, 1, newValue)
为了解决第二类问题,你可以使用splice():
app.items.splice(newLength)
对象的 v-for
v-for除了可以使用在数组上之外还可以应用在对象上。
<!-- Template -->
<ul>
<li v-for="value in obj">{{ value }}</li>
</ul>
// JavaScript
obj: {
firstName: 'Airen',
lastName: 'Liao',
age: 30
}使用v-for可以把obj的每个key对应的value值遍历出来,并且填到对应的li元素中。效果如下:

你也可以给对象的key遍历出来:
<ul>
    <li v-for="(value, key) in obj">{{ key }}: {{ value }}</li>
</ul>效果如下:

同样,也可以类似数组一样,可以把index索引做为第三个参数:
<ul>
    <li v-for="(value, key, index) in obj">{{ index }}. {{ key }}: {{ value }}</li>
</ul>
前面提到过,数组可以变异,但对于对象而言,Vue不能检测对象属性的添加或删除。这主要也是由于JavaScript的限制。不过在Vue中,对于已经创建好的实例,可以使用Vue.set(object, key, value)方法向嵌套对象添加响应式属性。例如:
var app = new Vue({
    data: {
        obj: {
            name: 'Airen'
        }
    }
})可以使用类似下面的方式,给obj对象添加一个新的属性age:
Vue.set(app.obj, 'age', 27)
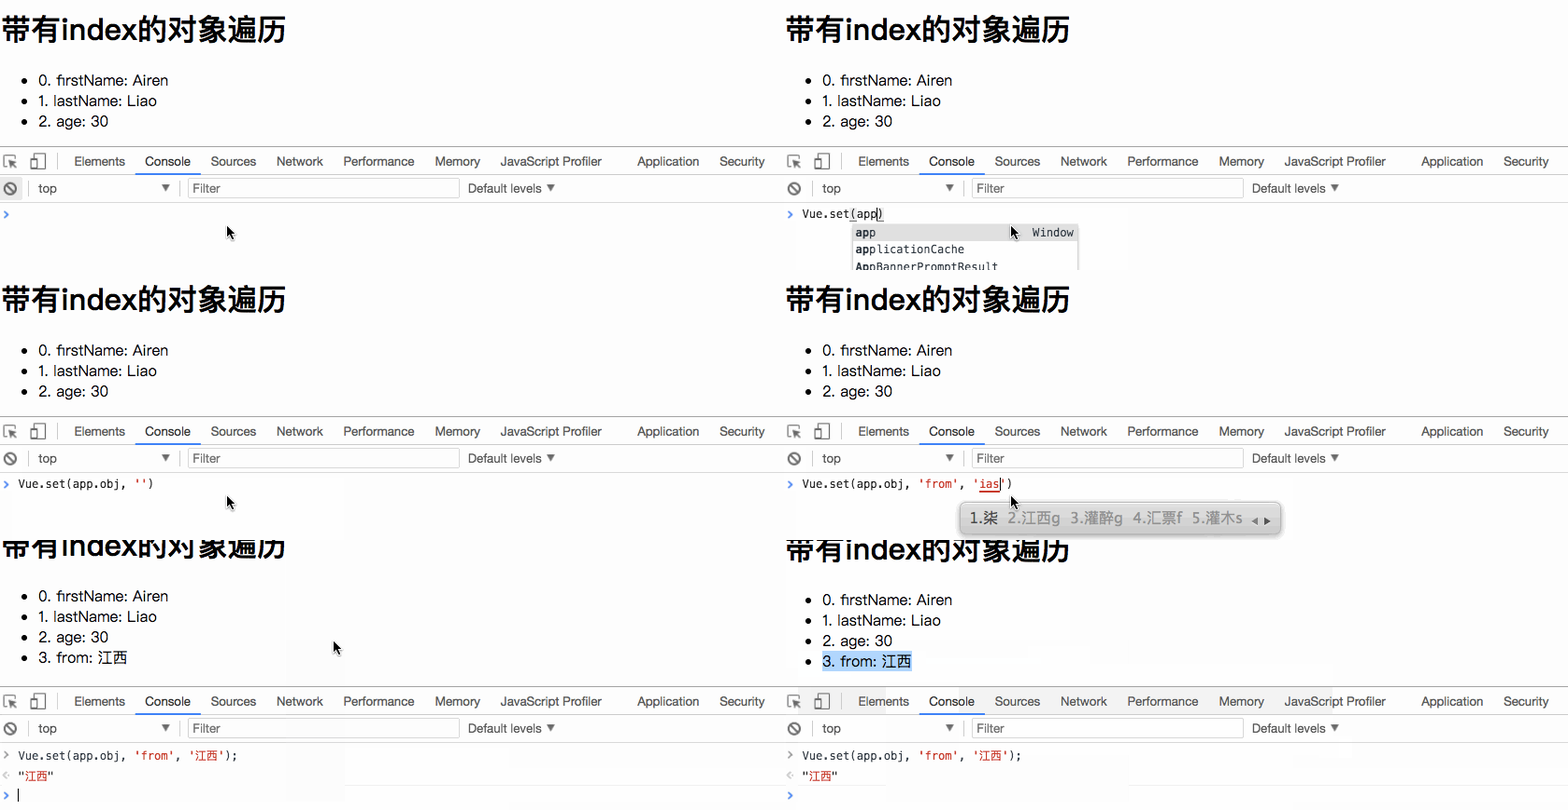
回到我们的示例中给数据源中的obj添加一个'from'的key,而且其对应的value值为'江西':
除了Vue.set()之外,还可以使用app.$set实例方法,它其实就是Vue.set的别名:
mounted(){
    this.$set(this.obj, '职位', '码农')
}
这里用到了Vue中的
mounted(),和computed一样,也不知道他在Vue中的作用,同样放到后面来。我们总是会搞明白的。
有时候你可能需要为已有对象赋予多个新属性,比如使用Object.assign()或_.extend()。在这种情况下,应该用两个对象的属性创建一个新的对象。所以,如果你想添加新的响应式属性,不要像这样:
Object.assign(this.obj, {
    age: 27,
    favoriteColor: 'Vue Green'
})应该这样做:
this.obj = Object.assign({}, this.obj, {
    age: 27,
    favoriteColor: 'Vue Green'
})一段取值范围的 v-for
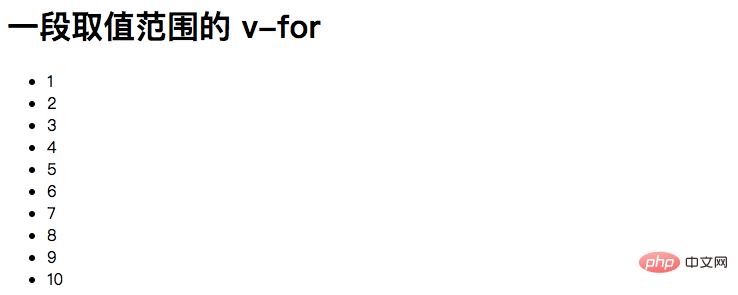
v-for也可以取整数。在这种情况下,它将重复多次模板:
<ul>
    <li v-for="n in 10">{{ n }}</li>
</ul>结果如下:
v-for 和 一个 <template>
类似于v-if,你也可以利用带有v-for的<template>渲染多个元素,比如:
<ul>
    <template v-for="(value, key) in obj">
        <li>
            <label :for="key">{{ key }}:</label>
            <input type="text" :placeholder="value" :id="key" />
        </li>
    </template>
</ul>效果如下:
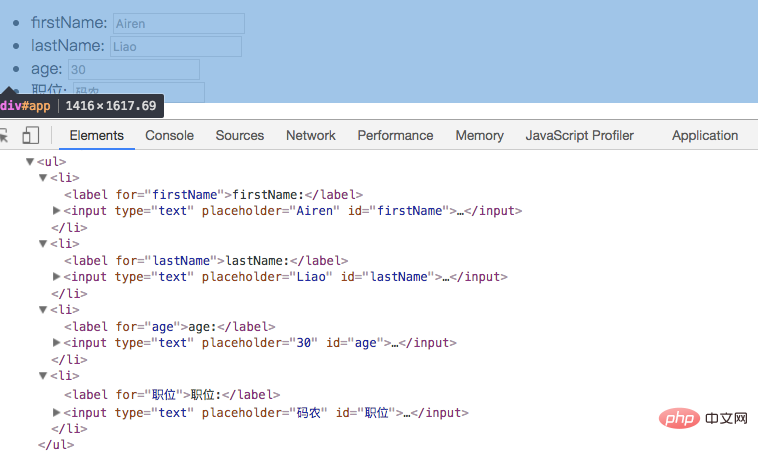
注意了,v-for和<template>一起使用的时候,需要把v-for写在<template>元素上。另外上面的示例中,咱们还使用了Vue的一些其他特性,但这些特性不是这节内容所要学习的。后面我们会有机会一一介绍的。
一个组件的 v-for
在自定义组件里,也可以像任何普通元素一样用v-for。
<my-component v-for="item in items" :key="item.id"></my-component>
2.2.0+ 的版本里,当在组件中使用
v-for时,key现在是必须的。
然而他不能自动传递数据到组件里,因为组件有自己独立的作用域。为了传递迭代数据到组件里,我们要用 props:
<my-component
    v-for="(item, index) in items"
    v-bind:item="item"
    v-bind:index="index"
    v-bind:key="item.id"
></my-component>不自动注入 item 到组件里的原因是,因为这使得组件会与 v-for 的运作紧密耦合。在一些情况下,明确数据的来源可以使组件可重用。
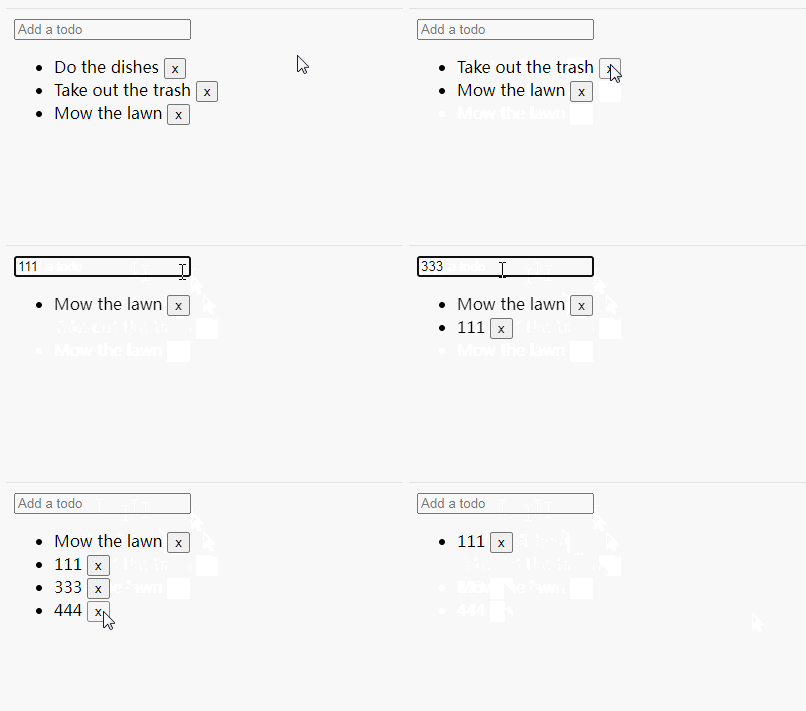
来看一个简单的Todo示例:
<div id="todo">
<input
v-model="newTodoText"
v-on:keyup.enter="addNewTodo"
placeholder="Add a todo"
/>
<ul>
<li
is="todoItem"
v-for="(todo, index) in todos"
v-bind:title="todo"
v-on:remove="todos.splice(index, 1)"></li>
</ul>
</div>
Vue.component('todoItem', {
template:`
<li>
{{ title }}
<button v-on:click="$emit('remove')">x</button>
</li>
`,
props: ['title']
})
new Vue({
el: '#todo',
data: {
newTodoText: '',
todos: [
'Do the dishes',
'Take out the trash',
'Mow the lawn'
]
},
methods: {
addNewTodo: function() {
this.todos.push(this.newTodoText)
this.newTodoText = ''
}
}
})
总结
这篇文章主要总结了Vue的v-for指令。通过这个指令,配合数据源中的数组或者对象,我们可以很方便的生成列表。这也常常称为列表渲染。当然配合一些模板,我们可以做出一些特有的功能和效果。比如文章中最后一个Todo 列表,使用v-for很易实现。
The above is the detailed content of Detailed explanation of Vue rendering list command: v-for. For more information, please follow other related articles on the PHP Chinese website!

Hot AI Tools

Undresser.AI Undress
AI-powered app for creating realistic nude photos

AI Clothes Remover
Online AI tool for removing clothes from photos.

Undress AI Tool
Undress images for free

Clothoff.io
AI clothes remover

AI Hentai Generator
Generate AI Hentai for free.

Hot Article

Hot Tools

Notepad++7.3.1
Easy-to-use and free code editor

SublimeText3 Chinese version
Chinese version, very easy to use

Zend Studio 13.0.1
Powerful PHP integrated development environment

Dreamweaver CS6
Visual web development tools

SublimeText3 Mac version
God-level code editing software (SublimeText3)

Hot Topics
 1378
1378
 52
52
 How to add functions to buttons for vue
Apr 08, 2025 am 08:51 AM
You can add a function to the Vue button by binding the button in the HTML template to a method. Define the method and write function logic in the Vue instance.
 How to use bootstrap in vue
Apr 07, 2025 pm 11:33 PM
Using Bootstrap in Vue.js is divided into five steps: Install Bootstrap. Import Bootstrap in main.js. Use the Bootstrap component directly in the template. Optional: Custom style. Optional: Use plug-ins.
 How to reference js file with vue.js
Apr 07, 2025 pm 11:27 PM
There are three ways to refer to JS files in Vue.js: directly specify the path using the <script> tag;; dynamic import using the mounted() lifecycle hook; and importing through the Vuex state management library.
 How to use watch in vue
Apr 07, 2025 pm 11:36 PM
The watch option in Vue.js allows developers to listen for changes in specific data. When the data changes, watch triggers a callback function to perform update views or other tasks. Its configuration options include immediate, which specifies whether to execute a callback immediately, and deep, which specifies whether to recursively listen to changes to objects or arrays.
 How to return to previous page by vue
Apr 07, 2025 pm 11:30 PM
Vue.js has four methods to return to the previous page: $router.go(-1)$router.back() uses <router-link to="/" component window.history.back(), and the method selection depends on the scene.
 Vue realizes marquee/text scrolling effect
Apr 07, 2025 pm 10:51 PM
Implement marquee/text scrolling effects in Vue, using CSS animations or third-party libraries. This article introduces how to use CSS animation: create scroll text and wrap text with <div>. Define CSS animations and set overflow: hidden, width, and animation. Define keyframes, set transform: translateX() at the beginning and end of the animation. Adjust animation properties such as duration, scroll speed, and direction.
 What does vue multi-page development mean?
Apr 07, 2025 pm 11:57 PM
Vue multi-page development is a way to build applications using the Vue.js framework, where the application is divided into separate pages: Code Maintenance: Splitting the application into multiple pages can make the code easier to manage and maintain. Modularity: Each page can be used as a separate module for easy reuse and replacement. Simple routing: Navigation between pages can be managed through simple routing configuration. SEO Optimization: Each page has its own URL, which helps SEO.
 How to use vue pagination
Apr 08, 2025 am 06:45 AM
Pagination is a technology that splits large data sets into small pages to improve performance and user experience. In Vue, you can use the following built-in method to paging: Calculate the total number of pages: totalPages() traversal page number: v-for directive to set the current page: currentPage Get the current page data: currentPageData()


